

Home Cinema Projector
How Projectors Get Burn-in
While projectors can get burned in, not all of them can be blamed for this problem. Burn-in can occur for various reasons, including lamp degeneration, lens dust, and bulb explosions. Some companies may be more accommodating when it comes to warranty claims than others. For example, they may not be interested in considering a burn-in claim if the projector is not still in its original packaging.
Image burn-in” is a phenomenon that can occur with some home theatre projectors, where a faint ghost image of a static image remains on the screen even after the image is no longer being projected. This is often caused by prolonged exposure to a static image, such as a logo, that is displayed on the screen for an extended period of time. Here’s how projectors can get burn-in:
- Prolonged Use: Projectors that are used for long periods of time, especially at high brightness levels, can be more susceptible to image burn-in.
- Displaying Static Images: Projectors that display static images, such as logos, on the screen for extended periods of time can also be more prone to burn-in. This is because the image remains in the same place on the screen for a prolonged period.
- Poor Quality Projectors: Lower quality projectors may be more prone to image burn-in due to less advanced cooling systems or less advanced technology.
- Lack of Maintenance: Projectors that are not properly maintained, including cleaning the filter and replacing the lamp when necessary, may be more prone to image burn-in.
- Improper Use: Projectors that are used improperly, such as being placed too close to the screen or used at the wrong angle, may also be more prone to image burn-in.
While image burn-in is a potential issue with some projectors, it can be minimized or prevented by using the projector properly, including following the manufacturer’s recommended usage guidelines, avoiding displaying static images for prolonged periods of time, and maintaining the projector regularly. In some cases, advanced technologies like pixel shifting can also help minimize image burn-in by spreading the image across multiple pixels instead of projecting a single static image on the same pixels repeatedly. By using the projector carefully and maintaining it properly, you can avoid the issue of image burn-in and enjoy a high-quality viewing experience.
Lamp Degrades Over Time
Lamps for projectors tend to degrade over time. Even if they are designed to last for several years, a lamp’s brightness can decrease by up to 25% over time. When this happens, a presentation will lose a significant portion of its effectiveness, and a fully darkened room will be necessary to get the same clarity of image. Depending on your application, this degrading process can affect your presentation’s quality or even your presentation’s effectiveness.
Thankfully, there are alternatives to lamp-based projectors. Although they cost a little more to buy, they may end up costing you more money over time. The initial investment of a lamp-based projector may be more affordable, but the lamp degrades over time and will have to be replaced more frequently. Therefore, it’s important to consider the total cost of ownership of a lamp-based projector before making a decision.
Fan Design
Projectors need a steady flow of clean air to run properly. Without proper ventilation, trapped heat can build inside the device, which will cause overheating. When positioning the projector, be sure to keep it away from heat-absorbing surfaces, such as carpeting or upholstery. Place it on a ceiling if possible to allow air to circulate better. Projectors also have air filters to prevent dust from accumulating.

While external fans may increase background noise, they are a cheap and easy option. Cooling pads with small fans are also a good option for keeping your projector cool. These are ideal if you are planning on using the projector for long periods. Most entertainment setups include many other devices that generate heat, which causes your projector to run hotter.
Dusty lens
A brown spot on your projector’s image may indicate a dirty lens. The dust and debris accumulated in the lens block the light coming from the equipment. The projector’s fan may also get stuck due to dust and lack of lubrication. If experiencing these effects, you should contact a professional to repair your projector’s lens.
A projector’s lens is the main device that sends an image to the screen. As a result, it must be clean and free of dust and other particles. Keeping the lens clean is essential to prevent the lens from degrading due to differential temperature. A clean lens also makes diagnosing image problems much easier.
Bulb Explosions
A variety of factors can cause bulb explosions in projectors. They may be due to a faulty design or cheap material. Some bulbs can even explode when exposed to oil from the hands. Regardless of the cause, it’s vital to ensure the safety of your projector.
First, never touch the lamp parts with bare hands. If you are unsure about this, you should use gloves to protect your hands. Also, never touch the lamp housing or the bulb itself with your hands. Oil on your hands will transfer onto the lamp and cause uneven heating or premature bulb failure. Once you have replaced the lamp, you should allow the projector to cool down. It usually takes about ten minutes to cool completely.
Despite the possibility of bulb explosions, these incidents are relatively rare. The most common cause is a defect in the projector. This may result from faulty wiring or a loose connection. The more poorly maintained a projector is, the more likely it is to experience this issue. This is why it is crucial to check for damage regularly.
Safely Leaving on For Long Periods of Time
When you leave a projector on for long periods, it can become overheated. This can lead to damage. The best way to avoid damage is to turn it off when not in use. Some models come with an “economy mode,” which reduces brightness and reduces the risk of lamp overheating. However, keeping the device away from extreme temperatures is still important. Likewise, avoid placing heavy objects on the projector.
Projectors produce a lot of heat while in use, and this can lead to early lamp failure. It is always a good idea to let them cool down before putting them away, so you can enjoy your movie. This also prevents the lamp from overheating and prolongs lamp life.

Hello, I’m Emily, and I’m delighted to join the 1Home Theatre Projector team. As a writer, I’m here to share my expertise and insights to help you create the perfect home cinema experience. Making decisions in the world of home entertainment can be overwhelming, but fear not—I’m here to provide clarity and guidance.


Projectors can overheat if they are close to electronics and are exposed to high temperatures. Follow these general safety tips to keep your projector in top shape. If you notice your projector overheating frequently, it might be a symptom of larger problems. Be sure to follow any manufacturer instructions on how to keep your projector cool.
The amount of time that you can leave your projector on will depend on a few factors, including the specific model of the projector, the quality of the lamp, and the usage conditions. Here are some general guidelines to follow when using a projector:
- Lamp Life: The lamp in a projector has a limited lifespan, usually around 2,000 to 4,000 hours. It’s important to check the manufacturer’s recommendations for your specific model to see how long the lamp is expected to last. Once the lamp reaches the end of its lifespan, it will need to be replaced.
- Cooling System: Projectors have an internal cooling system that is designed to keep the components from overheating. If the projector is left on for extended periods of time, the cooling system may struggle to keep up, which can cause damage to the internal components. It’s important to follow the manufacturer’s recommended usage guidelines to ensure that the cooling system is working properly.
- Usage Conditions: The environment in which the projector is used can also impact how long it can be left on. For example, a projector that is used in a cool, air-conditioned room will likely be able to stay on longer than a projector that is used in a hot, humid environment.
In general, it’s recommended that you turn off your projector when you’re not using it to help prolong the lifespan of the lamp and the internal components. If you do need to leave the projector on for an extended period of time, it’s important to follow the manufacturer’s recommended usage guidelines and ensure that the cooling system is working properly. By using the projector properly and maintaining it regularly, you can help ensure that it lasts for as long as possible.
Overheating a projector
If you’re using a projector in a room with a high ambient temperature, you need to keep it as cool as possible. Overheating a projector can result in a dangerous explosion of mercury-containing bulbs, which can injure or even kill people nearby. To minimize the chance of overheating, make sure the projector’s housing is free of any obstructions.
Another cause of overheating a projector is a lack of proper ventilation. The projector needs good ventilation to run properly, and if the air is too moist, it can get hot. Additionally, make sure the projector has a filter to keep the dust and debris out. A dirty filter is a major contributor to overheating.
Lamp life
The lamp life of a projector varies depending on the type of lens it uses. Lamps in LED, LCD, and DLP models generally have a lifespan of 5000 to 20000 hours. LASER projectors, however, can have a lamp life of up to 30000 hours. It’s important to understand that a projector is not just a light bulb, as it has a full circuitry inside. Many modern projectors even have a processor chip built into them.
Lamp life of a projector depends on two factors: how often it is used and how well it’s maintained. For older models, the lamp might last only 1,000 to 2,000 hours. However, newer technology has improved lamp life and even eliminated the need to change the lamp altogether. A newer model can have a lamp life of 20,000 hours or longer.
Turning off a projector
If your projector is shutting off on its own, chances are it has an internal component that’s malfunctioning. The most likely culprits are the lamp and power supply board. However, the problem can be fixed by switching to a different electrical outlet. However, before you try to do this, you should first check that the power cord is plugged into a standard outlet. In some cases, a power cord that’s damaged can be the culprit.
In addition to safety, you should also prevent overheating the lamp by turning off the projector after use. This will also help extend the lamp life. Some projectors even come with an auto-off feature that powers off the unit once it detects that it’s not in use. However, this feature isn’t available on all models.
Leaving it plugged in
When using a projector, it is important to never leave it plugged in during operation or when it is cooling down. Most models have fans to help cool the lamp, and pulling the plug can prevent the lamp from cooling down properly. This is not healthy for the lamp and can cause it to break prematurely.
In addition, leaving your projector on for too long can void your warranty. Some manufacturers prohibit leaving their projectors on for long periods of time. While it may be tempting to turn off a projector while you’re watching a movie, you could actually damage the bulb if you leave it unattended.
Cleaning the filter
If you leave a projector on for a long time, the chances of dust and other debris entering the projector are high. Consequently, it is very important to clean the filter regularly to maintain its optimal brightness. If you do not do this, dust and other debris will seep inside the projector, reducing the lamp life and resulting in an increased internal temperature. Generally, you should clean the filter at least quarterly.
In order to clean the filter, first turn off the power and unplug the projector from the power source. Then, open the projector and locate the compartment with the filter inside. You can use a soft brush or low-pressure air to remove dust particles. Be careful not to use high-pressure compressed air as it may damage the filter and allow more dust particles to enter.
Hello, I’m Emily, and I’m delighted to join the 1Home Theatre Projector team. As a writer, I’m here to share my expertise and insights to help you create the perfect home cinema experience. Making decisions in the world of home entertainment can be overwhelming, but fear not—I’m here to provide clarity and guidance.

Home theatre projectors are a great way to create an immersive and enjoyable viewing experience at home. However, with so many options available, it can be challenging to know what to look for when buying a home theatre projector. In this article, we’ll explore some of the key factors to consider when buying a home theatre projector.

Home Theatre Projector Pros
- Large Screen Size: One of the main advantages of using a home theatre projector is the ability to create a large screen size. Projectors can create an image that is much larger than a standard TV, providing a more immersive and cinematic experience.
- Customizable Image Size: Projectors also offer a customizable image size, allowing you to adjust the image size to fit your room and viewing preferences.
- Portability: Home theatre projectors are generally more portable than traditional TVs, making them a great option for those who want to move the projector between different rooms or take it on the go.
- Cost-effective: Projectors can be more cost-effective than traditional TVs, especially when it comes to creating a large screen size.
- Variety of Connectivity Options: Home theatre projectors offer a variety of connectivity options, including HDMI, VGA, and USB, allowing you to easily connect your devices and enjoy high-quality video and audio.
Home Theatre Projector Cons
- Brightness: One of the main disadvantages of using a home theatre projector is that they can be less bright than traditional TVs, especially in brightly lit rooms. This can affect the overall image quality and reduce the overall viewing experience.
- Image Quality: Projectors can be more sensitive to environmental factors such as room lighting and screen quality, which can affect the image quality and overall viewing experience.
- Placement: Projectors require a specific placement to produce the best possible image quality, which can limit the options for room layout and furniture placement.
- Noise: Projectors can produce more noise than traditional TVs, especially if they feature a fan-based cooling system.
- Maintenance: Projectors require regular maintenance, including cleaning the filters and replacing the lamp, which can add to the overall cost of ownership.

What to Know When Buying a Home Theatre Projector
")
If you’re in the market for a home theatre projector, there are a few important things to consider before purchasing. Here are some key factors to keep in mind:
- Resolution: One of the most important factors to consider when buying a home theatre projector is the resolution. You’ll want to ensure the projector has a high enough resolution to provide clear and detailed images. Look for a projector with a resolution of at least 1080p or higher.
- Brightness: The brightness of a projector is measured in lumens, and you’ll want to choose a projector with a brightness level that is appropriate for the size of the room and the amount of ambient light. A projector with a brightness of at least 2000 lumens is recommended for home theatre use.
- Contrast ratio: Contrast ratio refers to the difference between an image’s brightest and darkest parts. A higher contrast ratio will provide more depth and detail in the image. Look for a projector with a contrast ratio of at least 1000:1.
- Throw distance: The throw distance is the distance between the projector and the screen, and it’s important to choose a projector with a throw distance that is appropriate for the size of your room. Make sure to measure the distance between the projector and the screen before making a purchase.
- Connectivity: Consider the type of connectivity options that the projector offers, such as HDMI, VGA, and USB. Ensure that the projector has the connections you need to connect your devices.
- Noise level: Projectors can be noisy, and it’s important to choose a model that has a low noise level. Look for a projector with a noise level of 30 decibels or less.
- Brand and warranty: Finally, consider the brand and warranty of the projector before making a purchase. Choose a reputable brand with good customer reviews, and ensure that the projector has a warranty for added peace of mind.
Considering these factors, you can choose a home theatre projector that provides excellent picture quality and is suitable for your specific needs.
The Importance of Resolution When Buying a Home Theatre Projector
When buying a home theatre projector, the resolution is one of the most important factors to consider. Resolution refers to the number of pixels that make up an image and is a key factor in determining the clarity and detail of the images displayed by the projector. In this article, we’ll explore the importance of resolution when buying a home theatre projector and provide some tips for choosing a projector with the right resolution for your needs.
High resolution is essential for a great home theatre experience. A higher resolution provides greater detail, sharper edges, and more lifelike colors in the projected image. This is especially important for larger screens, as the image will be more visible and any imperfections will be more noticeable. High-resolution projectors are also ideal for displaying content such as Blu-ray discs, streaming services, and video games, often with high-quality graphics requiring a high-resolution display.
When it comes to home theatre projectors, there are several resolution options available. The most common resolution for home theatre projectors is 1080p, which is 1920 x 1080 pixels. This is a great option for most home theatre setups and provides excellent image quality. However, if you want even higher resolution, there are 4K projectors available that provide a resolution of 3840 x 2160 pixels, which is four times the resolution of 1080p.

When choosing a projector, it’s important to consider the screen size and viewing distance. A higher resolution is recommended for larger screens or longer viewing distances to ensure that the image remains clear and detailed. However, if you have a smaller screen or a shorter viewing distance, a lower resolution may be sufficient and can help save on the cost of the projector.
In summary, the resolution is a crucial factor to consider when buying a home theatre projector. A higher resolution provides greater detail and clarity in the image and is especially important for larger screens and high-quality content. When choosing a projector, consider the size of the screen and viewing distance to determine the appropriate resolution for your needs. By choosing a projector with the right resolution, you can ensure that you get the best possible home theatre experience.
The Importance of Brightness When Choosing a Home Theatre Projector
Brightness is one of the most important factors when choosing a home theatre projector. The brightness of a projector determines the quality of the image displayed on the screen and is a key factor in providing a great home theatre experience. In this article, we’ll explore the importance of brightness when choosing a home theatre projector and provide some tips for selecting a projector with the appropriate brightness for your needs.
Brightness is measured in lumens and refers to the amount of light the projector can produce. A brighter projector provides a clearer and more vivid image, which is especially important in environments with high levels of ambient light. In a home theatre environment, it’s important to choose a projector with a brightness level appropriate for the room’s size and the amount of ambient light present.
When selecting a projector, consider the size of the room and the distance between the projector and the screen. Larger rooms and longer distances between the projector and screen require higher brightness levels to ensure that the image remains clear and vivid. For example, a projector with a brightness level of 2000 lumens is recommended for rooms with high levels of ambient light, while a projector with a brightness level of 1000 lumens may be sufficient for darker rooms.
It’s also important to consider the type of content that you will be viewing with your home theatre projector. If you plan to watch movies or other content with a high level of detail, such as sports or video games, a higher level of brightness is recommended to ensure that the image remains clear and vivid. However, if you plan to use your projector primarily for low-light content such as movies or TV shows, a lower level of brightness may be sufficient.
In addition to brightness, it’s also important to consider the projector’s contrast ratio. Contrast ratio refers to the difference between an image’s brightest and darkest parts and is a key factor in providing a clear and vivid image. A higher contrast ratio provides more depth and detail in the image and can help improve the overall quality of the home theatre experience.
In conclusion, brightness is a crucial factor to consider when selecting a home theatre projector. A projector with the appropriate brightness level can help ensure that the image remains clear and vivid in various lighting environments. When selecting a projector, consider the size of the room, the distance between the projector and screen, and the type of content that you will be viewing to determine the appropriate level of brightness for your needs.
The Importance of Contrast Ratio When Choosing a Home Theatre Projector
Contrast ratio is an essential factor to consider when choosing a home theatre projector. The projector’s contrast ratio refers to the difference between the darkest and brightest parts of an image, and is a key factor in determining the overall image quality. In this article, we’ll explore the importance of contrast ratio when choosing a home theatre projector and provide some tips for selecting a projector with the appropriate contrast ratio for your needs.
A high contrast ratio is important for providing a clear and detailed image, especially in low-light environments. A higher contrast ratio provides more depth and detail in the image, making it more realistic and lifelike. In a home theatre environment, a high contrast ratio can help provide a more immersive viewing experience.

When selecting a projector, consider the type of content that you will be viewing. A high contrast ratio for movies and other video content can help provide more detail and improve the viewing experience. A high contrast ratio is also important for gaming, as it can help improve the clarity and detail of graphics and other visual elements.
When comparing projectors, it’s important to pay attention to the contrast ratio specifications. Projectors with a contrast ratio of at least 1000:1 are recommended for home theatre use, with higher ratios providing even better image quality. Some projectors also feature dynamic contrast ratios, which can provide even better contrast and more vivid colors.
It’s also important to consider other factors that can affect contrast, such as the type of screen being used. A high-quality screen can help improve the overall image quality and contrast, providing a more immersive viewing experience.
In addition to the contrast ratio, other factors to consider when choosing a home theatre projector include brightness, resolution, and throw distance. Choosing a projector that meets your specific needs in all of these areas can help ensure that you get the best possible home theatre experience.
In conclusion, the contrast ratio is a crucial factor to consider when choosing a home theatre projector. A high contrast ratio can help provide more detail and a more realistic image, improving the overall viewing experience. When selecting a projector, consider the type of content that you will be viewing and choose a projector with the appropriate contrast ratio for your needs. Choosing a projector with a high contrast ratio allows you to enjoy a more immersive and enjoyable home theatre experience.
How to Choose the Right Throw Distance for Your Home Theatre Projector
Throw distance is an important factor when choosing a home theatre projector. The throw distance is the distance between the projector and the screen, and it’s important to choose a projector with the appropriate throw distance for your room size and screen size. In this article, we’ll explore the importance of throw distance when choosing a home theatre projector and provide some tips for selecting a projector with the right throw distance for your needs.
When choosing a projector, it’s important to consider the size of the room and the distance between the projector and the screen. A projector with a short throw distance is ideal for smaller rooms or rooms with limited space. Short-throw projectors can be placed closer to the screen, which can help reduce the amount of shadow and glare the projector creates.
On the other hand, if you have a larger room or a larger screen size, a projector with a longer throw distance may be necessary. A longer throw distance allows the projector to be placed further away from the screen, which can help provide a larger image size and reduce distortion.
When choosing a projector, it’s also essential to consider the lens zoom capabilities. Some projectors feature a zoom lens, which allows you to adjust the image size without changing the distance between the projector and the screen. This can be especially helpful if you have a smaller room and need to adjust the image size to fit your screen.
In addition to throw distance and zoom capabilities, it’s also important to consider the projector’s aspect ratio. The aspect ratio is the ratio of the width to the height of the projected image. Choosing a projector with an aspect ratio matches your screen size and viewing preferences is important.
When selecting a home theatre projector, it’s important to consider all of these factors to ensure you get the best viewing experience. Choosing a projector with the appropriate throw distance, zoom capabilities, and aspect ratio allows you to create a home theatre setup that provides an immersive and enjoyable viewing experience.
In conclusion, throw distance is essential when choosing a home theatre projector. A projector with the appropriate throw distance can help ensure that the image is clear, vibrant, and properly sized for your room and screen. When selecting a projector, consider the size of your room, the distance between the projector and the screen, and the projector’s zoom capabilities and aspect ratio to ensure that you get the best possible home theatre experience.
A Guide to Choosing the Right Connectivity for Your Home Theatre Projector
When choosing a home theatre projector, connectivity is an important factor to consider. The right connectivity options allow you to easily connect your devices, such as Blu-ray players and gaming consoles, to the projector. In this article, we’ll explore the importance of connectivity when choosing a home theatre projector and provide some tips for selecting a projector with the right connectivity options for your needs.
Home theatre projectors’ most common connectivity options are HDMI, VGA, and USB. HDMI is the most popular option and provides high-quality digital video and audio. Most modern devices, such as Blu-ray players and gaming consoles, feature HDMI outputs, so choosing a projector with at least one HDMI input is important. Some projectors also feature multiple HDMI inputs, which can be useful if you plan to connect multiple devices to the projector.
VGA is an older connectivity option that is still commonly used for connecting computers and laptops to projectors. VGA provides analog video and audio and is useful if you plan to use your projector for presentations or other computer-related tasks.

USB connectivity is useful for playing media files directly from a USB drive. Some projectors feature a built-in media player that allows you to play movies, music, and photos directly from a USB drive.
When choosing a home theatre projector, it’s important to consider the specific devices that you plan to connect to the projector. Make sure that the projector has the appropriate connectivity options for your devices. Additionally, consider the length of the cables needed to connect your devices to the projector. Ensure the cables are long enough to reach from the projector to your devices without causing clutter or tripping hazards.
In addition to connectivity options, it’s also important to consider the audio options provided by the projector. Some projectors feature built-in speakers, while others require external speakers or a home theatre receiver for audio output. Make sure that the projector has the appropriate audio options for your needs.
In conclusion, connectivity is an important factor to consider when choosing a home theatre projector. The right connectivity options allow you to connect your devices and enjoy high-quality video and audio easily. When selecting a projector, consider the specific devices that you plan to connect, the length of the required cables, and the audio options provided by the projector. Choosing a projector with the appropriate connectivity options allows you to create a home theatre setup that provides an immersive and enjoyable viewing experience.
How to Choose a Home Theatre Projector with the Right Noise Level
Noise level is an important factor to consider when choosing a home theatre projector. The noise level of a projector refers to the amount of noise that it produces while in operation. In this article, we’ll explore the importance of noise level when choosing a home theatre projector and provide some tips for selecting a projector with the appropriate noise level for your needs.
The noise level of a projector is measured in decibels (dB). A lower noise level is generally preferred, as it provides a quieter and more enjoyable viewing experience. It’s recommended to choose a projector with a noise level of 30 dB or less.
When selecting a projector, consider the projector’s placement in the room. A projector that is placed close to the viewer or in an enclosed space can be especially distracting if it produces a lot of noise. A projector with a low noise level is recommended for these types of environments.
It’s also important to consider the specific noise level of the projector when it is in use. Some projectors produce a noticeable fan noise while in operation, while others are much quieter. Look for reviews and specifications that provide information on the projector’s noise level to ensure that it is appropriate for your needs.
In addition to noise level, it’s important to consider other factors that can affect the noise level of your home theatre setup. For example, external speakers and other components can also produce noise that can detract from the overall viewing experience. Make sure to choose components that are also quiet and produce minimal noise.
It’s also important to consider the cooling system of the projector. Some projectors use a fan-based cooling system, which can produce noise. Other projectors use a silent cooling system that does not produce any noise. When selecting a projector, consider the type of cooling system used and choose a projector with a silent cooling system if noise is a concern.
In conclusion, noise level is an important factor to consider when choosing a home theatre projector. A low noise level can help ensure a more enjoyable and immersive viewing experience. When selecting a projector, consider the projector’s placement, the specific noise level of the projector, and the cooling system used. Choosing a projector with the appropriate noise level allows you to create a home theatre setup that provides a quiet and enjoyable viewing experience.
Why Brand and Warranty are Important Factors When Choosing a Home Theatre Projector
Brand and warranty are important factors when choosing a home theatre projector. The brand of the projector can provide an indication of the quality and reliability of the product, while the warranty provides protection against defects and other issues that may arise. In this article, we’ll explore the importance of brand and warranty when choosing a home theatre projector and provide some tips for selecting a projector with a reputable brand and a strong warranty.
When choosing a home theatre projector, it’s important to choose a reputable brand with a track record of producing high-quality products. A reputable brand is more likely to produce a reliable projector that performs well and is also more likely to provide good customer support in case of any issues or questions. Some well-known brands in the home theatre projector industry include Sony, Epson, and Optoma.
In addition to the brand, it’s also important to consider the warranty provided by the projector manufacturer. A strong warranty can provide peace of mind and protection against defects and other issues that may arise. Look for a projector that comes with a warranty of at least one year, and consider purchasing an extended warranty for additional protection.
When reviewing the warranty, pay attention to the specific coverage provided. Some warranties may cover only certain parts or components, while others may provide more comprehensive coverage. It’s also important to consider the terms of the warranty, such as any limitations or exclusions that may apply.
It’s also a good idea to read reviews and customer feedback to get an idea of the reliability and customer support provided by the manufacturer. Look for feedback on the brand and warranty, as well as on the overall performance and quality of the projector.
In addition to brand and warranty, it’s also important to consider other factors when choosing a home theatre projector, such as resolution, brightness, and connectivity. By considering all of these factors, you can choose a projector that meets your specific needs and provides an immersive and enjoyable viewing experience.
In conclusion, brand and warranty are important factors when choosing a home theatre projector. A reputable brand and a strong warranty can provide peace of mind and protection against defects and other issues that may arise. When selecting a projector, consider the brand, warranty, and other factors such as resolution, brightness, and connectivity. Choosing a projector with a reputable brand and a strong warranty allows you to create a home theatre setup that provides a reliable and enjoyable viewing experience.

Size of Projected Image
The size of the projected image is a key factor to consider when using a home theatre projector. Projectors can create an image that is muchh larger than a standard TV, providing a more immersive and cinematic viewing experience.
The size of the projected image can be adjusted by changing the distance between the projector and the screen or wall. Most projectors come with a zoom feature that can also adjust the size of the projected image. It’s important to choose a projector with a throw ratio that is appropriate for the size of the room and the desired screen size.
Size of Projected Image Calculator
Projected Image Size Calculator
The size of the projected image can range from as small as 50 inches to as large as 300 inches or more, depending on the capabilities of the projector and the distance between the projector and the screen. The recommended screen size varies based on the resolution of the projector and the viewing distance. As a general rule of thumb, the screen size should be about twice the distance between the projector and the screen.
When choosing the size of the projected image, it’s important to consider the size of the room and the seating arrangement. A larger image size is ideal for a larger room, while a smaller image size may be more appropriate for a smaller room. It’s also important to consider the aspect ratio of the projector and the screen, as this can affect the quality of the image and the overall viewing experience.
In conclusion, the size of the projected image is an important factor to consider when using a home theatre projector. The size of the projected image can be adjusted by changing the distance between the projector and the screen, and most projectors come with a zoom feature that can also adjust the size of the image. When choosing the size of the projected image, consider the size of the room and the seating arrangement, as well as the aspect ratio of the projector and the screen. By choosing the appropriate size for the projected image, you can create an immersive and enjoyable viewing experience in your home.
Things to Consider Before Buying Your Home Theatre Projector
A home theatre projector is a great way to create an immersive and enjoyable viewing experience at home. However, with so many options available, it can be challenging to know what to look for when buying a home theatre projector. In this article, we’ll explore some of the key factors to consider before buying a home theatre projector.

- Room Size: The size of the room is an important consideration when choosing a home theatre projector. Larger rooms require a projector with a higher brightness and a longer throw distance to create a larger image size.
- Screen Size: The size of the screen is another important factor to consider. Projectors can create an image that is much larger than a standard TV, so it’s important to choose a screen size that is appropriate for the room and the viewing distance.
- Resolution: Resolution refers to the number of pixels in the projected image and is a major factor in determining image quality. Look for projectors with high resolution, such as 1080p or 4K, for the best possible viewing experience.
- Brightness: Brightness is an important consideration, especially in rooms with a lot of ambient light. Look for projectors with high lumens ratings for the best possible image quality in all lighting conditions.
- Contrast Ratio: Contrast ratio refers to the difference between the brightest and darkest parts of the image. A high contrast ratio is important for creating a clear and detailed image, especially in darker scenes.
- Throw Distance: Throw distance refers to the distance between the projector and the screen. It’s important to choose a projector with a throw distance that is appropriate for the size of the room and the desired screen size.
- Connectivity: Look for a projector with a variety of connectivity options, including HDMI, VGA, and USB, to easily connect your devices and enjoy high-quality video and audio.
- Brand and Warranty: Consider the brand and warranty of the projector before making a purchase. A reputable brand is more likely to produce a reliable and high-quality product, and a strong warranty can provide protection against defects and other issues.
- Cost: Cost is an important factor to consider, as home theatre projectors can range in price from a few hundred dollars to several thousand. Set a budget and choose a projector that offers the features and quality you need within your budget.
In conclusion, there are many factors to consider when buying a home theatre projector, including room size, screen size, resolution, brightness, contrast ratio, throw distance, connectivity, brand and warranty, and cost. By considering these factors and choosing a projector that meets your specific needs, you can create an immersive and enjoyable viewing experience in your home.
Projector Lamp Cost
Projector lamps are an essential component of a home theatre projector, providing the light needed to create a clear and bright image. However, the cost of projector lamps can be a concern for many users. Here’s what you need to know about projector lamp cost.
The cost of projector lamps varies based on several factors, including the brand of the projector, the model of the lamp, and the quality of the lamp. In general, higher-end projectors will have more expensive lamps than lower-end models.
Most projector lamps have a lifespan of around 2,000 to 4,000 hours, depending on usage and environmental factors such as temperature and humidity. When the lamp reaches the end of its life, it will need to be replaced to maintain the quality of the image.

The cost of a replacement lamp can range from around $50 to $500 or more, depending on the factors mentioned above. In addition to the cost of the lamp, there may be additional costs for installation, such as hiring a professional technician to replace the lamp.
To reduce the cost of projector lamps, consider purchasing a high-quality projector that uses a long-lasting lamp. Some projectors also offer an eco-mode that can extend the life of the lamp and reduce the need for frequent replacements.
It’s also important to purchase projector lamps from a reputable source to ensure that you are getting a high-quality product. Generic or off-brand lamps may be cheaper, but they may not provide the same level of performance and reliability as a genuine replacement lamp.
In conclusion, the cost of projector lamps can be a concern for home theatre projector users. The cost of a replacement lamp can range from $50 to $500 or more, depending on several factors. To reduce the cost of projector lamps, consider purchasing a high-quality projector with a long-lasting lamp and purchase replacement lamps from a reputable source. By taking these steps, you can ensure that your home theatre projector provides a high-quality viewing experience at a reasonable cost.
Home Theatre Projector Costs
The cost of a home theatre projector can vary widely depending on a range of factors, including the quality of the projector, its features and capabilities, and the brand name. Here are some factors to consider when estimating the cost of a home theatre projector:
- Resolution: Higher resolution projectors will typically cost more. A 1080p projector will be less expensive than a 4K projector, for example.
- Brightness: Higher lumens ratings, which indicate greater brightness, also tend to increase the cost of the projector.
- Contrast Ratio: Higher contrast ratios, which offer more detail in darker and lighter scenes, can also increase the cost of a projector.
- Features: Projectors with additional features such as built-in speakers, wireless connectivity, and 3D capability will also typically cost more.
- Brand: Projectors from well-known brands may be more expensive than those from lesser-known brands. The quality of the projector can also vary based on the brand name.
- Lamp Life: Projectors that use longer-lasting lamps can also cost more upfront.
- Screen Size: The size of the screen the projector will be used with may also affect the cost of the projector, as larger screens require more powerful projectors.
In general, home theatre projectors can range in price from a few hundred dollars to several thousand dollars. It’s important to balance the desired quality and features with the budget for the project. A high-end home theatre projector can cost over $5,000, while an entry-level projector may be available for under $500.
It’s also important to consider additional costs, such as the cost of the projector screen, installation, and maintenance. These costs can vary depending on the size and complexity of the installation.
In conclusion, the cost of a home theatre projector can vary widely depending on the specific features and capabilities of the projector, as well as the brand name. By considering the desired quality and features and balancing them with the budget, it’s possible to find a projector that provides a high-quality viewing experience at a reasonable cost.
Blank Wall or A White Screen
When setting up a home theatre projector, one important decision to make is whether to project onto a blank wall or a white screen. Here are some factors to consider when making this decision:

- Image Quality: A white screen can provide a better image quality than a blank wall, as it is specifically designed for projector use. A white screen can reflect the light from the projector more evenly, resulting in a clearer and more vibrant image.
- Ambient Light: A blank wall may be more reflective than a white screen, which can cause issues with ambient light. A white screen can reduce the impact of ambient light on the image, leading to better image quality in all lighting conditions.
- Size: A blank wall may limit the size of the projected image, as it is typically smaller than a dedicated screen. A white screen allows for greater flexibility in image size, as well as more accurate aspect ratios.
- Portability: A blank wall is always available, whereas a white screen can be difficult to move or transport. However, there are portable screens available for those who need to move the screen from one location to another.
- Cost: A blank wall is free, whereas a white screen can be a significant expense. However, the cost of a white screen can be worth it for those seeking the best possible image quality.
- Room Design: A white screen can be a better option for those who want to create a dedicated home theatre room with a custom design. A blank wall may be less desirable if it doesn’t fit with the overall room design.
In conclusion, while projecting onto a blank wall is an option, a white screen can provide better image quality, reduce the impact of ambient light, and allow for greater flexibility in image size. However, a white screen can be more expensive and less portable than a blank wall. Ultimately, the decision between a blank wall and a white screen will depend on factors such as image quality, ambient light, size, portability, cost, and room design.
Benefits of Having a Home Cinema Projector
Home theatre projectors have become increasingly popular as a way to create an immersive and enjoyable viewing experience at home. There are many benefits to using a home theatre projector, including:
- Large Screen Size: One of the main benefits of using a home theatre projector is the ability to create a large screen size. Projectors can create an image that is much larger than a standard TV, providing a more immersive and cinematic experience.
- Customizable Image Size: Projectors also offer a customizable image size, allowing you to adjust the image size to fit your room and viewing preferences.
- Portability: Home theatre projectors are generally more portable than traditional TVs, making them a great option for those who want to move the projector between different rooms or take it on the go.
- Cost-effective: Projectors can be more cost-effective than traditional TVs, especially when it comes to creating a large screen size.
- Variety of Connectivity Options: Home theatre projectors offer a variety of connectivity options, including HDMI, VGA, and USB, allowing you to easily connect your devices and enjoy high-quality video and audio.
- Immersive Viewing Experience: The large screen size and customizable image size of a home theatre projector create an immersive viewing experience that is ideal for movies, sports, and other types of entertainment.
- Easy to Set Up: Home theatre projectors are generally easy to set up and use, with most models offering plug-and-play connectivity and intuitive user interfaces.
- Versatility: Home theatre projectors are versatile, with many models offering a variety of features, such as built-in speakers, 3D capability, and wireless connectivity.
- Room Design: With a home theatre projector, you can design your room to fit your preferences. There is no need to fit furniture around the TV as you can place the projector where it fits best, creating a unique and personalized viewing experience.
In conclusion, home theatre projectors offer many benefits, including a large screen size, customizable image size, portability, cost-effectiveness, versatility, and immersive viewing experience. When choosing a home theatre projector, consider the specific features and benefits that best meet your needs and preferences. With a home theatre projector, you can create a viewing experience that is personalized and enjoyable for you and your family.

Home Cinema Projector Downsides
While a home cinema projector can provide an immersive and enjoyable viewing experience, there are some downsides to consider when deciding whether to use a projector in your home theatre setup. Here are some of the most common downsides to using a home cinema projector:
- Ambient Light: Projectors typically require a dark environment to produce a high-quality image. Even low levels of ambient light can significantly impact the quality of the image. This means that a dedicated home theatre room with light control is necessary for the best viewing experience.
- Limited Lamp Life: Projectors use a lamp that has a limited lifespan, usually around 2,000 to 4,000 hours. This means that the lamp will need to be replaced periodically, which can add to the cost of owning a projector.
- Maintenance: In addition to replacing the lamp, projectors also require regular maintenance to keep the filter clean and prevent overheating. This can be time-consuming and may require professional assistance.
- Image Quality: While projectors can produce a large image, the quality of the image can vary depending on the quality of the projector and the screen used. Lower-end projectors may have lower image quality than higher-end models.
- Setup: Projectors require a bit more setup than a traditional TV, including mounting the projector, running cables, and adjusting the image. This can be challenging for those who are not familiar with home theatre setup.
- Noise: Projectors can produce a significant amount of noise, which can be distracting during quiet scenes. This noise can come from the fan or the motor used to move the lens.
- Limited Viewing Angles: Some projectors have limited viewing angles, meaning that the image may be distorted or difficult to see from certain angles. This can be a concern for those with large families or groups of friends who want to enjoy the viewing experience together.
In conclusion, while a home cinema projector can provide an immersive and enjoyable viewing experience, there are some downsides to consider. These include ambient light, limited lamp life, maintenance, image quality, setup, noise, and limited viewing angles. By understanding these downsides and addressing them where possible, you can enjoy a high-quality viewing experience with your home theatre projector.

Cinema Projector Fan Noise
Fan noise is a common issue with home cinema projectors. The fan in a projector is used to keep the internal components cool and prevent overheating. However, this fan can also produce a significant amount of noise, which can be distracting during quiet scenes and diminish the overall viewing experience. Here are some ways to address cinema projector fan noise:
- Positioning: The positioning of the projector can impact the amount of fan noise it produces. Placing the projector on a stable and level surface can reduce the amount of noise, as can positioning it in a way that maximizes airflow and reduces the amount of heat generated.
- Noise Reduction Materials: Adding noise reduction materials, such as acoustic panels, to the room can help absorb and reduce the sound produced by the fan. These materials can be placed on the walls or ceiling, and can help improve the overall sound quality of the room.
- Quiet Mode: Many projectors offer a “quiet mode” option that reduces the amount of noise produced by the fan. This mode may lower the brightness of the image slightly, but can significantly reduce the amount of fan noise.
- External Fan: Some projectors have the option to add an external fan to help cool the unit. This can reduce the strain on the internal fan and reduce the amount of noise produced.
- Upgrade the Projector: In some cases, upgrading to a higher-end projector can significantly reduce the amount of fan noise. Higher-end models are often designed with quieter fans and more advanced cooling systems.
In conclusion, fan noise is a common issue with home cinema projectors, but there are several ways to address it. By positioning the projector correctly, adding noise reduction materials, using the quiet mode option, adding an external fan, or upgrading the projector to a higher-end model, you can reduce the amount of fan noise and improve the overall viewing experience.
Home Theatre Projectors vs. TVs
When it comes to creating a home theatre experience, the choice between a projector and a TV can be a difficult one. Here are some factors to consider when deciding between a home theatre projector and a TV:
- Screen Size: Projectors can produce much larger images than TVs, making them a great choice for those who want a truly immersive experience. A projector can produce an image that is 100 inches or more, while the largest TVs are typically around 85 inches.
- Image Quality: Both projectors and TVs can produce high-quality images, but there are some differences to consider. Projectors can produce a more cinematic experience, with better color accuracy and contrast. However, TVs typically offer better brightness and detail, especially in brightly-lit rooms.
- Viewing Environment: Projectors require a dark room to produce the best image quality, while TVs can produce a good image in a wider range of lighting conditions. If you plan to watch movies during the day, a TV may be a better choice.
- Setup: Projectors require more setup than TVs, including mounting the projector, running cables, and adjusting the image. This can be challenging for those who are not familiar with home theatre setup.
- Cost: In general, projectors are less expensive than larger TVs. However, the cost of a projector screen can add to the overall cost of the setup.
- Portability: Projectors can be more portable than TVs, allowing you to move the setup from room to room or take it with you on the go.
- Maintenance: Projectors require more maintenance than TVs, including lamp replacement and filter cleaning.
In conclusion, the choice between a home theatre projector and a TV will depend on a range of factors, including screen size, image quality, viewing environment, setup, cost, portability, and maintenance. Projectors can produce a more immersive and cinematic experience with a larger image size, while TVs are typically easier to set up and can produce better image quality in bright rooms. By considering these factors and choosing the option that best fits your needs and preferences, you can create a high-quality home theatre experience.

Carl is the author of 1home Theatre Projector. When he’s not busy writing about all things projector-related, you can find him playing basketball or watching a good movie. He knows that jumping to a projector-based home cinema can be daunting, but he’s here to help make it as easy as possible. With his comprehensive guides and product reviews, you’ll be able to find the right projector for your needs and set it up in no time. Plus, he’s always on top of the latest news and information on upcoming releases, so you’ll always be ahead of the curve.
4k video resolution is becoming increasingly popular, but there is still some confusion. 2160p is the standard for 4k resolution, which means that 4k video has a total of 2160 horizontal lines.
Is 4k Video Resolution the Same as 2160p?
This significantly increased from 1080p, which has only 1080 horizontal lines. The extra detail in 4k video makes it ideal for high-definition screens and is becoming more common in home movie theaters.
Resolution Watching Youtube, Disney+, Amazon Prime, or Netflix
The resolution is everything when you’re watching a video on youtube or a movie on Disney+, Amazon Prime, or Netflix. A low-resolution video can be blurry and difficult to manage, while a high-resolution video can be clear and sharp. There are a few different ways to measure video quality, but the most common is by pixels.
The more pixels in a video, the higher the resolution and the better the quality. For example, Full HD videos have a resolution of 1920×1080, which means that there are 1,920 horizontal pixels and 1,080 vertical pixels. That’s a total of 2,073,600 pixels or two million pixels. By contrast, 4K videos have a resolution of 3840×2160.

That’s four times as many pixels as Full HD, for 8,294,400 pixels. That’s why 4K videos look sharper and more precise than Full HD videos – they’ve got four times as many pixels. When it comes to video quality, the resolution is everything.
Is 4k Video Resolution the Same as 2160p?
Regarding 4k resolution, there is a lot of confusion about what the term means. Is 4k the same as 2160p? The answer is yes! In the home theater industry, the standard resolution for 4k is 3840×2160. This also goes for the cinematic standard and digital television (DTV) standards. Although the resolutions may vary slightly, 4k refers to a horizontal resolution of about 4000 pixels.
Ultra HD TVs and Ultra HD Blu-ray discs have a resolution of 3840×2160, while digital projectors are slightly wider at 4096×2160. So, next time you wonder if 4k and 2160p are the same things, now you know!
What Is 4K?
If you’re interested in buying a 4K monitor, a 4K Laser TV, a 4K ultra-short-throw (UST) projector, or a 4k LCD TV, there are a few things you should know about the technology.
First, an actual 4K display has a horizontal resolution of at least 4000 pixels. It has four times as many pixels as a 1080p display. The most common 4K resolution is 3840×2160, sometimes called “UHD” or “Ultra HD.”
However, this resolution doesn’t strictly adhere to the definition of 4K since it only has 3,840 pixels of horizontal resolution. Nevertheless, it’s still considered 4K by most people. When shopping for a 4K monitor, pay attention to the resolution and make sure it meets your needs.

The term 4K originally referred to a digital cinema resolution, now called DCI 4K. This resolution is 4096 x 2160, but most consumer TVs and monitors are only 3840 x 2160. The difference might not seem like much, but it can make a big difference in picture quality. A 4096 x 2160 resolution will either stretch and distort the picture or require black boxes across the top and bottom – neither of which consumers are happy to see.
So, 4K almost always refers to the 3840 x 2160 display resolution to appease home consumers. This resolution is still considered to be “ultra HD” and provides a significant upgrade over 1080p. It’s important to note that most content isn’t filmed in 4K, so you’re likely not getting the full benefit of your 4K TV or monitor.
However, many streaming services like Disney+, Amazon Prime, or Netflix now offer 4K content, and the picture quality is unbeatable. If you’re looking for the best possible picture quality, 4K is the way to go.
What Is UHD?
UHD, or ultra-high-definition, has become the new standard for resolution in recent years. Many Television manufacturers have begun to produce TVs with a UHD resolution slightly lower than 4K. However, the difference in resolution is not noticeable to the average person.
UHD TVs are becoming increasingly popular because they offer a better picture quality than HDTVs. In addition, UHD TVs are often cheaper than 4K TVs. As a result, UHD is quickly becoming the new standard for TV resolution.

Trying to keep up with all the latest advancements in television technology can be confusing. One minute you’re being told that HD is the best since sliced bread, and the next, you’re being bombarded with ads for 4K TVs. So what’s the difference between HD and 4K, and do you need to upgrade your television? Here’s a quick rundown of the basics.
HD, or High Definition, refers to a resolution of 1920×1080 pixels. That’s approximately two million pixels or two megapixels. 4K, however, has a resolution of 3840×2160 pixels. That works out to around eight megapixels or four times as many as HD. So yes, 4K is technically a higher resolution than HD, and it does offer some benefits in terms of picture quality.
However, it’s essential to remember that most people don’t have a 4K TV yet, so there’s not a lot of 4K content available. Unless you’re planning on buying a new TV anyway, you might want to wait a while before switching to 4K.
What Is 2160p?
2160p is the term used to describe display resolutions where the vertical resolution is 2,160 pixels. The “p” stands for “progressive scan,” a format in which the lines of each frame of a moving image are drawn in sequence.
This is in contrast to interlaced video, where each frame’s odd and even lines are drawn alternatingly. Practically, all 2160p display resolutions are also 4K (by its loose definition). In other words, 2160p is vertical resolution, and 4K is horizontal resolution. Whether watching a movie or playing a video game, 2160p provides a stunning level of detail and clarity. So if you’re looking for the best viewing experience, choose a device with a 2160p display resolution.
Similarities and Differences of 4K and 2160p
There are a few significant similarities and differences between 4K and 2160p. Both can do High Dynamic Range (HDR) and Wide Color Gamut (WCG) display technology, resulting in sharper images and wider color variegation. However, the difference between the two isn’t just a matter of a few extra pixels width-wise.
4K was developed by the Digital Cinema Initiative and had an aspect ratio of 4096×2160, while 2160p falls just a little bit short with a 3840×2160 resolution. So if you’re looking for true Ultra HD, make sure your projector or HDTV claims to have a 4K display.
Short Summary
So, what does this mean for you? If you’re looking to get the best possible 4K experience, you should seek out cinemas using DCI 4K projectors. However, if you’re content with a 2160p UHD experience, you can save money by opting for a less expensive projector. Either way, 4K technology will enhance your viewing experience and take it to the next level.

Conclusion
Trying to keep track of all the different display resolutions out there can be confusing. To make things more complicated, some resolutions have multiple names. For example, a display resolution of 4096 x 2160 can be called faithful 4K, 4K UHD, or 2160p.
Meanwhile, a resolution of 3840 x 2160 is technically called 4K UHD, UHDTV1, or just UHD. However, most people use the term “4K” to refer to any resolution in the 4000 range, so in common usage, all of these terms are interchangeable.
Things will get even more confusing when 8K TVs start becoming popular. The term “UHD” will no longer refer exclusively to displays with a 3840 x 2160. Instead, it will describe any display with a resolution of either 4096 x 2160 (true 4K) or 7680 x 4320 (8K). So when shopping for a new TV, pay attention to the actual resolution rather than the specific term used to describe it. That way, you can be sure you’re getting the exact display you want.
4K, or 2160p, is the latest display resolution to hit the market, causing quite a stir. Its main competitors are 1080p, also known as Full HD, and 720p, known as HD. Many consumers are confused about which resolution and retailers aren’t helping by short-handing 4K as just “4K.” 4K is 3840 × 2160, so it’s not technically accurate.
However, its popularity might have something to do with the fact that “2160p” doesn’t roll off the tongue as quickly as “4K.” Whatever the reason for its popularity, 4K is here to stay, so we might as well learn to love it.
A 4K television is a television with a display resolution of approximately 4000 pixels. The term “4K” refers to the image’s horizontal resolution, roughly 4000 pixels. In contrast, a 1080p television has a resolution of only 1920×1080 pixels. The increase in resolution from 1080p to 4K significantly boosts image quality, resulting in a sharper, more detailed picture.
Many retailers are eager to label everything as 4K to make their products sound more feature-rich. However, it is essential to note that not all 4K displays are created equal. Some 4K displays may have a lower refresh rate or use lower-quality panels, which can result in inferior image quality. When shopping for a 4K television, carefully read the specifications to ensure that you are getting a high-quality product.
Carl is the author of 1home Theatre Projector. When he’s not busy writing about all things projector-related, you can find him playing basketball or watching a good movie. He knows that jumping to a projector-based home cinema can be daunting, but he’s here to help make it as easy as possible. With his comprehensive guides and product reviews, you’ll be able to find the right projector for your needs and set it up in no time. Plus, he’s always on top of the latest news and information on upcoming releases, so you’ll always be ahead of the curve.


Understanding Why Your 4K Television Display Looks Blurry

Explore Affordable Projector Options for Amazing Home Cinema

Discovering the World of Digital Projection Technology

Leading Provider of Professional Audiovisual Solutions

Best Noise Cancelling Headphones for Dogs – Keep Your Pet Calm!

-
 Beginners Guides3 months ago
How to Use a Projector & 10 Tips to Set up Your Projector Perfectly
-
 Beginners Guides3 months ago
How to Make a Home Theatre
-
 Beginners Guides3 months ago
How to Watch Curzon Home Cinema on My LG TV
-
 Beginners Guides3 months ago
How Do I Connect My Home Theater to My TV Wirelessly?
-
 Beginners Guides3 months ago
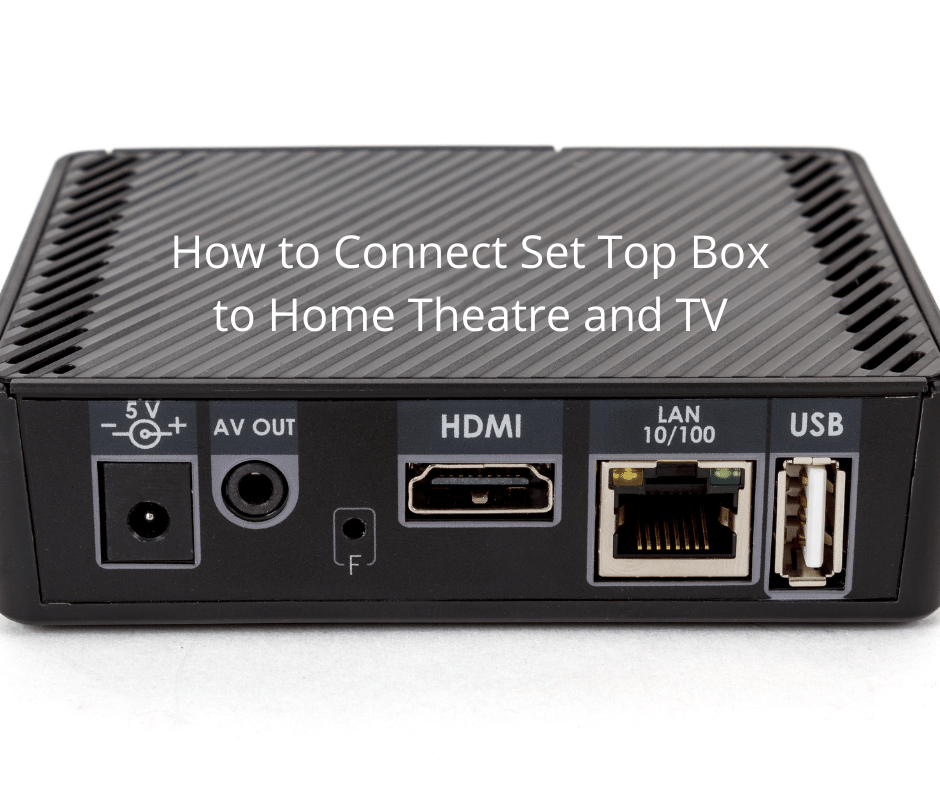
How to Connect Set Top Box to Home Theatre and TV
-
 Beginners Guides3 months ago
How to Use Surround Sound With Firestick
-
 Beginners Guides3 months ago
How to Connect Speaker Wire & Spot the Connectors
-
 Home Cinema3 months ago
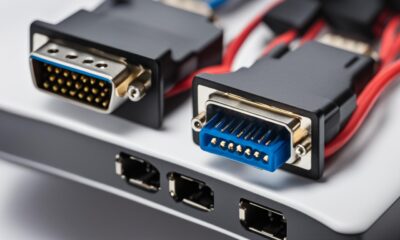
Understanding the VGA Port: Your Guide to Display Interfaces