Connect with us

Home Cinema

What to Know when Buying a Home Theatre Projector

Published

on

Home theater projectors provide a fantastic opportunity to enhance your viewing experience from the comfort of your own home. With a wide variety of options on the market, it can be difficult to determine which features are most important when purchasing a home theater projector. This article will delve into the essential factors to keep in mind when selecting a home theater projector.

Optoma HD39HDRx High Brightness HDR 1080p Home Theater Projector | 120Hz Refresh Rate | 4,000 Lumens | Fast 8.4ms Response time with 120Hz | Easy Setup, 1.3X Zoom | 4K Input | Quiet 26 dB Operation

Home Theatre Projector Pros

  • Large Screen Size: One of the main advantages of using a home theatre projector is the ability to create a large screen size. Projectors can create an image that is much larger than a standard TV, providing a more immersive and cinematic experience.
  • Customizable Image Size: Projectors also offer a customizable image size, allowing you to adjust the image size to fit your room and viewing preferences.
  • Portability: Home theatre projectors are generally more portable than traditional TVs, making them a great option for those who want to move the projector between different rooms or take it on the go.
  • Cost-effective: Projectors can be more cost-effective than traditional TVs, especially when it comes to creating a large screen size.
  • Variety of Connectivity Options: Home theatre projectors offer a variety of connectivity options, including HDMI, VGA, and USB, allowing you to easily connect your devices and enjoy high-quality video and audio.

Home Theatre Projector Cons

  • Brightness: One of the main disadvantages of using a home theatre projector is that they can be less bright than traditional TVs, especially in brightly lit rooms. This can affect the overall image quality and reduce the overall viewing experience.
  • Image Quality: Projectors can be more sensitive to environmental factors such as room lighting and screen quality, which can affect the image quality and overall viewing experience.
  • Placement: Projectors require a specific placement to produce the best possible image quality, which can limit the options for room layout and furniture placement.
  • Noise: Projectors can produce more noise than traditional TVs, especially if they feature a fan-based cooling system.
  • Maintenance: Projectors require regular maintenance, including cleaning the filters and replacing the lamp, which can add to the overall cost of ownership.
What to Know when Buying a Home Theatre Projector

What to Know When Buying a Home Theatre Projector

SAMSUNG 120" The Premiere Ultra Short Throw 4K UHD Smart Single Laser Projector for Home Theater, HDR, 2.2Ch Surround Sound System w/ Alexa Built-In (SP-LSP7TFAXZA, Latest Model)

If you’re in the market for a home theatre projector, there are a few important things to consider before purchasing. Here are some key factors to keep in mind:

  1. Resolution: One of the most important factors to consider when buying a home theatre projector is the resolution. You’ll want to ensure the projector has a high enough resolution to provide clear and detailed images. Look for a projector with a resolution of at least 1080p or higher.
  2. Brightness: The brightness of a projector is measured in lumens, and you’ll want to choose a projector with a brightness level that is appropriate for the size of the room and the amount of ambient light. A projector with a brightness of at least 2000 lumens is recommended for home theatre use.
  3. Contrast ratio: Contrast ratio refers to the difference between an image’s brightest and darkest parts. A higher contrast ratio will provide more depth and detail in the image. Look for a projector with a contrast ratio of at least 1000:1.
  4. Throw distance: The throw distance is the distance between the projector and the screen, and it’s important to choose a projector with a throw distance that is appropriate for the size of your room. Make sure to measure the distance between the projector and the screen before making a purchase.
  5. Connectivity: Consider the type of connectivity options that the projector offers, such as HDMI, VGA, and USB. Ensure that the projector has the connections you need to connect your devices.
  6. Noise level: Projectors can be noisy, and it’s important to choose a model that has a low noise level. Look for a projector with a noise level of 30 decibels or less.
  7. Brand and warranty: Finally, consider the brand and warranty of the projector before making a purchase. Choose a reputable brand with good customer reviews, and ensure that the projector has a warranty for added peace of mind.

Considering these factors, you can choose a home theatre projector that provides excellent picture quality and is suitable for your specific needs.

The Importance of Resolution When Buying a Home Theatre Projector

When buying a home theatre projector, the resolution is one of the most important factors to consider. Resolution refers to the number of pixels that make up an image and is a key factor in determining the clarity and detail of the images displayed by the projector. In this article, we’ll explore the importance of resolution when buying a home theatre projector and provide some tips for choosing a projector with the right resolution for your needs.

Advertisement

High resolution is essential for a great home theatre experience. A higher resolution provides greater detail, sharper edges, and more lifelike colors in the projected image. This is especially important for larger screens, as the image will be more visible and any imperfections will be more noticeable. High-resolution projectors are also ideal for displaying content such as Blu-ray discs, streaming services, and video games, often with high-quality graphics requiring a high-resolution display.

When it comes to home theatre projectors, there are several resolution options available. The most common resolution for home theatre projectors is 1080p, which is 1920 x 1080 pixels. This is a great option for most home theatre setups and provides excellent image quality. However, if you want even higher resolution, there are 4K projectors available that provide a resolution of 3840 x 2160 pixels, which is four times the resolution of 1080p.

Epson Home Cinema LS11000 4K PRO-UHD Laser Projector, HDR, HDR10+, 2,500 Lumens Color & White Brightness, HDMI 2.1, Motorized Lens, Lens Shift, Focus, Zoom, 3840 x 2160, 120 Hz, Home Theater, Gaming

When choosing a projector, it’s important to consider the screen size and viewing distance. A higher resolution is recommended for larger screens or longer viewing distances to ensure that the image remains clear and detailed. However, if you have a smaller screen or a shorter viewing distance, a lower resolution may be sufficient and can help save on the cost of the projector.

In summary, the resolution is a crucial factor to consider when buying a home theatre projector. A higher resolution provides greater detail and clarity in the image and is especially important for larger screens and high-quality content. When choosing a projector, consider the size of the screen and viewing distance to determine the appropriate resolution for your needs. By choosing a projector with the right resolution, you can ensure that you get the best possible home theatre experience.

The Importance of Brightness When Choosing a Home Theatre Projector

Brightness is one of the most important factors when choosing a home theatre projector. The brightness of a projector determines the quality of the image displayed on the screen and is a key factor in providing a great home theatre experience. In this article, we’ll explore the importance of brightness when choosing a home theatre projector and provide some tips for selecting a projector with the appropriate brightness for your needs.

Brightness is measured in lumens and refers to the amount of light the projector can produce. A brighter projector provides a clearer and more vivid image, which is especially important in environments with high levels of ambient light. In a home theatre environment, it’s important to choose a projector with a brightness level appropriate for the room’s size and the amount of ambient light present.

Advertisement

When selecting a projector, consider the size of the room and the distance between the projector and the screen. Larger rooms and longer distances between the projector and screen require higher brightness levels to ensure that the image remains clear and vivid. For example, a projector with a brightness level of 2000 lumens is recommended for rooms with high levels of ambient light, while a projector with a brightness level of 1000 lumens may be sufficient for darker rooms.

It’s also important to consider the type of content that you will be viewing with your home theatre projector. If you plan to watch movies or other content with a high level of detail, such as sports or video games, a higher level of brightness is recommended to ensure that the image remains clear and vivid. However, if you plan to use your projector primarily for low-light content such as movies or TV shows, a lower level of brightness may be sufficient.

In addition to brightness, it’s also important to consider the projector’s contrast ratio. Contrast ratio refers to the difference between an image’s brightest and darkest parts and is a key factor in providing a clear and vivid image. A higher contrast ratio provides more depth and detail in the image and can help improve the overall quality of the home theatre experience.

In conclusion, brightness is a crucial factor to consider when selecting a home theatre projector. A projector with the appropriate brightness level can help ensure that the image remains clear and vivid in various lighting environments. When selecting a projector, consider the size of the room, the distance between the projector and screen, and the type of content that you will be viewing to determine the appropriate level of brightness for your needs.

The Importance of Contrast Ratio When Choosing a Home Theatre Projector

Contrast ratio is an essential factor to consider when choosing a home theatre projector. The projector’s contrast ratio refers to the difference between the darkest and brightest parts of an image, and is a key factor in determining the overall image quality. In this article, we’ll explore the importance of contrast ratio when choosing a home theatre projector and provide some tips for selecting a projector with the appropriate contrast ratio for your needs.

Advertisement

A high contrast ratio is important for providing a clear and detailed image, especially in low-light environments. A higher contrast ratio provides more depth and detail in the image, making it more realistic and lifelike. In a home theatre environment, a high contrast ratio can help provide a more immersive viewing experience.

Sony VPL-XW5000ES 4K HDR Laser Home Theater Projector with Native 4K SXRD Panel, Black

When selecting a projector, consider the type of content that you will be viewing. A high contrast ratio for movies and other video content can help provide more detail and improve the viewing experience. A high contrast ratio is also important for gaming, as it can help improve the clarity and detail of graphics and other visual elements.

When comparing projectors, it’s important to pay attention to the contrast ratio specifications. Projectors with a contrast ratio of at least 1000:1 are recommended for home theatre use, with higher ratios providing even better image quality. Some projectors also feature dynamic contrast ratios, which can provide even better contrast and more vivid colors.

It’s also important to consider other factors that can affect contrast, such as the type of screen being used. A high-quality screen can help improve the overall image quality and contrast, providing a more immersive viewing experience.

In addition to the contrast ratio, other factors to consider when choosing a home theatre projector include brightness, resolution, and throw distance. Choosing a projector that meets your specific needs in all of these areas can help ensure that you get the best possible home theatre experience.

In conclusion, the contrast ratio is a crucial factor to consider when choosing a home theatre projector. A high contrast ratio can help provide more detail and a more realistic image, improving the overall viewing experience. When selecting a projector, consider the type of content that you will be viewing and choose a projector with the appropriate contrast ratio for your needs. Choosing a projector with a high contrast ratio allows you to enjoy a more immersive and enjoyable home theatre experience.

Advertisement

How to Choose the Right Throw Distance for Your Home Theatre Projector

Throw distance is an important factor when choosing a home theatre projector. The throw distance is the distance between the projector and the screen, and it’s important to choose a projector with the appropriate throw distance for your room size and screen size. In this article, we’ll explore the importance of throw distance when choosing a home theatre projector and provide some tips for selecting a projector with the right throw distance for your needs.

When choosing a projector, it’s important to consider the size of the room and the distance between the projector and the screen. A projector with a short throw distance is ideal for smaller rooms or rooms with limited space. Short-throw projectors can be placed closer to the screen, which can help reduce the amount of shadow and glare the projector creates.

On the other hand, if you have a larger room or a larger screen size, a projector with a longer throw distance may be necessary. A longer throw distance allows the projector to be placed further away from the screen, which can help provide a larger image size and reduce distortion.

When choosing a projector, it’s also essential to consider the lens zoom capabilities. Some projectors feature a zoom lens, which allows you to adjust the image size without changing the distance between the projector and the screen. This can be especially helpful if you have a smaller room and need to adjust the image size to fit your screen.

In addition to throw distance and zoom capabilities, it’s also important to consider the projector’s aspect ratio. The aspect ratio is the ratio of the width to the height of the projected image. Choosing a projector with an aspect ratio matches your screen size and viewing preferences is important.

Advertisement

When selecting a home theatre projector, it’s important to consider all of these factors to ensure you get the best viewing experience. Choosing a projector with the appropriate throw distance, zoom capabilities, and aspect ratio allows you to create a home theatre setup that provides an immersive and enjoyable viewing experience.

In conclusion, throw distance is essential when choosing a home theatre projector. A projector with the appropriate throw distance can help ensure that the image is clear, vibrant, and properly sized for your room and screen. When selecting a projector, consider the size of your room, the distance between the projector and the screen, and the projector’s zoom capabilities and aspect ratio to ensure that you get the best possible home theatre experience.

A Guide to Choosing the Right Connectivity for Your Home Theatre Projector

When choosing a home theatre projector, connectivity is an important factor to consider. The right connectivity options allow you to easily connect your devices, such as Blu-ray players and gaming consoles, to the projector. In this article, we’ll explore the importance of connectivity when choosing a home theatre projector and provide some tips for selecting a projector with the right connectivity options for your needs.

Home theatre projectors’ most common connectivity options are HDMI, VGA, and USB. HDMI is the most popular option and provides high-quality digital video and audio. Most modern devices, such as Blu-ray players and gaming consoles, feature HDMI outputs, so choosing a projector with at least one HDMI input is important. Some projectors also feature multiple HDMI inputs, which can be useful if you plan to connect multiple devices to the projector.

VGA is an older connectivity option that is still commonly used for connecting computers and laptops to projectors. VGA provides analog video and audio and is useful if you plan to use your projector for presentations or other computer-related tasks.

Advertisement
Optoma GT1090HDRx Short Throw Laser Home Theater Projector | 4K HDR Input | Reliable Lamp-Free Operation 30,000 Hours | Bright 4,200 Lumens for Day and Night Viewing

USB connectivity is useful for playing media files directly from a USB drive. Some projectors feature a built-in media player that allows you to play movies, music, and photos directly from a USB drive.

When choosing a home theatre projector, it’s important to consider the specific devices that you plan to connect to the projector. Make sure that the projector has the appropriate connectivity options for your devices. Additionally, consider the length of the cables needed to connect your devices to the projector. Ensure the cables are long enough to reach from the projector to your devices without causing clutter or tripping hazards.

In addition to connectivity options, it’s also important to consider the audio options provided by the projector. Some projectors feature built-in speakers, while others require external speakers or a home theatre receiver for audio output. Make sure that the projector has the appropriate audio options for your needs.

In conclusion, connectivity is an important factor to consider when choosing a home theatre projector. The right connectivity options allow you to connect your devices and enjoy high-quality video and audio easily. When selecting a projector, consider the specific devices that you plan to connect, the length of the required cables, and the audio options provided by the projector. Choosing a projector with the appropriate connectivity options allows you to create a home theatre setup that provides an immersive and enjoyable viewing experience.

How to Choose a Home Theatre Projector with the Right Noise Level

Noise level is an important factor to consider when choosing a home theatre projector. The noise level of a projector refers to the amount of noise that it produces while in operation. In this article, we’ll explore the importance of noise level when choosing a home theatre projector and provide some tips for selecting a projector with the appropriate noise level for your needs.

The noise level of a projector is measured in decibels (dB). A lower noise level is generally preferred, as it provides a quieter and more enjoyable viewing experience. It’s recommended to choose a projector with a noise level of 30 dB or less.

Advertisement

When selecting a projector, consider the projector’s placement in the room. A projector that is placed close to the viewer or in an enclosed space can be especially distracting if it produces a lot of noise. A projector with a low noise level is recommended for these types of environments.

It’s also important to consider the specific noise level of the projector when it is in use. Some projectors produce a noticeable fan noise while in operation, while others are much quieter. Look for reviews and specifications that provide information on the projector’s noise level to ensure that it is appropriate for your needs.

In addition to noise level, it’s important to consider other factors that can affect the noise level of your home theatre setup. For example, external speakers and other components can also produce noise that can detract from the overall viewing experience. Make sure to choose components that are also quiet and produce minimal noise.

It’s also important to consider the cooling system of the projector. Some projectors use a fan-based cooling system, which can produce noise. Other projectors use a silent cooling system that does not produce any noise. When selecting a projector, consider the type of cooling system used and choose a projector with a silent cooling system if noise is a concern.

In conclusion, noise level is an important factor to consider when choosing a home theatre projector. A low noise level can help ensure a more enjoyable and immersive viewing experience. When selecting a projector, consider the projector’s placement, the specific noise level of the projector, and the cooling system used. Choosing a projector with the appropriate noise level allows you to create a home theatre setup that provides a quiet and enjoyable viewing experience.

Advertisement

Why Brand and Warranty are Important Factors When Choosing a Home Theatre Projector

Brand and warranty are important factors when choosing a home theatre projector. The brand of the projector can provide an indication of the quality and reliability of the product, while the warranty provides protection against defects and other issues that may arise. In this article, we’ll explore the importance of brand and warranty when choosing a home theatre projector and provide some tips for selecting a projector with a reputable brand and a strong warranty.

When choosing a home theatre projector, it’s important to choose a reputable brand with a track record of producing high-quality products. A reputable brand is more likely to produce a reliable projector that performs well and is also more likely to provide good customer support in case of any issues or questions. Some well-known brands in the home theatre projector industry include Sony, Epson, and Optoma.

In addition to the brand, it’s also important to consider the warranty provided by the projector manufacturer. A strong warranty can provide peace of mind and protection against defects and other issues that may arise. Look for a projector that comes with a warranty of at least one year, and consider purchasing an extended warranty for additional protection.

When reviewing the warranty, pay attention to the specific coverage provided. Some warranties may cover only certain parts or components, while others may provide more comprehensive coverage. It’s also important to consider the terms of the warranty, such as any limitations or exclusions that may apply.

It’s also a good idea to read reviews and customer feedback to get an idea of the reliability and customer support provided by the manufacturer. Look for feedback on the brand and warranty, as well as on the overall performance and quality of the projector.

Advertisement

In addition to brand and warranty, it’s also important to consider other factors when choosing a home theatre projector, such as resolution, brightness, and connectivity. By considering all of these factors, you can choose a projector that meets your specific needs and provides an immersive and enjoyable viewing experience.

In conclusion, brand and warranty are important factors when choosing a home theatre projector. A reputable brand and a strong warranty can provide peace of mind and protection against defects and other issues that may arise. When selecting a projector, consider the brand, warranty, and other factors such as resolution, brightness, and connectivity. Choosing a projector with a reputable brand and a strong warranty allows you to create a home theatre setup that provides a reliable and enjoyable viewing experience.

BenQ HT2050A 1080P Home Theater Projector | 2200 Lumens | 96% Rec.709 for Accurate Colors | Low Input Lag Ideal for Gaming | 2D Keystone for Flexible Setup

Size of Projected Image

The size of the projected image is a key factor to consider when using a home theatre projector. Projectors can create an image that is muchh larger than a standard TV, providing a more immersive and cinematic viewing experience.

The size of the projected image can be adjusted by changing the distance between the projector and the screen or wall. Most projectors come with a zoom feature that can also adjust the size of the projected image. It’s important to choose a projector with a throw ratio that is appropriate for the size of the room and the desired screen size.

Size of Projected Image Calculator

Projected Image Size Calculator

Projected Image Size Calculator


The size of the projected image can range from as small as 50 inches to as large as 300 inches or more, depending on the capabilities of the projector and the distance between the projector and the screen. The recommended screen size varies based on the resolution of the projector and the viewing distance. As a general rule of thumb, the screen size should be about twice the distance between the projector and the screen.

When choosing the size of the projected image, it’s important to consider the size of the room and the seating arrangement. A larger image size is ideal for a larger room, while a smaller image size may be more appropriate for a smaller room. It’s also important to consider the aspect ratio of the projector and the screen, as this can affect the quality of the image and the overall viewing experience.

Advertisement

In conclusion, the size of the projected image is an important factor to consider when using a home theatre projector. The size of the projected image can be adjusted by changing the distance between the projector and the screen, and most projectors come with a zoom feature that can also adjust the size of the image. When choosing the size of the projected image, consider the size of the room and the seating arrangement, as well as the aspect ratio of the projector and the screen. By choosing the appropriate size for the projected image, you can create an immersive and enjoyable viewing experience in your home.

Things to Consider Before Buying Your Home Theatre Projector

A home theatre projector is a great way to create an immersive and enjoyable viewing experience at home. However, with so many options available, it can be challenging to know what to look for when buying a home theatre projector. In this article, we’ll explore some of the key factors to consider before buying a home theatre projector.

Things to Consider Before Buying Your Home Theatre Projector
  1. Room Size: The size of the room is an important consideration when choosing a home theatre projector. Larger rooms require a projector with a higher brightness and a longer throw distance to create a larger image size.
  2. Screen Size: The size of the screen is another important factor to consider. Projectors can create an image that is much larger than a standard TV, so it’s important to choose a screen size that is appropriate for the room and the viewing distance.
  3. Resolution: Resolution refers to the number of pixels in the projected image and is a major factor in determining image quality. Look for projectors with high resolution, such as 1080p or 4K, for the best possible viewing experience.
  4. Brightness: Brightness is an important consideration, especially in rooms with a lot of ambient light. Look for projectors with high lumens ratings for the best possible image quality in all lighting conditions.
  5. Contrast Ratio: Contrast ratio refers to the difference between the brightest and darkest parts of the image. A high contrast ratio is important for creating a clear and detailed image, especially in darker scenes.
  6. Throw Distance: Throw distance refers to the distance between the projector and the screen. It’s important to choose a projector with a throw distance that is appropriate for the size of the room and the desired screen size.
  7. Connectivity: Look for a projector with a variety of connectivity options, including HDMI, VGA, and USB, to easily connect your devices and enjoy high-quality video and audio.
  8. Brand and Warranty: Consider the brand and warranty of the projector before making a purchase. A reputable brand is more likely to produce a reliable and high-quality product, and a strong warranty can provide protection against defects and other issues.
  9. Cost: Cost is an important factor to consider, as home theatre projectors can range in price from a few hundred dollars to several thousand. Set a budget and choose a projector that offers the features and quality you need within your budget.

In conclusion, there are many factors to consider when buying a home theatre projector, including room size, screen size, resolution, brightness, contrast ratio, throw distance, connectivity, brand and warranty, and cost. By considering these factors and choosing a projector that meets your specific needs, you can create an immersive and enjoyable viewing experience in your home.

Projector Lamp Cost

Projector lamps are an essential component of a home theatre projector, providing the light needed to create a clear and bright image. However, the cost of projector lamps can be a concern for many users. Here’s what you need to know about projector lamp cost.

The cost of projector lamps varies based on several factors, including the brand of the projector, the model of the lamp, and the quality of the lamp. In general, higher-end projectors will have more expensive lamps than lower-end models.

Advertisement

Most projector lamps have a lifespan of around 2,000 to 4,000 hours, depending on usage and environmental factors such as temperature and humidity. When the lamp reaches the end of its life, it will need to be replaced to maintain the quality of the image.

EWO'S Replacement Projector Lamp for ELPLP96 Epson Powerlite Home Cinema 2100 2150 1060 660 760hd VS250 VS350 VS355 EX9210 EX9220 EX3260 EX5260 EX7260 X39 W39 S39 109W V13H010L96 Lamp Bulb Replacement

The cost of a replacement lamp can range from around $50 to $500 or more, depending on the factors mentioned above. In addition to the cost of the lamp, there may be additional costs for installation, such as hiring a professional technician to replace the lamp.

To reduce the cost of projector lamps, consider purchasing a high-quality projector that uses a long-lasting lamp. Some projectors also offer an eco-mode that can extend the life of the lamp and reduce the need for frequent replacements.

It’s also important to purchase projector lamps from a reputable source to ensure that you are getting a high-quality product. Generic or off-brand lamps may be cheaper, but they may not provide the same level of performance and reliability as a genuine replacement lamp.

In conclusion, the cost of projector lamps can be a concern for home theatre projector users. The cost of a replacement lamp can range from $50 to $500 or more, depending on several factors. To reduce the cost of projector lamps, consider purchasing a high-quality projector with a long-lasting lamp and purchase replacement lamps from a reputable source. By taking these steps, you can ensure that your home theatre projector provides a high-quality viewing experience at a reasonable cost.

Home Theatre Projector Costs

The cost of a home theatre projector can vary widely depending on a range of factors, including the quality of the projector, its features and capabilities, and the brand name. Here are some factors to consider when estimating the cost of a home theatre projector:

Advertisement
  1. Resolution: Higher resolution projectors will typically cost more. A 1080p projector will be less expensive than a 4K projector, for example.
  2. Brightness: Higher lumens ratings, which indicate greater brightness, also tend to increase the cost of the projector.
  3. Contrast Ratio: Higher contrast ratios, which offer more detail in darker and lighter scenes, can also increase the cost of a projector.
  4. Features: Projectors with additional features such as built-in speakers, wireless connectivity, and 3D capability will also typically cost more.
  5. Brand: Projectors from well-known brands may be more expensive than those from lesser-known brands. The quality of the projector can also vary based on the brand name.
  6. Lamp Life: Projectors that use longer-lasting lamps can also cost more upfront.
  7. Screen Size: The size of the screen the projector will be used with may also affect the cost of the projector, as larger screens require more powerful projectors.

In general, home theatre projectors can range in price from a few hundred dollars to several thousand dollars. It’s important to balance the desired quality and features with the budget for the project. A high-end home theatre projector can cost over $5,000, while an entry-level projector may be available for under $500.

It’s also important to consider additional costs, such as the cost of the projector screen, installation, and maintenance. These costs can vary depending on the size and complexity of the installation.

In conclusion, the cost of a home theatre projector can vary widely depending on the specific features and capabilities of the projector, as well as the brand name. By considering the desired quality and features and balancing them with the budget, it’s possible to find a projector that provides a high-quality viewing experience at a reasonable cost.

Blank Wall or A White Screen

When setting up a home theatre projector, one important decision to make is whether to project onto a blank wall or a white screen. Here are some factors to consider when making this decision:

Akia Screens 125 inch Motorized Electric Remote Controlled Drop Down Projector Screen 16:9 8K 4K HD 3D Retractable Ceiling Wall Mount Black Projection Screen Office Home Theater Movie AK-MOTORIZE125H
  1. Image Quality: A white screen can provide a better image quality than a blank wall, as it is specifically designed for projector use. A white screen can reflect the light from the projector more evenly, resulting in a clearer and more vibrant image.
  2. Ambient Light: A blank wall may be more reflective than a white screen, which can cause issues with ambient light. A white screen can reduce the impact of ambient light on the image, leading to better image quality in all lighting conditions.
  3. Size: A blank wall may limit the size of the projected image, as it is typically smaller than a dedicated screen. A white screen allows for greater flexibility in image size, as well as more accurate aspect ratios.
  4. Portability: A blank wall is always available, whereas a white screen can be difficult to move or transport. However, there are portable screens available for those who need to move the screen from one location to another.
  5. Cost: A blank wall is free, whereas a white screen can be a significant expense. However, the cost of a white screen can be worth it for those seeking the best possible image quality.
  6. Room Design: A white screen can be a better option for those who want to create a dedicated home theatre room with a custom design. A blank wall may be less desirable if it doesn’t fit with the overall room design.

In conclusion, while projecting onto a blank wall is an option, a white screen can provide better image quality, reduce the impact of ambient light, and allow for greater flexibility in image size. However, a white screen can be more expensive and less portable than a blank wall. Ultimately, the decision between a blank wall and a white screen will depend on factors such as image quality, ambient light, size, portability, cost, and room design.

Benefits of Having a Home Cinema Projector

Home theatre projectors have become increasingly popular as a way to create an immersive and enjoyable viewing experience at home. There are many benefits to using a home theatre projector, including:

  1. Large Screen Size: One of the main benefits of using a home theatre projector is the ability to create a large screen size. Projectors can create an image that is much larger than a standard TV, providing a more immersive and cinematic experience.
  2. Customizable Image Size: Projectors also offer a customizable image size, allowing you to adjust the image size to fit your room and viewing preferences.
  3. Portability: Home theatre projectors are generally more portable than traditional TVs, making them a great option for those who want to move the projector between different rooms or take it on the go.
  4. Cost-effective: Projectors can be more cost-effective than traditional TVs, especially when it comes to creating a large screen size.
  5. Variety of Connectivity Options: Home theatre projectors offer a variety of connectivity options, including HDMI, VGA, and USB, allowing you to easily connect your devices and enjoy high-quality video and audio.
  6. Immersive Viewing Experience: The large screen size and customizable image size of a home theatre projector create an immersive viewing experience that is ideal for movies, sports, and other types of entertainment.
  7. Easy to Set Up: Home theatre projectors are generally easy to set up and use, with most models offering plug-and-play connectivity and intuitive user interfaces.
  8. Versatility: Home theatre projectors are versatile, with many models offering a variety of features, such as built-in speakers, 3D capability, and wireless connectivity.
  9. Room Design: With a home theatre projector, you can design your room to fit your preferences. There is no need to fit furniture around the TV as you can place the projector where it fits best, creating a unique and personalized viewing experience.

In conclusion, home theatre projectors offer many benefits, including a large screen size, customizable image size, portability, cost-effectiveness, versatility, and immersive viewing experience. When choosing a home theatre projector, consider the specific features and benefits that best meet your needs and preferences. With a home theatre projector, you can create a viewing experience that is personalized and enjoyable for you and your family.

Advertisement

Benefits of Having a Home Cinema Projector

Home Cinema Projector Downsides

While a home cinema projector can provide an immersive and enjoyable viewing experience, there are some downsides to consider when deciding whether to use a projector in your home theatre setup. Here are some of the most common downsides to using a home cinema projector:

Advertisement
  1. Ambient Light: Projectors typically require a dark environment to produce a high-quality image. Even low levels of ambient light can significantly impact the quality of the image. This means that a dedicated home theatre room with light control is necessary for the best viewing experience.
  2. Limited Lamp Life: Projectors use a lamp that has a limited lifespan, usually around 2,000 to 4,000 hours. This means that the lamp will need to be replaced periodically, which can add to the cost of owning a projector.
  3. Maintenance: In addition to replacing the lamp, projectors also require regular maintenance to keep the filter clean and prevent overheating. This can be time-consuming and may require professional assistance.
  4. Image Quality: While projectors can produce a large image, the quality of the image can vary depending on the quality of the projector and the screen used. Lower-end projectors may have lower image quality than higher-end models.
  5. Setup: Projectors require a bit more setup than a traditional TV, including mounting the projector, running cables, and adjusting the image. This can be challenging for those who are not familiar with home theatre setup.
  6. Noise: Projectors can produce a significant amount of noise, which can be distracting during quiet scenes. This noise can come from the fan or the motor used to move the lens.
  7. Limited Viewing Angles: Some projectors have limited viewing angles, meaning that the image may be distorted or difficult to see from certain angles. This can be a concern for those with large families or groups of friends who want to enjoy the viewing experience together.

In conclusion, while a home cinema projector can provide an immersive and enjoyable viewing experience, there are some downsides to consider. These include ambient light, limited lamp life, maintenance, image quality, setup, noise, and limited viewing angles. By understanding these downsides and addressing them where possible, you can enjoy a high-quality viewing experience with your home theatre projector.

BenQ HT3550 4K Home Theater Projector with HDR10 and HLG - 95% DCI-P3 and 100% Rec.709 - Dynamic Iris for Enhanced Darker Contrast Scenes - 3 Year Industry Leading Warranty

Cinema Projector Fan Noise

Fan noise is a common issue with home cinema projectors. The fan in a projector is used to keep the internal components cool and prevent overheating. However, this fan can also produce a significant amount of noise, which can be distracting during quiet scenes and diminish the overall viewing experience. Here are some ways to address cinema projector fan noise:

Cinema Projector Fan Noise
  1. Positioning: The positioning of the projector can impact the amount of fan noise it produces. Placing the projector on a stable and level surface can reduce the amount of noise, as can positioning it in a way that maximizes airflow and reduces the amount of heat generated.
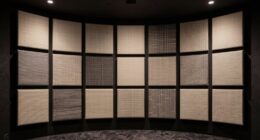
  2. Noise Reduction Materials: Adding noise reduction materials, such as acoustic panels, to the room can help absorb and reduce the sound produced by the fan. These materials can be placed on the walls or ceiling, and can help improve the overall sound quality of the room.
  3. Quiet Mode: Many projectors offer a “quiet mode” option that reduces the amount of noise produced by the fan. This mode may lower the brightness of the image slightly, but can significantly reduce the amount of fan noise.
  4. External Fan: Some projectors have the option to add an external fan to help cool the unit. This can reduce the strain on the internal fan and reduce the amount of noise produced.
  5. Upgrade the Projector: In some cases, upgrading to a higher-end projector can significantly reduce the amount of fan noise. Higher-end models are often designed with quieter fans and more advanced cooling systems.

In conclusion, fan noise is a common issue with home cinema projectors, but there are several ways to address it. By positioning the projector correctly, adding noise reduction materials, using the quiet mode option, adding an external fan, or upgrading the projector to a higher-end model, you can reduce the amount of fan noise and improve the overall viewing experience.

Home Theatre Projectors vs. TVs

When it comes to creating a home theatre experience, the choice between a projector and a TV can be a difficult one. Here are some factors to consider when deciding between a home theatre projector and a TV:

  1. Screen Size: Projectors can produce much larger images than TVs, making them a great choice for those who want a truly immersive experience. A projector can produce an image that is 100 inches or more, while the largest TVs are typically around 85 inches.
  2. Image Quality: Both projectors and TVs can produce high-quality images, but there are some differences to consider. Projectors can produce a more cinematic experience, with better color accuracy and contrast. However, TVs typically offer better brightness and detail, especially in brightly-lit rooms.
  3. Viewing Environment: Projectors require a dark room to produce the best image quality, while TVs can produce a good image in a wider range of lighting conditions. If you plan to watch movies during the day, a TV may be a better choice.
  4. Setup: Projectors require more setup than TVs, including mounting the projector, running cables, and adjusting the image. This can be challenging for those who are not familiar with home theatre setup.
  5. Cost: In general, projectors are less expensive than larger TVs. However, the cost of a projector screen can add to the overall cost of the setup.
  6. Portability: Projectors can be more portable than TVs, allowing you to move the setup from room to room or take it with you on the go.
  7. Maintenance: Projectors require more maintenance than TVs, including lamp replacement and filter cleaning.

In conclusion, the choice between a home theatre projector and a TV will depend on a range of factors, including screen size, image quality, viewing environment, setup, cost, portability, and maintenance. Projectors can produce a more immersive and cinematic experience with a larger image size, while TVs are typically easier to set up and can produce better image quality in bright rooms. By considering these factors and choosing the option that best fits your needs and preferences, you can create a high-quality home theatre experience.

Advertisement

Advertisement

Carl is the author of 1home Theatre Projector. When he's not busy writing about all things projector-related, you can find him playing basketball or watching a good movie. He knows that jumping to a projector-based home cinema can be daunting, but he's here to help make it as easy as possible. With his comprehensive guides and product reviews, you'll be able to find the right projector for your needs and set it up in no time. Plus, he's always on top of the latest news and information on upcoming releases, so you'll always be ahead of the curve.

Continue Reading
Advertisement

Home Cinema

How to Reduce Projector Fan Noise: Tips for a Quieter Viewing Experience

See how simple adjustments and smart choices can transform your projector experience, leaving you wondering what other secrets await for ultimate silence.

Published

on

minimize projector fan noise

To reduce projector fan noise and enhance your viewing experience, start by activating Eco Mode, which can lower noise levels to around 26 dB. Proper placement is key; elevate the projector at least 3-4 feet above the audience and guarantee adequate airflow around it. Regular maintenance, like cleaning air filters and updating firmware, also helps keep noise down. Consider sound-dampening materials in your projector's enclosure to absorb noise. Finally, if you're in the market for a new projector, choose models known for their quiet operation. Discovering more strategies could lead to an even quieter setup!

Key Takeaways

  • Activate Eco Mode to lower fan noise to 26-28 dB while extending projector lifespan and improving energy efficiency.
  • Ensure proper placement by elevating the projector and maintaining clearance for effective airflow, reducing perceived noise levels.
  • Regularly clean air filters and schedule annual maintenance checks to enhance cooling efficiency and minimize noise.
  • Use acoustic treatments like sound-dampening materials and vibration-dampening mounts to absorb noise and vibrations from the projector.
  • Select a quiet projector model, ideally operating below 30 dB, and consider LED or laser options for quieter performance.

Understanding Projector Noise

analyzing projector sound levels

When it comes to projectors, noise is often an overlooked factor that can disrupt your viewing experience. Most projector noise comes from the cooling fans, which operate to prevent overheating. These fans usually run at decibel levels between 30 to 40 dB, and in high-performance models, the fan noise can be even louder due to increased active cooling requirements. This can considerably impact your enjoyment in a home cinema setting.

Fortunately, modern projectors have made strides in reducing fan noise. Many 4K projectors now operate below 32 dB, providing a quieter viewing experience that minimizes distractions.

If you're looking to reduce fan noise further, consider using features like Eco Mode. This setting slows down the fan speeds and dims the lamp brightness, potentially lowering noise levels to around 26 dB, which is ideal for creating a serene environment.

Understanding projector noise is essential for enhancing your home cinema experience. By choosing a quieter model and utilizing features that reduce fan noise, you can guarantee that your movie nights are as immersive as possible, letting you focus on the film rather than the noise.

Eco Mode Benefits

sustainable energy consumption advantages

Eco Mode offers notable advantages for those seeking a quieter and more efficient projector experience. By activating Eco Mode, you can greatly reduce projector fan noise. Many modern projectors operate at sound levels between 26dB and 28dB, which is quieter than a whisper, making for a more enjoyable viewing experience. This quieter operation is achieved by decreasing the fan speed and lowering lamp brightness, which in turn minimizes heat production.

Here's a quick comparison of Eco Mode benefits:

Advertisement

Benefit Description Impact on Viewing Experience
Reduced Noise Sound levels drop to 26dB-28dB Less distraction from audio
Lower Heat Production Decreased lamp brightness leads to less heat Extends projector lifespan
Energy Efficiency Consumes less power while maintaining quality Lower operational costs
Reduced Thermal Stress Minimizes wear on components Enhances durability

Utilizing Eco Mode not only promotes a quieter operation but also helps in extending the lifespan of your projector and its lamp, ultimately contributing to energy efficiency and reduced operational costs.

Placement Strategies

effective job placement techniques

Proper placement of your projector can greatly minimize fan noise and enhance your overall viewing experience. By following these placement strategies, you'll effectively reduce sound disruption and create an immersive environment.

  1. Elevate the Projector: Positioning the projector at least 3-4 feet above the audience helps sound travel upward, reducing perceived noise levels.
  2. Guarantee Minimum Clearance: Maintain at least 50cm of space around the projector. This guarantees proper airflow, preventing overheating and excessive projector fan noise.
  3. Utilize Vibration-Dampening Features: If you're using a mount, choose one with vibration-dampening features. This helps isolate the projector from surfaces that might amplify noise.
  4. Avoid Enclosed Spaces: Don't place your projector in enclosed areas without adequate ventilation. Lack of airflow can lead to heat pooling, causing the fan to work harder and creating louder operational noise.

Maintenance Tips

essential care guidelines

Maintaining your projector is essential for reducing fan noise and ensuring peak performance. By following these maintenance tips, you can enjoy a quieter viewing experience and prolong your projector's life.

Maintenance Task Frequency Benefits
Regularly clean air filters Monthly Increases airflow, reduces noise levels
Schedule professional maintenance checks Annually Identifies issues early for ideal performance
Replace worn-out fans As needed Minimizes operational noise
Keep firmware updated Quarterly Improves performance and reduces noise levels
Monitor lamp life Monthly Prevents overheating, decreases fan speed

To start, regularly clean air filters, as clogged filters can lead to increased fan noise and reduced cooling efficiency. Don't forget to schedule periodic professional maintenance checks to catch any noise issues early. If you notice louder sounds, consider replacing worn-out fans with quieter models. Keeping your projector's firmware updated is also vital, as manufacturers release updates that can enhance performance and reduce noise levels. Finally, monitor lamp life closely—older lamps generate more heat, causing fans to work harder, which increases noise output.

Noise Reduction Techniques

effective sound diminishing methods

To effectively reduce projector fan noise, you'll want to explore a few key techniques.

First, activating Eco Mode can greatly lower noise levels while adjusting your projector's placement can enhance stability and minimize vibrations.

Additionally, incorporating acoustic treatments in the room can further absorb sound and improve your overall viewing experience.

Eco Mode Benefits

Eco Mode Benefits (Noise Reduction Techniques)

Advertisement

Switching on Eco Mode can markedly enhance your viewing experience by cutting down projector fan noise to a whisper-quiet range of 26dB to 28dB. This setting creates a quieter environment, allowing you to fully immerse yourself in your favorite content without distractions.

Additionally, utilizing energy-efficient options can help lower overall energy consumption, similar to the efficiency seen with geothermal heat pumps.

Here are some key benefits of using Eco Mode:

  1. Lowering Lamp Brightness: This feature reduces heat output, which lessens the need for aggressive fan cooling.
  2. Extended Lifespan: By operating at lower temperatures, Eco Mode can help extend the lifespan of your projector's lamp.
  3. Reduced Maintenance Frequency: With less heat and strain on components, you'll find that maintenance is needed less often.
  4. Performance Balance: Many modern projectors, like the BenQ HT3550, strike an effective balance between performance and noise reduction in Eco Mode.

Utilizing Eco Mode not only minimizes fan noise but also enhances the overall viewing experience, promoting immersive engagement with your favorite shows or movies.

Enjoy a quieter environment while ensuring your projector runs efficiently for years to come!

Placement Strategies

While Eco Mode effectively reduces fan noise, projector placement also plays an essential role in creating a quieter viewing experience. By employing smart placement strategies, you can greatly enhance your setup. Here are some key tips to take into account:

Advertisement

Placement Strategy Description
Position Height Place the projector 3-4 feet above the audience for reduced noise perception.
Required Clearance Ascertain at least 50cm of clearance around the projector for ideal airflow.
Ceiling Mounts Use ceiling mounts to distance the projector from viewers, minimizing sound disruption.
Ventilation Avoid enclosed spaces; verify proper ventilation to prevent heat buildup and increased fan noise.
Distance from Walls Maintain distance from walls and reflective surfaces to reduce sound reflections.

Acoustic Treatment Solutions

When it comes to minimizing projector fan noise, incorporating acoustic treatment solutions can make a significant difference in your viewing experience. By focusing on how to absorb sound and reduce vibrations, you can achieve a quieter environment.

Regular maintenance, such as ensuring your projector's filters are clean, can also help reduce overall noise levels and improve performance. Here are four effective techniques:

  1. Acoustic Panels: Install acoustic panels in your projection room to absorb sound, which helps reduce ambient noise levels and enhances your overall viewing experience.
  2. Foam Panels Under the Projector: Attaching 2×2 acoustic foam panels to the bottom of your projector can effectively block higher-frequency fan noise while still allowing for proper airflow and cooling.
  3. Sound Barriers: Constructing a sound barrier with solid wood and foam can absorb sound reflections and prevent direct noise transmission to your audience.
  4. Vibration Dampening Materials: Utilize rubber materials around the projector for vibration dampening to minimize noise from vibrations caused by the fan and other internal components.

Combining these acoustic treatment solutions not only reduces fan noise but also improves thermal management and enhances your overall viewing experience.

For ideal projector performance, consider projector bulb maintenance as part of your setup.

Selecting a Quiet Projector

choosing a silent projector

To enjoy an immersive home theater experience, you'll want to select a projector that operates quietly. Look for models with fan noise levels below 30 dB, as this range is ideal for enjoying films without distractions. Models featuring Eco Mode can lower noise further, operating around 26 dB-28 dB.

Check out the table below for a comparison of some popular quiet projectors:

Projector Model Fan Noise Level (dB) Light Source
BenQ HT5550 26-32 LED
BenQ W5700 26-32 Laser
Epson 5050UB 30 Lamp
Sony VPL-HW45ES 28 Lamp
Optoma UHD50X 27 Laser

When choosing a quiet projector, consider brands with strong reputations for acoustic engineering, like BenQ, which incorporates smart cooling technology. Also, projectors that use LED or laser light sources tend to operate more quietly than traditional lamp-based models. Before making your purchase, read user reviews specifically mentioning noise levels to verify you get the quiet projector that meets your home theater needs.

Advertisement

Acoustic Engineering Insights

sound design and analysis

When you're setting up your projector, understanding noise minimization techniques can make a big difference in your viewing experience.

Smart cooling technology, like that found in some high-end models, helps maintain low sound levels by adjusting fan speeds based on heat.

Noise Minimization Techniques

Reducing projector fan noise involves a blend of smart design and material choices that effectively tackle unwanted sound.

By focusing on acoustic engineering principles, you can create a more enjoyable viewing experience. Here are some noise minimization techniques you can implement:

1. Use Sound Dampening Materials: Lining projector enclosures with materials like Alubutyl can absorb vibrations and minimize sound produced, enhancing overall acoustics.

Keeping your projector clean and well-maintained, including regular cleaning, can also help reduce excess noise from dust accumulation.

Advertisement

2. Incorporate Vibration-Dampening Mounts: Utilize mounts designed to isolate fan vibrations, considerably reducing noise during operation.

3. Prioritize Regular Maintenance: Confirm ideal airflow by cleaning air filters and checking for dust buildup on internal components.

This helps maintain efficient cooling and reduces noise from projector fans.

4. Implement Smart Cooling Solutions: Select models that adjust fan speed based on thermal monitoring, allowing them to operate quietly, especially under 32dB.

Smart Cooling Technology

Smart cooling technology transforms the way projectors manage heat, enhancing both performance and user experience. By utilizing thermal monitoring, this technology dynamically adjusts fan speeds, ensuring peak cooling efficiency while greatly reducing fan noise.

Advertisement

For instance, high-performance projectors like BenQ's 4K HDR models maintain sound levels below 32dB, thanks to advanced acoustic engineering. This level of quiet operation makes them perfect for immersive viewing experiences.

In Eco Mode, projectors can further reduce fan noise to between 26dB and 28dB by slowing down fan speeds during less intensive tasks, enhancing viewer comfort. Additionally, BenQ projectors are designed with specially selected parts that minimize air turbulence and annoying sounds, contributing to a quieter operation.

The integration of smart cooling technology can dramatically lower perceived noise levels, ensuring that projector sound levels don't detract from the overall viewing experience.

By embracing these innovations, you can enjoy your favorite movies or presentations without the distraction of background noise, making each session more enjoyable and immersive.

Enclosure Design Considerations

optimal enclosure design factors

To create an effective projector enclosure, you must prioritize airflow and thermal management. If you restrict air circulation, you risk overheating your projector and increasing fan noise.

Here are some key considerations for your enclosure design:

Advertisement

  1. Airflow: Guarantee that the enclosure has adequate ventilation and allows for dynamic fan speeds to adapt to the projector's heat output.
  2. Projector Placement: Position your projector so that internal fans are unobstructed, maximizing their efficiency and minimizing noise levels.
  3. Flame-Resistant Materials: Construct the enclosure using flame-resistant materials to guarantee safety, as projectors generate significant heat during operation.
  4. Sound-Dampening Materials: Incorporate barriers and sound-dampening materials like rubber or Alubutyl within the enclosure to reduce sound transmission from the projector to your viewing area.

Vibration Mitigation Strategies

effective vibration control techniques

Even with a well-designed enclosure, vibrations from the projector can still contribute to unwanted fan noise. To effectively implement vibration mitigation strategies, consider using rubber dampening materials or sheets on your projector. These materials can greatly absorb vibrations, helping to reduce fan noise during operation.

Additionally, using Alubutyl adhesive to mount your projector will prevent sound transmission to surrounding surfaces, further enhancing your setup.

Cover reflective surfaces like plasterboard with sound-absorbing materials to decrease noise levels by minimizing sound reflections in the room. Choosing higher airflow fans with lower noise ratings can also help reduce internal noise while ensuring efficient cooling.

Before finalizing your setup, conduct initial noise-level tests using duct tape. This can help you assess changes in sound and guide your adjustments to fan configurations and projector placement.

Frequently Asked Questions

How Do I Reduce the Noise on My Projector?

To reduce noise on your projector, use Eco Mode, keep it away from walls and viewers, clean air filters regularly, and consider sound-absorbing materials in your room. Look for quieter models if needed.

How Do You Silence a Noisy Fan?

When a fan's roar drowns out your peace, you can silence it. Try cleaning the blades, adjusting its position, or using sound-dampening materials. Sometimes, simply replacing it with a quieter model works wonders.

Advertisement

Do All Projectors Have Loud Fans?

Not all projectors have loud fans; some are designed for quieter operation. You'll find models that run as low as 26 dB, while others may exceed 40 dB, especially budget options. Choose wisely!

How Do You Reduce the Noise in a Ventilation Fan?

You might be surprised to find that reducing noise in a ventilation fan isn't just about silence. Start by cleaning it, adding sound-absorbing materials, and installing isolation mounts to achieve a noticeably quieter environment.

Conclusion

In summary, tackling projector fan noise doesn't have to be an intimidating task. By understanding your projector's mechanics and implementing the tips we've discussed, you can create a quieter viewing experience. It's like having a conversation at a lively café—you can still enjoy the ambiance without shouting. So, whether you're binge-watching your favorite show or presenting in a meeting, you'll appreciate the difference a little effort can make in reducing that distracting hum.

Continue Reading

Home Cinema

DIY Projector Screen: Step-by-Step Tutorial

Navigate the exciting world of DIY projector screens with our step-by-step tutorial, and discover the secrets to creating the perfect movie night experience.

Published

on

create your own projector screen

Creating a DIY projector screen is a fun project that can enhance your movie nights. First, gather materials like blackout cloth or specialized fabrics, and decide on a frame – PVC for portability or wood for sturdiness. Measure, cut, and assemble your frame before cutting the screen material to size. Stretch it tight over the frame using a staple gun to minimize wrinkles. For mounting, secure D-rings and brackets to guarantee stability. Finally, position your screen at eye level to optimize the viewing experience. Want to make certain everything's seamless? There's plenty more to explore about setup and maintenance.

Key Takeaways

  • Choose suitable screen material like blackout cloth or projector fabric for optimal image quality.
  • Construct a sturdy frame using PVC or wood, ensuring proper dimensions for your projector's aspect ratio.
  • Securely stretch and staple the screen material over the frame to eliminate wrinkles and ensure a flat surface.
  • Properly mount the screen using D-rings and wall anchors, maintaining a distance of at least 1 foot from walls.
  • Regularly calibrate your projector settings and check for any signs of wear on equipment for the best viewing experience.

Materials Needed for Your Screen

essential items for screen

When you're ready to create your DIY projector screen, gathering the right materials is vital for achieving the best results. First, you'll need to choose your screen material. Options like blackout cloth, canvas, or specialized projector screen fabric provide different levels of reflectivity and light-blocking capabilities, which are essential for peak image quality in both home cinema and gaming settings.

For the frame, you can either build a frame using PVC for lightweight portability or opt for a sturdy wooden frame for durability, making certain it can handle the demands of high refresh rates and low input lag for gaming enthusiasts top projectors for gaming.

Next, consider your mounting hardware. This includes brackets, screws, and wall anchors, tailored to the type of wall you're working with, whether it's drywall or concrete. If you decide to paint your screen instead of using fabric, be sure to get specific projector screen paint to enhance image quality and color accuracy. Multiple coats might be necessary for a properly reflective surface.

Lastly, don't forget the tools needed for assembly. A drill, saw, measuring tape, and staple gun will guarantee precise construction and secure mounting of your screen. By gathering these materials, you'll be set to create a fantastic DIY projector screen that performs well in any ambient light situation.

Step-by-Step Assembly Process

sequential assembly instructions guide

To kick off the assembly process, start by measuring the desired dimensions for your DIY projector screen and cutting the frame materials—whether wood or PVC—to the appropriate size. Guarantee the lengths correspond to your selected aspect ratio, like 16:9 or 4:3.

For a relaxing viewing experience, consider enhancing your space with essential oils, which can improve focus and create a soothing atmosphere while you enjoy your films (mood enhancement benefits).

Advertisement

Next, follow these steps to assemble the frame:

  1. Assemble the frame: Join the cut pieces at the corners using screws or corner brackets for a sturdy structure. Double-check that all corners form right angles for stability.
  2. Select your screen material: Choose between blackout cloth or specially designed projector screen fabric. Cut it to size, allowing for an overlap on the frame for securing.
  3. Stretch the screen: Tightly stretch the screen material over the frame, using a staple gun to secure it at regular intervals. Confirm there are no wrinkles or sagging areas that could distort the projected image.
  4. Attach mounting hardware: Finally, attach D-rings or brackets to the frame for secure mounting.

With your frame complete, you're ready to set it up in your home theater and enjoy an impressive projector light experience!

Mounting Your Projector Screen

installing projector screen securely

Mounting your projector screen properly is vital for achieving the best viewing experience. To guarantee ideal viewing comfort, position the screen at eye level, reducing neck strain during use. Use a laser level to make certain the screen is perfectly horizontal, which is critical for accurate projection.

Here's a quick guide to what you'll need for a secure installation:

Component Purpose
D-rings Attach to the screen frame for easy mounting
Mounting brackets Provide stable support for the screen
Wall anchors Confirm secure installation based on wall type
Distance from walls Enhance sound quality and avoid obstruction

When attaching the D-rings or mounting brackets, place them in the top corners of the screen frame. This allows for a balanced setup. Make certain to select appropriate wall anchors for your wall type, whether it's drywall or concrete. Finally, consider placing the screen at least 1 foot away from walls to enhance sound quality and confirm nothing obstructs the projection. With these steps, you'll enjoy a well-mounted projector screen for all your viewing needs!

Tips for Optimal Viewing

maximize your viewing experience

After you've securely mounted your projector screen, refining your viewing setup can greatly enhance your experience.

Regular maintenance of your equipment is also essential for guaranteeing longevity and performance, much like the importance of air purifier maintenance in enhancing air quality.

Here are some essential tips for achieving ideal viewing:

Advertisement

  1. Positioning: Verify your projector screen is at eye level, roughly 24-36 inches above the floor. This prevents neck strain and promotes comfortable viewing.
  2. Screen Size and Distance: Maintain a seating arrangement that places you 1.5 to 2.5 times the screen width away. This distance maximizes immersion and helps maintain ideal viewing angles.
  3. Control Ambient Light: Use blackout curtains or dark paint on adjacent walls to minimize reflections. This is especially important for projectors over 3,500 lumens, as it greatly enhances projection quality.
  4. Calibration: Regularly calibrate your projector settings for brightness, contrast, and color accuracy. This guarantees you get the best visual experience from your DIY projector screen.

Troubleshooting Common Issues

resolving frequent technical problems

Troubleshooting common projector screen issues can save you from frustrating viewing experiences and guarantee your setup runs smoothly.

If you notice a blurred image, first check that the projector is focused properly. Next, verify the screen material is taut and wrinkle-free to provide a flat projection surface.

For image alignment problems, adjust the projector's placement or use the keystone correction settings to achieve a rectangular image.

If color accuracy doesn't seem right, explore the projector's settings to optimize brightness and contrast levels based on your screen material.

If you find that your screen reflects too much ambient light, consider repositioning it for better results or installing blackout curtains to minimize external light interference.

In cases where the screen appears sagging or loose, reinforce the mounting hardware or tighten the screen material. This adjustment will help maintain a flat projection surface, enhancing your overall viewing experience with your DIY Projection Screen.

Advertisement

Addressing these common issues promptly will guarantee you enjoy a seamless and visually pleasing setup every time you project.

Frequently Asked Questions

How Do You Make a Homemade Projector Screen?

To make a homemade projector screen, choose a smooth, reflective fabric, cut a frame to size, secure the material tightly, and mount it at eye level for the best viewing experience. Enjoy your movie nights!

What Material Can I Use for a Projector Screen?

Imagine hosting a movie night outdoors; using blackout cloth can create a perfect screen. For your projector screen, you can also consider canvas, specialized screen fabric, or even lightweight PVC sheets for portability.

Will a White Tarp Work as a Projector Screen?

Yes, a white tarp can work well as a projector screen. Its smooth surface reflects light effectively. Just make sure to stretch it tight and use it in a dark area for the best image quality.

Can You Use a Bed Sheet for a Projector Screen?

Using a bed sheet is like painting on a blank canvas; it can work well as a projector screen. Just guarantee it's smooth, white, and properly sized for the best viewing experience. Enjoy your movie night!

Advertisement

Conclusion

Now that you've crafted your DIY projector screen, you're ready to transform your living room into a personal cinema. Just like the first time you watched the stars flicker on a clear night, this screen will bring those magical moments into your home. Remember, every movie night is a chance to create memories, so grab some popcorn and enjoy the show! Your hard work has paid off, and the adventure of cinematic storytelling awaits.

Continue Reading

Home Cinema

How to Choose the Right Projector Mount for Your Setup

Knowing the right factors for selecting a projector mount can transform your viewing experience; discover what you need to consider before making a decision.

Published

on

By

selecting ideal projector mount

Choosing the right projector mount starts with evaluating your room layout and projector specifications. Consider if you need a ceiling, wall, shelf, or stand mount based on your space and aesthetic preferences. Be certain to check weight capacity and ventilation needs to avoid overheating. Compatibility with your projector is key, so consult specs for a precise fit. Think about future upgrades, too, as this can impact your choice. By understanding these factors, you'll guarantee an ideal viewing experience. Discover more tips to refine your selection process and enhance your entire setup.

Key Takeaways

  • Assess your room layout and size to determine the ideal mounting position for optimal projection quality.
  • Consider the projector's weight and ensure the mount's weight capacity is sufficient for stability and safety.
  • Evaluate compatibility with your projector model to prevent installation issues and ensure proper function.
  • Think about ambient light conditions when selecting a mount to minimize glare and enhance image clarity.
  • Explore different mount types (ceiling, wall, shelf, stands) to find the one that best fits your aesthetic and functional needs.

Importance of Proper Mounting

Understanding the importance of proper mounting can greatly enhance your viewing experience. When you install your projector safely on a ceiling or wall, you guarantee top-notch image quality.

A well-mounted projector provides sharp, clear, and aligned projections, making your presentations or movie nights much more enjoyable. Additionally, a good mounting solution can contribute to better sound performance, especially when integrated with a home theater setup that includes quality audio systems.

Safety is another critical aspect of mounting. By securing your projector correctly, you prevent potential falls and injuries, offering peace of mind, especially in high-traffic areas. Additionally, effective mounting solutions save valuable floor space, creating a more organized and clutter-free environment.

Proper installation allows for angle adjustments, which can markedly improve image stability and reduce the risk of overheating or damage to the equipment.

Types of Projector Mounts

variety of projector mounts

When selecting a projector mount, you'll find several types available, each catering to different needs and environments.

Shelf mounts are cost-effective options that offer a sturdy flat surface attached to the wall. While they're easy to install, guarantee careful construction to avoid collapse; they mightn't blend well with all home decor.

Advertisement

For those looking to elevate their space with some creativity, consider how a projector can complement your living room transformation goals.

Ceiling mounts provide a fixed position, ideal for permanent installations, guaranteeing safety and balance for your projector. However, they complicate maintenance and angle adjustments due to their height.

Wall mounts integrate well with room decor and can support heavyweight projectors, but they limit your viewing angle flexibility.

If you prefer mobility, consider projector stands. These versatile devices are suitable for various setups, including outdoor use, allowing easy relocation and adjustments.

For a more elegant solution, projector lifts conceal the projector when it's not in use, enhancing your room's aesthetics while saving space. However, be prepared for additional installation considerations.

Advertisement

Advantages and Disadvantages

pros and cons analysis

When choosing a projector mount, you need to weigh the advantages and disadvantages of each option.

Consider factors like stability, aesthetics, and flexibility to find the best fit for your space.

Additionally, understanding how design principles can enhance your overall setup can be beneficial, especially when you think about fostering a culture of creativity and experimentation in your workspace Design Thinking Leadership.

Understanding these key points will help you make a more informed decision.

Mounting Options Overview

There are several mounting options for projectors, each with its own set of advantages and disadvantages. Shelf mounts are a cost-effective choice, providing a solid base for your projector. However, they can pose safety risks if not constructed properly and might clash with your home decor aesthetics.

Additionally, considering the investment in a Gold IRA can hedge against inflation, similar to how projector mounts protect your technology.

Advertisement

Ceiling mounts offer great stability and safety, making them ideal for permanent setups, but they can be difficult to adjust for best viewing angles and require ladders for maintenance.

Wall mounts integrate well with your decor and can support heavier projectors, yet they limit flexibility in viewing angles and may not suit all room layouts.

If mobility is essential for your setup, projector stands provide versatility, allowing for different configurations, including outdoor use. However, they may lack stability compared to fixed mounts in certain environments.

Lastly, projector lifts enhance aesthetics by concealing the projector when it's not in use, but they can be more expensive and complex to install than traditional options.

Key Considerations for Selection

Choosing the right projector mount involves several key considerations that can greatly impact your viewing experience.

Advertisement

First, evaluate your room layout and size, as ceiling height and available wall space will affect your mounting options. For instance, ceiling mounts offer safety and a clean look but can complicate maintenance, while shelf mounts are cost-effective but might clash with your decor. Additionally, conducting thorough keyword research can help identify the best options for your specific needs.

Next, consider your projection requirements, including screen size and aspect ratio. The necessary distance and viewing angle for effective projection are vital for ideal results. Make sure to assess compatibility with your specific projector models; dedicated mounts align screw holes perfectly, while universal mounts offer flexibility across various devices.

Don't forget to factor in ambient light conditions, as they can greatly influence image clarity. The right mount should help minimize glare and enhance viewing quality.

Key Factors for Selection

criteria for choosing wisely

Evaluating your needs is crucial when selecting a projector mount. Start by evaluating your room layout and size, taking into account wall space availability and ceiling height. This helps you determine the most suitable mounting position for ideal projector placement.

Next, understand your projection requirements by defining the desired image size, aspect ratio, and the distance necessary for effective image projection. Incorporating various aspects of your setup, such as the potential for future upgrades or changes, can further enhance your choice. It's also beneficial to contemplate the ideal investment strategy for your equipment, guaranteeing you're getting the best value for your needs.

Review viewing angles and distance to guarantee that your mount allows for ideal image alignment, while also accommodating ambient light conditions that could affect image clarity. It's crucial to take into account throw distance and mount shift capabilities, as these factors guarantee proper projector setup and help achieve the desired image size and quality.

Advertisement

Lastly, consult with experts or refer to manufacturer specifications for tailored recommendations on projector mounts that support various projector types and weights. By focusing on these key factors, you'll be better equipped to choose a mount that perfectly fits your setup, enhances your viewing experience, and meets your unique needs.

Specific Mounts Overview

detailed mounts analysis summary

When you're choosing a projector mount, understanding the different types available is essential. Each mount comes with its own key features and installation factors that can impact your setup.

It's important to take into account aspects such as weight capacity and compatibility with your projector model, as improper mounting can lead to performance issues.

Additionally, ensuring that your mount is placed in a suitable environment is critical for ideal projector function, much like how cat health and nutrition can influence a pet's wellbeing.

Let's compare the options to help you find the best fit for your needs.

Mount Types Comparison

A variety of projector mounts cater to different needs and preferences, influencing both functionality and aesthetics in your space.

Advertisement

When considering a mount types comparison, here are some common options:

1. Ceiling Mounts: These guarantee safety and balance, making them ideal for permanent setups. They're often recommended for larger spaces where ceiling height allows for peak projection.

However, they can be tricky to adjust and require ladders for maintenance.

2. Wall Mounts: These integrate well with your home decor and can support heavier projectors.

Consider the importance of reputation and reviews from past clients when choosing a service to install your mount.

Advertisement

But keep in mind that they offer limited viewing angle flexibility.

3. Shelf Mounts: Cost-effective and providing a solid base, shelf mounts can clash with home decor if not chosen carefully.

They may also pose safety risks if not properly constructed.

For more versatility, consider projector stands that allow for easy relocation, or projector lifts that conceal the projector when not in use, enhancing your room's aesthetics.

Each option has its pros and cons, so assess your space and usage needs carefully to guarantee you choose the best mount for your setup.

Advertisement

Key Features Evaluation

Choosing the right projector mount involves understanding the unique features that each option brings to the table. If you're looking for versatility, the XGIMI Portable Stand is a great choice, offering 360° panoramic rotation and height adjustment up to 795mm. This makes it suitable for both desktop and floor use.

Additionally, using a projector can enhance your home entertainment experience, similar to how ceiling fans enhance air circulation for overall comfort. The XGIMI X-Desktop Stand Pro combines stability with aesthetics, thanks to its aluminum alloy base and universal compatibility with a ¼-inch screw, while allowing a height adjustment of up to 9.5 cm.

For those needing a more robust option, the XGIMI X-Floor Stand supports a height range from 19 to 35 inches, featuring a triangular base design for enhanced stability in various settings.

If you're considering shelf mounts, they can be a cost-effective solution for wall attachment but may clash with your home decor, especially if not designed for heavy projectors. On the other hand, ceiling mounts provide a clean, fixed integration into your space, though they require ladder access for adjustments or maintenance.

Ultimately, evaluate each mount's stability, viewing angle, and compatibility with your projector and screen.

Advertisement

Installation Considerations

Selecting the right installation method for your projector can make all the difference in achieving the best viewing experience. Here are some key options to take into account:

  1. Ceiling Mount: Ideal for permanent setups in larger rooms, ceiling mounts provide safety and balance for your projector. They guarantee proper ventilation and can often support heavier models, similar to how garage door openers enhance home security with modern technology.
  2. Wall Mount: If you're looking for a solution that integrates seamlessly with your home decor, wall mounts are a great choice. They typically support heavier projectors and can easily fit into various aesthetic styles.
  3. Mobile Options: For maximum versatility, think about mobile projector stands. These allow for easy relocation and adjustments, perfect for both indoor and outdoor use.

When choosing a mount, confirm it's compatible with your projector model. Dedicated mounts are tailored for specific models, while universal mounts offer flexibility.

Also, pay attention to weight capacity and ventilation; mounts must support the projector's weight securely and allow unobstructed airflow to prevent overheating.

XGIMI Mount Options

xgimi projector mounting solutions

XGIMI's mount options provide the perfect blend of versatility and stability for your projector needs. Whether you're setting up for a home theater or a professional presentation, these XGIMI projector stands offer reliable mounting solutions.

Mount Type Key Features Ideal Use
XGIMI Portable Stand 360° panoramic rotation, 5kg load capacity Mobile setups
XGIMI X-Desktop Stand Pro Universal compatibility, height adjustment (up to 9.5 cm) optimal image projection
XGIMI X-Floor Stand Adjustable heights (19 to 35 inches) Indoor and outdoor environments

All XGIMI stands emphasize stability and ease of use, ensuring that you can focus on your presentation without worry. With sleek aesthetics, these mounting options blend seamlessly into any setting. Plus, they're compatible with a variety of projector models, giving you the flexibility you need for different user needs and environments. Choose XGIMI for a reliable and stylish solution that elevates your viewing experience.

Screen Compatibility

device display compatibility issues

How do you guarantee a seamless viewing experience with your projector? Screen compatibility is key. You need to take into account several factors to assure everything aligns perfectly for ideal image clarity and enjoyment.

  1. Aspect Ratio: Make sure the projector's aspect ratio matches the screen. This prevents image distortion during presentations or movie nights.
  2. Throw Distance: Different projectors require specific throw distances to project the right image size. Know your projector's needs to avoid any hiccups.
  3. Mounting Height: The screen's mounting height should align with your projector installation. An improper height can affect the viewing angle and overall experience.

Larger screens often need secure anchoring, while smaller ones may mount directly to the wall.

Additionally, using brackets for adjustment allows you to fine-tune the distance from the wall, assuring ideal visibility.

Taking these considerations into account helps you achieve a setup that not only looks great but performs well too.

Advertisement

With the right screen compatibility, you can elevate your viewing experience, making every presentation or movie night enjoyable and hassle-free.

Installation Considerations

installation guidelines and recommendations

With screen compatibility sorted, it's time to focus on installation considerations that will guarantee your projector setup performs at its best.

Start by evaluating your room layout and size to determine the ideal mounting position. Verify there's enough wall or ceiling space for installation, taking into account the projector model you're using, as different types may require specific configurations for proper alignment and stability.

Next, examine the mounting hardware. Confirm it's rated for the weight of your projector to avoid potential safety hazards or equipment damage.

Pay attention to ventilation requirements, as your mount shouldn't obstruct the projector's cooling fans or airflow; overheating can lead to performance issues.

If you're opting for ceiling mounts, plan for easy access to the projector for maintenance and adjustments. You'll want it to be accessible, especially if you need to use a ladder for retrieval.

Advertisement

Additional Accessories and Products

supplementary items and gear

When setting up your projector, considering additional accessories can greatly enhance your overall experience.

These accessories not only improve the functionality of your setup but also boost your projector's performance. Here are three must-have accessories:

  1. Projector Screens: Investing in a quality projector screen guarantees ideal viewing angles and clarity, making your presentations or movie nights far more enjoyable.
  2. TV Stick 4K: Priced at €79.99, this device considerably enhances your streaming capabilities, allowing you to access a wider range of content seamlessly.
  3. Support Multi-Angle Accessories: At €89.99, these versatile accessories provide multiple viewing angles, making sure that everyone in the room has a great view.

Additionally, don't forget about quality cables and adapters for ideal connectivity, which are essential for maintaining clear visuals and sound.

You can often find promotions or bundled purchases through community memberships that save you money on these vital accessories.

Conclusion

Choosing the right projector mount can really enhance your viewing experience. Did you know that 70% of home theater enthusiasts say a proper mount improves picture quality? By considering factors like compatibility, installation ease, and specific features, you can find a mount that suits your setup perfectly. Whether you opt for a fixed or adjustable mount, taking the time to select the right one will elevate your home entertainment to a whole new level!

Continue Reading
Advertisement

Affiliate disclaimer

As an affiliate, we may earn a commission from qualifying purchases. We get commissions for purchases made through links on this website from Amazon and other third parties.

Advertisement

Vetted

top electrostatic headphones 2024 top electrostatic headphones 2024
Vetted2 months ago

The 10 Best Electrostatic Headphones of 2024 – Ultimate Sound Experience Unveiled

Unlock the ultimate sound experience with the top electrostatic headphones of 2024—discover which models will elevate your audio journey to...

concert earplugs for hearing protection concert earplugs for hearing protection
Vetted2 months ago

15 Best Earplugs for Concerts: Protect Your Hearing Without Missing the Music

Check out the 15 best earplugs for concerts that protect your hearing while enhancing your music experience—discover which ones are...

comfortable earbuds for small ears comfortable earbuds for small ears
Vetted2 months ago

14 Best Earbuds for Small Ears That Offer Comfort and Sound Quality

Mysterious and comfortable, discover the 14 best earbuds for small ears that elevate your sound experience like never before!

best earbuds for calls best earbuds for calls
Vetted2 months ago

14 Best Earbuds for Phone Calls in 2024 – Crystal Clear Sound and Comfort

Discover the crystal-clear sound and comfort of the 14 best earbuds for phone calls in 2024, and find out which...

kid friendly safe earbuds kid friendly safe earbuds
Vetted2 months ago

15 Best Earbuds for Kids: Safe, Durable, and Perfect for Little Ears

Attention parents: Discover the 15 best earbuds for kids that prioritize safety and fun, but which one will be the...

top dynamic mics 2024 top dynamic mics 2024
Vetted2 months ago

15 Best Dynamic Microphones for Every Sound Engineer in 2024

Achieve the perfect sound with our top 15 dynamic microphones of 2024, tailored for every sound engineer's needs—discover your ideal...

top drum mics 2024 top drum mics 2024
Vetted2 months ago

15 Best Drum Mics of 2024 – Elevate Your Sound With These Top Picks

The ultimate guide to the 15 best drum mics of 2024 reveals top picks that will transform your sound—find out...

ultimate sound quality headphones ultimate sound quality headphones
Vetted2 months ago

15 Best Drum Headphones for Ultimate Sound Quality and Comfort

Browse our top 15 drum headphones for superior sound quality and comfort—discover which pair will elevate your drumming experience to...

ski helmet audio accessories ski helmet audio accessories
Vetted2 months ago

15 Best Ski Helmet Headphones to Enhance Your Slopes Experience

Immerse yourself in the slopes with the 15 best ski helmet headphones that promise unmatched sound quality and comfort—discover which...

top dj headphones 2024 top dj headphones 2024
Vetted2 months ago

15 Best DJ Headphones of 2024 – Ultimate Sound Quality and Comfort

Discover the top 15 DJ headphones of 2024 that promise unmatched sound quality and comfort—find out which models made the...

Advertisement

Trending