To clean your projector lens without scratches, first turn off and unplug the device, letting the lens cool down completely. Use a soft, canned air canister held upright to gently remove dust and debris. Apply a lens-specific cleaning solution to a microfiber cloth and wipe in gentle circular motions, avoiding excessive pressure or harsh materials. Inspect the lens afterward to verify it’s clear. For more tips on safe cleaning techniques, keep exploring the best methods.
Key Takeaways
- Use soft, lint-free microfiber cloths and circular motions to gently clean the lens without scratching.
- Apply a lens-specific cleaning solution sparingly to avoid abrasive damage.
- Keep the cloth slightly damp, not soaked, to prevent liquid from seeping into the projector.
- Always clean after the lens has cooled to prevent thermal stress or smudging.
- Avoid rough or abrasive materials like paper towels, which can scratch the lens surface.

TOWOND Projector Screen and Stand, 150 inch Indoor Outdoor Projection Screen, Portable 16:9 4K HD Rear Front Movie Screen with Carry Bag Wrinkle-Free Design for Home Theater Backyard Cinema
Projector Screen with Stand. 150-inch diagonal, 160°wide viewing angle, aspect ratio 1:1 and 16:9 4k HD portable projector...
As an affiliate, we earn on qualifying purchases.
Gather the Necessary Cleaning Supplies
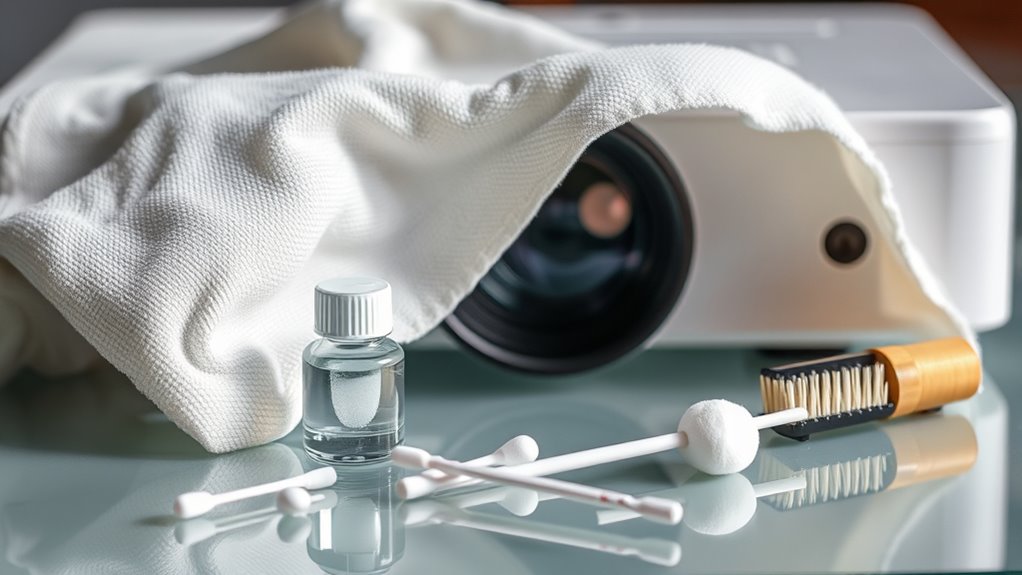
Before you begin cleaning your projector lens, it’s essential to gather the right supplies. Using proper cleaning techniques guarantees you won’t damage the lens during maintenance. Start with a soft, lint-free microfiber cloth to gently wipe away dust and smudges. You’ll also need a small spray bottle with lens cleaning solution or a mixture of distilled water and isopropyl alcohol—avoid harsh chemicals. Cotton swabs can help clean tight spots, but only use them gently. Keep a blower brush handy to remove loose debris without touching the lens surface. These supplies are critical for common projector maintenance, preventing scratches and ensuring clear image quality. Having everything ready before you start makes the cleaning process safer and more effective, ensuring your projector stays in top condition. Proper AI in Business tools can also help identify the best cleaning methods for your device. Additionally, understanding angel numbers can offer spiritual guidance during routine maintenance, promoting a balanced approach to care. Incorporating proper maintenance routines ensures your projector lens remains clear and functional over time. To further safeguard your lens, consider learning about Kia Tuning options that can enhance your vehicle’s overall performance and reliability. Being aware of family photoshoot fails can remind you to handle your equipment gently to avoid unexpected mishaps.

Valerion StreamMaster Plus 4K Laser Projector - 300" IMAX Enhanced Home Theater, 4ms |240Hz Response, Gaming Projector with 3D & Dolby Vision, HDR10, GTV, Smart Home & AI Assistant
Speed and Power Like Never Before - Experience unmatched speed with the AI-9618 chipset, 4GB RAM/ 128GB ROM—delivering...
As an affiliate, we earn on qualifying purchases.
Turn Off and Unplug Your Projector
Before you start cleaning, make sure your projector is turned off and unplugged from the power source. This prevents any electrical hazards and protects your device. Always wait a few minutes to let the projector cool down before handling it. Ensuring the proper contrast ratio is maintained can help protect your projector’s internal components from potential damage during cleaning. Additionally, being aware of emotional support patterns can help you recognize signs of stress or anxiety in yourself or others during the process. Remember, essential oil properties can also be used to create a calming environment during your cleaning routine.
Power Down Safely
To prevent damage to your projector and guarantee safety, you should always power it down properly before cleaning the lens. This assures power down safety and protects you from electrical hazards. Follow these steps:
- Press the power button and wait for the projector to shut off completely.
- Allow the device to cool down, usually for 10-15 minutes, to avoid burns.
- Turn off any connected devices to prevent electrical surges.
- Switch off the power strip or unplug the projector from the wall, adhering to electrical precautions.
- Remember that proper maintenance of your projector, including regular cleaning, helps ensure optimal performance and longevity.
- Referring to manufacturer guidelines can provide specific instructions tailored to your projector model, further ensuring safe and effective cleaning.
- Incorporate cleaning frequency recommendations to maintain your projector’s clarity and prevent dust buildup.
- Refer to the retail hours for any additional assistance or service options if needed.
- Additionally, understanding the internal components of your projector can help you identify potential issues during cleaning and maintenance.
Taking these steps minimizes the risk of electrical shocks or damage. Proper powering down guarantees your projector is safe to clean and helps maintain its longevity. Always follow manufacturer guidelines for power down procedures.
Unplug Before Cleaning
Always unplug your projector before cleaning to guarantee safety and prevent electrical hazards. This step is essential in your maintenance checklist to avoid shocks or damage to internal components. Turning off and unplugging the device ensures that no power runs through it during cleaning, reducing the risk of accidental activation or electrical mishaps. Before handling any delicate parts, double-check that the projector is completely powered down and disconnected from the power source. This simple precaution not only protects you but also helps maintain the longevity of your equipment. Incorporating this step into your routine emphasizes electrical safety and ensures you can clean your lens effectively without risking damage or injury. Additionally, understanding the security of your home can give you peace of mind while performing maintenance, knowing your space is protected during your cleaning routine. Always prioritize safety first before proceeding with any cleaning tasks, and be aware of the electrical safety guidelines to prevent accidents. Regularly inspecting your projector’s power connections can also help prevent potential electrical issues.

XGIMI HORIZON 20 4K RGB Triple Laser Home Projector, 3200 ISO Lumens, Google TV with Licensed Netflix, Optical Zoom & Lens Shift, IMAX Enhanced, Dolby Vision, 300" Display, 240Hz, 1ms Input Lag
Powered by RGB Triple Laser: The X-Master RGB triple laser engine delivers 3200 ISO lumens and a 100,000:1...
As an affiliate, we earn on qualifying purchases.
Allow the Lens to Cool Down
Make sure to let the lens cool down before cleaning it. If it’s still hot, you risk thermal damage or smudging the lens surface. Waiting for it to reach a safe temperature helps keep your projector in good shape. Additionally, allowing the lens to cool can prevent damage from heat, which is important for maintaining optimal performance. Cooling the lens also reduces the risk of condensation forming on the surface, which can cause fogginess or spots during use. Being aware of industry trends and advancements in lens maintenance can help you adopt best practices for lens care and prolong the lifespan of your projector components. Regularly inspecting and cleaning the lens according to recommended guidelines ensures your projector continues to operate at its best.
Prevent Thermal Damage
Allowing your projector lens to cool down after use is essential to prevent thermal damage. Proper thermal regulation ensures the lens doesn’t overheat, which could compromise its integrity. Efficient heat dissipation helps maintain ideal operating conditions and extends the lifespan of your equipment. To achieve this, consider these key practices:
- Turn off the projector and unplug it, allowing internal components to stabilize.
- Avoid touching or cleaning the lens immediately after use; give it time to cool.
- Ensure proper ventilation around the projector to facilitate heat dissipation.
- Store the projector in a cool, dry place to prevent heat buildup during idle periods.
- Understanding thermal damage prevention is crucial for maintaining projector longevity and optimal performance.
Wait for Safe Temperature
After using your projector, giving the lens time to cool down is essential before cleaning. High lens temperature can cause accidental smudges or damage if you touch the lens too soon. Allow the projector to undergo proper projector cooling, which helps the lens reach a safe temperature for handling. Waiting a few minutes ensures the lens isn’t hot to the touch and reduces the risk of thermal damage. Rushing this step might lead to warping or cracking of sensitive components. Check that the lens feels cool and comfortable before proceeding. Patience at this stage protects your equipment and makes cleaning safer and more effective. Remember, a cooled lens minimizes the chance of scratches or other damage during the cleaning process.

ShowMaven 100in /120in Fixed Frame Projector Screen, Diagonal 16:9, Active 3D 4K Ultra HD Projector Screen for Home Theater or Office (16:9, 120")
Wide Viewing Angle: 100-inch diagonal white screen with 16:9 aspect ratio(53.7" H x 91.8" W). 120-inch diagonal white...
As an affiliate, we earn on qualifying purchases.
Use a Soft, Compressed Air Canister

Using a soft compressed air canister is an effective way to remove dust and loose debris from your projector lens without risking scratches. It provides gentle dust removal, preventing particles from scratching the surface. To maximize safety and effectiveness, follow these steps:
- Hold the canister upright to avoid propellant leaks.
- Keep a safe distance of about 6 inches from the lens.
- Use short bursts of compressed air to dislodge dust.
- Avoid shaking the canister during use to maintain consistent airflow.
This method ensures dust removal without contact, reducing the risk of scratches. Be careful to direct the airflow precisely, and don’t use compressed air near delicate components. Regularly using a soft compressed air canister keeps your lens clean and maintains ideal image quality.
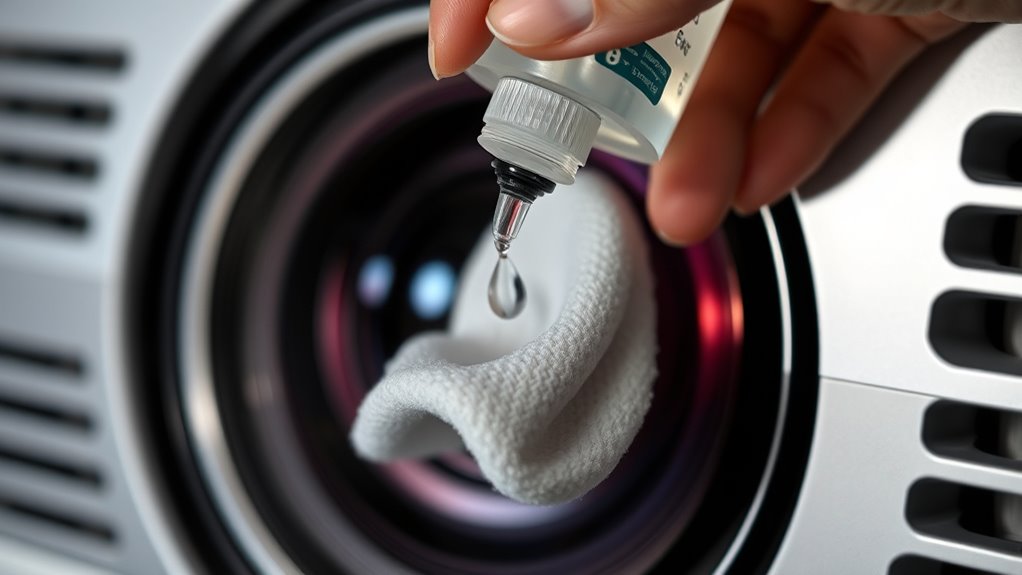
Select a Gentle, Lens-Specific Cleaning Solution
Choose a lens cleaner solution designed specifically for projector lenses to avoid damage. Make certain to avoid harsh chemicals like alcohol or ammonia, which can harm the coating. Always test the cleaner on a small area first to ensure it won’t cause any unwanted effects.
Use Lens Cleaner Solution
What’s the best way to guarantee your projector lens stays crystal clear? Using a lens cleaner solution designed specifically for optics guarantees effective cleaning without damage. This method aligns with essential lens cleaning tips and promotes proper projector maintenance. Here are key steps to follow:
- Select a gentle, lens-specific cleaner.
- Apply a small amount to a microfiber cloth—never directly on the lens.
- Gently wipe in circular motions, avoiding pressure.
- Use a dry portion of the cloth to remove any residual moisture.
Choosing the right solution prevents scratches and streaks, maintaining excellent image quality. Proper use of lens cleaner solutions is vital for preserving your projector’s longevity and ensuring sharp projections every time.
Avoid Harsh Chemicals
To protect your projector lens from damage, steer clear of harsh chemicals that can cause scratches or deterioration. Instead, opt for gentle, lens-specific cleaning solutions or safe chemical alternatives like distilled water or a mixture of isopropyl alcohol and water in a 50/50 ratio. DIY cleaning tips include avoiding household cleaners, ammonia, or alcohol-based products not designed for lenses, as they can strip coatings or leave residue. These harsh chemicals might seem effective but often do more harm than good over time. Using mild, recommended solutions ensures your lens stays clear and undamaged. Always remember that gentle, appropriate cleaning agents are key to maintaining your projector’s performance and longevity without risking scratches or clouding.
Test Before Applying
Before applying any cleaning solution to your projector lens, it is vital to test it on a small, inconspicuous area first. This step guarantees the solution won’t damage or discolor the lens during routine lens cleaning. To do this effectively, consider these points:
- Use a gentle, lens-specific cleaning solution recommended for projector maintenance.
- Apply a small amount to a microfiber cloth, not directly on the lens.
- Gently dab the test area, observing for any adverse reactions like streaks or discoloration.
- Allow the lens to dry and inspect for damage before proceeding with full cleaning.
Performing this simple test helps prevent scratches and ensures safe lens cleaning, maintaining peak image quality and prolonging your projector’s lifespan.
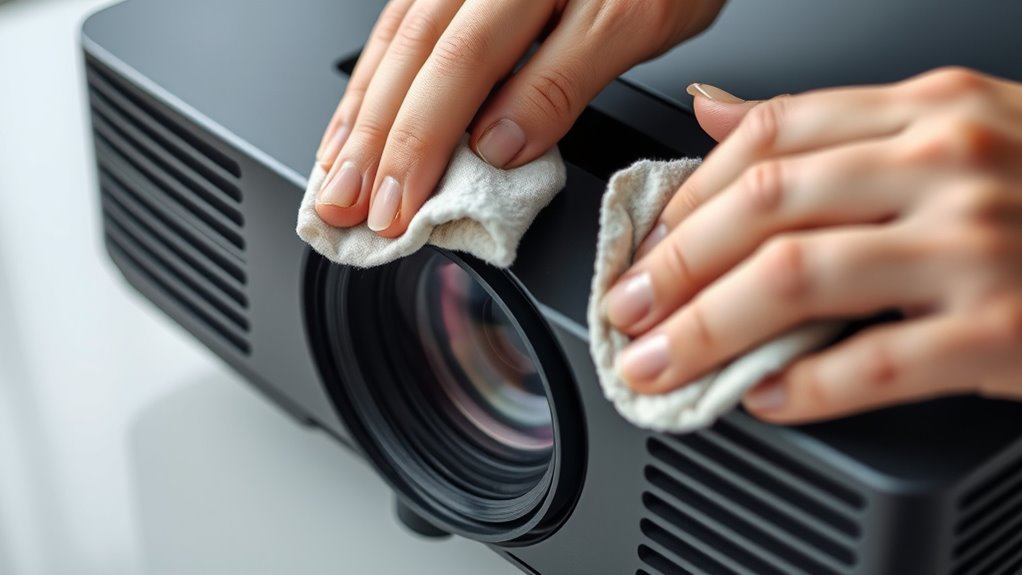
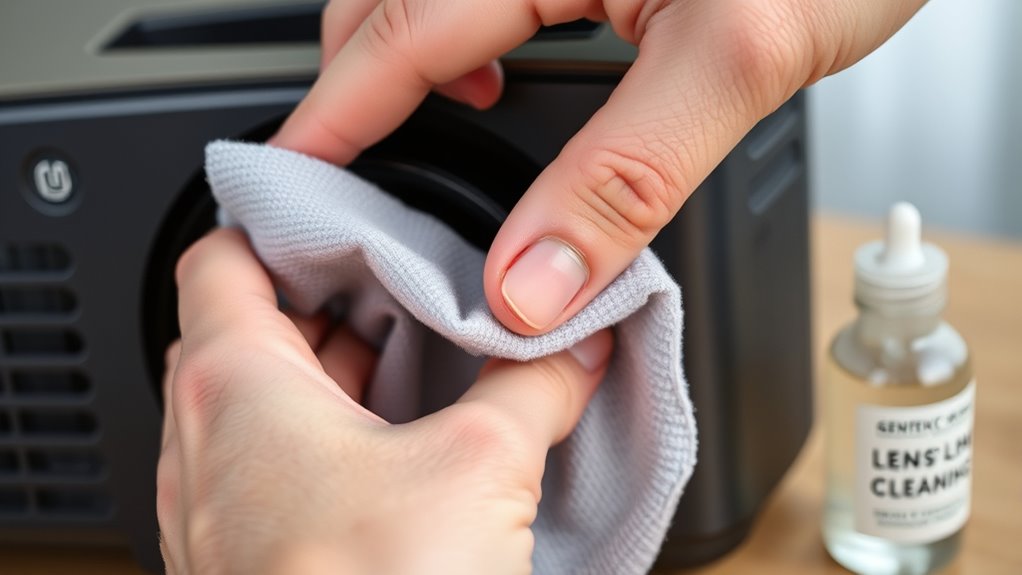
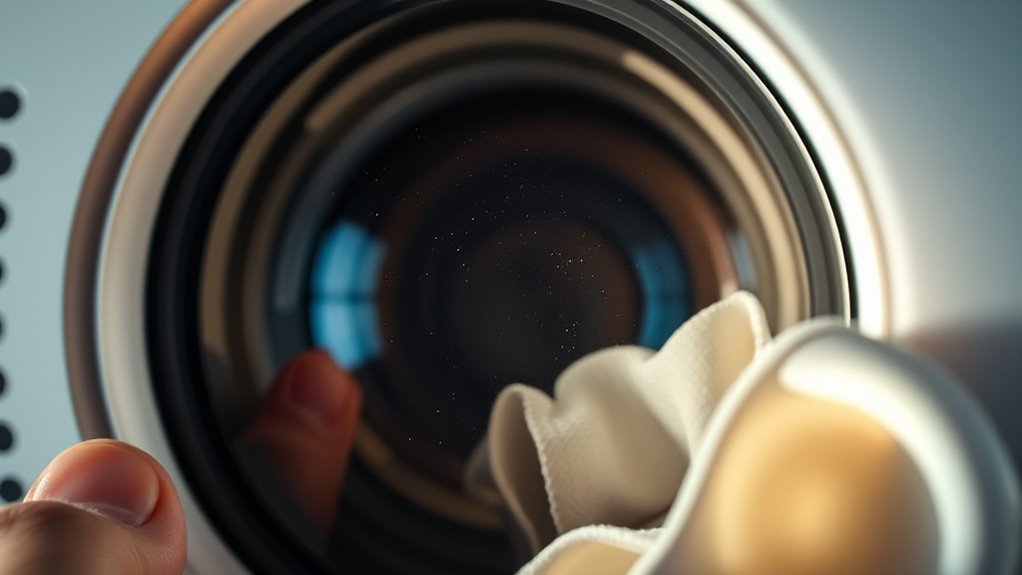
Apply Cleaning Solution to a Microfiber Cloth
Applying cleaning solution to your microfiber cloth correctly is essential for effective lens cleaning. First, pour a small amount of the cleaning solution onto the microfiber cloth—avoid spraying directly onto the lens to prevent excess liquid. Gently dampen the cloth, ensuring it’s moist but not soaked. Using a microfiber cloth helps prevent scratches and streaks, so make sure it’s clean and free of debris. When applying the cleaning solution, work in a controlled manner, distributing the liquid evenly across the cloth’s surface. This prevents excess solution from seeping into the projector components. Remember, a little cleaning solution goes a long way. Proper application ensures you won’t damage the lens while effectively loosening dirt and smudges for a clear, scratch-free finish.
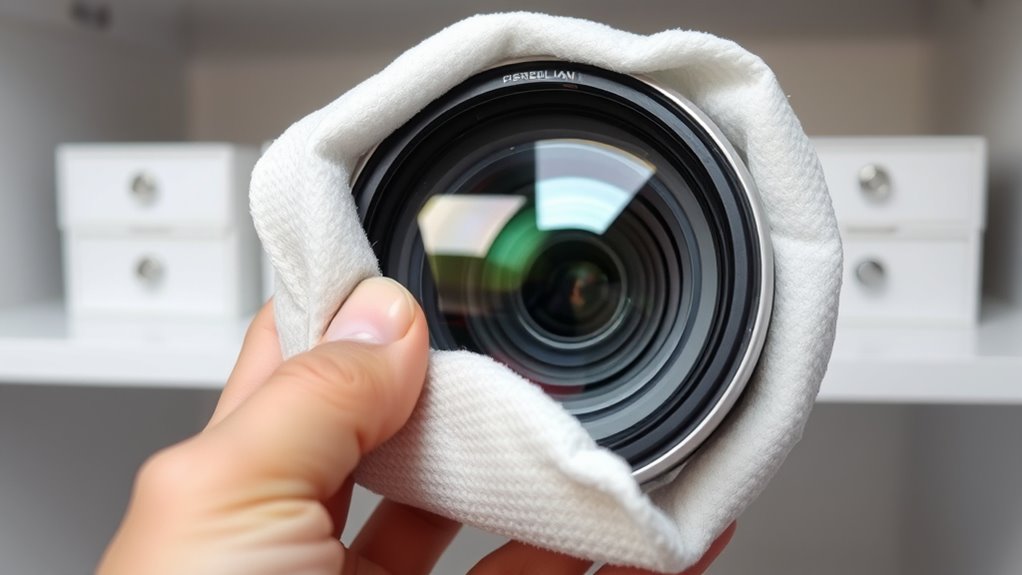
Gently Wipe the Lens in Circular Motions
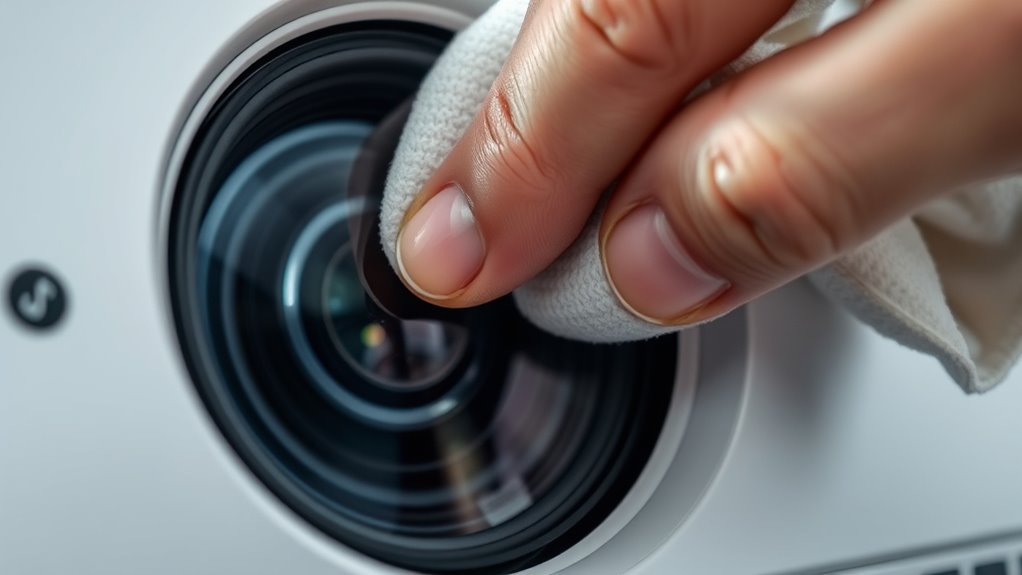
Start wiping the lens gently using circular motions. This technique guarantees thorough lens cleaning without scratching the surface. As you move the microfiber cloth, focus on maintaining light pressure and consistent movement. To maximize your cleaning, consider these tips:
- Use soft, lint-free materials designed for lens cleaning.
- Keep your hand steady to avoid uneven pressure.
- Follow the shape of the lens with gentle, continuous circular motions.
- Avoid applying excessive force that could damage the lens surface.
Performing lens cleaning in circular motions helps lift dirt and smudges evenly, preventing streaks or scratches. This method guarantees a safe, effective clean while maintaining the integrity of your projector lens. Patience and gentle handling are key for best results.
Avoid Using Harsh Materials or Excessive Pressure
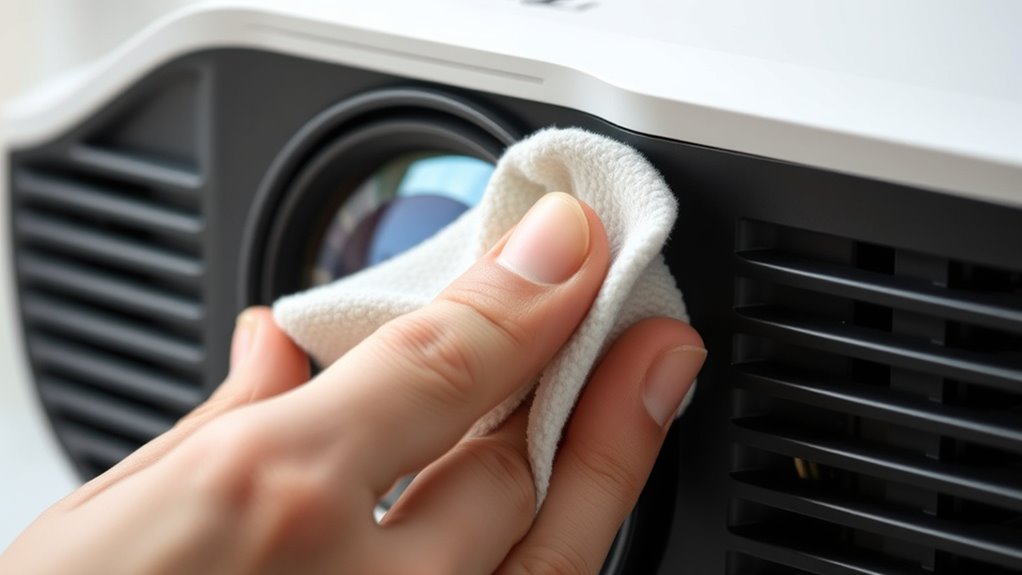
Using harsh materials or pressing too hard can easily damage your projector lens. Avoid abrasive materials like paper towels, rough cloths, or any scrubbing pads that could scratch the surface. These can leave marks or cause permanent damage. Similarly, applying excessive pressure while cleaning can distort or crack the lens coating. Use a soft, lint-free cloth and gentle, circular motions to clean the lens effectively. Remember, less force is more; gentle pressure prevents scratches and preserves the lens’s clarity. Never use harsh chemicals or rough cleaning tools, as they can erode the lens surface. Taking your time and handling the lens carefully ensures you remove dust and smudges without risking damage. Proper technique keeps your projector lens clear and in good condition long-term.
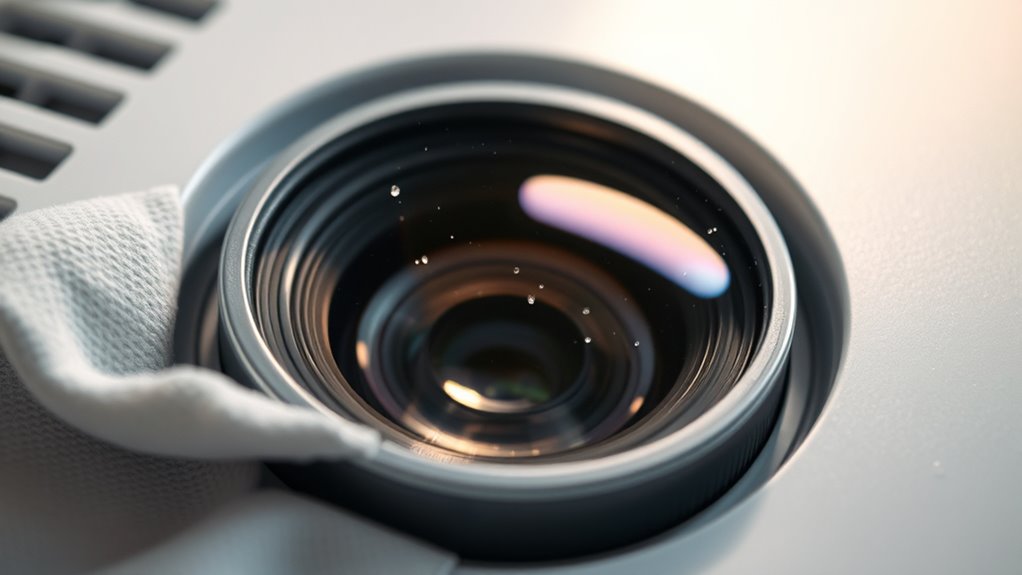
Inspect the Lens for Remaining Smudges or Dust
Have you checked the lens thoroughly after cleaning? Proper lens inspection guarantees no smudges or dust remain. Carefully examine the entire surface under good lighting, holding the projector at different angles. To confirm your dust removal was successful, consider these steps:
- Look for streaks, fingerprints, or smudges that might still be present.
- Check for any remaining dust particles, especially around edges or corners.
- Use a soft, lint-free cloth to gently wipe the lens again if needed.
- Confirm that the lens appears clear and free of debris before reassembling or turning on the projector.
A meticulous inspection guarantees excellent image quality and prevents future dust buildup, ensuring your projector stays in top condition.
Store Your Projector Properly to Prevent Future Dirt
After guaranteeing your projector lens is spotless and free of dust, proper storage becomes key to maintaining its cleanliness. Always store your projector in a clean, dry place away from direct sunlight and humidity. Use protective covers or lens caps to shield the lens when not in use. Proper storage prevents dust, dirt, and debris from settling on the lens surface, reducing the need for frequent cleaning. Keep the projector upright or in a position recommended by the manufacturer to avoid scratches or damage. Regularly check the storage area for dust buildup and clean the protective covers to ensure they remain effective. Taking these simple steps helps preserve your projector’s clarity and extends its lifespan, keeping your viewing experience crisp and dust-free.
Frequently Asked Questions
Can I Use Household Glass Cleaner on My Projector Lens?
You might wonder if household glass cleaner is safe for your projector lens. It’s tempting to use household cleaners, but they often contain chemicals that can harm lens coatings. To preserve your lens, avoid these products and opt for gentle, lens-specific cleaners. This approach ensures lens preservation and keeps your projector functioning at its best. Always follow manufacturer instructions to prevent damage and maintain excellent image quality.
How Often Should I Clean My Projector Lens?
You should clean your projector lens based on your lens cleaning frequency and your projector maintenance schedule. Typically, cleaning it every 3 to 6 months is enough, but if you notice dust or smudges affecting image quality, clean it sooner. Regular maintenance helps prevent buildup that could damage the lens. Remember, gentle cleaning is key—avoid harsh chemicals and use a soft cloth to keep your projector in top condition.
Is It Safe to Clean the Lens While the Projector Is Still Warm?
Thinking about cleaning your lens while it’s still warm? It’s better to let the lens cool down first, as high lens temperature can make cleaning safety tricky. When the lens is warm, delicate surfaces may be more vulnerable, risking scratches or smudges. For the safest, clearest results, wait until the projector has fully cooled, then gently clean your lens. Patience guarantees a pristine view and preserves your projector’s longevity.
What Should I Do if My Lens Gets Scratched Despite Precautions?
If your lens gets scratched despite precautions, don’t panic. You should consider lens repair options or professional scratch prevention services. Avoid trying to fix scratches yourself, as this could worsen the damage. Instead, consult a specialist for proper cleaning and repair. To prevent future issues, always handle your projector lens gently, use proper cleaning tools, and follow best scratch prevention practices. Regular maintenance helps keep your lens clear and damage-free.
Are There Professional Cleaning Services for Projector Lenses?
You might wonder if professional services can help with lens cleaning. Yes, many specialized companies offer professional cleaning services for projector lenses, ensuring thorough removal of dust and smudges without causing scratches. These experts use delicate techniques and proper equipment to maintain your lens’s clarity. Investing in professional cleaning can extend your projector’s lifespan and improve image quality, especially if you’re unsure about doing it yourself or worried about damaging the lens.
Conclusion
Cleaning your projector lens is like tending to a delicate garden—patience and care guarantee clarity blooms. With each gentle wipe, you nurture a clear view, letting your images shine brightly once again. Keep your tools and habits in harmony, and your projector will stand the test of time. Remember, a well-cared lens reflects not just your screen, but your dedication to quality. Clear vision begins with simple, careful steps—your gateway to endless cinematic journeys.