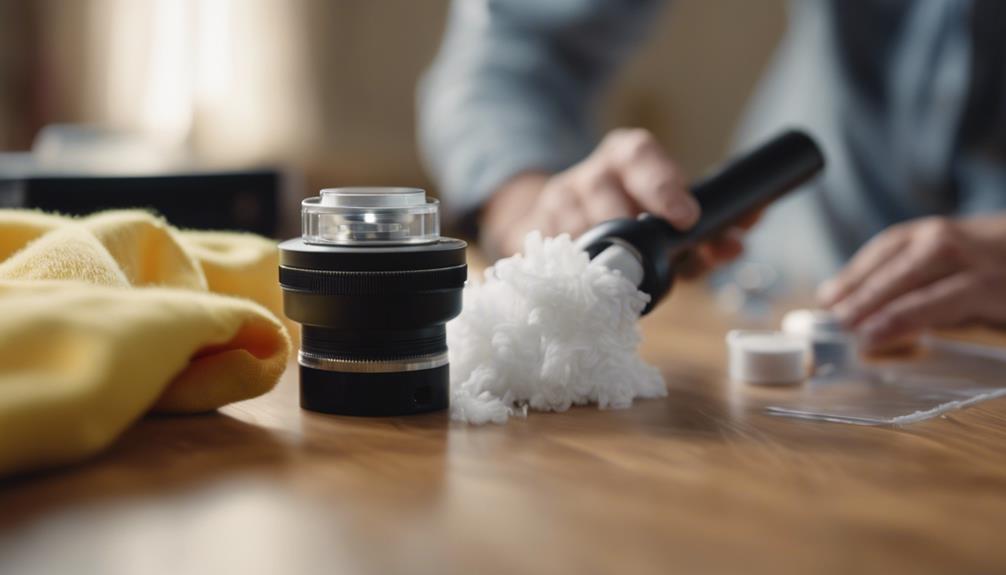
To properly clean your projector and its lens, start by powering it off and letting it cool for about 20 minutes. Use a blower to remove dust from the lens. Dampen a microfiber cloth and wipe the lens gently in a circular motion, avoiding direct application of cleaner to the lens. For stubborn smudges, use isopropyl alcohol on a lint-free cloth. Don't forget to dust the projector's exterior regularly and clean air filters every 3-6 months. Maintaining this routine guarantees clearer images and prolongs your projector's life; you'll find even more tips to enhance its performance.
Key Takeaways
- Power off the projector and let it cool for 20 minutes before starting the cleaning process.
- Use a blower to remove loose dust from the lens before applying any cleaners.
- Dampen a microfiber cloth with a safe lens cleaner and wipe the lens in a circular motion.
- After cleaning, use a dry microfiber cloth to eliminate any moisture or streaks from the lens.
SOULWIT 50 Pcs Self Adhesive Cable Management Clips, Cable Organizers Sticky Wire Clips Cord Holder for TV PC Laptop Ethernet Cable Desktop Home Office (Black)
🔷EASY TO USE: Simply peel and stick, making your home look tidier.
As an affiliate, we earn on qualifying purchases.
Importance of Cleaning Projectors

Cleaning your projector regularly is essential for maintaining sharp image quality and vibrant colors. Over time, dust accumulates on the projector lenses, which can greatly degrade the projected image. This buildup leads to blurred visuals and reduced brightness, making your viewing experience less enjoyable. By prioritizing cleaning, you'll enhance contrast and clarity, allowing the protective lens coatings to do their job effectively.
It's recommended to clean your projector lenses at least once a year, or more often if you're in a dusty environment. This routine maintenance prevents costly repairs or replacements that can arise from neglecting lens care. Users report noticeable improvements in visual clarity and a reduction in light spill after cleaning, highlighting the importance of keeping your equipment in top shape.
When you clean your projector, make certain you use the right cleaning solution and techniques to avoid damaging the lens coatings. Regular cleaning not only helps maintain high image quality but also extends the life of your projector. So, make it a habit to clean your projector, and you'll enjoy crisp, vibrant images for years to come.

SOULWIT 50Pcs Self Adhesive Cable Management Clips, Cable Organizers Wire Clips Cord Holder for TV PC Ethernet Cable under Desk Home Office (Black)
🔷SUPER EASY TO USE: Stick to clean surface, open tab, insert multiple cables, close the tab, enjoy the...
As an affiliate, we earn on qualifying purchases.
Recommended Cleaning Products
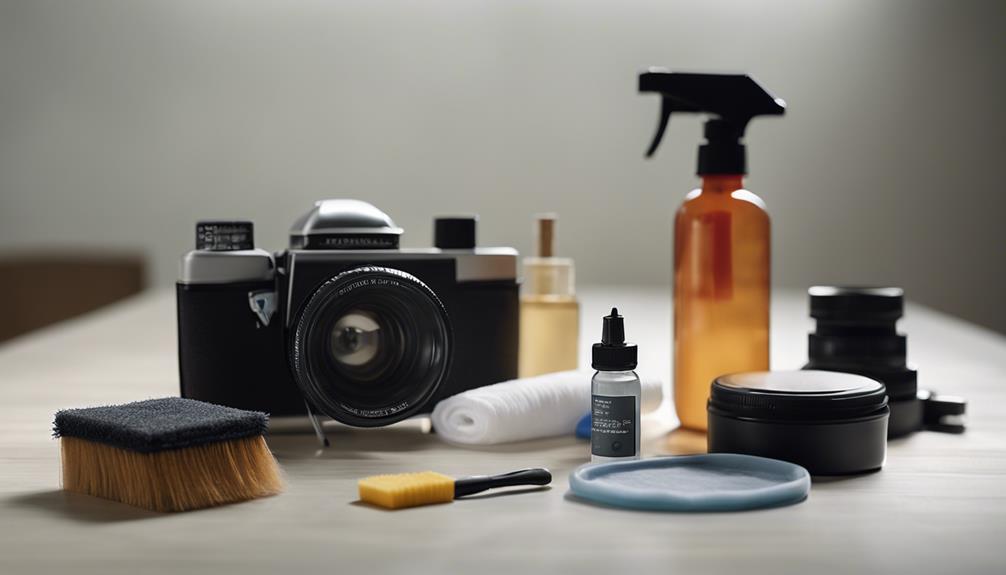
To keep your projector in excellent condition, you'll want to use specialized cleaning products designed for optical surfaces.
One of the best options is Peca Products Formula MC, a lens cleaner that safely cleans projector lenses without damaging their coatings.
For DIY enthusiasts, a combination of distilled water and Q-tips can effectively clean a projector while preventing mineral deposits that could scratch the lens.
When it comes to removing any dust, canned air works well, but steer clear of compressed air since it can introduce moisture.
Instead, consider using a soft brush to gently brush the lens before applying any liquid cleaners.
For stubborn smudges, you can use a few drops of isopropyl alcohol on a lint-free cloth to guarantee you don't harm the lens coatings.
Always opt for lens-cleaning paper over paper towels, as it's designed to avoid scratches and lint.
Finally, using a microfiber cloth helps maintain the integrity of your projector lens and guarantees ideal lens cleaning.
Keeping these products in mind will make the process of cleaning your projector straightforward and efficient.
![Smart 4K Projector [Google TV Stick Built-in & 360° Stand] with WiFi 6, Bluetooth 5.3, HDR10, 30W Hi-Fi, AI Auto Focus, Outdoor Portable Short Throw Movie Projector for Home Theater Bedroom Ceiling](https://m.media-amazon.com/images/I/41zno6cZMFL._SL500_.jpg)
Smart 4K Projector [Google TV Stick Built-in & 360° Stand] with WiFi 6, Bluetooth 5.3, HDR10, 30W Hi-Fi, AI Auto Focus, Outdoor Portable Short Throw Movie Projector for Home Theater Bedroom Ceiling
[Google TV Built-in | 10,000+ Apps | Voice Control] The smart projector with wifi and bluetooth features Google...
As an affiliate, we earn on qualifying purchases.
Cleaning Techniques and Best Practices
Using the right techniques can make all the difference in maintaining your projector's lens and guaranteeing peak performance.
Start by regularly inspecting the lens for dust and debris. When you notice any, it's best to clean it using a microfiber cloth and a lens-cleaning solution designed for optics. Avoid alcohol-based cleaners and paper towels, as these can damage the lens coatings and leave scratches.
Before applying any solution, use a manual lens blower or a lens brush to gently remove loose particles. This step prevents rubbing any remaining dust into the lens surface.
When you're ready to clean, apply the solution to your cloth—not directly to the lens. Wipe the lens in a gentle circular motion, starting from the center and moving outward. This technique matches the lens's polishing pattern and minimizes the risk of streaks or scratches.
Always follow the instructions provided with your cleaning products to guarantee you're using them correctly.

【Now with Netflix & 3000ANSI】Smart 4K Projector with WiFi and Bluetooth, VISSPL 3D Dolby Audio and Auto Focus Portable Outdoor Projector, Movie Home Theater Projectors for Bedroom/Ceiling
[ Netflix Ready - No Extra Devices Needed ] – VISSPL Smart Projector: No TV stick, no casting,...
As an affiliate, we earn on qualifying purchases.
Step-by-Step Cleaning Process

Powering off and unplugging your projector is the essential first step in the cleaning process. Allow it to cool for at least 20 minutes to prevent any damage. Once it's cool, use a blower to clear dust from the lens. This will help remove any loose particles before you start cleaning.
Next, dampen a microfiber cloth with a lens cleaning solution or distilled water. Gently wipe the lens in a circular motion, starting from the center and moving outward. This technique helps avoid scratches and effectively removes dust on the lens. Remember, never spray the cleaner directly on the lens; always apply it to the cloth first.
After cleaning, use a clean, dry microfiber cloth to remove any remaining moisture or streaks, ensuring the lens is completely dry. Replace the lens cap once you're done and store the projector safely.
Here's a quick reference table for your cleaning process:
| Step | Action |
|---|---|
| 1. Power Off | Unplug the power source |
| 2. Dust Removal | Use a blower to clear dust |
| 3. Cleaning the Lens | Gently wipe the lens in a circular motion |
| 4. Final Drying | Wipe with a dry cloth |
Advanced Cleaning Techniques

After you've completed the basic cleaning process, it's time to explore advanced techniques that can tackle tougher stains and guarantee your projector lens remains in pristine condition.
For stubborn dirt, consider using a soft brush to gently remove particles without touching the lens directly. This will help you avoid scratches while making a perceptible difference in cleanliness.
If you encounter dust in hard-to-reach areas, use compressed air to blow on the lens and eliminate debris.
Remember, never use harsh chemicals, as they can damage the lens coatings. Instead, if needed, mix mild soap with water for deeper cleaning. Moisten a lint-free cloth with this solution—just don't spray directly on the lens.
When cleaning, always wipe in a circular motion, starting from the center to the edges. For those tough smudges, repeat the process with a second cloth, making sure you remove all residue.
After cleaning, inspect the lens thoroughly to ascertain it's dry and spotless before reassembling your projector.
These advanced techniques are invaluable for theater owners and enthusiasts who want their equipment to perform at its best.
Maintenance Frequency and Tips

Regular maintenance is essential for keeping your projector in top shape and ensuring peak performance. To help you stay on track, follow these maintenance frequency tips designed for cleaning your projector effectively.
| Maintenance Task | Frequency | Tips |
|---|---|---|
| Clean projector lens | Every 100 hours | Use a microfiber cloth; don't scratch the lens. |
| Inspect lens | Once a year | Check for dust or smudges; deep clean if needed. |
| Dust exterior | Weekly | Keep debris away for better clarity. |
| Clean air filters & vents | Every 3-6 months | Replace filters after 100 hours to prevent overheating. |
Make sure to let the lens air dry completely before covering it again. If you're unsure about any aspect of maintenance, come join the discussion in the forum community. You'll find tips from fellow projector enthusiasts who know what you need to use to keep your projector in great condition. Remember, projectors are designed for peak performance, so taking care of them means you'll enjoy stunning visuals every time.
Frequently Asked Questions
How Often Should I Clean My Projector Lens?
You should clean your projector lens every 100 hours of use for peak performance. If you're in a high-use environment, consider inspecting it monthly. Always check your user manual for specific recommendations tailored to your model.
Can I Use Windex to Clean a Projector Lens?
You shouldn't use Windex to clean your projector lens. It can damage the anti-reflective coatings, reducing image quality. Stick to lens cleaners specifically designed for optical surfaces to keep your projector in top shape.
How Do You Deep Clean a Projector?
To deep clean your projector, power it off and unplug it. Remove dust with a soft brush, clean filters regularly, and consult a professional for internal components. Inspect it every 100 hours for necessary maintenance.
How Do You Clean a Burnt Projector Lens?
To clean a burnt projector lens, first assess the damage. Gently wipe minor burns with a microfiber cloth and lens cleaner, but for severe burns, you'll need to consult a professional for replacement.
Conclusion
Keeping your projector clean is like tending to a garden; with regular care, it flourishes and delivers vibrant images.
By using the right products and techniques, you guarantee that every presentation blooms with clarity.
Just as you wouldn't let weeds choke your flowers, don't let dust and grime dim your projector's brilliance.
Embrace these maintenance tips, and watch your projector shine like a well-tended landscape, ready to impress every audience with its vivid displays.