
To preserve image quality, you should regularly clean and maintain your projector optics. Start by inspecting the lens for dust and smudges, using a soft brush to dislodge particles. Opt for Kodak lens cleaning paper and a gentle optical cleaner when needed. Avoid harsh chemicals and cotton balls to prevent damage. Regular cleaning not only enhances clarity but also extends the projector's lifespan. Don't forget to maintain the projector case and lamp vents. Effective care prevents dust buildup, ensuring vibrant images. There's much more to explore about keeping your projector in top shape, so you might want to keep going!
Key Takeaways
- Regularly inspect and clean projector lenses using proper tools to prevent dust accumulation and maintain image clarity.
- Employ safe cleaning techniques, such as using microfiber cloths and avoiding direct application of cleaning solutions on lenses.
- Maintain the projector case and exterior by wiping down surfaces and using a vacuum with a soft brush to remove dust.
- Utilize filters and lens caps to protect optics from dust and enhance image quality, ensuring consistent performance.
- Establish routine maintenance schedules to identify and address potential issues early, preserving projector lifespan and image quality.

Official Licensed Google TV Smart Projector, HAPPRUN 4K UHD Home Theater with Dolby Sound, Wi-Fi & Bluetooth, Built-in Streaming Apps, Compatible with Games Consoles & Smartphone, Indoor & Outdoor Use
[ Built-in Official Licensed Google TV ] - Without additional equipment, the smart projector can directly access Netflix,...
As an affiliate, we earn on qualifying purchases.
Importance of Regular Maintenance

Maintaining your projector isn't just a good idea; it's fundamental for getting the most out of your investment. Regular maintenance, particularly cleaning the lens and external components, plays a significant role in enhancing performance and extending the lifespan of your device.
When you perform routine inspections, you can quickly identify dust accumulation and other potential issues before they start affecting image quality.
Proper care practices are essential. Using the right cleaning materials and techniques helps you avoid damaging sensitive lens coatings and internal components.
The cleaner your environment, the less often you'll need to clean your projector. A dust-free space not only allows for ideal image clarity but also contributes to the longevity of your equipment.
Don't underestimate the benefits of scheduled professional servicing. Having experts handle internal cleaning guarantees that all components remain in excellent condition, leading to consistent image quality over time.
![Projector with 5G WiFi and Bluetooth, Native 1080P Projector[Projector Screen Included], Full HD 18000LM Movie Projector, 100" Display Home Theater, Compatible with Phone/Laptop/TV Stick](https://m.media-amazon.com/images/I/51tJ+dTl5qL._SL500_.jpg)
Projector with 5G WiFi and Bluetooth, Native 1080P Projector[Projector Screen Included], Full HD 18000LM Movie Projector, 100" Display Home Theater, Compatible with Phone/Laptop/TV Stick
【2.4G/5G Dual-Band Wifi & Bluetooth Connection】 Roconia projector supports screen mirroring on iOS, Android and Windows devices without...
As an affiliate, we earn on qualifying purchases.
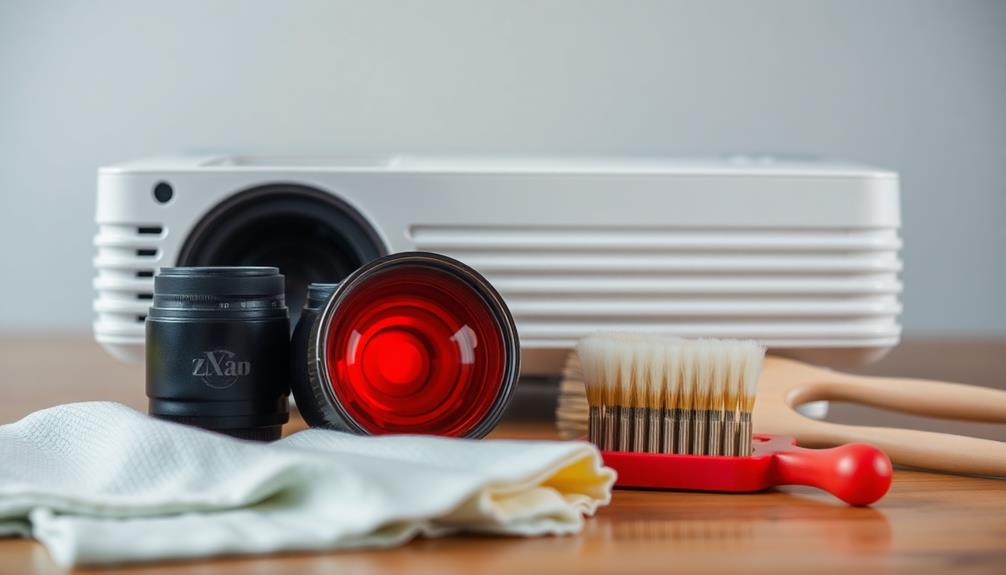
Essential Cleaning Tools
To keep your projector lenses in top shape, you'll need the right cleaning tools.
Using Kodak lens cleaning paper, a versatile lens pen, and microfiber cloths can make a significant difference in maintaining clarity.
Don't forget to have soft brushes and specialized cleaning solutions on hand for those tougher smudges.
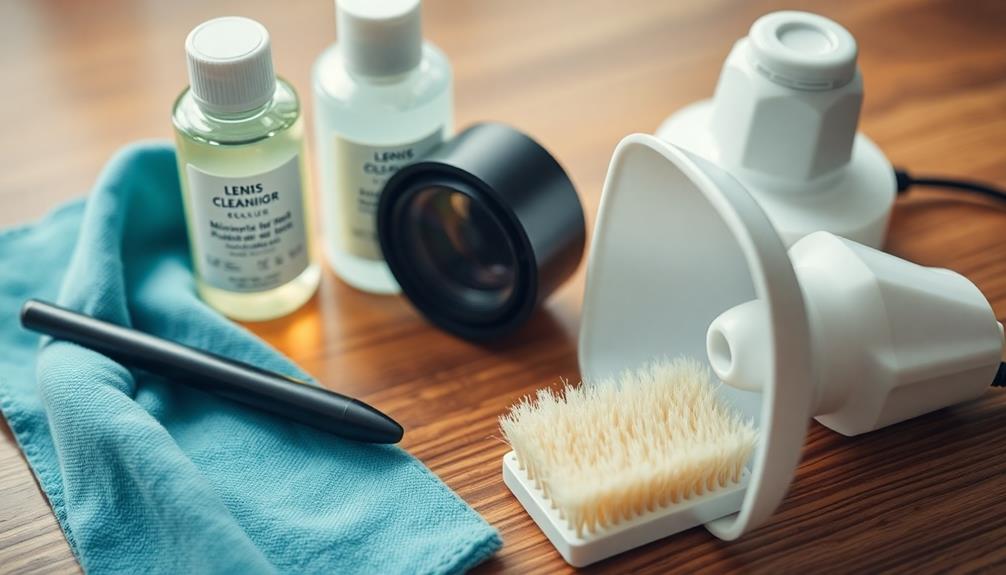
Recommended Cleaning Supplies
Keeping your projector lenses clean is essential for ideal performance, and having the right cleaning supplies makes all the difference. To maintain your projector lens in top condition, consider these recommended cleaning supplies:
- Kodak lens cleaning paper: This option minimizes scratches compared to other materials, ensuring a safer clean.
- Soft cloths or microfiber cloths: Perfect for gentle dusting, these materials help maintain the lens surface without causing damage.
- Lens pen: Designed for optical surfaces, this tool provides dual functionality for dust removal without direct contact with the lens.
For stubborn smudges, high-purity alcohol or professional cleaning solutions can be effective, but for regular use, pure water is often the safer choice.
You'll want to avoid using cotton balls or harsh chemicals, as these can leave fibers or residues that might harm the lens coating, ultimately affecting image quality.
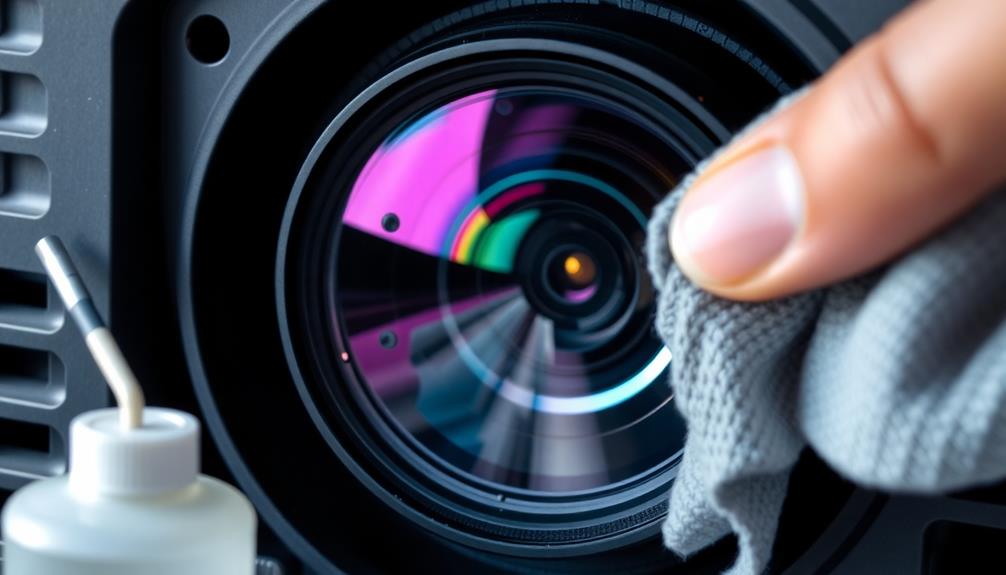
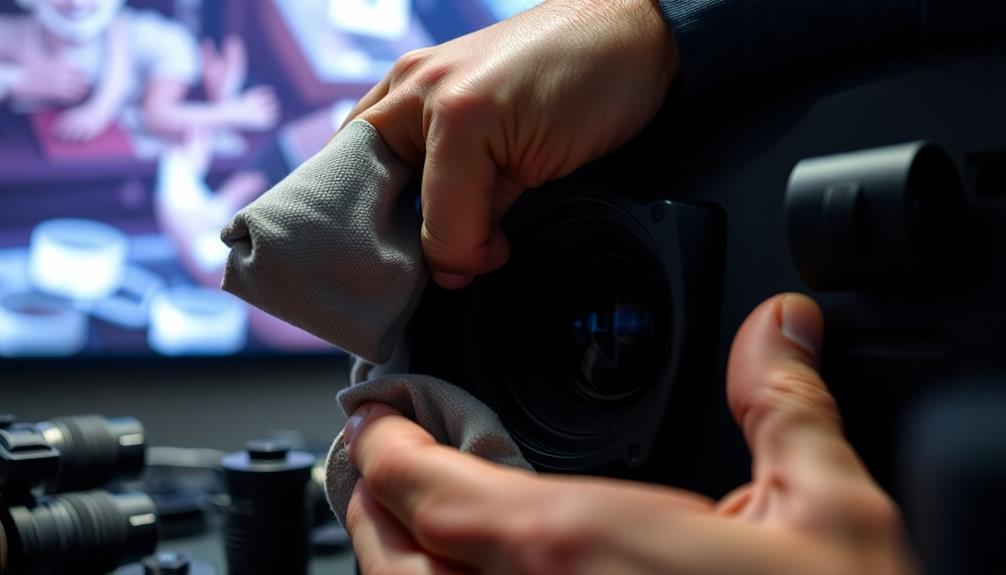
Safe Cleaning Techniques
Proper cleaning techniques are just as important as having the right supplies when it comes to maintaining your projector's performance. Start by using a soft brush, like a 0.5 mm brush, to gently dislodge any dust particles on the lens. This step's vital because it prevents scratches before you use any cleaning solution.
When you're ready to lens clean, opt for Kodak lens cleaning paper and a solution specifically designed for optical surfaces. These products effectively remove smudges without risking damage. After brushing, use an ultra-microfiber cloth to wipe the lens gently. Unlike traditional materials, ultra-microfiber reduces the chances of lint and scratches.
Avoid using cotton balls with liquids, as the fibers can stick to the lens surface. Always apply cleaning solutions to your cloth rather than directly onto the lens to prevent pooling, which can cause damage.
For stubborn residues, you might consider using isopropyl alcohol (IPA) sparingly and only when absolutely necessary. Excessive use can harm the lens coating, compromising your projector's image quality.

Epson Home Cinema 980 3-Chip 3LCD 1080p Projector 4,000 Lumens Color and White Brightness, Streaming/Gaming/ Media Room, Built-In Speaker, Auto Picture Skew, 16000:1 Contrast, 2 HDMI Ports
Exceptional Picture Quality — Provides stunning, detailed 1080p images and fast data processing that’s optimized for fast-action sports,...
As an affiliate, we earn on qualifying purchases.
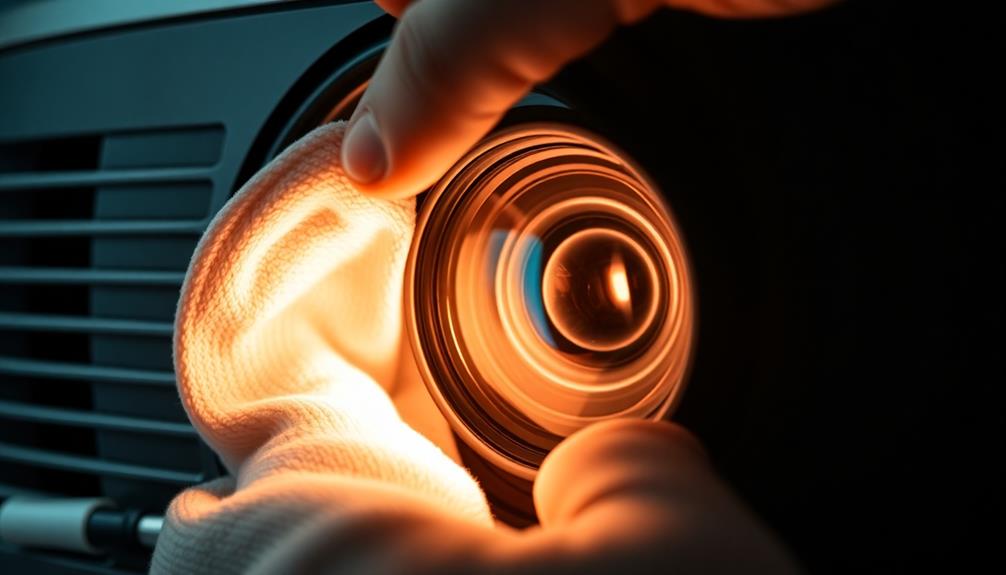
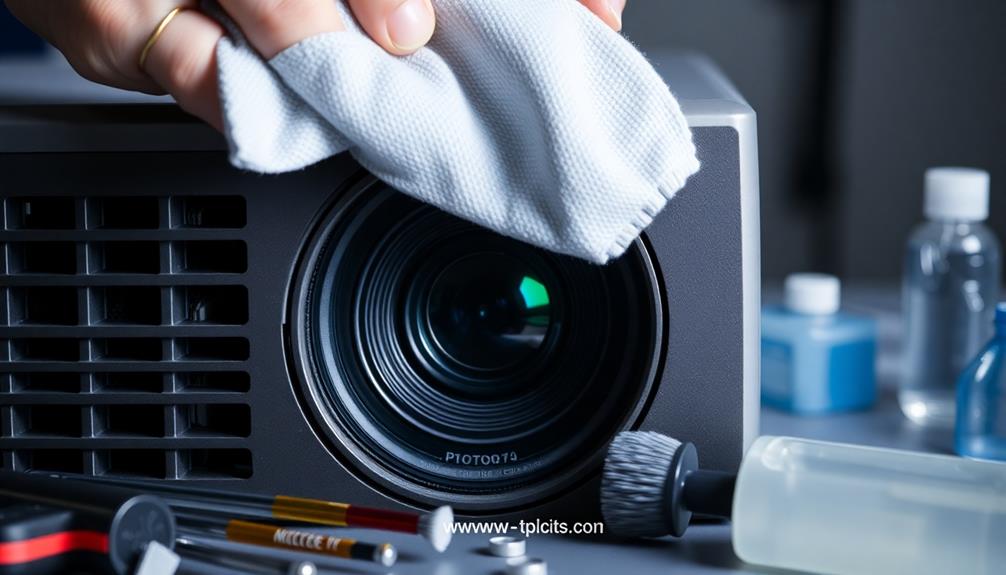
Step-by-Step Lens Cleaning

Cleaning your projector lens is vital for maintaining ideal image quality and performance. Follow these simple steps to guarantee your lens stays in top condition.
- Inspect the lens: Look for visible dust or smudges. Use compressed air to gently dislodge any loose particles.
- Moisten the cleaning material: For stubborn smudges, dampen lens-cleaning paper or a soft microfiber cloth with distilled water or a recommended lens cleaner.
- Clean gently: Apply the damp cloth in a gentle circular motion, avoiding cotton balls or abrasive materials that could scratch the lens.
Before cleaning, make sure the lens has cooled for at least 30 minutes.
After you've cleaned it, allow the lens to air dry completely before reassembling or using the projector. This step is essential to prevent moisture buildup that could compromise performance.
Regular maintenance is key, so schedule light cleaning routines at least once a month.
This helps maintain lens clarity and prevents dust accumulation that could impact your image quality.
1500 ANSI Official Licensed Google TV Smart Projector, HAPPRUN 4K Full HD Home Theater with Auto Focus, Dolby Sound, Wi-Fi Bluetooth, Built-in Apps, Compatible with Phone & PC, Indoor & Outdoor Use
[ Built-in Officially Licensed Google TV ]-Enjoy the reliability of an officially certified Google TV projector. Stream Netflix,...
As an affiliate, we earn on qualifying purchases.
Maintaining the Projector Case

When it comes to maintaining your projector case, start by powering off and unplugging the device for safety.
Use a soft cloth to wipe down the exterior and keep dust at bay, and for tough stains, a damp cloth with mild detergent will do the trick.
Regular cleaning not only keeps your projector looking good but also helps it run smoothly for years to come.
Exterior Cleaning Techniques
Maintaining the projector case is essential for guaranteeing both its longevity and performance. Start by powering off and unplugging the projector to prevent any electrical hazards. Use a soft cloth to gently wipe the surface of the lens and the projector case, removing surface dust. If you encounter stubborn stains, a damp cloth with neutral detergent will work wonders without damaging the finish.
To keep your projector in prime shape, consider these cleaning techniques:
- Wipe down the projector case regularly to keep it dust-free.
- Use a vacuum with a soft brush attachment to clean the vents and guarantee maximum airflow.
- Avoid harsh chemicals like alcohol or wax, as they can damage the material.
Keep an eye out for any dust on the lens, as it can affect image quality. Establishing a routine cleaning schedule will help maintain a dust-free environment around your projector.
Don't forget to check the lens cap, too, to guarantee it's clean and ready for use. By implementing these techniques, you'll preserve the performance and lifespan of your projector.
Dust Prevention Strategies
How can you effectively keep dust at bay and protect your projector? Start by regularly wiping the exterior of your projector case with a soft cloth. This simple cleaning routine removes surface dust, preventing it from entering the internal components and affecting image quality.
When your projector isn't in use, store it in a clean, dust-free environment. This greatly reduces the likelihood of dust settling on the case and lens.
Additionally, use a vacuum with a soft brush attachment to clean the vents. This maintenance step prevents dust buildup that could impact internal cooling and overall performance.
Be mindful of where you place your projector. Avoid high foot traffic areas and locations near open windows, as these conditions can increase dust exposure.
Care for Lamp Vent Screens

Care for Lamp Vent Screens
Regular care for lamp vent screens is vital to keep your projector running smoothly and efficiently. Neglecting these screens can lead to debris buildup, which impacts airflow, projector performance, and ultimately, image quality.
Proper maintenance is particularly important for gaming enthusiasts, as high refresh rates enhance gaming experiences. To guarantee safety during maintenance, always turn off and unplug your projector before you start cleaning.
Here's how to effectively care for your lamp vent screens:
- Use a vacuum with a crevice attachment: This allows you to remove dust without direct contact with internal components.
- Follow specific model instructions: Proper lamp removal helps you access the vent screens without causing damage.
- Avoid touching the glass of the lamp directly: This prevents contamination that could lead to image quality issues.
Protecting Projection Optics
To keep your projection optics in top shape, it's crucial to implement lens protection techniques and regular maintenance practices.
Using filters and lens caps can greatly enhance image quality and shield your equipment from dust and scratches.
Lens Protection Techniques
When it comes to protecting your projector's optics, implementing effective lens protection techniques is essential.
These methods not only help maintain image quality but also reduce dust accumulation and the need for frequent cleaning.
Here are some practical techniques you can adopt:
- Attach a circular polarizer filter: This enhances image contrast while safeguarding against dust and scratches.
- Use lens caps: When the projector's idle, covering the lens prevents dust from settling, ensuring it remains clean and ready for use.
- Secure filters with double-sided tape: If your lens lacks screw provisions, this provides extra protection against environmental factors.
Regular Maintenance Practices
Maintaining your projector's optics is essential for guaranteeing crisp, clear images and ideal performance. Implementing regular inspections of the lens for dust and smudges helps you maintain image clarity and guarantees peak performance. Establishing light cleaning routines with appropriate materials, like microfiber cloths, can notably reduce the frequency of deep cleaning.
To protect your projector further, consider the following preventive measures:
| Maintenance Practice | Frequency | Benefits |
|---|---|---|
| Regular Inspections | Weekly | Detects dust/smudges early |
| Light Cleaning Routines | Bi-weekly | Maintains image clarity |
| Preventive Measures | Monthly | Protects lens from dirt |
| Professional Servicing | Annually | Addresses internal dust issues |
Keeping your projector in a dust-free environment and storing it with the lens cap on when not in use minimizes dirt accumulation on the optics. Finally, scheduling professional servicing for internal cleaning when necessary guarantees that any internal dust issues are resolved without risking damage to your projector. By following these practices, you'll enhance your projector's longevity and performance.
Importance of Filters
Filters play an essential role in protecting your projector's optics and enhancing image quality. By using the right filters, you can markedly reduce glare and improve contrast, making your viewing experience much more enjoyable.
Regular maintenance of these filters not only preserves their effectiveness but also safeguards the underlying projection optics from potential damage.
Consider these key benefits of using filters:
- Circular polarizer filters can boost image contrast, ensuring vibrant colors and sharp details.
- Lens caps, when your projector's not in use, keep dust away, minimizing cleaning frequency and maintaining image clarity.
- Double-sided tape can secure filters on lenses that don't have a screw provision, preventing any slippage during operation.
Implementing high-quality filters is vital for prolonging the lifespan of your projector. They help maintain consistent image quality, ensuring you get the most out of your investment.
Remember to inspect and clean your filters regularly to keep them functioning at their best. By prioritizing these practices, you'll enhance your overall projection experience while protecting your valuable equipment.
Common Cleaning Mistakes
Many projector owners make common cleaning mistakes that can harm their lenses and affect image quality. One major error is using cotton balls with liquids; they can leave behind fibers that stick to the lens, potentially causing scratches. Instead, opt for microfiber cloths that won't shed.
Blowing air directly from your mouth onto the lens is another mistake. This can introduce saliva, which may damage the lens coating. Remember, that coating is essential for ideal performance.
Frequent and rigorous cleaning can backfire too. Excessive contact with the lens surface often leads to more haze rather than clarity, resulting in scratches. When you apply cleaning solutions, always wet the cloth first; dry materials can be abrasive and lead to damage.
Dust Impact on Performance

Even a thin layer of dust on your projector lens can impact image quality, making it crucial to keep the lens clean.
While minor dust particles mightn't be noticeable, excessive dust accumulation can blur your images and diminish contrast, leading to a subpar viewing experience.
Regular cleaning is essential for maintaining peak performance.
Consider the effects of neglecting dust on your projector:
- Reduced image clarity: Dust can obscure details and make images look hazy.
- Increased lens damage risk: Using harsh cleaning methods on heavily soiled lenses can harm delicate coatings.
- Frequent cleaning necessity: Letting dust build up will force you to clean more often, disrupting your setup.
Troubleshooting Image Issues
Neglecting lens cleaning can lead to various image issues that may affect your viewing experience. For instance, blurred images often indicate lens contamination or internal dust buildup. When you notice these symptoms, it's essential to act quickly, as they can require professional servicing for thorough cleaning.
If your projector exhibits contrast loss or image distortion, you should check for internal dust and particles that may not be visible on the lens surface. Regular inspections of both the lens and internal components can help you identify potential issues early, preventing significant degradation of image quality.
When cleaning, always use appropriate cleaning techniques. Excessive or harsh methods can damage the lens coating and worsen image clarity. Use a microfiber cloth and specialized lens cleaner to avoid scratching the surface.
For persistent lens issues, consulting the manufacturer's guidelines is wise. If the problems continue, seeking professional assistance guarantees proper maintenance and prevents further complications.
Professional Servicing Recommendations
When it comes to maintaining your projector, professional servicing is often a necessity for keeping it in top shape. Scheduling a professional maintenance visit at least once a year can greatly enhance your projector's ideal performance and image quality.
Technicians specialize in cleaning internal components and can reach areas that are tricky for you, such as:
- The optical engine, where dust accumulation can degrade performance.
- Internal lens assemblies, which require careful handling to avoid damage.
- Other hard-to-access areas that might harbor dust and dirt.
Regular inspections by professionals can catch wear and tear before they lead to bigger issues, ensuring that your projector remains functional and efficient.
These experts are equipped with the right tools and knowledge to provide thorough maintenance, extending your projector's lifespan. With their help, you can maintain high-quality image output and enjoy a seamless viewing experience.
Don't overlook the importance of professional servicing—it's a key investment in preserving the performance and longevity of your projector.
Frequently Asked Questions
How to Improve Projector Image Quality?
To improve projector image quality, regularly adjust settings like brightness and contrast, guarantee proper resolution, and keep the projector's lens clean. Use high-quality content and maintain an ideal viewing environment for the best experience.
How Do You Clean Projector Optics?
To clean projector optics, power off and unplug it first. Use compressed air to remove dust, then gently wipe the lens with a soft cloth and lens cleaner, avoiding harsh chemicals or abrasive materials.
Do Projectors Require Maintenance?
While you might think projectors run endlessly, they actually need maintenance. By cleaning them regularly, you'll guarantee they perform at their best, extending their lifespan and enhancing your overall viewing experience greatly.
What Is the Preventive Maintenance of a Projector?
To prevent issues, regularly inspect your projector for dust, keep it in a clean environment, and store it properly. Following manufacturer guidelines for cleaning and scheduling professional servicing will enhance its longevity and performance.
Conclusion
By regularly cleaning and maintaining your projector, you're not just preserving image quality; you're enhancing your viewing experience. Think of it this way: a well-maintained projector is like a sharp eye, delivering vivid details and crisp colors. Don't let dust and neglect dim your visuals. Commit to routine care, and your projector will reward you with stunning performances for years to come. So, why wait? Start your maintenance journey today and see the difference for yourself!