Building your own custom projector screen can be a fun and rewarding DIY project. Start with a classic white sheet for a budget-friendly option, or consider painting a smooth wall with non-reflective paint for enhanced image quality. For a more polished look, frame the screen using durable materials like wood or PVC pipes. Guarantee proper tension to avoid wrinkles, and choose the right location for ideal viewing. With some basic DIY skills, you can create a screen that meets your specific needs and enhances your movie nights. Explore further for tips on material selection and construction techniques!
Key Takeaways
- Choose a method for your projector screen, such as a classic white sheet or a painted wall, based on your budget and space requirements.
- Ensure proper surface preparation by filling imperfections, cleaning, and using painter's tape to outline your desired screen dimensions.
- Select high-quality, non-reflective paint or a suitable projection surface for optimal image quality and contrast.
- Maintain screen tension by securely stretching the material across the frame and ensuring it is tightly fastened to prevent wrinkles.
- Consider portability and storage solutions, especially if using PVC pipe frames, for easy assembly and transport of your projector screen.
Classic White Sheet Method
When it comes to creating a DIY projector screen, many find the Classic White Sheet Method to be a simple yet effective solution. This method involves using a smooth, high thread count classic white sheet as a cost-effective projection surface, which guarantees clear and vibrant image quality.
To enhance your viewing experience, consider investing in a good sound system configuration like a 5.1 setup for immersive audio essential components. To make sure your setup is sturdy, you can use grommets or heavy-duty tape, allowing you to hang the sheet easily with bungee cords or hooks.
Accurate sizing is vital, so grab a measuring tape to determine the right dimensions for the wall or frame where the screen will go. Before you set it up, take a moment to iron the bedsheet; this step helps eliminate wrinkles that could distort the projected image, creating a flat and smooth surface for best projection.
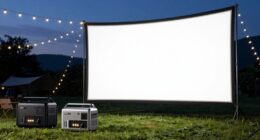
This technique is particularly ideal for temporary setups, like outdoor movie nights. Since it's simple and affordable, it's perfect for those who want a quick and effective projector screen without investing in permanent solutions.
Painted Wall Method

When you choose the Painted Wall Method for your projector screen, proper surface preparation is key to achieving great results.
It's important to take into account the environment where the screen will be set up, as factors like lighting can greatly affect image quality.
You'll want to make sure the wall is smooth and clean before applying the paint for the best image quality.
Key Factors in Choosing a Home Cleaning Service can also help you maintain the wall's condition over time.
Let's explore the steps for preparing the surface, application techniques, and selecting the right paint for your space.
Surface Preparation Steps
To create an ideal surface for your DIY projector screen using the painted wall method, start by addressing any imperfections in the wall. Fill any holes or cracks with spackle, then sand the area smooth to achieve a uniform base. This step is essential for guaranteeing your projector screen paint adheres properly and provides a flawless finish.
Additionally, it's important to verify that the wall is dry and clean to prevent any debris from affecting the final result. Regular maintenance of the wall surface can also help avoid issues that may arise from moisture or dust, similar to how clogging remedies can prevent toilet issues.
Next, use painter's tape to outline the dimensions of the screen area. Make sure it's level and positioned correctly for peak viewing. This will help guide your painting and prevent any mishaps.
Choose a high-quality projector screen paint that's non-reflective, like Sherwin-Williams ProClassic Smooth Enamel Satin Extra White. This type of paint is designed for peak image clarity, greatly enhancing your viewing experience.
When it's time to paint, use a roller to apply the projector screen paint for a smooth finish. Allow it to dry completely before removing the painter's tape for clean edges.
For even better results, consider painting the surrounding wall a darker, non-reflective color to minimize stray light and improve overall image quality. This meticulous surface preparation will set you up for projector screen success.
Application Techniques
Applying your projector screen paint effectively is vital for achieving the best image quality. Start by preparing your wall surface; fill any holes and sand it smooth to guarantee an even application of paint. This step is fundamental for an ideal screen material.
Once your surface is ready, use painter's tape to outline the desired screen area, making sure it's level and aligned correctly. To enhance the quality further, consider utilizing well-draining soil for any plants in the room, which can help maintain a comfortable humidity level.
Now, it's time to apply your specialized projector screen paint. Using a paint roller, apply a coat evenly over the taped area for a uniform finish that enhances image quality and color accuracy. If your room has high ambient light, consider using a light gray paint. This choice can remarkably improve contrast and overall image quality.
After the paint dries, carefully remove the painter's tape to reveal a clean, sharp edge, giving your screen a professional look.
Optimal Paint Selection
Choosing the right paint is key to maximizing your projector screen's performance. For the best image quality and color accuracy, consider using non-reflective, extra white paint, like Sherwin-Williams ProClassic Smooth Enamel Satin Extra White. This type of paint enhances brightness and detail in your projected images, and implementing a well-structured content strategy can further improve your overall project outcomes, such as your viewing experience effective clustering improves user experience.
However, if you're in a room with high ambient light, opt for a light gray paint instead. This can improve contrast and visibility, giving you ideal projection performance.
Before you start painting, verify the wall surface is well-prepared. Fill any holes and sand the wall smooth to avoid imperfections that could distort the image. It's also wise to apply projector screen paint specifically designed for this purpose, as it usually provides superior results compared to standard wall paints.
Lastly, don't forget to test the paint compatibility with your wall surface before applying it. This step guarantees proper adhesion and durability, so your projector screen setup stands the test of time.
Fixed Frame Method

When you're choosing materials for your fixed frame, think about the best options that'll hold up over time.
Consider incorporating elements that reflect a cozy aesthetic, such as using wood for a rustic touch and creating a space that feels welcoming, similar to a modern farmhouse bedroom.
You'll also want to guarantee the screen is tensioned correctly to avoid any wrinkles, which can disrupt your viewing experience.
Let's explore how to select the right frame materials and apply effective screen tension techniques.
Frame Material Selection
Selecting the right materials for your fixed frame projector screen is essential to achieving a sturdy and aesthetically pleasing setup. Here are some options to take into account for your frame material selection:
| Material | Features |
|---|---|
| Kiln-dried Poplar Wood | Resistant to warping, customizable appearance |
| Galvanized Metal Pipes | Durable, weather-resistant, easy to construct |
| PVC Pipes | Lightweight, budget-friendly, portable |
| Frame Dimensions | Confirm dimensions fit your desired screen size |
| Square Frame | Verify corner-to-corner lengths are equal |
Kiln-dried poplar wood is great if you want a sleek look that can resist warping. For a more robust choice, galvanized metal pipes are ideal for both indoor and outdoor setups, thanks to their durability. If you're on a budget or need something portable, PVC pipes are lightweight but keep in mind they could struggle with wind if placed outdoors.
Regardless of the material you choose, be certain your frame dimensions accommodate your projector screen size, including any desired border. Finally, check that your frame is square to maintain a flat screen surface for peak image quality.
Screen Tension Techniques
Achieving ideal screen tension is vital for a flawless viewing experience with your fixed frame projector screen. To guarantee optimal tension, securely stretch the screen material across the frame and staple it at regular intervals.
Start from the center and work your way towards the edges; this method helps maintain even tension and prevents wrinkles or distortion during projection. Additionally, consider using a DIY Kitchen Wall Decor approach to creatively enhance your viewing area, making it not only functional but also aesthetically pleasing.
Before finalizing your attachment with staples or adhesive, use a measuring tape to verify that the screen material is taut and evenly aligned on all sides. This step is significant in achieving a smooth projection surface.
Consider incorporating a tensioning system featuring adjustable corner brackets or clamps. These allow for fine-tuning the screen's tautness post-installation, guaranteeing a perfectly flat surface.
Choosing high-quality screen materials, like blackout fabrics, contributes to lasting tension under varying environmental conditions. Regularly inspect the screen for tension and integrity over time; adjust as necessary to address any sagging or loosening caused by humidity or temperature changes.
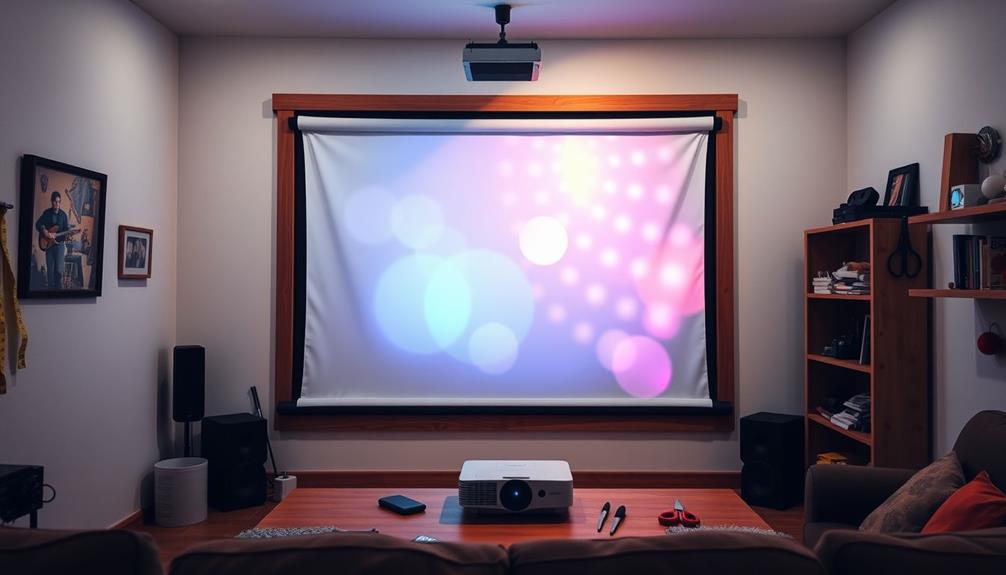
Pull-Down Screen Method

The pull-down screen method offers a sleek solution for anyone wanting a versatile projector screen that doesn't take up permanent space. You can use white blackout cloth or specific projector screen material, which can be conveniently retracted when not in use. This feature makes it perfect for multi-purpose rooms where you need flexibility.
Additionally, enhancing your workspace with elements that promote creativity and focus, such as a cottagecore home office, can further improve your viewing experience and overall productivity.
To install your pull-down screen, secure mounting brackets that attach the roller mechanism to a wall or ceiling. This guarantees the screen operates smoothly and maintains the right tension. One of the best aspects of this method is its adjustability; you can set the screen to various heights to optimize viewing levels based on your seating arrangement and projector setup.
The pull-down screen is also suitable for both indoor and outdoor use, offering a clean, unobtrusive look when retracted. This enhances the overall aesthetics of your space.
Just remember to select a durable roller mechanism to assure longevity and reliable performance, especially if you plan to use it frequently. By choosing this method, you'll achieve a professional-looking setup that's easy to manage.
PVC Pipe Frame Method

When you're ready to set up a DIY projector screen using the PVC Pipe Frame Method, you'll need a few key materials.
This method isn't only cost-effective but also allows for customization based on your space and preferences. You'll cut and assemble the PVC pipes into a sturdy frame and stretch your projection fabric over it.
Plus, the lightweight design makes it easy to transport and store when you're not using it.
Consider incorporating energy-efficient appliances into your setup to minimize power consumption.
Materials Needed Overview
Constructing your own projector screen using the PVC pipe frame method requires a few vital materials. Start by gathering six 1-inch diameter PVC pipes and eight 90-degree elbow connectors. These will form the structure of your PVC frame, providing the necessary support for your screen.
To guarantee a clean and effective setup, consider how to efficiently manage any potential pet hair that may accumulate in the area; using a vacuum with a self-cleaning brush roll can help maintain a neat environment.
Next, you'll need a 6 ft x 8 ft white tarp or blackout cloth, which will serve as the projection surface. This fabric is essential for achieving the best image quality.
To secure the blackout cloth to the frame, you can either use PVC cement or create sewn pockets along the edges. A hacksaw will be necessary to cut the PVC pipes to the desired lengths, while a drill will help you create holes for securing the tarp.
Don't forget to have heavy-duty rope on hand; this will be useful for hanging the frame or securing the tarp, guaranteeing stability whether you're indoors or outdoors.
Lastly, double-check that all connections are tight, and the frame is level and sturdy. This'll make sure your new projector screen can withstand the tension of the attached fabric and deliver a great viewing experience.
Assembly Steps Explained
Starting your assembly with the PVC pipe frame involves cutting six sections of 1-inch diameter PVC pipes to your preferred lengths. Make certain to take into account any additional height needed for the screen setup. Next, connect the pipes using 90-degree connectors to form a rectangular frame that will securely hold your screen material.
Here's a quick overview of the assembly steps:
| Step | Description |
|---|---|
| 1 | Cut six PVC pipe sections to size for the frame. |
| 2 | Assemble the frame using 90-degree connectors. |
| 3 | Drill holes in the corners for securing the screen material. |
Once your frame is constructed, lay the white blackout cloth or projector screen fabric flat. Pull it over the frame, using PVC cement or sewn pockets to attach the fabric, making sure there are no wrinkles. Finally, check the stability and levelness of the frame before mounting it in your desired location. This will guarantee your DIY Projector Screen provides ideal projection quality for your viewing experience!
Portability and Storage Tips
One of the major advantages of using the PVC pipe frame method is its portability, making it perfect for those who want a flexible viewing solution. You can easily disassemble the screen, allowing for compact storage when it's not in use.
Opt for lightweight 1-inch diameter PVC pipes; they're simple to transport without adding much weight to your load.
To keep the fabric taut and wrinkle-free during both setup and storage, secure it to the frame using PVC cement or sewn pockets. When you're ready to store your frame, label each PVC section to guarantee quick assembly later. This way, you won't waste time fumbling around when you want to set it up again.
Consider investing in a carrying bag or case for your disassembled frame and fabric. This will protect your materials from damage during transport, making sure everything stays in good condition for your next movie night or outdoor event.
With these portability and storage tips, your DIY projector screen will be easy to set up, take down, and store, giving you a hassle-free viewing experience whenever you need it.
DIY Vs. Purchased Screens

While many people opt for purchased projector screens for convenience, a DIY approach can often provide superior value and customization. By building your own screen, you can save hundreds of dollars, allowing you to invest in a higher-quality projector or sound system instead.
Customization is one of the biggest advantages of a DIY screen. You're able to tailor the dimensions and materials to fit your specific room requirements and personal preferences, ensuring an ideal viewing experience.
When it comes to quality image projection, DIY setups can rival or even surpass commercial options. Using materials like high thread count sheets or specialized projector screen paint, you can achieve excellent results that match your needs.
Plus, DIY projects allow for easier self-maintenance and repairs, reducing long-term costs that come with professional services for purchased screens.
While purchased screens offer convenience, they don't always guarantee better quality. Many DIY methods can effectively produce superior viewing experiences when executed properly.
Ultimately, investing time and effort into a DIY projector screen can lead to impressive results that suit both your budget and your space.
Screen Location Considerations

Choosing the right location for your DIY projector screen can greatly enhance your viewing experience. Start by evaluating your available space and selecting a wall that minimizes light interference. Ideally, you want a spot that's not exposed to direct sunlight.
Position the screen 24-36 inches off the floor to guarantee comfortable viewing angles and reduce neck strain for everyone watching.
Next, consider the projector's throw distance. Most projectors follow a 2.0 throw ratio, so calculate the best distance between the projector and the screen for a clear image.
Additionally, evaluate your seating arrangement. Confirm all viewers have a clear line of sight to the screen, with the seating distance being approximately 1.5 to 2.5 times the screen width for the best experience.
If you're setting up outdoors, think about variable weather conditions and ambient light. Choose stable ground that allows for adequate seating and guarantees the screen remains taut.
Screen Material Options

When it comes to selecting the right material for your DIY projector screen, several options can greatly impact your viewing experience. A high thread count white bedsheet is an affordable choice, but you'll need to keep it wrinkle-free for the best image quality.
If you're looking for something that blocks light effectively, consider using white blackout cloth. It's budget-friendly and enhances image clarity, making it a favorite among DIY enthusiasts.
Another great option is projector screen paint, which is specially designed for application on walls. This paint creates a reflective surface that boosts both image quality and color accuracy, although it does require proper preparation for the best results.
If you want something lightweight and portable, large foam boards are a solid choice. You can wrap them in reflective fabric to enhance brightness, providing a smooth projection surface.
Lastly, repurposing white or light-colored roller blinds offers a space-saving and retractable solution, allowing you to adjust the screen height easily.
Each of these materials has its pros and cons, so choose what best fits your needs and budget for an ideal viewing experience.
Frame Construction Techniques

Once you've selected the perfect material for your DIY projector screen, it's time to move on to constructing a sturdy frame. Start by measuring the desired dimensions of the screen, keeping in mind any border size you want. This guarantees the final frame fits perfectly around the projection area.
Cut your wooden beams to the specified lengths, and for larger screens, include internal vertical supports to enhance stability and prevent sagging.
Next, use L and T-brackets to securely join the beams at the corners. This will create a robust structure that can withstand the tension of the screen material. As you assemble, regularly verify that the corner-to-corner diagonal lengths of the frame are equal. This step is vital for confirming that your frame is square and properly aligned.
Before attaching your screen material, take the time to smooth any sharp corners of the frame with sandpaper. This will help prevent damage to the screen fabric during attachment and usage.
With these frame construction techniques, you'll have a solid foundation for your DIY projector screen, ready for a fantastic viewing experience.
Visual Aesthetics and Specifications

Enhancing the visual aesthetics of your DIY projector screen is essential for achieving the best viewing experience. Start by selecting the right screen material; this can greatly influence projection quality. For instance, high-gain materials work wonders with low-brightness projectors, while stretchable fabrics offer portability without sacrificing image clarity.
Next, consider the screen size. Ideally, your screen height should equal 1/6 of the distance to the farthest seating. For 16:9 HDTV setups, aim for a height that's 1/3 of this distance. This guarantees comfort and maximizes image clarity.
Lastly, don't overlook your wall color. Neutral colors like white, beige, or light gray enhance brightness and contrast, while darker hues can help reduce stray light reflection, especially for projectors over 3,500 lumens.
Here's a quick reference table for visual aesthetics:
| Aspect | Recommendation |
|---|---|
| Screen Material | High-gain or stretchable |
| Screen Size | 1/6 of seating distance |
| Reflective Surface | Neutral wall colors preferred |
| Brightness Level | Match with projector lumens |
Conclusion
With your custom projector screen, you're not just elevating your home theater; you're transforming your living space into a cinematic wonderland that rivals the best movie theaters! Whether you chose a classic method or a modern twist, the right screen can make all the difference in your viewing experience. So, gather your materials, release your creativity, and get ready to enjoy movie nights like never before. Your epic DIY journey awaits—let's get started!