Building your own projector screen is easier than you think and saves you money too! Start by choosing materials like white blackout cloth or dedicated screen fabric. You'll need basic tools such as a measuring tape, staple gun, and a cordless drill. Cut your wood or PVC pipes to the desired size, assemble the frame, and attach the fabric securely. Once mounted, check for alignment and adjust as necessary for the best viewing angle. Regularly inspect for light leaks and make sure the screen stays taut for the best image quality. Keep going, and you'll discover even more handy tips and tricks!
Key Takeaways
- Choose the right screen material, such as white blackout cloth or dedicated screen fabric, for optimal light reflection and blocking.
- Construct a sturdy frame using wood or PVC pipes, ensuring precise measurements and secure assembly.
- Mount the screen 24-36 inches off the floor for the best viewing angle, using D-rings and wall brackets for stability.
- Regularly test and adjust the projector settings, screen tension, and alignment to maintain image quality and prevent light leaks.

SOULWIT 50Pcs Self Adhesive Cable Management Clips - Black
🔷SUPER EASY TO USE: Stick to clean surface, open tab, insert multiple cables, close the tab, enjoy the...
As an affiliate, we earn on qualifying purchases.
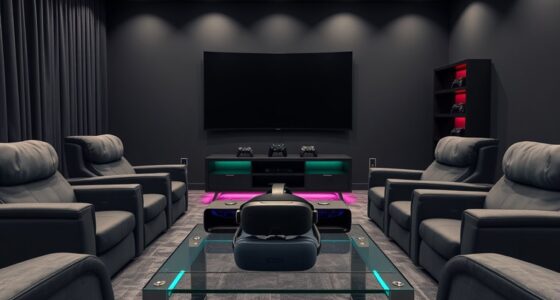
DIY Projector Screen Basics

Creating a DIY projector screen offers you an affordable and flexible solution for enjoying movies and presentations in the comfort of your own space.
When planning your DIY projector screen, consider the screen material you'll use. Popular choices include a high-thread-count white bedsheet, projector screen paint, or blackout cloth, which guarantees ideal projection quality.
Understanding the type of projector you have is essential, as different projectors may require specific screen types for the best image quality.
A basic projector screen typically features a 16:9 aspect ratio, which works well for most home theater setups. For example, a 73-inch diagonal image needs dimensions of 63.5 inches wide and 36 inches high.
Don't forget the impact of ambient light. To enhance your viewing experience, controlling the light in your space will vastly improve the quality of your projections.
So, whether you're watching a blockbuster film or giving a presentation, your DIY projector screen will provide a great solution tailored to your needs.
With just a little effort, you can create a stunning display that rivals commercial options.

XHF 120 PCS Adhesive Cable Wire Clips Black, Outdoor Christmas Light Clips, Cable Management Wire Organizer Cord Holder for Under Desk, Car, Wall, TV PC Ethernet Cable
High quality material:XHF Adhesive Cable Clips are manufactured from Strong Adhesive and PA66 nylon
As an affiliate, we earn on qualifying purchases.
Materials and Tools Needed

To build your DIY projector screen, you'll need a few essential materials and tools to guarantee a smooth and successful project.
Start with a white blackout cloth or dedicated screen fabric, as these options promote ideal light reflection and image quality. For the supporting structure, you can choose between a sturdy wooden frame or PVC pipes, depending on your preference and the desired screen size.
Next, gather your tools. A measuring tape is vital for accurate dimensions, while a cordless drill will help you assemble the frame. You'll also need a level to make sure everything's aligned correctly during installation. To attach the fabric securely to the frame, a staple gun is necessary; it'll help you achieve a smooth, wrinkle-free surface for projection.
Consider optional materials too, like paint for finishing touches on your frame and border tape to enhance the screen's aesthetic appeal.
Having everything ready will make the construction process much easier and more efficient, guaranteeing your DIY projector screen looks as good as it performs.
With these materials and tools in hand, you're well on your way to creating an impressive viewing experience.

120PCS XHF Adhesive Cable Wire Clips White, Cable Staples Outdoor Cable Management Wire Organizer Cord Holder for Under Desk, Car, Wall, TV PC Ethernet Cable
High quality material:XHF Adhesive Cable Clips are manufactured from Strong Adhesive and PA66 nylon
As an affiliate, we earn on qualifying purchases.
Construction Process Overview

Start by measuring your desired screen size and cutting the wood or PVC pipes to fit, guaranteeing everything aligns perfectly for a sturdy frame.
Once you've got your pieces, assemble the frame using screws or connectors, making sure all corners are at 90 degrees with a Speed Square. If you're building a larger screen, consider adding internal supports for enhanced stability.
Next, lay the projector screen fabric face down on a clean, flat surface. Position the frame over the fabric, guaranteeing it's evenly centered for uniform coverage.
Now, secure the fabric to the back of the frame with a staple gun, maintaining even tension as you go. Trim any excess material for a neat finish.
After the assembly is complete, it's time to prepare for mounting. Attach D-rings to the back of the frame, which will help you secure it later.
When you're ready to mount, choose your desired location on the wall and guarantee the frame aligns properly with the projector for the best viewing experience.
With everything in place, you're set for the next step: attaching and mounting the screen!

【Now with Netflix & 3000ANSI】Smart 4K Projector with WiFi and Bluetooth, VISSPL 3D Dolby Audio and Auto Focus Portable Outdoor Projector, Movie Home Theater Projectors TV Lamp Bulb for Bedroom/Ceiling
[ Netflix Ready - No Extra Devices Needed ] – VISSPL Smart Projector: No TV stick, no casting,...
As an affiliate, we earn on qualifying purchases.
Attaching and Mounting the Screen

When attaching and mounting your projector screen, you'll want to choose the right screen material for ideal image quality.
Secure mounting techniques are essential for stability, and adjusting the height will guarantee a comfortable viewing experience.
Let's explore how to get each step just right.
Screen Material Selection
How do you choose and attach the right screen material to guarantee a flawless projection experience? Start with the white blackout cloth, which is ideal for projector screens due to its excellent light-blocking capabilities. Verify your screen material measures at least 80 inches wide and 45 inches high, providing ample coverage for a standard 73-inch diagonal image.
Here's a quick comparison of popular screen materials:
| Material | Light Blocking | Reflection Quality |
|---|---|---|
| White Blackout Cloth | Excellent | Good |
| Matte White | Good | Excellent |
| Silver | Fair | Very Good |
Using a staple gun, attach the screen material to the back of the frame, verifying even screen tension to maintain a flat surface. This prevents wrinkles that could distort the image. Don't forget to install D-rings in the top corners for easy wall mounting, keeping the screen 24-36 inches off the floor for ideal viewing in your home theater. Regularly check and adjust the screen tension post-mounting to keep your projection setup looking sharp.
Secure Mounting Techniques
For a sturdy setup, secure the projector screen material to the frame with a staple gun, making certain even tension to prevent sagging.
This secure attachment is essential for achieving a smooth viewing surface. Once the material is attached, install D-rings in the top corners of the frame for wall mounting. These provide reliable anchor points that make hanging and removal easy.
When you're ready to mount the screen, use wall brackets or hooks that can support the weight of the frame and screen material. This guarantees stability and prevents accidents during use.
It's also important to check the screen alignment using a laser level during installation. This step assures that your projector screen is perfectly straight and positioned at the desired height for peak viewing.
After securing the screen, regularly inspect the mounting hardware and connections. This ongoing maintenance is key to guaranteeing the stability and safety of your setup.
Adjusting Screen Height
After securely mounting your projector screen, adjusting its height is key to achieving the best viewing experience. Start by positioning the bottom edge of the screen 24-36 inches off the floor. This height minimizes neck strain and guarantees an enjoyable viewing angle. Use a laser level to confirm the screen is straight, allowing for ideal alignment with the projector image.
If you're using D-rings for mounting, place them in the top corners of the frame. This setup allows for secure attachment and easy installation on wall hooks or brackets. Before finalizing the height, measure the distance from your projector to the screen, making sure it's within the manufacturer's recommended range for your specific model.
If you need to make installation adjustments post-mounting, simply loosen the mounting hardware, reposition the screen to your desired height, and then securely tighten it again. This way, you can achieve the perfect screen height for your space, guaranteeing a clear and comfortable viewing experience.
Testing and Adjustments

Once you've set up your projector screen, it's time to test its performance.
Check the quality of the projection, adjust for any light leaks, and manage the screen tension to guarantee a smooth surface.
Quality Projection Check
To guarantee the best viewing experience, you'll want to routinely check the projection quality by connecting your projector to a power source and a media device.
Start by projecting a solid color slide onto your screen surface to evaluate for any light leaks or imperfections. If you notice any issues, adjust the screen tension or alignment to achieve a smooth, matte white surface that's perfect for quality projection.
Next, test the projector's brightness and contrast settings. Calibrate these based on your screen type and the ambient light conditions in the room to assure ideal viewing.
It's also a good idea to conduct trial runs with various content types, such as movies and presentations, to assess both sound clarity and overall image quality during real usage scenarios.
Don't forget to regularly inspect the projector lens and screen surface for dust or smudges, as keeping these clean is essential for maintaining high image quality over time.
Light Leak Adjustments
Identifying and fixing light leaks is essential for optimizing your DIY projector screen's performance. Start by projecting a solid black image onto your screen. As you do this, look for any areas where light spills through, revealing gaps in your frame materials or fabric tension.
Once you've spotted the light leaks, grab some adhesive felt tape. This material is perfect for sealing the edges of your projection screen, as it absorbs excess light and enhances the overall image quality.
After making adjustments, always check for new light leaks, especially if you've relocated the screen. Changes in setup can create unexpected gaps or misalignments. Additionally, verify that your mounting brackets or hooks keep the screen taut; sagging can lead to increased light leakage, particularly at the bottom or sides.
If you're using a light-colored wall as your screen, consider applying matte black border tape around the projection area. This will help minimize light bounce and greatly improve contrast.
Screen Tension Management
After addressing light leaks, the next step is to verify your screen has the right tension for maximum image clarity and quality. Ensuring your screen is evenly tensioned is essential to prevent sagging and wrinkles that could distort your images. Start by securing the fabric from the center of the frame and working outward. This method helps maintain tautness across the entire surface.
To assist with adjustments, especially for larger screens, consider using D-rings and tension cables. Regularly check for any loose areas, as consistent screen tension directly impacts the projected image quality. If you're using a pull-down screen, make sure the roller mechanism allows for a smooth retraction to maintain that ideal screen tension.
Here's a quick reference table for tension management:
| Issue | Solution |
|---|---|
| Sagging | Adjust tension cables |
| Wrinkles | Re-staple fabric evenly |
| Loose fabric | Check and tighten all areas |
| Uneven image projection | Project an image and adjust |
| Pull-down resistance | Inspect roller mechanism |
Comparisons: DIY Vs. Purchased Screens

When weighing the benefits of DIY versus purchased projector screens, cost, customization, and quality are essential factors that can greatly influence your decision.
DIY projector screens are typically more cost-effective, often saving you 50% or more compared to purchased options. This significant savings can allow you to invest in high-quality materials, such as blackout cloth or projector screen paint, which can enhance the viewing experience.
Another advantage of going the DIY route is customization. You can tailor the dimensions and features of your screen to fit your specific room requirements and personal preferences, something that's often limited with commercial screens. Plus, assembling a DIY screen only requires basic construction skills, making it accessible for most enthusiasts.
In terms of quality, a well-constructed DIY screen can rival or even exceed commercial options, especially when using quality materials.
Finally, maintenance and repairs are straightforward with DIY screens; you can handle them independently without incurring ongoing costs associated with commercial screen upkeep.
To summarize, choosing between DIY and purchased screens involves evaluating these key factors to find the best fit for your needs.
Frequently Asked Questions
How to Make Your Own Screen for a Projector?
To make your own screen for a projector, choose a smooth, light-colored surface. Measure accurately, cut your material, and secure it tightly. Test the setup, adjusting focus and light for the best viewing experience.
What Is the Best Material for a DIY Projector Screen?
You might be surprised to learn that the best material for your projector screen can dramatically affect your viewing experience. White blackout cloth or specialized projector screen fabric often yields the clearest, most vibrant images for your setup.
What Wood to Use for a Projector Screen?
For your projector screen, use high-quality plywood or MDF for a sturdy frame. Choose wood at least 3/4 inch thick to prevent warping, and consider lightweight options for portability or hardwood for a permanent setup.
How to Turn a Wall Into a Projector Screen?
To turn a wall into a projector screen, choose a smooth, light-colored surface. Use painter's tape for alignment, apply projector screen paint, and let it dry. Then remove the tape for a crisp projection area.
Conclusion
Building your own projector screen can seem intimidating, but it's actually a fun and rewarding project.
Sure, you could buy a screen, but where's the satisfaction in that? By crafting your own, you customize it to fit your space and save money in the process.
You'll gain hands-on skills and create a unique piece that enhances your movie nights.
So roll up your sleeves, gather your materials, and enjoy the process of bringing your cinematic dreams to life!