
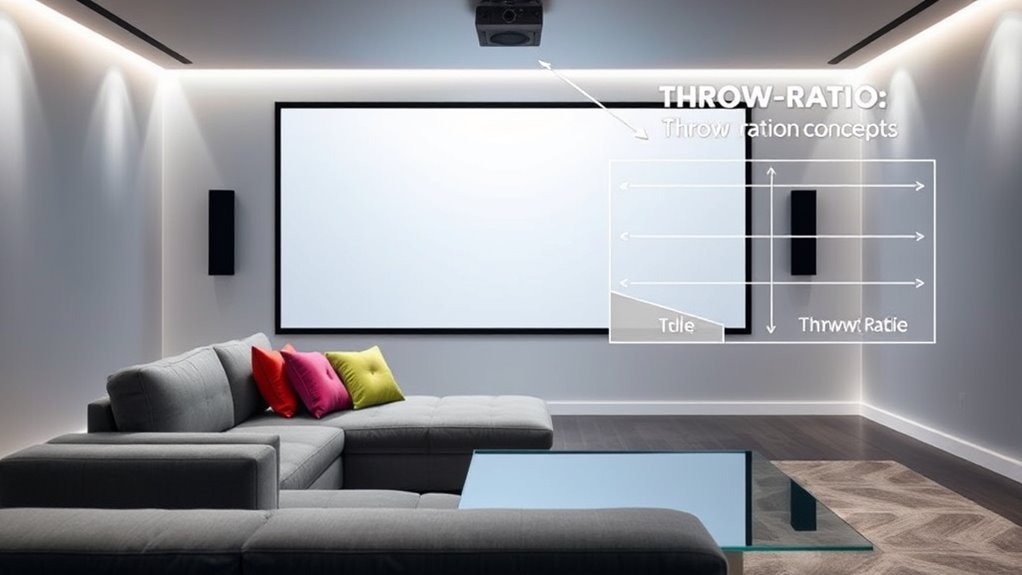
A throw ratio is a simple way to understand how far your projector should be from the screen to get the right image size. It’s the ratio of distance to image width, helping you decide where to place your projector for the best focus and clarity. Lower ratios mean closer placement for larger images, while higher ratios need more space. Keep exploring, and you’ll quickly become confident in choosing and setting up the perfect projector setup.
Key Takeaways
- Throw ratio defines the relationship between projector-to-screen distance and image width, influencing setup and image size.
- A lower throw ratio (e.g., 1.5:1) allows closer placement for larger images; higher ratios need more distance.
- Types include short throw, standard throw, and long throw, each suitable for different room sizes and projection needs.
- Calculating throw ratio involves measuring the distance from projector to screen and dividing by the desired image width.
- Understanding throw ratio helps in selecting the right projector and placement for clear, properly sized images.

ViewSonic LS740W 5500 Lumens WXGA Laser Projector with 1.3X Optical Zoom, H/V Keystrone, 360 Degrees Projection for Auditorium, Conference Room, and Education
High Brightness Laser Projector: WXGA (1280x800p) resolution with a 1.2-1.5 throw ratio and 5,500 ANSI lumens for clear,...
As an affiliate, we earn on qualifying purchases.
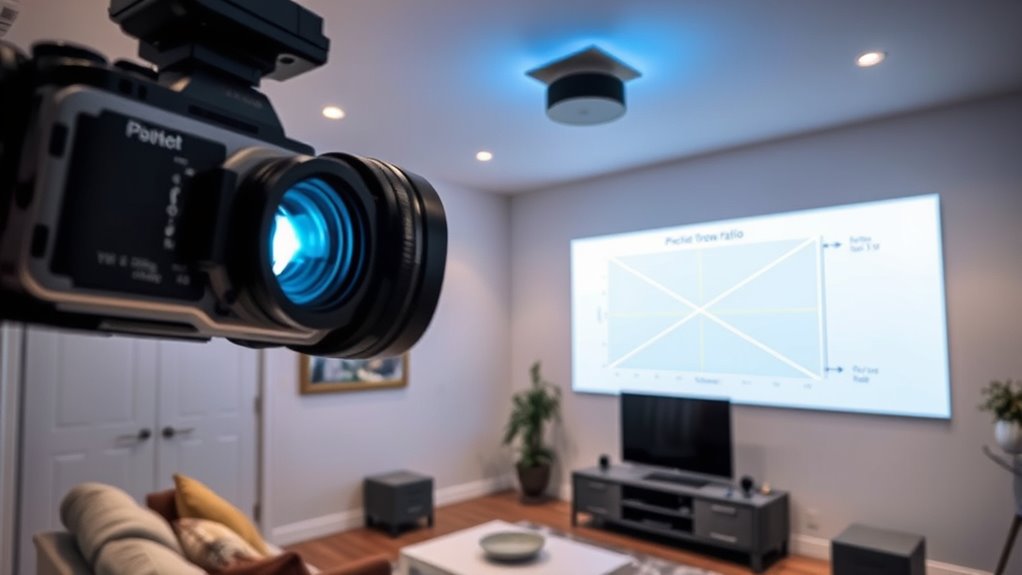
What Is Throw Ratio?

Have you ever wondered how projectors determine the size of the image they produce relative to their distance from the screen? It all comes down to the projection lens and the projector’s throw ratio. The throw ratio is a simple formula: it’s the ratio of the distance from the projector to the screen divided by the width of the image. This ratio helps you understand how large the image will be at a given distance. For example, a projector with a throw ratio of 1.5:1 will produce a larger image when placed closer, while one with a higher ratio, like 2.5:1, needs to be farther back. Fundamentally, the projection lens and throw ratio work together to determine the image size based on how far you position the projector. Understanding projection setup can also help you optimize your viewing experience and prevent common issues like image distortion or inadequate brightness. Additionally, tuning your projector can optimize image quality and performance for your specific space. Knowing how the throw ratio interacts with room dimensions is essential for achieving the desired image size without repositioning your equipment.

2000 ANSI 4K Decoding Projector with WiFi and Bluetooth, HAPPRUN Movie Home Theater with Auto Focus, 300'' Display for Indoor/Outdoor, Smart Proyector Compatible with Phone/TV Stick/PC/PS5
[EASIER OPERATION: AI Smart Screen Adjustment] HAPPRUN projector comes with auto focus and 6D auto-keystone technology, enjoy a...
As an affiliate, we earn on qualifying purchases.
Understanding Projector Distance and Screen Size

To achieve the ideal image size, understanding how projector distance relates to screen size is essential. Your projector’s distance from the screen determines the projected image, influenced by the screen aspect ratio. A wider aspect ratio, like 16:9, requires a different distance than a square 4:3 screen for the same size. Ambient light conditions also matter: in bright rooms, you’ll want a larger, brighter image to maintain clarity, which may require adjusting the projector’s distance. Closer placement produces smaller images, while moving back enlarges the picture. By balancing projector distance with your screen size and aspect ratio, you ensure a clear, proportionate display suited to your space and lighting environment. Proper understanding helps you optimize image quality and viewing experience. Additionally, considering the contrast ratio of your projector can significantly impact the perceived sharpness and clarity of your images. Knowing the throw ratio can also help you determine the optimal distance for your specific projector model. Understanding your projector’s lens shift capabilities can further assist in achieving the best image alignment without distortion. Furthermore, understanding the light output of your projector can assist in choosing the right placement to achieve the desired brightness level in different ambient lighting conditions.

NexiGo Aurora Pro MKII, 4K Tri-Color Laser UST Projector, 30000:1 Contrast Ratio, Dynamic Iris & Laser Dimming, 0.21:1 Throw Ratio, Dolby Vision & Atmos, HDR10+, 3D, 4.2ms ~ 8ms Low Latency (Renewed)
【Scene Adapt Engine】Enjoy higher-contrast visuals with our Scene Adapt Engine (SAE), the technology behind Dynamic Iris and Dynamic...
As an affiliate, we earn on qualifying purchases.
How To Calculate Throw Ratio
To calculate the throw ratio, start by measuring the distance from your projector to the screen. Then, determine the width of your projected image. Finally, divide the projector distance by the image width to find your throw ratio. Understanding the importance of accurate measurements ensures optimal setup and image clarity. Additionally, knowing your projector specifications can help you choose the right placement for the best viewing experience. For outdoor setups, consider environmental factors like lighting conditions, which may influence your projector’s performance and image visibility. Recognizing astrological signs and their effects can also be a fun way to personalize your space or presentation environment. Incorporating farmhouse-inspired decor elements can also create a cozy and inviting atmosphere for your viewing space.
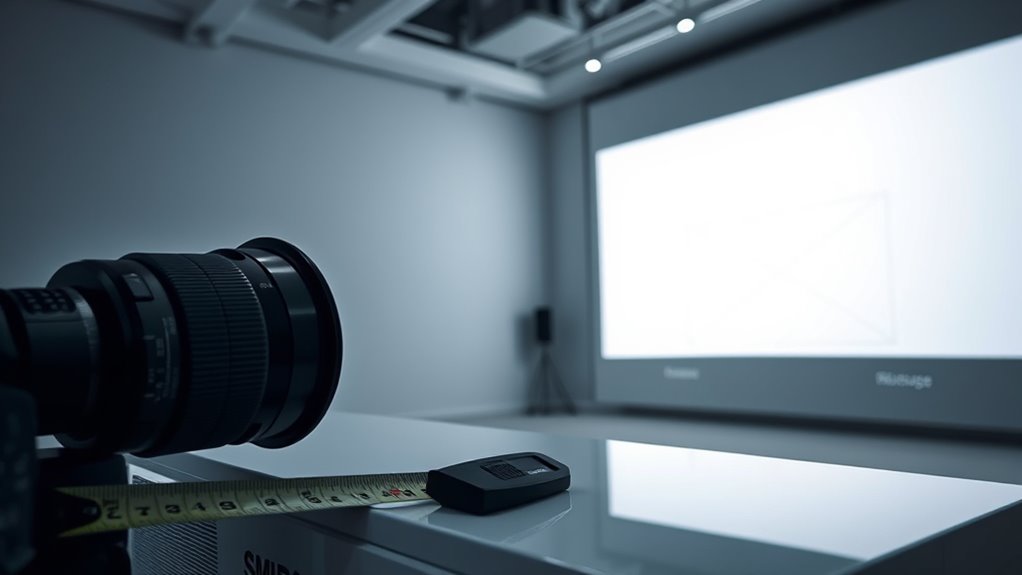
Measure Projector Distance
Measuring the projector distance is essential for calculating the throw ratio accurately. To do this, position your projector at the intended projection point, considering the projection angle and lens shift. The projection angle influences how far the projector needs to be from the screen for a specific image size. Lens shift can adjust the image vertically or horizontally without moving the projector, affecting the measurement. Use a tape measure to find the distance from the projector to the screen, noting any adjustments made via lens shift. Here’s a quick visual guide:
| Projection Distance | Image Width | Notes |
|---|---|---|
| 8 feet | 60 inches | Standard setup |
| 10 feet | 75 inches | Larger image |
| 12 feet | 90 inches | Adjusted for angle |
| 14 feet | 105 inches | Max projection |
| 16 feet | 120 inches | Suitable for large |
Accurate measurement guarantees precise throw ratio calculation. Additionally, understanding bulb maintenance can help ensure consistent image quality over time, especially since headphones are often used during extended viewing sessions to avoid disturbances. Properly managing projection placement can also optimize your viewing experience and projection clarity.
Determine Projector Width
Understanding how to determine your projector’s width is essential for accurately calculating the throw ratio. To do this, you need to take into account your projector’s lens and the screen material. The projector lens affects how wide the image will be at a given distance, so knowing its specifications helps estimate the projected width. Measure from the lens to the screen, then account for the screen material’s size and aspect ratio. If your projector is placed at a specific distance, use the lens’s throw ratio to estimate the projected width directly. Keep in mind that different screen materials can slightly alter the image size and clarity, so choosing the right material ensures your calculations match the actual projection. Additionally, understanding the Snapdragon 8 Gen 3’s AI capabilities can help optimize your multimedia setup for better image processing and display quality. Incorporating astrology and personal traits can also provide unique insights into personalized entertainment preferences, enhancing your viewing experience. Being aware of projector placement best practices can further improve your setup accuracy and image results. Properly managing storage conditions can help maintain your projector and screen in optimal condition, ensuring consistent performance over time. Familiarizing yourself with projection calibration techniques can also help you fine-tune your setup for the best possible image quality. This step helps you select the perfect projector and setup for your space.
Divide for Ratio
Ever wondered how to accurately calculate your projector’s throw ratio? It’s simple: you divide the distance from the projector to the screen by the width of the projected image. To do this correctly, guarantee your lens focus is properly adjusted, as this impacts image size. Knowing your aspect ratio helps, too, since it determines the shape of your image—widescreen or standard. Measure the distance between the projector and the screen, then divide that measurement by the width you want your image to be. For example, if the distance is 10 feet and your image width is 5 feet, your throw ratio is 2:1. This calculation helps you choose the right projector placement to achieve the desired image size with ideal focus and aspect ratio. Additionally, understanding the Special Occasion context can assist in planning the perfect setup for events like holiday parties or family gatherings.
NexiGo Aurora Pro MKII, 4K Tri-Color Laser UST Projector, 30000:1 Contrast Ratio, Dynamic Iris & Laser Dimming, 0.21:1 Throw Ratio, Dolby Vision & Atmos, HDR10+, 3D, 4.2ms ~ 8ms Low Latency
【Scene Adapt Engine】Enjoy higher-contrast visuals with our Scene Adapt Engine (SAE), the technology behind Dynamic Iris and Dynamic...
As an affiliate, we earn on qualifying purchases.
Types of Throw Ratios: Short, Standard, and Long Throw

When choosing a projector, it’s important to understand the three main types of throw ratios: short, standard, and long. Short throw projectors have a projection lens that can produce large images from a small distance, ideal for tight spaces. Standard throw projectors are versatile, suitable for most rooms, with a typical projection distance. Long throw projectors require a greater distance, perfect for large venues. Here’s a visual to help *imagine this*:
| Throw Type | Ideal Distance | Common Use |
|---|---|---|
| Short | 3-8 feet | Small rooms, classrooms |
| Standard | 8-15 feet | Living rooms, offices |
| Long | 15+ feet | Auditoriums, conference halls |
Why Throw Ratio Matters for Your Setup

Choosing the right throw ratio directly impacts how well your projector fits into your space and how effectively it displays images. A suitable throw ratio ensures your image aligns perfectly with your projection surface without distortion or excessive size. It also influences how well your setup handles ambient light; a longer throw can help reduce glare and washout in brighter rooms, while a short throw is better for small spaces with limited room for projection distance. If your space has a large or irregular projection surface, selecting the correct throw ratio becomes even more vital to achieve a clear, sharp image. Ultimately, understanding why throw ratio matters helps you optimize your projector’s performance and guarantees a satisfying viewing experience in your specific environment.
Choosing the Right Projector for Your Space
Selecting the right projector for your space involves considering how its features align with your room’s size, layout, and lighting conditions. One key factor is the projection angle, which determines how the image fits your setup and wall placement. You also need to evaluate ambient light, as too much light can wash out the picture. If your room has lots of natural or artificial light, look for a projector with high brightness (lumens) to maintain clarity. For smaller or darker spaces, a lower brightness model might suffice. Additionally, consider how the projection angle affects where you position the projector and the overall image size. Matching these elements ensures your setup delivers a clear, vibrant picture without the need for excessive adjustments.
Common Throw Ratio Terms Explained

Understanding common throw ratio terms is essential for choosing the right projector, as these figures directly impact how large your image will be at a given distance. The projection lens determines the throw ratio, which is the relationship between the lens’s focal length and the size of the image it produces. A short throw lens has a low throw ratio, allowing you to create a large image from a short distance. Conversely, a long throw lens has a higher ratio, requiring more space to achieve the same image size. Knowing these terms helps you select a projection lens that fits your space and desired image size. This understanding helps you optimize your setup for clarity and comfort while avoiding distortions or insufficient image coverage.
Tips for Optimizing Your Projection Setup
To get the most out of your projection setup, start by positioning your projector at the right distance from the screen. This ensures the projection angle is *ideal*, reducing distortion and keystone effects. Adjust the angle so the image is straight and centered, which improves picture quality. Consider ambient light in the room; too much light can wash out your image, so dim the lights or close blinds for a clearer picture. Use a screen with a high gain if ambient light is unavoidable. Keep your projector level and aligned with the screen’s surface. Regularly check the focus and zoom to maintain sharpness. These adjustments help maximize brightness, contrast, and color accuracy, delivering a better viewing experience.
Frequently Asked Questions
Can Throw Ratio Affect Image Quality?
Yes, the throw ratio can affect image quality because it influences your projection distance and screen size. If you choose a projector with an incorrect throw ratio for your space, the image might be blurry or distorted, reducing clarity. To get a sharp, clear picture, you need a proper throw ratio that matches your room’s dimensions, ensuring the projection fits well and maintains excellent image quality.
How Does Throw Ratio Influence Projector Placement?
A good throw ratio helps you find the perfect spot for your projector, making setup enjoyable. It determines the mounting distance needed to achieve your desired screen size, so you don’t have to guess or compromise. A smaller throw ratio allows for closer placement, ideal for compact spaces, while a larger one needs more distance. Adjusting your projector’s position guarantees a crisp, well-sized image without hassle.
Is a Lower or Higher Throw Ratio Better?
A lower throw ratio is better if you want a shorter projection distance and more lens flexibility, making it easier to install in tight spaces. It allows your projector to produce a large image from a close distance, ideal for small rooms. Conversely, a higher throw ratio suits larger spaces, requiring a greater projection distance. Consider your room size and desired image size to choose the best throw ratio for your setup.
What Is the Ideal Throw Ratio for Small Rooms?
In small rooms, an ideal throw ratio is around 1.0 to 1.5, which allows you to project a large screen from a short distance. Did you know that 85% of home theater setups use projectors with a throw ratio below 2.0? This means you can enjoy a big screen without needing much space. Focus on your projector’s screen size and distance to find the perfect throw ratio for your room.
How Do Ambient Light Conditions Impact Throw Ratio Choice?
Ambient light and brightness levels greatly impact your throw ratio choice. In bright rooms with lots of ambient light, you should opt for a projector with a shorter throw ratio to ensure a brighter, clearer image. This helps combat the washed-out effect caused by ambient light. Conversely, in darker rooms, a longer throw ratio works well, as less brightness is needed to produce a vivid picture.
Conclusion
Don’t let confusing terminology hold you back from the perfect setup. Understanding throw ratio helps you pick the right projector for your space, ensuring a clear, vibrant image. Even if your room isn’t huge, there’s a projector with the right throw ratio for you. Just remember, a little knowledge goes a long way—so don’t shy away from experimenting until you find what works best. Your ideal projection experience is just a setup away!