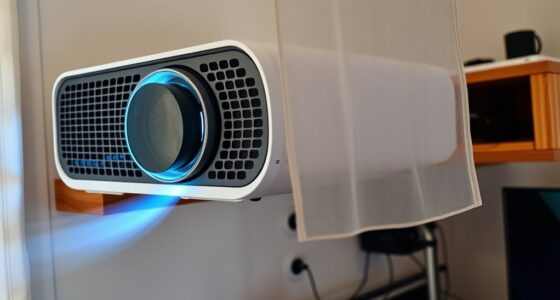

To set the perfect throw distance, start by checking your projector’s throw ratio in the specifications. Measure your desired screen width, then multiply that by the throw ratio to find the ideal distance from the projector to the screen. Adjust your placement accordingly, considering ambient light and room setup, to guarantee a sharp, properly focused image. If you want to fine-tune your setup for the best results, continue exploring these key calibration steps.
Key Takeaways
- Determine your projector’s throw ratio from the manufacturer’s specifications.
- Measure your desired screen width to guide accurate distance calculation.
- Multiply the screen width by the throw ratio to find the optimal projector placement distance.
- Adjust for ambient light conditions to prevent image washout or distortion.
- Fine-tune the projector position and calibrate settings regularly for a sharp, clear image.

Choosing the right throw distance is essential for ideal accuracy and safety. When setting up your projector, understanding how to calculate the correct distance ensures you get a sharp, properly sized image without distortions. It’s not just about plugging in numbers; it’s about fine-tuning your setup to match your space and viewing needs. Proper projector calibration plays a vital role here, as it helps you adjust image settings for clarity and focus, ensuring the projected picture looks crisp and professional. Calibration isn’t a one-time task—it’s an ongoing process, especially if you change the projector’s position or environment. Regular calibration ensures that even if you move the device or switch screens, your image remains perfect.
Proper projector calibration is key to achieving sharp images and adjusting for environmental changes.
An often overlooked factor is the throw ratio, which provides a practical guideline for optimal projector placement based on your desired image size. Ambient light considerations are equally important when determining your throw distance. Bright rooms with lots of natural or artificial light can wash out images if your projector is too close or not adequately calibrated. Conversely, in darker environments, you have more flexibility with placement, but you still need to consider how far away the projector should be for ideal focus and image size. Too close, and you might get a distorted or overly bright image; too far, and you risk losing sharpness or creating a dim picture. Adjusting the throw distance based on ambient light ensures your display remains vivid and clear, regardless of room conditions.
To calculate the ideal throw distance, start by reviewing your projector’s specifications. Manufacturers usually provide a throw ratio, which is the ratio of the distance from the projector to the width of the image. For example, a projector with a 1.5:1 ratio means that for every foot of image width, you need to place the projector 1.5 feet away. Measure your intended screen size, and then multiply that by the throw ratio to find your approximate distance. Keep in mind that environmental factors like ambient light can influence this calculation; in brighter rooms, you might want to position the projector slightly further back to prevent glare and improve image quality.
Ultimately, setting the correct throw distance involves a balance of technical calculations and environmental awareness. Regular calibration ensures your projector stays aligned with your setup, and considering ambient light conditions helps you adapt for the best viewing experience. By paying attention to these factors, you’ll enhance your projector’s placement, resulting in a clear, appropriately sized image that’s safe and enjoyable for everyone.

SOULWIT 50Pcs Self Adhesive Cable Management Clips - Black
🔷SUPER EASY TO USE: Stick to clean surface, open tab, insert multiple cables, close the tab, enjoy the...
As an affiliate, we earn on qualifying purchases.
Frequently Asked Questions
How Does Ambient Light Affect Throw Distance?
Ambient light profoundly impacts your projection throw distance by affecting projection clarity. When there’s too much ambient light, your image appears washed out and less sharp, forcing you to move the projector closer to improve clarity. Conversely, in darker environments, you can increase the throw distance for a larger, clearer image. Managing ambient light helps you optimize projection quality and achieve the perfect image at the right distance.
Can Throw Distance Be Adjusted After Installation?
Yes, you can adjust throw distance after installation. Use adjustment methods like changing the projector’s position or lens shift to modify the distance. Calibration techniques, such as focusing and keystone correction, help fine-tune the image for ideal clarity. Make small incremental adjustments, then test the image to guarantee perfect alignment. Regular calibration ensures your projector maintains the best image quality even after initial setup.
What Is the Ideal Throw Ratio for Small Rooms?
Imagine a cozy room where your projector’s throw ratio guides your screen placement perfectly. For small rooms, aim for a 1.2:1 to 1.5:1 ratio, ensuring the projector height complements the screen size without overcrowding. This ratio allows you to position the projector close to the wall, maintaining clear and sharp images while avoiding shadows. Adjust your projector’s placement to match these ratios for an ideal viewing experience.
How Do Different Screen Sizes Influence Throw Distance?
Your screen size directly influences throw distance; larger screens require more space to maintain ideal image quality, while smaller screens need less distance. As you select a bigger screen, you’ll need to increase the throw distance to keep images sharp and clear. Conversely, smaller screens allow for shorter distances, making setup easier in tight spaces. Adjusting for screen size ensures you achieve the best image quality for your viewing environment.
Are There Safety Considerations When Setting Throw Distance?
You should consider safety when setting throw distance, especially regarding projection angle and mounting height. If the projection angle is too steep or the mounting height is too low, the projector could pose a hazard or cause glare. Confirm your setup maintains a safe distance for viewers, avoids overheating, and allows easy access for adjustments. Prioritize stability and proper placement to prevent accidents and guarantee an ideal viewing experience.

XHF 120 PCS Adhesive Cable Wire Clips Black, Outdoor Christmas Light Clips, Cable Management Wire Organizer Cord Holder for Under Desk, Car, Wall, TV PC Ethernet Cable
High quality material:XHF Adhesive Cable Clips are manufactured from Strong Adhesive and PA66 nylon
As an affiliate, we earn on qualifying purchases.
Conclusion
By carefully setting your throw distance, you guarantee a crisp, clear image every time. Did you know that projectors placed at the ideal distance can improve image quality by up to 30%? So, take the time to measure accurately and adjust accordingly. When you get it right, your viewing experience becomes more immersive and enjoyable. Remember, the perfect throw distance isn’t just about size—it’s about creating a picture that truly captivates.

120PCS XHF Adhesive Cable Wire Clips White, Cable Staples Outdoor Cable Management Wire Organizer Cord Holder for Under Desk, Car, Wall, TV PC Ethernet Cable
High quality material:XHF Adhesive Cable Clips are manufactured from Strong Adhesive and PA66 nylon
As an affiliate, we earn on qualifying purchases.

Mini Projector, Portable Projector with Wifi and Bluetooth, Built in Apps
【Built-in WiFi & Bluetooth Projector with Apps】Dual-band WiFi 2.4G + 5G ensures fast and stable wireless streaming. Bluetooth...
As an affiliate, we earn on qualifying purchases.