Connect with us

Home Cinema

Troubleshooting HDMI Connection Issues With Projectors

Get expert tips to resolve HDMI connection issues with projectors and discover what simple steps you might be overlooking!

Published

on

resolving hdmi projector issues

If you're facing HDMI connection issues with your projector, start by checking your HDMI cable for damage or looseness. Confirm that you've selected the correct input source on your projector. If you're using an HDMI splitter, test it directly with another device to rule out compatibility issues. Also, verify that the output resolution from your source device matches your projector's native specifications. Restarting both the projector and your source device can refresh the connection. If problems persist, there are detailed steps and tips to troubleshoot further, so you can get back to enjoying your setup effectively.

Key Takeaways

  • Ensure the correct HDMI input source is selected on the projector to match the connected device.
  • Check HDMI cables for damage or looseness, and replace them if necessary to restore signal.
  • Confirm that the output resolution of the source device does not exceed the projector's native resolution specifications.
  • Restart both the projector and source device to apply any changes made in display settings effectively.

Causes of No Signal HDMI

hdmi signal loss reasons

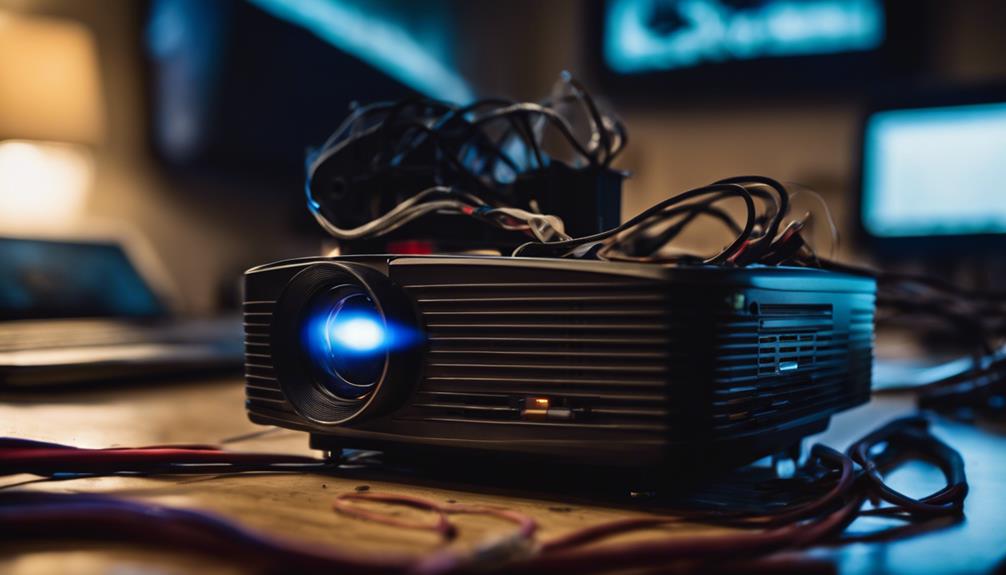
When you see a "No Signal" message on your projector, it often means there's a misconfiguration in your display settings or a simple connection issue.

First, check that you've selected the correct HDMI input source on your projector. If the wrong source is active, it won't receive a signal from your video source.

Next, inspect your HDMI cables. A damaged or loose cable can interrupt the signal flow, so ascertain that all connections are secure and that the cables are free from visible damage. If you're using an HDMI splitter, try connecting your source device directly to the projector; faulty splitters can cause signal issues.

Another common cause of a "No Signal" message is incompatible resolution settings. If your source device is outputting a resolution that exceeds what the projector can handle, it won't display anything. Always match your video source's output resolution to the projector's native specifications to avoid this problem.

Troubleshooting Display Settings

adjusting screen configuration issues

To troubleshoot display settings effectively, make certain your laptop is set to either extend or duplicate the display to the projector. You can usually adjust this through the control panel or by using a function key, like Fn + F4.

If your projector works but a "no signal" message appears, check the input source settings on the projector to confirm it matches the HDMI port you're using.

Advertisement

Next, verify your resolution settings on the source device. Ascertain that they don't exceed the projector's native resolution, which is typically 1280×720 or 1920×1080.

If your laptop doesn't automatically detect the projector, it's time to take some troubleshoot steps. Manually refresh the display settings or click the "Detect" option from the display settings menu.

After you've adjusted everything, restart both the projector and your laptop. This guarantees that all changes are applied correctly.

HDMI Splitter and Cable Issues

hdmi splitter connectivity problems

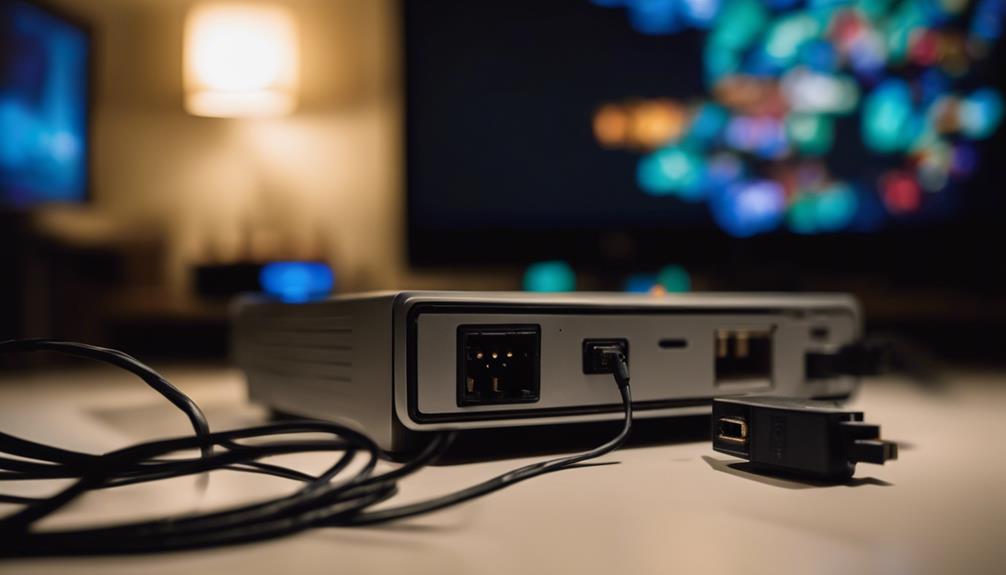
If you're still facing HDMI connection challenges after adjusting your display settings, it might be time to investigate potential issues with your HDMI splitter and cables. HDMI splitters can sometimes malfunction, leading to signal problems like the dreaded "No Signal" error on your projector. To resolve the problem, test your HDMI splitter with different devices and cables to verify compatibility.

Using high-quality HDMI cables is essential, especially for longer distances, as they minimize signal loss. Regularly inspect your cables for any damage or wear that could affect the HDMI output. If you continue to have issues, try connecting your source device directly to the projector without the splitter. This can help isolate the problem and confirm whether the splitter is at fault.

Additionally, limiting the number of devices connected through a single HDMI splitter can prevent signal degradation and improve overall performance. Following these troubleshooting steps will help you identify and fix any HDMI splitter and cable issues, guaranteeing a smooth connection for your projector.

Advertisement

Adjusting Resolution Settings

modifying display quality options

Adjusting the resolution settings on your source device is essential for guaranteeing a successful HDMI connection with your projector. To avoid connection issues, follow these steps:

  1. Match Native Resolution: Confirm the output resolution of your source device matches the projector's native resolution, typically 1280×720 or 1920×1080, depending on your model.
  2. Check Compatibility: Access your projector's menu to verify which resolutions it supports. This helps you avoid overscaling and guarantees proper signal reception.
  3. Experiment with Settings: If you encounter a "no signal" message, try different resolution settings on your source device. Sometimes, the initial setting isn't compatible with your projector.
  4. Update Firmware: Regularly check for firmware updates on both your projector and source device. These updates can enhance compatibility with various resolutions and improve overall performance.

Maintenance and Support Tips

essential care guidance tips

Maintaining your HDMI setup is just as important as adjusting resolution settings, ensuring a reliable connection and ideal performance.

Start by regularly inspecting your HDMI cables for wear or damage. This prevents signal interruptions that can disrupt your HDMI video during an important presentation.

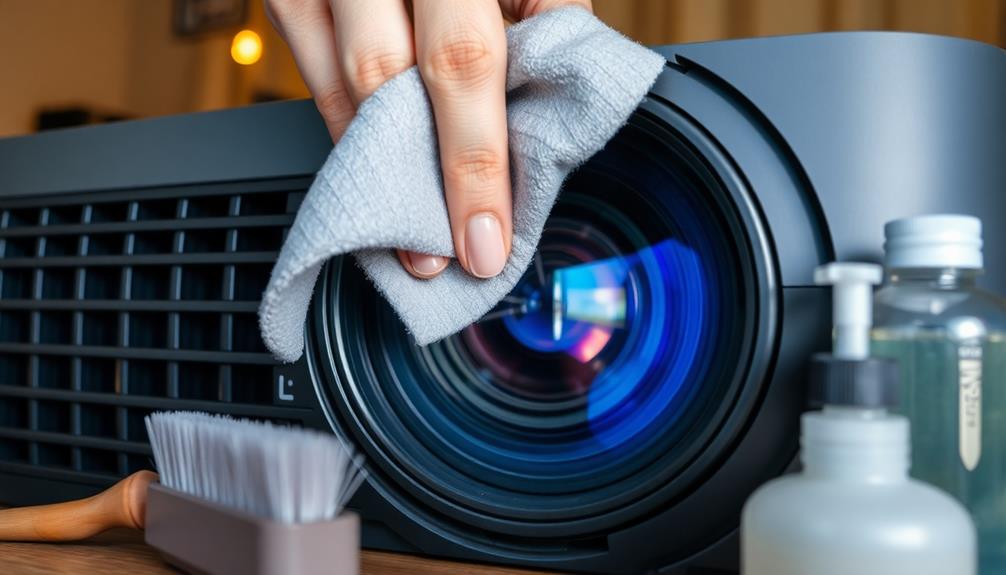
Clean the HDMI ports on both your projector and source devices to remove dust, which can impede connectivity and lead to "no signal" issues.

Keep your firmware updated on both devices, as these updates can enhance compatibility and resolve potential connectivity problems.

If you're using an Ultra Short Throw projector, maintaining a clear and stable connection is essential.

Store your HDMI cables properly to avoid tangling, bending, or stretching, which can lead to cable damage over time.

Advertisement

If you encounter recurring issues, document them and communicate with manufacturer support to facilitate efficient troubleshooting. They can help resolve the issue faster, especially if it involves different source devices.

Following these maintenance and support tips will enhance your setup's longevity and performance, ensuring smooth operation whether you're using a remote control or adjusting settings directly on the device.

Frequently Asked Questions

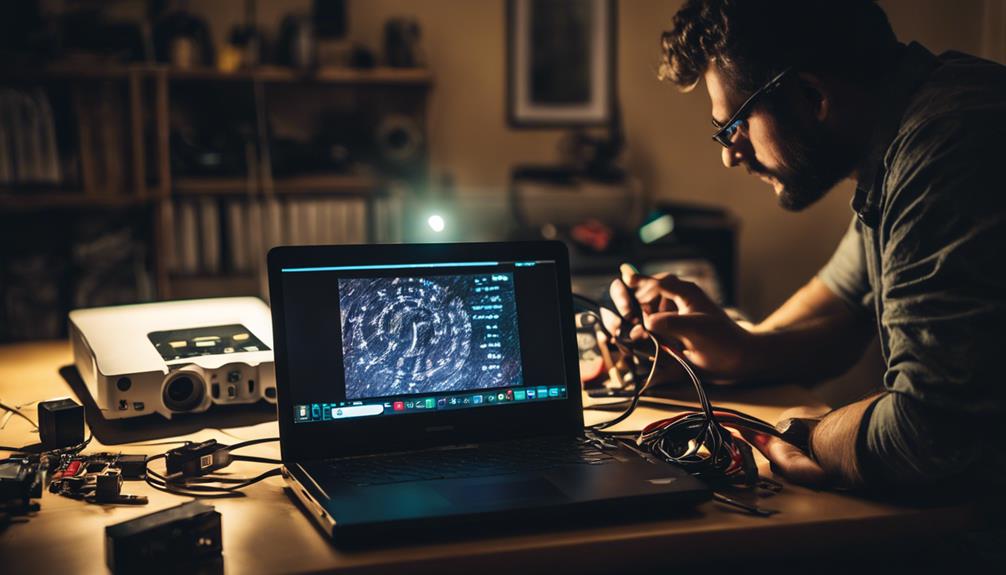
How Do I Troubleshoot HDMI Connection Problems?

To troubleshoot HDMI connection problems, check all cable connections, verify the correct input source is selected, test with a different cable, adjust resolution settings, and power cycle both devices to resolve any temporary glitches.

Why Is My HDMI Saying No Signal When It's Connected?

Ever wondered why your screen's blank? If your HDMI says "no signal," check if the source device's output matches the projector's settings, verify cables are secure, and toggle display modes to get things working.

Why Is My Projector Connected but No Signal?

If your projector's connected but shows no signal, check the input source selection, make certain all cables are secure, confirm the source device's powered on, and adjust the resolution to match the projector's capabilities.

Advertisement

What Causes HDMI Port to Fail?

Did you know that nearly 70% of HDMI port failures stem from physical damage or dust buildup? Such issues can obstruct connections, cause overheating, or lead to corrosion, ultimately resulting in poor or nonexistent signal transmission.

Conclusion

In troubleshooting HDMI connection issues, remember that patience is key. Just like tuning a musical instrument, small adjustments can make all the difference in achieving harmony between your projector and device.

If you encounter a "No Signal" message, take a moment to check cables, settings, and connections.

With a little persistence, you'll find the right combination to create a seamless display.

With every tweak, you're one step closer to the perfect presentation!

Advertisement

Hello, I'm Art, and I'm excited to be a part of the 1Home Theatre Projector team. As a writer, I'm here to contribute my knowledge and insights to help you achieve the ultimate home cinema experience. I understand that making decisions in the world of home entertainment can be complex, and I'm here to simplify the process for you.

Continue Reading
Advertisement

Home Cinema

Understanding Projector Specifications: Lumens, Contrast Ratio, and Resolution Explained

Keen to elevate your projector experience? Discover how lumens, contrast ratio, and resolution can transform your viewing like never before.

Published

on

projector specs lumens contrast resolution

To enhance your projector experience, it's essential to understand lumens, contrast ratio, and resolution. Lumens indicate brightness, with more needed in well-lit spaces; generally, over 2,500 lumens is suitable for such environments. Contrast ratio determines image depth, with a ratio above 10,000:1 being great for home theaters. Finally, resolution affects clarity, with 4K offering superior detail compared to lower resolutions like 1080p. By combining these specifications wisely, you can achieve an excellent viewing experience tailored to your needs. There's plenty more to explore regarding these projector essentials that can elevate your viewing game.

Key Takeaways

  • Brightness is measured in lumens; higher lumens are required for brighter environments to ensure clear visibility.
  • Contrast ratio influences image quality, with a ratio over 10,000:1 ideal for home theaters.
  • Higher resolutions like 4K provide sharper images, enhancing detail for movies and gaming experiences.
  • Ambient lighting affects projector performance; brighter spaces require projectors with at least 2,500 lumens for optimal visibility.
  • Selecting the right projector involves balancing brightness, contrast, and resolution based on specific viewing needs and environments.

Projector Brightness Measurement

brightness measurement for projectors

When choosing a projector, understanding brightness measurement is key to getting the best image quality. Projector brightness is measured in lumens (lm), and this number considerably impacts how well you'll see your content in different lighting conditions.

For ideal sound quality in conjunction with your visuals, consider using best dynamic microphones for sound engineers to enhance the overall experience. If you're using your projector in a dimmed room, a model with 500-1000 lumens will generally suffice. However, if you're in a bright space or planning to project outdoors, you'll want something that exceeds 1500 lumens to combat the ambient light.

For small rooms with controlled lighting, around 500 lumens should work fine; but remember, larger images in bright settings might require projectors boasting up to 20,000 lumens. Higher brightness equates to increased visibility, but it often comes with a higher price tag.

Therefore, it's crucial to evaluate the specific lighting conditions of your intended viewing environment.

Understanding Contrast Ratio

evaluating visual accessibility standards

When you're choosing a projector, understanding contrast ratio is key for enhancing your viewing experience.

Higher contrast ratios yield deeper blacks and brighter whites, which are essential for detailed image rendering in dark scenes. You'll find different types of contrast ratios, like native and dynamic, each affecting how you perceive images.

Advertisement

Knowing how these ratios are measured can help you make an informed decision for your specific needs, whether it's for home theater or professional use.

For instance, a projector with a high static contrast ratio can greatly impact the perceived sharpness and clarity of images, making it an important factor to take into account for enhancing visual experiences.

Types of Contrast Ratios

Understanding contrast ratios is essential for evaluating projector performance, as they directly impact image quality. There are several types of contrast ratios to take into account when choosing projectors. One common type is dynamic contrast, which often presents inflated numbers that don't accurately reflect real-world viewing conditions. This can mislead you if you're looking for true image quality.

High-quality content can help in understanding these specifications more deeply, as it enhances credibility and trustworthiness when making a purchase decision topical authority in content.

On the other hand, native contrast provides a more honest measurement of a projector's performance. For instance, the JVC NZ7 boasts an impressive native contrast ratio of 40,000:1, showcasing its capability for deep blacks and bright whites.

Advertisement

Then there's full on/off contrast, which measures brightness between solid white and black screens. While this can result in higher numbers, it can also mislead you about the actual viewing experience.

Measuring Contrast Ratios

Measuring contrast ratios is essential for determining a projector's true performance in real-world scenarios. The contrast ratio reflects the difference in brightness between the darkest black and the brightest white a projector can produce, expressed as a ratio (e.g., 10,000:1).

There are two main methods for measuring contrast ratios: Full On/Off Contrast, which often gives inflated numbers, and ANSI Contrast, which offers a more realistic measurement through alternating black and white patterns.

When evaluating projector features, pay attention to native contrast ratios, as they accurately represent a projector's capabilities. Dynamic contrast ratios can be misleading; they often rely on peak measurements and don't reflect typical viewing conditions.

Be cautious, too—manufacturer-reported contrast ratios can sometimes exaggerate performance. For a clearer picture, consult independent reviews and measurements.

Advertisement

A high contrast ratio is particularly important in darker environments, as it helps achieve deeper blacks and more vibrant colors. This not only enhances image quality but also plays a significant role in your overall viewing experience.

Importance in Viewing Experience

A projector's contrast ratio plays an important role in your viewing experience, directly impacting how vivid and lifelike the images appear. The contrast ratio measures the difference in brightness between the darkest and lightest parts of an image. A higher ratio indicates better image quality and richer colors.

For home theaters, a contrast ratio over 10,000:1 is ideal, ensuring you see every detail, especially in darker scenes. In contrast, business projectors often have much lower ratios, ranging from 200 to 1,000:1, which may not suffice for cinematic experiences.

Ambient lighting greatly affects perceived contrast. In darker rooms, the contrast becomes more visible, enhancing your overall viewing experience. However, if you're in a bright environment, you'll need a projector with higher lumen output to maintain image clarity and vibrancy.

Contrast sensitivity, or your ability to distinguish objects from backgrounds, is closely linked to the contrast ratio, making it vital to reflect upon when evaluating projector performance across different conditions.

Advertisement

The Role of Resolution

importance of clear resolutions

When choosing a projector, resolution plays an essential role in your viewing experience.

Higher resolutions like 1080p and 4K deliver sharper, more detailed images that enhance everything from gaming to movie nights.

Understanding the common resolution types can help you select the best option for your specific needs.

Importance of High Resolution

High resolution is vital for delivering stunning visual experiences that captivate audiences. When you choose a projector, the resolution greatly impacts the quality of the image you see. Higher resolutions, like 4K (3840×2160), offer a high-quality image that's sharper and more detailed than lower resolutions, such as 720p or 1080p. This clarity is especially important for creating an immersive experience in movies and gaming.

For movie lovers, a 4K projector enhances the realism of scenes, making them appear lifelike, particularly on larger screens. Gamers also benefit from higher resolutions, as they allow for clearer visuals, helping you recognize details and improving your performance in fast-paced environments.

Different resolutions cater to various needs; for instance, WXGA (1280×800) is suitable for general presentations, while WUXGA (1920×1200) is better for detailed content.

Advertisement

Choosing the right resolution is essential—while a 1080p projector works for casual viewing, a 4K projector elevates high-definition gaming and cinematic experiences. Ultimately, the right resolution guarantees you enjoy the best possible visuals for your specific needs.

Common Resolution Types

Understanding projector resolutions is essential for selecting the right model for your needs. Resolutions are defined by pixel count, with common types including 720p (1280×720), 1080p (1920×1080), and 4K UHD (3840×2160). Each of these resolutions offers progressively sharper and more detailed images, greatly impacting your viewing experience.

If you're into high-definition films or streaming, a 4K projector can create stunningly lifelike visuals, enhancing clarity even in large displays. Conversely, for casual viewing or presentations, 1080p might be sufficient.

When it comes to gaming, while 1080p works for most scenarios, 4K is the go-to for high-end gaming to boost visual fidelity and detail recognition.

Additionally, consider how resolution affects your projector's suitability for different environments. Higher resolutions are better for close viewing distances, as they minimize pixelation.

Advertisement

Impact of Lighting Conditions

lighting conditions affect outcomes

Lighting conditions play an essential role in projector performance, directly impacting the clarity and vibrancy of the images displayed. In bright environments, you'll need a projector with higher brightness ratings—typically at least 2,500 lumens—to guarantee visibility. Conversely, in a dark room, you can achieve good results with as few as 500 lumens. This significant difference highlights how ambient light influences your choice of projector.

When you're in a well-lit area, the contrast ratio becomes critical. Ambient light can wash out colors and diminish image depth, making it important to select a projector with a higher contrast ratio. This enhancement helps preserve the vibrancy of the displayed images despite the surrounding light.

If you're using a projector in a classroom or business setting, you'll likely need one with 4,000 lumens or more to counteract overhead lighting and make certain your presentations are clear.

Choosing the Right Projector

selecting ideal projector options

When it comes to choosing the right projector for your needs, evaluating both the environment and intended usage is vital. First, assess your room's ambient light conditions. If you have a bright space, you'll need a projector with at least 2,500 lumens to guarantee ideal visibility.

Next, consider what you'll be using the projector for. For home theaters, a high contrast ratio of 10,000:1 or higher is perfect, as it delivers vibrant colors and deep blacks. On the other hand, business presentations might prioritize brightness over contrast.

Resolution is another significant factor. If you're planning to watch high-definition movies or play games, a 4K projector is your best bet for stunning visuals. However, for general presentations and casual viewing, a 1080p projector will often suffice.

Keep in mind that projectors with higher lumens typically come at a higher price. So, balancing brightness, contrast ratio, and resolution within your budget is essential.

Advertisement

Lastly, don't forget to research independent reviews and performance tests, as manufacturer-reported specifications can often be inflated. Making an informed choice will guarantee you get the best projector for your needs.

Balancing Specifications for Viewing

optimizing viewing experience specifications

Selecting the right projector involves more than just picking a model with impressive specifications; it's about finding a balance that suits your viewing environment and needs.

You need to take into account brightness, contrast ratio, and resolution to create an ideal experience. Here's what to keep in mind:

  • Bright images for well-lit spaces
  • Deep blacks for rich, vibrant colors
  • Clear details for immersive experiences
  • Comfortable viewing to reduce eye strain
  • Versatile setups for various activities

In a bright room, a projector with at least 2,500 lumens is crucial, while a darker setting may only require 1,000 lumens.

The contrast ratio plays an important role too; aim for over 10,000:1 for a home theater to guarantee those deep blacks and eye-catching colors.

Frequently Asked Questions

What Is a Good Contrast Ratio for Projectors?

A good contrast ratio for projectors varies by use. For home theaters, aim for over 10,000:1; for business, 4,000:1. Gaming projectors should have at least 2,000:1 for better dark scene visibility.

What Is a Better Contrast Ratio, 1000:1 or 3000:1?

A 3000:1 contrast ratio's definitely better than 1000:1. You'll notice more vibrant images with deeper blacks and brighter whites, enhancing your viewing experience, especially in darker settings where details matter the most.

Advertisement

How to Understand Projector Specs?

When you're choosing a projector, think of it like picking a movie. You want bright images, deep contrasts, and sharp details. So, check the lumens, contrast ratio, and resolution to match your viewing needs.

Is 20000:1 Contrast Good?

Yes, a 20,000:1 contrast ratio's excellent! It enhances your viewing experience by delivering deep blacks and vibrant colors, especially in low-light settings. You'll notice finer details and richer images during movies or gaming sessions.

Conclusion

As you navigate the world of projectors, imagine casting vibrant images against a canvas of possibilities. With the right balance of lumens lighting up your space, contrast ratios painting rich details, and resolution sharpening every pixel, your viewing experience transforms into a masterpiece. Whether it's a movie night or a business presentation, understanding these specs empowers you to choose wisely. So, embrace the brilliance and let your screen come alive, turning every moment into a visual feast.

Continue Reading

Home Cinema

The Impact of Ambient Light on Projector Performance: Solutions and Tips

Prepare to transform your projector experience as we explore how ambient light affects performance and discover effective solutions to enhance your viewing pleasure.

Published

on

ambient light projector optimization tips

Ambient light can really impact your projector's performance by washing out colors and reducing clarity. If you're projecting in brighter settings, consider using ambient light rejecting screens to enhance contrast and color accuracy. Light-colored walls and surfaces reflect more light, so darkening your room with blackout curtains can help. It's also useful to regularly calibrate your projector to adapt to changing light conditions. Positioning your projector strategically can minimize glare and improve image quality. By implementing these tips, you'll elevate your viewing experience, and there's even more to discover about optimizing your setup.

Key Takeaways

  • Ambient light significantly affects projector image quality, washing out colors and reducing contrast, especially in bright environments.
  • Using ambient light rejecting (ALR) screens enhances contrast and color accuracy, improving image clarity in daylight conditions.
  • Implementing blackout curtains or shades minimizes excess ambient light, creating an ideal environment for projections.
  • Regularly calibrating projectors ensures optimal performance, adapting to varying ambient light levels throughout the day.
  • Strategic projector positioning helps reduce glare and reflections, enhancing overall image quality and viewing experience.

Understanding Ambient Light

exploring ambient light dynamics

When you think about watching a movie or giving a presentation, ambient light plays an essential role in how well you can see the projected images. Ambient light, whether from natural sources like sunlight or artificial sources such as lamps, can greatly affect the visibility of projected images. It alters the intensity and color perception, impacting the contrast and overall image quality.

If your space has light-colored walls or surfaces, you might notice that ambient light reflects off these surfaces, washing out colors and reducing clarity. This can lead to frustrating viewing experiences, especially when you can't fully control the lighting conditions.

Standard white screens tend to scatter light indiscriminately, worsening the problem.

To combat these challenges, consider using ambient light rejecting (ALR) screens. These light rejecting screens help enhance projector performance by improving black levels and reducing the impact of ambient light.

This can greatly enhance your viewing experience and lessen eye strain, allowing you to enjoy clear, vibrant projected images. By understanding the effects of ambient light, you can make informed choices to optimize your projector setup.

Advertisement

Effects of Ambient Light on Projectors

ambient light impact projectors

During daylight hours, ambient light can greatly impact projector performance, often washing out images and dulling colors. This results in reduced contrast and color accuracy, which can lead to a disappointing viewing experience.

As the intensity and color of ambient light fluctuate throughout the day, it's essential to assess these conditions before projecting content. Some projectors are better equipped to handle bright environments, so selecting a model tailored for higher brightness can help combat ambient light effectively.

Moreover, light-colored walls and surfaces can exacerbate the issue by reflecting excess light onto the projection surface, diminishing image quality. To improve image clarity, consider using light-rejecting projector screens designed to minimize the effects of ambient light. These screens can enhance contrast and color accuracy, providing a more vibrant viewing experience.

Implementing simple measures, like using shades or curtains, can greatly help maintain ideal ambient light levels for projection. By controlling light sources entering your space, you can create a more conducive environment for your projector, ensuring you get the best performance possible.

Strategies for Optimizing Performance

performance optimization strategies guide

To achieve ideal projector performance, you must assess and adjust various factors affecting your viewing environment. Here are some strategies to enhance your setup:

  1. Evaluate Ambient Light Levels: Before you project, check the ambient light in your room. Adjust projector settings such as brightness and contrast to guarantee peak image clarity and vibrancy.
  2. Implement Room Adjustments: Use blackout curtains or shades to control light entry. This reduces excessive ambient light, allowing for a more immersive viewing experience.
  3. Utilize an Ambient Light Rejecting Screen: Investing in a high-quality ALR screen can greatly enhance contrast and clarity, making it easier to enjoy your projector's performance in uncontrolled lighting conditions.
  4. Minimize Glare and Reflections: Position your projector away from direct light sources. This will help reduce glare and reflections, thereby improving overall image quality.

Additionally, remember to regularly calibrate your projector. This guarantees consistent performance and adaptation to varying ambient light conditions, ultimately enhancing your viewing experience.

Techniques to Enhance Image Quality

image quality enhancement techniques

Several techniques can greatly enhance your projector's image quality, guaranteeing an enchanting viewing experience.

Start by investing in an ambient light rejecting (ALR) screen. This type of screen selectively reflects the projected image while absorbing surrounding ambient light, which helps maintain contrast and color accuracy even in bright environments.

Next, regularly calibrate your projector settings to optimize performance based on current ambient light levels. Adjusting brightness, contrast, and color will considerably improve the image.

Advertisement

Consider room modifications, like installing blackout curtains or shades, to combat ambient light and enhance the overall viewing experience.

Position your projector strategically, keeping it away from direct light sources to reduce glare. This will improve image clarity and guarantee a better viewing angle.

Lastly, opt for high-quality, darker surfaces or specially formulated screen paints that absorb ambient light and reduce reflections.

These choices further enhance your projector's image quality in brightly lit settings. With these techniques, you'll create an optimized environment that allows your projector to shine, providing vibrant visuals that captivate your audience.

Future Trends in Projector Technology

advancements in projector technology

As projector technology evolves, you'll notice several exciting trends shaping the future of visual displays. These innovations aim to enhance your viewing experience, even in challenging ambient light conditions.

Here are four key trends to keep an eye on:

Advertisement
  1. Smart Projectors: With AI technology, these devices automatically adjust brightness and improved contrast based on your environment, ensuring peak image quality. This is particularly beneficial for top gaming projectors that require accurate color and detail in varied lighting.
  2. Ambient Light Rejecting Screen Materials: Recent advancements in these materials greatly enhance light absorption and reflection, allowing projectors to deliver clear images in brightly lit rooms.
  3. Increased Brightness Capabilities: New projectors are being designed to perform exceptionally well in high ambient light settings, making them perfect for both home theater and outdoor cinema experiences.
  4. Compact and Sustainable Projectors: The rise of portable projectors caters to users who want flexibility without sacrificing performance. Plus, eco-friendly designs focus on lower power consumption and longer lifespans, aligning with sustainable technology trends.

Embracing these trends not only improves your viewing experience but also adapts to the ever-changing environment, making projectors more versatile than ever.

Frequently Asked Questions

How Can I Improve My Projector Light?

To improve your projector light, adjust brightness and contrast settings, use an ambient light-rejecting screen, and control room lighting with blackout curtains. Regular calibration also helps maintain clarity and vibrancy in various lighting conditions.

How Can I Make My Projector Better in Daylight?

To make your projector better in daylight, try adjusting brightness settings, using an Ambient Light Rejecting screen, and positioning it away from sunlight. Blackout curtains can also help create a darker viewing environment for improved images.

How Can I Improve My Projector Image in Daylight?

To improve your projector image in daylight, try using an ambient light-rejecting screen, position your projector correctly, adjust your room with blackout curtains, and choose a brighter model with at least 3,000 lumens.

What Is the Difference Between Ambient Light Rejecting Screen and Projector Screen?

You've got to experience the magic of an Ambient Light Rejecting (ALR) screen! Unlike standard screens that wash out images, ALR screens enhance clarity and vibrancy in bright rooms, making every detail pop like never before.

Conclusion

To sum up, managing ambient light can greatly safeguard your projector's performance. By implementing innovative strategies and savvy techniques, you can successfully enhance image quality and enjoy stunning visuals. As technology continues to evolve, staying savvy about future trends will keep your setup shining brightly. So, embrace these tips, illuminate your viewing experience, and transform ordinary moments into extraordinary memories with vibrant, vivid images that captivate and charm your audience.

Advertisement
Continue Reading

Home Cinema

Projector Calibration 101: Achieving the Perfect Picture

Achieve stunning picture quality with essential projector calibration techniques—discover how to elevate your viewing experience and unlock your projector’s full potential!

Published

on

perfect picture projector calibration

Calibrating your projector is essential for achieving stunning picture quality. Start by setting up your projector properly and considering ambient light, as darker rooms enhance contrast. Use calibration tools like discs or software to adjust brightness and color settings. Regular recalibration every six months helps maintain image fidelity. Don't forget to optimize projector distance and apply keystone correction to avoid distortion. If you encounter challenges, like excessive brightness or color inaccuracies, dedicated tools can assist you. By mastering these techniques, you can elevate your viewing experience—stick around to discover even more strategies for perfecting your setup!

Key Takeaways

  • Proper calibration improves color accuracy, brightness, and contrast, enhancing overall image quality and preventing distortion.
  • Utilize calibration tools like colorimeters and calibration discs for precise adjustments and optimal viewing experiences.
  • Regular maintenance and recalibration every six months ensure sustained image fidelity and projector performance.
  • Ambient lighting conditions significantly affect calibration; dark rooms are ideal for achieving accurate color perception.
  • Implement keystone correction to maintain image alignment and avoid distortion for a clear and sharp picture.

Understanding Calibration Importance

significance of calibration awareness

When it comes to achieving the best possible viewing experience, understanding the importance of calibration is vital. Calibration is a systematic process that fine-tunes your projector's settings to match the original source's colors, brightness, and contrast. This guarantees visual fidelity across various content types, enhancing image quality and preventing color distortion and blurriness.

For instance, achieving ideal color accuracy in home cinema projectors can greatly elevate your viewing experience.

Regular calibration is important for extending your projector's lifespan. By refining settings, you can reduce wear and tear on components while improving overall performance. Adjusting brightness and contrast according to room conditions and your personal viewing preferences allows for a tailored experience that maximizes your projector's capabilities beyond factory settings.

While you can make some adjustments yourself, professional calibration is often recommended, especially for high-end setups. This expert service can greatly improve picture accuracy, contrast, and texture compared to standard factory settings.

Ultimately, understanding calibration importance empowers you to create an ideal viewing environment, transforming your projector into a powerful tool for entertainment. So, don't overlook the calibration process; it's essential for enjoying the best image quality and getting the most out of your projector.

Advertisement

Tools for Effective Calibration

calibration tool optimization techniques

To achieve an accurate calibration, you'll need the right tools at your disposal. Start with calibration tools like software applications that guide you through adjusting your projector settings, including built-in test patterns for fine-tuning. A colorimeter is essential for measuring color accuracy, ensuring your projector output aligns with visual standards.

Additionally, consider how proper air filtration, similar to HEPA filtration effectiveness, can improve your viewing environment by reducing dust and allergens that may interfere with your projector's performance.

Don't forget about calibration discs or videos, such as the Spears & Munsil High Definition Benchmark, which help you manually adjust brightness settings, contrast, and color temperature for the best picture quality.

Using computer calibration software can provide real-time feedback, allowing you to make immediate adjustments based on measured data.

Calibration Process Steps

calibration procedure detailed steps

The calibration process starts with ensuring your projector is set up correctly. Position it at the right distance from the screen and make sure it's level to avoid distortion, which greatly impacts image quality.

Additionally, consider the environment where you're calibrating; ambient light can affect how colors are perceived, so it might be helpful to select the right cold medication for your needs during this process.

Once that's sorted, follow these steps for effective calibration:

Advertisement
  • Use a calibration disc: This helps you access built-in test patterns for adjusting brightness and contrast, ensuring both bright and dark areas look their best.
  • Fine-tune focus and sharpness: Check clarity with high-contrast images to avoid any blurriness, ensuring a crisp picture.
  • Adjust color settings: Access the color calibration options to fine-tune color temperature and saturation, focusing on achieving natural hues, especially for skin tones.
  • Check aspect ratio: Make sure the aspect ratio matches your content for ideal performance and no image distortion.
  • Regular maintenance: Recalibrate every six months or after any notable changes to your projector setup to maintain image fidelity over time.

Optimizing Picture Quality

enhancing image clarity techniques

Achieving ideal picture quality involves more than just calibration; it requires attention to detail in your projector setup and environment. To attain the best image quality, start by positioning the projector at the correct distance from the screen, based on its throw ratio. This prevents image distortion and maintains clarity.

Next, consider the ambient lighting in your space. A dark room enhances contrast and overall image quality, providing the best viewing experience. Regularly adjust the brightness settings to avoid washed-out images, aiming for a balance that allows for deep blacks and vivid colors.

Utilizing high-quality projection screens or smooth white walls can greatly improve the reflection and clarity of the projected image. Keeping your screen clean is equally important to maintain sharpness.

Lastly, implement keystone correction to fix any image distortion caused by the projector's placement. This guarantees a perfectly squared image, allowing you to enjoy a stunning display that utilizes the full color space your projector offers.

Common Calibration Challenges

calibration difficulties and solutions

Many users face common calibration challenges when setting up their projectors. One of the biggest hurdles is adjusting the brightness setting. Factory defaults often prioritize showroom appeal, leading to excessive brightness that washes out details in darker scenes.

Color calibration can also be tricky without the right tools, as achieving accurate skin tones requires careful adjustments.

Additionally, ambient lighting conditions play an important role in calibration outcomes. It's best to calibrate in a dark room to avoid interference from external light sources.

Advertisement

Keystone correction is another challenge; it can introduce image distortion, making proper projector placement essential before making any adjustments.

To help you tackle these calibration challenges, consider the following:

  • Adjust brightness settings to avoid washed-out images.
  • Use appropriate tools for accurate color calibration.
  • Calibrate in dark environments for better results.
  • Verify proper projector placement to minimize distortion.
  • Regularly clean the lens to maintain picture quality.

Keystone Correction Techniques

image distortion adjustment methods

When you're setting up your projector, keystone correction is key to ensuring that the image looks sharp and aligned.

You can choose between manual adjustment methods, which keep the resolution intact, or digital correction, which offers convenience but might slightly reduce image quality.

Understanding these techniques will help you achieve the best viewing experience possible.

Manual Adjustment Methods

Manual keystone correction techniques are vital for enhancing your projector's image quality. By physically adjusting the projector's position, you can effectively align the image and eliminate distortion caused by angled placement.

Advertisement

Here are some key steps to follow for manual correction:

  • Set the projector at the correct height: Confirm the lens is level with the center of the screen for minimal distortion.
  • Adjust the distance from the screen: Position it to maintain the correct aspect ratio and ideal image size.
  • Tilt or angle the projector: Make small adjustments to correct trapezoidal distortions.
  • Incremental changes are important: Avoid making excessive adjustments, as they can degrade the overall quality of the image.
  • Be aware of limitations: Understand that extensive manual keystone correction can compromise resolution and sharpness.

Digital Correction Advantages

While manual adjustments can considerably enhance your projector's image quality, digital keystone correction offers a modern alternative that simplifies the process. This technique uses software algorithms to quickly adjust distortion, allowing you to align the image without physically moving the projector.

It's especially helpful when your projector is positioned at an angle to the screen, as it compensates for trapezoidal distortions that can occur.

However, keep in mind that while digital keystone correction is user-friendly, it may slightly reduce image resolution and quality. The scaling and processing needed to fit the corrected image into the display area can lead to a loss of sharpness. To achieve the ideal image, it's essential to minimize reliance on these adjustments through proper initial setup.

Many advanced projectors now feature auto-correction capabilities, which automatically detect distortion and apply digital keystone corrections. This enhances your experience by streamlining setup processes and saving you time.

Nevertheless, be cautious about overusing these features, as excessive adjustments can compromise the overall image quality. Balancing digital correction with precise setup is key to enjoying a stunning viewing experience.

Advertisement

Advanced Calibration Insights

precision measurement techniques explained

Advanced calibration techniques are essential for achieving the highest quality image from your projector. By using advanced tools like colorimeters and calibration software, you can make precise adjustments to brightness, contrast, and accurate color reproduction.

A well-calibrated projector guarantees an advanced image that looks stunning in any setting.

To get started, focus on these key calibration steps:

  • Adjust gamma and white point for ideal brightness.
  • Fine-tune RGB grayscale linearity, especially for HDR content.
  • Use calibration discs and built-in test patterns to check and correct black level and sharpness.
  • Regularly recalibrate every six months, particularly after environmental changes.
  • Be aware of the projector's tone-mapping algorithms, and turn off tone mapping during HDR calibration for best results.

Frequently Asked Questions

How Do I Get the Best Picture on My Projector?

To get the best picture on your projector, position it correctly, control ambient lighting, and use high-quality screens. Regularly calibrate settings like brightness and contrast to guarantee peak image quality and viewing experience.

How Do I Calibrate My Projector?

Calibrating your projector is like tuning a fine instrument. Start by positioning it correctly, adjusting brightness and contrast with test patterns, and keeping lenses clean. Regular maintenance guarantees you're always ready for a dazzling display!

How Much Does It Cost to Calibrate a Projector?

Calibrating a projector can cost between $200 and $500, depending on the technician's expertise. If you're considering DIY options, calibration tools range from $30 to $150, offering a budget-friendly alternative for adjustments.

Do Projectors Need to Be Calibrated?

While many believe projectors don't need calibration, they actually do. If you want accurate colors and ideal performance, it's essential to calibrate regularly, especially after moving the projector or changing its lamp.

Advertisement

Conclusion

In the world of projector calibration, you're the artist, and your screen is the canvas. By mastering the tools and techniques outlined, you can paint a vibrant picture that dances with life and detail. As you tackle challenges and refine your settings, remember that each adjustment brings you closer to cinematic perfection. So grab your remote, embrace the journey, and let your projector transform your space into a breathtaking visual masterpiece. Your audience will thank you!

Continue Reading
Advertisement

Affiliate disclaimer

As an affiliate, we may earn a commission from qualifying purchases. We get commissions for purchases made through links on this website from Amazon and other third parties.

Advertisement

Vetted

top electrostatic headphones 2024 top electrostatic headphones 2024
Vetted2 months ago

The 10 Best Electrostatic Headphones of 2024 – Ultimate Sound Experience Unveiled

Unlock the ultimate sound experience with the top electrostatic headphones of 2024—discover which models will elevate your audio journey to...

concert earplugs for hearing protection concert earplugs for hearing protection
Vetted2 months ago

15 Best Earplugs for Concerts: Protect Your Hearing Without Missing the Music

Check out the 15 best earplugs for concerts that protect your hearing while enhancing your music experience—discover which ones are...

comfortable earbuds for small ears comfortable earbuds for small ears
Vetted2 months ago

14 Best Earbuds for Small Ears That Offer Comfort and Sound Quality

Mysterious and comfortable, discover the 14 best earbuds for small ears that elevate your sound experience like never before!

best earbuds for calls best earbuds for calls
Vetted2 months ago

14 Best Earbuds for Phone Calls in 2024 – Crystal Clear Sound and Comfort

Discover the crystal-clear sound and comfort of the 14 best earbuds for phone calls in 2024, and find out which...

kid friendly safe earbuds kid friendly safe earbuds
Vetted2 months ago

15 Best Earbuds for Kids: Safe, Durable, and Perfect for Little Ears

Attention parents: Discover the 15 best earbuds for kids that prioritize safety and fun, but which one will be the...

top dynamic mics 2024 top dynamic mics 2024
Vetted2 months ago

15 Best Dynamic Microphones for Every Sound Engineer in 2024

Achieve the perfect sound with our top 15 dynamic microphones of 2024, tailored for every sound engineer's needs—discover your ideal...

top drum mics 2024 top drum mics 2024
Vetted2 months ago

15 Best Drum Mics of 2024 – Elevate Your Sound With These Top Picks

The ultimate guide to the 15 best drum mics of 2024 reveals top picks that will transform your sound—find out...

ultimate sound quality headphones ultimate sound quality headphones
Vetted2 months ago

15 Best Drum Headphones for Ultimate Sound Quality and Comfort

Browse our top 15 drum headphones for superior sound quality and comfort—discover which pair will elevate your drumming experience to...

ski helmet audio accessories ski helmet audio accessories
Vetted2 months ago

15 Best Ski Helmet Headphones to Enhance Your Slopes Experience

Immerse yourself in the slopes with the 15 best ski helmet headphones that promise unmatched sound quality and comfort—discover which...

top dj headphones 2024 top dj headphones 2024
Vetted2 months ago

15 Best DJ Headphones of 2024 – Ultimate Sound Quality and Comfort

Discover the top 15 DJ headphones of 2024 that promise unmatched sound quality and comfort—find out which models made the...

Advertisement

Trending