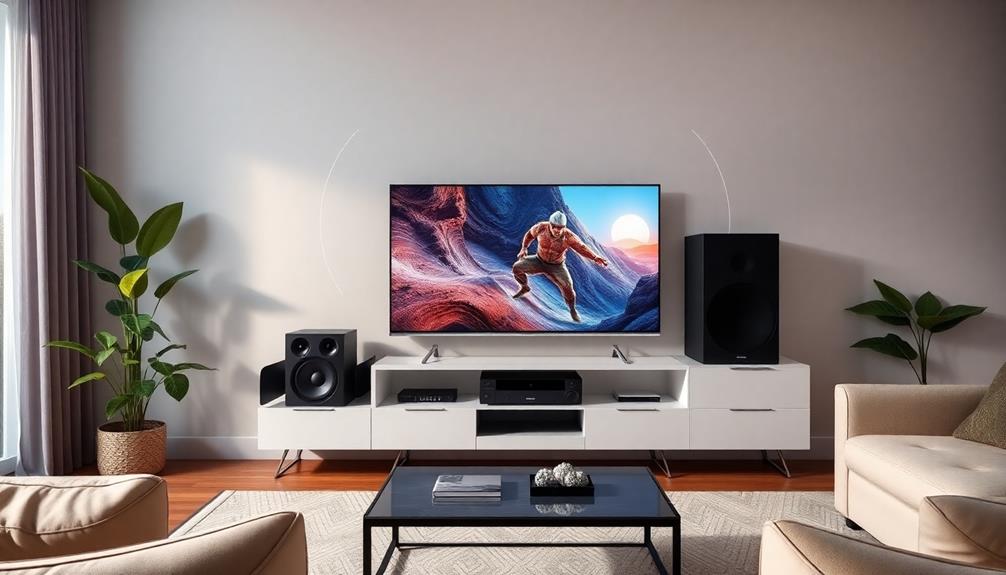
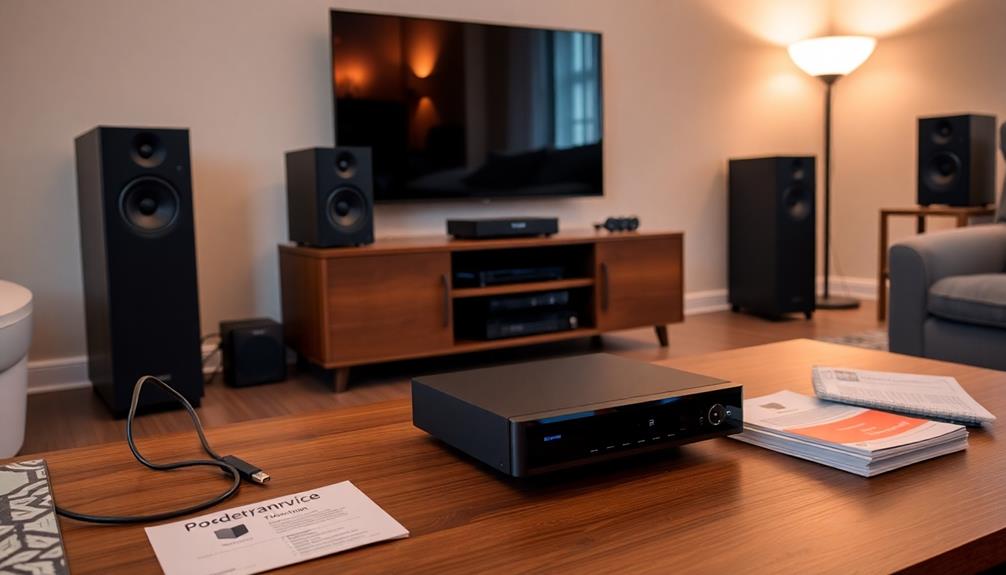
To connect your set-top box to your home theatre and TV, start by using two HDMI cables. Connect the HDMI OUT from the set-top box to the HDMI IN on the home theatre, then link the home theatre's HDMI OUT to the TV's HDMI IN, preferably an ARC-enabled port. Power on all devices and select the correct HDMI input source on your TV. Verify the audio settings on your set-top box are configured to output via HDMI for peak sound. From here, you can tackle any issues and explore additional tips for flawless setup.
Key Takeaways
- Use HDMI cables for optimal audio and video quality, connecting the set-top box to the home theatre and then to the TV.
- If using coaxial or optical cables for audio, ensure a separate video connection via HDMI or composite video cables.
- Access audio settings on the set-top box and select the appropriate output format, such as HDMI or Dolby Digital.
- Verify device compatibility and set the correct HDMI input sources on the TV and home theatre for successful playback.
- Regularly check for firmware updates on all devices to enhance compatibility and audio performance.

ULTIMEA 5.1CH Surround Sound Bar with Subwoofer, Dolby Atmos, VoiceMX, BassMX, APP, 300W Soundbar for Smart TV, Home Theater Surround Sound System for TV, Bluetooth 5.4, Poseidon M60 (2026 Model)
Simplified 5.1ch Dolby Atmos Setup: Enjoy immersive 4D sound with real Dolby Atmos and 5.1-channel audio. Five built-in...
As an affiliate, we earn on qualifying purchases.
Connection Methods Overview

When connecting your set-top box to a home theatre and TV, using HDMI cables is your best bet for superior audio and video quality. HDMI allows you to transmit both audio and video signals through a single cable, simplifying your setup.
Additionally, high-quality projectors can enhance your viewing experience, especially when enjoying top gaming projectors that support 4K resolution and HDR. Connect the HDMI OUT from your set-top box to the HDMI IN on your home theatre. Then, connect the HDMI OUT from the home theatre to your TV's HDMI IN.
If your home theatre system supports Audio Return Channel (ARC), use an ARC-enabled HDMI port on your TV for seamless audio return, eliminating the need for an additional optical cable.
If you're considering audio-only connections, coaxial or optical cables can transmit surround sound up to 5.1 channels. These options are suitable if your home theatre or TV lacks HDMI support.
However, verify your devices are compatible with the audio formats you plan to use. Always check the specifications of each device to configure your audio settings correctly.
Saiyin Sound Bars for Smart TV with Subwoofer, 2.1 Deep Bass Small Soundbar Monitor Speaker Home Theater Surround System PC Gaming Bluetooth/AUX/Optical Connection, Wall Mountable 17-inch
【Enjoy Deep Bass from Dedicated Subwoofer】The deep rich bass from our new generation sound bar and subwoofer will...
As an affiliate, we earn on qualifying purchases.
Step-by-Step HDMI Connection
To get started with your HDMI connection, you'll need a few essential pieces of equipment.
Make certain to check your projector's compatibility with your set-top box to guarantee a smooth connection. Additionally, keeping an eye on your projector's bulb maintenance can help enhance your viewing experience.
Once you've gathered everything, follow these straightforward steps to set it all up correctly. If you run into any issues, we've got troubleshooting tips to help you out.
Required Equipment Overview
Connecting your set-top box to a home theatre and TV through HDMI is a straightforward process that enhances your viewing experience. To get started, you'll need two HDMI cables.
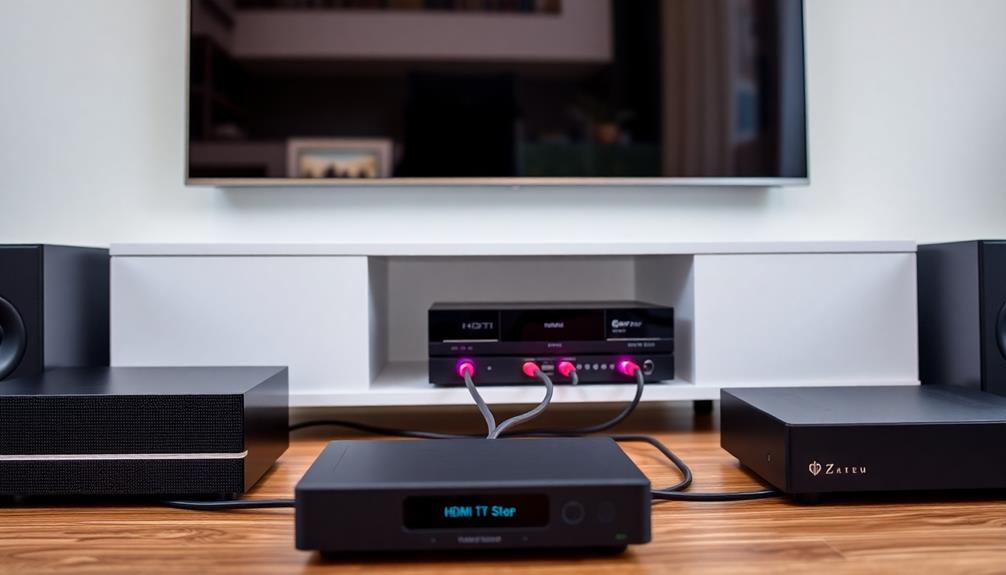
The first HDMI cable connects the HDMI OUT port on your set-top box to an available HDMI IN port on your home theatre system. This connection allows for high-quality video and audio transmission, much like how the presence of security systems can enhance safety and peace of mind in your home.
Next, use the second HDMI cable to connect the HDMI OUT port on your home theatre system to the HDMI IN port on your TV. For the best results, opt for an ARC-enabled HDMI port for ideal audio return, ensuring sound travels seamlessly between devices.
Once everything is connected, make sure both your TV and home theatre system are set to the correct HDMI input sources. This step is essential to receive both audio and video signals effectively.
Connection Process Steps
Now that you have all the necessary equipment in place, it's time to go through the steps for connecting your set-top box to your home theatre system and TV using HDMI.
- Connect the HDMI OUT port of the set-top box to the HDMI IN port on the home theatre system using a high-quality HDMI cable for maximum audio and video quality.
- Link the HDMI OUT port of the home theatre system to the HDMI IN port on your TV, ideally using an HDMI ARC-enabled port for audio return capabilities.
- Power on both the TV and home theatre system, and verify they're set to the correct HDMI input source for audio and video playback.
- Access the audio settings on your set-top box and set the audio output to HDMI, confirming compatibility with your home theatre system for the best sound performance.
Troubleshooting Common Issues
When troubleshooting common issues with your HDMI connection, it's crucial to start with the basics. First, verify your HDMI cable is securely connected from the HDMI OUT port on the set-top box to the HDMI IN port on the home theatre receiver, and then from the HDMI OUT on the home theatre to the HDMI IN on the TV.
Next, set your TV and home theatre receiver to the correct HDMI input source. If you're not getting any sound, double-check the audio output settings on the set-top box, making sure it's set to HDMI or another compatible audio format.
Restart all connected devices to reset connections, and check for any firmware updates that might resolve sound issues. If you hear distorted audio, inspect your HDMI connections for a secure fit. You may also want to try a different HDMI cable to eliminate potential faults.
Here's a quick troubleshooting guide:
| Issue | Suggested Action |
|---|---|
| No Sound | Check audio output settings |
| Distorted Audio | Inspect HDMI connections and cables |
| No Video/Image | Verify correct HDMI input is selected |

Sony S100F 2.0ch Soundbar with Bass Reflex Speaker, Integrated Tweeter and Bluetooth, (HTS100F), easy setup, compact, home office use with clear sound black
Straight from the theater to your home: easy set-up, built-in tweeter, 2-ch speaker with simple Bluetooth connection
As an affiliate, we earn on qualifying purchases.
Coaxial and Optical Setup

To set up your home theatre system for peak audio performance, start by choosing between coaxial and optical cables. Both options provide excellent sound quality, but they've distinct advantages.
Here's how to connect them:
- Connect the coaxial or optical cable from the set-top box's COAX OUT or OPTICAL OUT to the corresponding COAX IN or OPTICAL IN on your home theatre receiver.
- Use a separate HDMI or composite video cable to link the set-top box to your TV for video display, since coaxial and optical cables are strictly for audio.
- Adjust the audio output settings on your set-top box to match your connection type—Optical or Coaxial.
- For peak audio quality, consider using optical cables, which reduce interference and support multi-channel sound formats.
After making the connections, test your audio by playing content designed for surround sound.
This way, you can adjust your home theatre receiver settings to verify you're getting the best playback through your chosen audio cable.
Enjoy the immersive experience of your home theatre!

ULTIMEA Sound Bar with Wireless Subwoofer, 240W Peak Power, VoiceMX & BassMX, App Control, 2.1ch Soundbar for Smart TV, Adjustable Bass, HDMI, Optical, Bluetooth 6.0, Poseidon M30 (2026 Model)
Wireless Subwoofer, Place It Anywhere: The wireless subwoofer connects to the soundbar without audio cables, giving you the...
As an affiliate, we earn on qualifying purchases.
Configuring Audio Settings
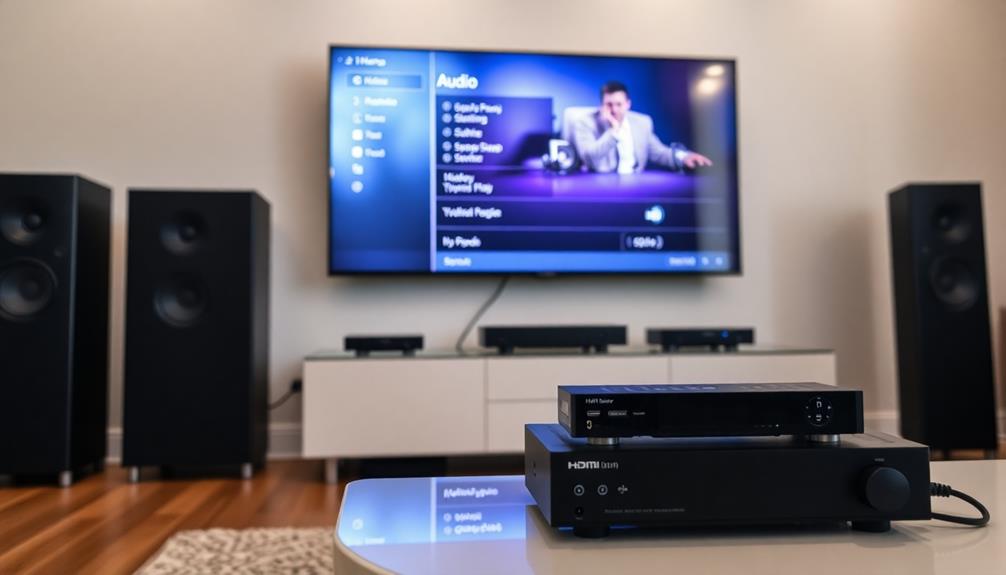
How can you confirm your audio setup delivers the finest sound quality? Start by accessing the Settings menu on your set-top box to select the audio output format that matches your home theatre system.
Depending on your setup, choose HDMI, PCM, or Dolby Digital. If you're using HDMI, make sure to set the audio output to "Bitstream." This allows your home theatre receiver to decode surround sound formats effectively.
For those using optical or coaxial cables, set the audio output on your set-top box to "Dolby Digital" or "Other" to guarantee compatibility with your system.
Regularly check for firmware updates on both your set-top box and home theatre system, as these can improve compatibility and audio performance.
After you've adjusted the settings, it's crucial to test your setup with content that utilizes surround sound. This will confirm that you've configured everything correctly and achieve ideal audio output.
Troubleshooting Common Issues

Even with the right audio settings configured, issues can still arise that disrupt your home theatre experience.
Here are some common problems and how to troubleshoot them:
- No sound: Verify the correct input source is selected on both your receiver and TV, and check that all HDMI cables are securely connected.
- Distorted audio: Inspect all connections for any damage. Also, double-check your audio settings on the source device and adjust the equalizer settings if needed.
- System shuts off: If your home theatre system turns off after 20 minutes, confirm it's receiving a proper audio signal from the set-top box or TV. Review the power settings to verify they're configured correctly.
- Surround sound issues: If surround sound isn't functioning, verify that your set-top box outputs audio in a compatible format, like Bitstream or PCM, and make sure your receiver is set to the correct audio format.
Product Compatibility Guide

Choosing the right devices for your home theatre setup is crucial for achieving the best audio and visual experience. To guarantee compatibility among your set-top box, home theatre system, and TV, pay attention to the following key aspects:
| Feature | Requirement |
|---|---|
| HDMI Ports | HDMI 2.0 or higher |
| Audio Formats | Dolby Digital, PCM |
| HDCP Support | Yes |
| Video Resolution | Supports desired resolution |
First, confirm that all devices have compatible HDMI ports to deliver ideal 4K HDR performance. Next, check that your home theatre supports the same audio formats used by your set-top box. Proper sound decoding is crucial for an immersive experience.
Additionally, make sure the output settings on your set-top box are correctly configured for HDMI or other connection methods like optical. Finally, verify that all devices support HDCP to facilitate seamless communication. Reviewing the specifications of each device guarantees they can handle the desired video resolution and audio channels, allowing you to enjoy a complete home theatre experience.
Community Insights and Tips
When setting up your home theatre, drawing on community insights can be incredibly helpful. Many users recommend using HDMI connections for the best audio and video quality, as they reduce cable clutter while supporting surround sound formats. You might also want to take into account HDMI ARC (Audio Return Channel) for simpler connections.
Here are some tips from the community to enhance your setup:
- Use HDMI cables for superior audio and video quality.
- Adjust audio settings on both your set-top box and home theatre system for formats like Dolby Digital or PCM.
- If you encounter audio issues, check your cable connections and input selections.
- Opt for optical cables when HDMI isn't available; they can still deliver great audio quality.
Frequently Asked Questions
Can I Connect a Set-Top Box to a Home Theatre?
Yes, you can connect a set-top box to a home theatre. Just use an HDMI, optical, or RCA cable to improve audio quality and enjoy a better surround sound experience during your favorite shows.
How to Connect Cable Box to TV and Surround Sound?
Wondering how to enhance your viewing experience? Connect your cable box to your TV using HDMI, then link it to your surround sound system. Adjust audio settings for the best sound quality and enjoy!
How Do I Connect My Soundbar to My TV and Set-Top Box?
To connect your soundbar to your TV and set-top box, you'll want to use an HDMI cable. Confirm all connections are secure, power on devices, and adjust your TV's audio settings for ideal sound.
How to Connect TV and Home Theatre?
Imagine a symphony of sound filling your room. To connect your TV and home theatre, link them via HDMI cables, ensuring the right ports are used. Adjust settings for seamless audio enjoyment. You'll love the experience!
Conclusion
By connecting your set-top box to your home theatre and TV, you're not just enhancing your viewing experience; you're creating a cozy entertainment haven. With the right setup, you'll transform movie nights into cinematic adventures. So, don't shy away from diving into those connection methods and fine-tuning your audio settings. Embrace the journey, and soon you'll be the master of your media domain, enjoying all your favorite shows in style! Happy connecting!