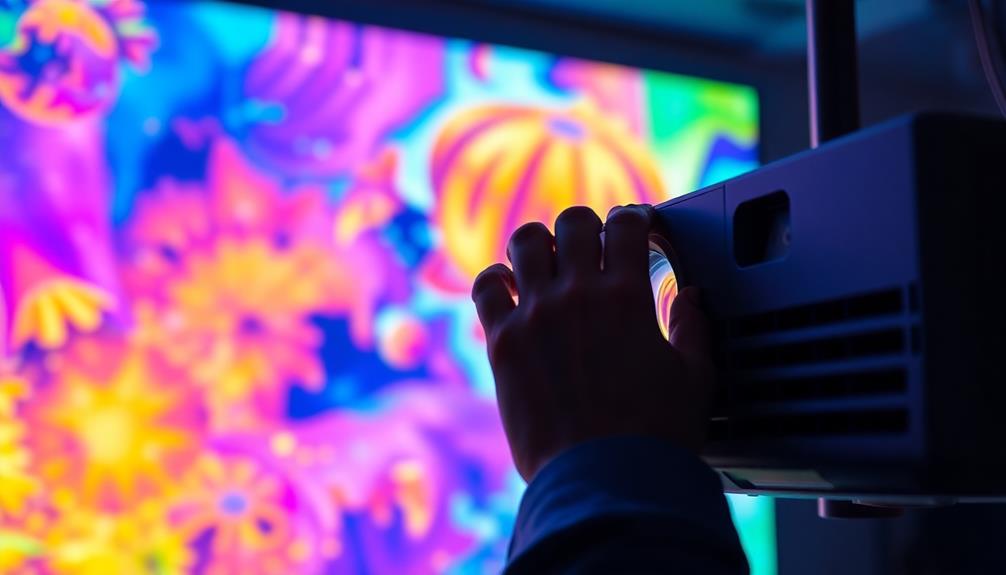
To guarantee sharp images on your 3-chip projector, proper convergence adjustment is key. Even a slight discrepancy of 0.1 pixels can blur details and cause color fringing. Start by making small adjustments, ideally in 0.1 pixel increments, and test your results with real content, like Blu-ray still frames. Regular assessment is essential, so keep an eye on convergence quality. Remember, adjustments beyond the 2-pixel tolerance may not offer noticeable improvements. If you're facing persistent issues or want to optimize your setup, there's plenty more valuable information to guide you through the process.
Key Takeaways
- Make fine adjustments in increments of 0.1 pixels to achieve optimal convergence and enhance image sharpness.
- Regularly assess convergence quality using actual video content, such as Blu-ray still frames, for accurate calibration.
- Aim for a convergence tolerance of up to 2 pixels; excessive adjustments may lead to discoloration and haziness.
- Utilize test patterns to identify and address subtle convergence issues that may not be visible during regular viewing.
- Continuous monitoring and adjustments are essential for maintaining peak performance and reducing color fringing on 3-chip projectors.
![[Built-in Apps/4K Support] Smart Outdoor Projector with WiFi and Bluetooth, Movie Projector, DoIby Audio with Dual Speaker, Auto Focus w/ YouTube&PrimeVideo Proyector, Upgrad P62 Pro](https://m.media-amazon.com/images/I/51yAGv8VI7L._SL500_.jpg)
[Built-in Apps/4K Support] Smart Outdoor Projector with WiFi and Bluetooth, Movie Projector, DoIby Audio with Dual Speaker, Auto Focus w/ YouTube&PrimeVideo Proyector, Upgrad P62 Pro
[Upgraded Classic – P62 Pro Movie Projector] Building on the reliability and low return rate of the classic...
As an affiliate, we earn on qualifying purchases.
Understanding Convergence Adjustment

Understanding convergence adjustment is vital for optimizing your projector's performance. This process typically involves making fine adjustments in pixel increments, often as small as 0.1 pixels. Such precise adjustments can greatly reduce visible misconvergence, enhancing overall image sharpness and minimizing color fringing.
Many projectors, like the Sony HW10, have a convergence tolerance of up to 2 pixels, meaning any adjustments beyond this threshold may not yield noticeable improvements.
When calibrating your projector, focus on real-world content rather than just test patterns. Users report better results regarding clarity and color accuracy this way. However, be cautious—improper adjustments can introduce haziness around fine details, particularly in high-contrast areas. As a result, it's essential to implement precise calibration techniques to avoid discoloration.
After the initial setup, regularly assess the convergence quality. Remember, subsequent adjustments can lead to varying results depending on the type of content and viewing conditions. Keeping an eye on these factors will guarantee that your projector delivers the best possible performance, allowing you to fully enjoy your viewing experience.

4K Projector with Built-in Apps, 1500ANSI Auto Focus&6D Keystone Dolby Audio Kogata Smart Projector with WiFi 6 Bluetooth Outdoor Movie Proyector for Home Theater HDR10+ UPGRADE
【UPGRADE Version】Unlimited Streaming –Compatible with Netflix & Dolby Audio& DTS Audio: The Kogata GC357 home projector comes with...
As an affiliate, we earn on qualifying purchases.
Techniques for Effective Calibration
Effective calibration techniques can greatly enhance your projector's image quality. By focusing on precise convergence adjustments, you can minimize color fringing and guarantee peak performance.
Here are some techniques to take into account:
- Make adjustments in increments of 0.1 pixels for more accurate alignment.
- Regularly assess convergence quality using actual video content, like Blu-ray film still frames, instead of test patterns.
- Experiment with fractional shifts, particularly lowering the blue channel to improve overall convergence.
- Aim for a convergence tolerance of up to 2 pixels, but be cautious—incorrect adjustments can lead to discolouration in high-contrast areas.
HAPPRUN Native 1080P Projector, Bluetooth Home Theater Movie Projector with Built-in Speaker, Compatible with Smartphone, HDMI, Fire Stick, PS5, Indoor & Outdoor Use - Without Google TV System
[ Native 1080P Full HD Resolution ] - Enjoy crystal-clear visuals with HAPPRUN H1's native 1920x1080 resolution, delivering...
As an affiliate, we earn on qualifying purchases.
Common Issues and Solutions

While fine-tuning your projector's convergence, you might encounter several common issues that can impact image quality. Misconvergence, even as slight as 0.1 pixels, can lead to noticeable discrepancies in sharp images from distances of just 12-13 feet. This emphasizes the need for precise convergence adjustments to achieve ideal viewing experiences.
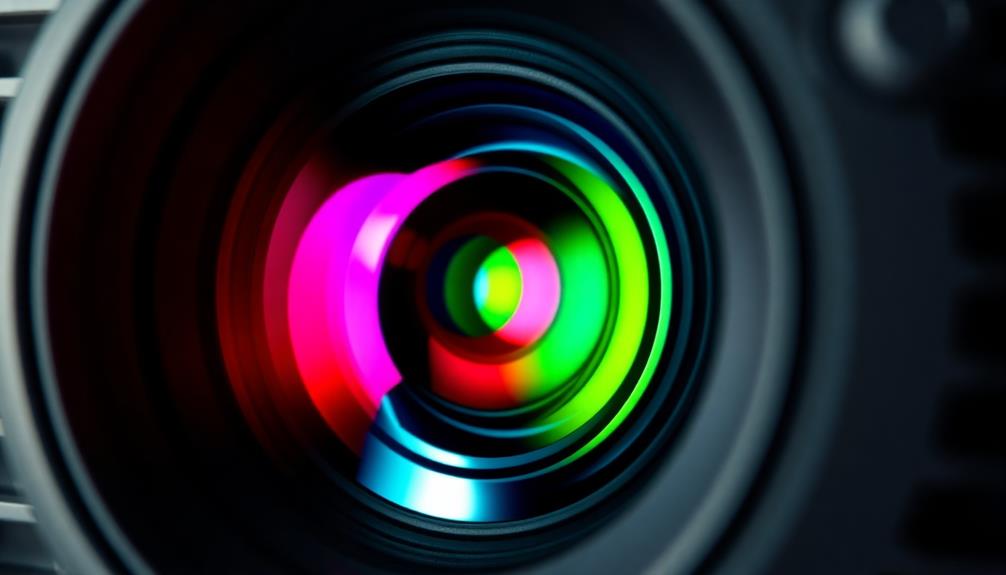
One common problem is color fringing, which can blur fine details and diminish overall image clarity. To tackle this, make small adjustments—shifting by 0.1 pixels can greatly reduce haziness and improve picture quality. Remember, higher-end 3-chip projectors, like the Sony VW80, generally provide superior convergence performance, so if you're using a lower-end model, be extra diligent with your adjustments.
Regularly assess convergence quality using actual video content rather than just test patterns. This approach gives you a more accurate representation of projector performance and helps identify necessary adjustments.
If you notice persistent issues, consider consulting your projector's manual or reaching out to a professional for assistance. Taking these steps will guarantee you enjoy sharp images and a satisfying viewing experience.
![Outdoor-Projector-4K with WiFi and Bluetooth: [3000 Brightness/50W DoIby/Built-in APPs] Portable-Projector Smart OS 2.0&AI Auto Focus, ONOAYO Movie Proyector Compatible with Netflix/YouTube/PrimeVideo](https://m.media-amazon.com/images/I/41YCwa1cXcL._SL500_.jpg)
Outdoor-Projector-4K with WiFi and Bluetooth: [3000 Brightness/50W DoIby/Built-in APPs] Portable-Projector Smart OS 2.0&AI Auto Focus, ONOAYO Movie Proyector Compatible with Netflix/YouTube/PrimeVideo
[Stream Without Limits - Built-in APPs, Compatible with Netflix] The ONO3Pro 2.0 outdoor projector brings the world’s top...
As an affiliate, we earn on qualifying purchases.
User Experiences and Insights
Many users have shared their experiences with projector convergence adjustments, emphasizing the importance of fine-tuning for achieving ideal image quality.
Many projector owners have found that even minor convergence adjustments of just 0.1 pixels can yield more effective results than larger shifts. This precision helps minimize visible convergence issues, which can often be detected from distances as close as 12-13 feet.
Here are some insights from users:
- Utilizing test patterns is essential for identifying convergence problems.
- Adjustments can sometimes introduce slight haziness around fine details.
- Blu-ray film still frames offer a clearer understanding of color fringing.
- Calibration is key for maintaining peak image clarity.
The Sony HW10 projector, for example, has a convergence tolerance of up to 2 pixels, setting user expectations high.
By paying attention to these nuances, you can enhance your viewing experience considerably. Engaging in careful calibration can make all the difference, allowing you to enjoy sharp images without distracting artifacts.
Whether you're watching a movie or playing games, the right adjustments provide a richer, more immersive experience.
Impact on Image Quality
Fine-tuning convergence adjustments directly influences image quality, especially on 3-chip projectors where precision is key.
Even slight misconvergence can lead to noticeable fringing and detail loss, making it vital to get those pixel adjustments just right. Users of projectors like the Sony HW10 have found that adjusting by as little as 0.1 pixels can greatly enhance image clarity.
Using test patterns is essential, as they can reveal convergence issues that mightn't be apparent during regular content viewing. Regular assessments with both test patterns and actual video help guarantee your adjustments are effective.
As you fine-tune your settings, pay attention to color fringing, especially magenta and green edges; precise adjustments help to reduce these artifacts, leading to improved overall image quality without considerable detail loss.
Community Resources and Support
The projector community is a treasure trove of resources and support for those looking to perfect their convergence adjustments.
Whether you're working with 3-chip devices or simply aiming for ideal image sharpness, engaging with fellow enthusiasts can make a significant difference.
Here are some key community offerings:
- Personal Experiences: Users share their own settings and techniques for effective convergence adjustment.
- Test Patterns: Members emphasize using test patterns to assess convergence quality, ensuring consistent camera positioning during captures.
- Incremental Adjustments: Advice on making adjustments in 0.1 pixel increments helps minimize misconvergence and enhance overall image sharpness.
- Collaborative Troubleshooting: Community engagement fosters sharing of test results and experiences, addressing viewer concerns regarding convergence tolerances.
Frequently Asked Questions
How to Make a Projector Image Sharper?
To make your projector image sharper, start by warming it up for 20-30 minutes. Then, adjust convergence in 0.1 pixel increments, using high-quality test patterns to check for alignment and color accuracy.
What Is a 3 Chip DLP Projector?
You'd think all projectors are the same, but a 3-chip DLP projector uses three chips for red, green, and blue. This design enhances color accuracy, brightness, and image quality compared to single-chip models.
How Do You Fix a Convergence Projector?
To fix a convergence projector, start by adjusting the built-in settings carefully. Use test patterns to assess alignment, check after warming up, and shift colors as needed for ideal clarity and reduced fringing.
What Is a 3 Chip Technology Projector?
A 3-chip technology projector uses three individual chips for red, green, and blue light, enhancing color accuracy and brightness. You'll enjoy sharper images and reduced color fringing, perfect for professional or high-quality home viewing.
Conclusion
To sum up, mastering convergence adjustment is essential for achieving sharp images on your 3-chip projector. With proper calibration techniques, you can minimize common issues like color misalignment, enhancing your viewing experience. Did you know that nearly 30% of projector users report dissatisfaction due to poor image quality? By accessing community resources and sharing insights, you'll not only improve your setup but also join a network of enthusiasts dedicated to perfecting their projection skills.