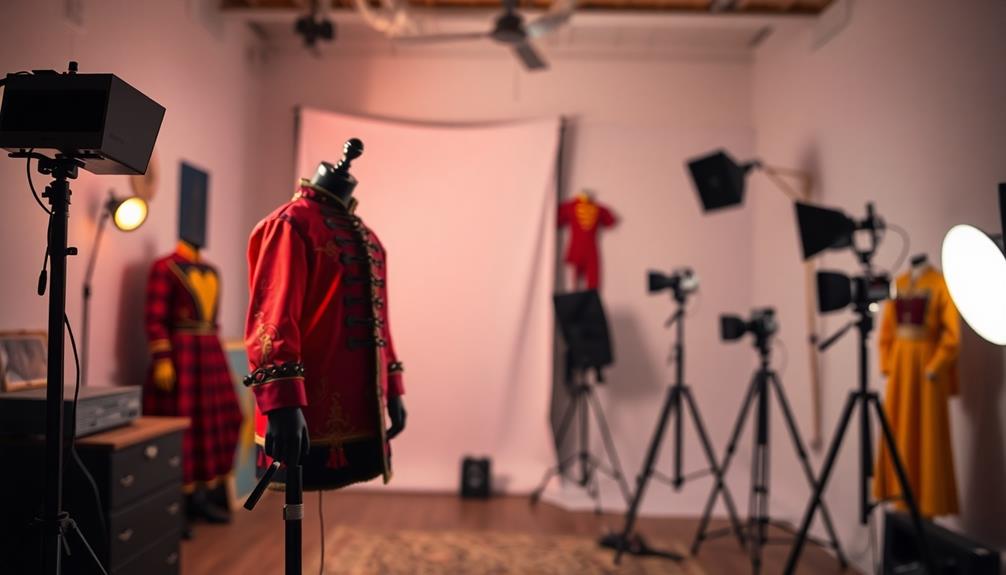
Using a projector for costume and cosplay photography can elevate your images greatly. First, pick a projector with at least 2000 lumens for brightness and clarity. Position it 8-10 feet away from your model, ensuring it's above eye level to eliminate shadows. Darken the room to make the projections pop, and use high-resolution images for vibrant backdrops. Experiment with angles and poses to create dynamic compositions that enhance storytelling. By controlling lighting and color temperatures, you'll achieve a cohesive look. Keep experimenting, and soon you'll discover how to make your cosplay scenes truly enchanting.
Key Takeaways
- Choose a high-brightness projector (at least 2000 lumens) for clear projections in various lighting conditions.
- Position the projector 8-10 feet away and above the model's eye level to avoid shadows.
- Use high-resolution images and darker color palettes for vibrant and immersive backdrops.
- Experiment with dynamic compositions, utilizing different angles and poses to enhance storytelling.
- Maintain communication with models to encourage natural expressions and engagement with the projected elements.

SOULWIT 50Pcs Self Adhesive Cable Management Clips, Cable Organizers Wire Clips Cord Holder for TV PC Ethernet Cable under Desk Home Office (Black)
🔷SUPER EASY TO USE: Stick to clean surface, open tab, insert multiple cables, close the tab, enjoy the...
As an affiliate, we earn on qualifying purchases.
Understanding Projector Types

When diving into the world of costume photography, understanding projector types is vital for achieving stunning visuals. You'll typically encounter three main types: LCD, DLP, and LCOS. Among these, LCOS projectors stand out for their superior image quality, thanks to advanced technology that minimizes visible pixels in the projected image. This clarity is essential for guaranteeing your costumes and backdrops look their best.
Digital projectors have become more accessible, allowing you to project images directly from various devices. However, you must pay close attention to projector resolution. A higher resolution means fewer visible pixels, which enhances the overall quality of the projected image. This is especially important in costume photography, where detail can make or break the aesthetic.
Additionally, consider the brightness of your projector, measured in lumens. A projector with around 3000 lumens offers flexibility across different photography settings, while a lower lumen count may limit your options.
Be certain to choose a projector compatible with various image file formats, as this guarantees seamless integration of backgrounds that complement your costume themes. By understanding these factors, you'll set the stage for breathtaking costume photography.

XHF 120 PCS Adhesive Cable Wire Clips Black, Outdoor Christmas Light Clips, Cable Management Wire Organizer Cord Holder for Under Desk, Car, Wall, TV PC Ethernet Cable
High quality material:XHF Adhesive Cable Clips are manufactured from Strong Adhesive and PA66 nylon
As an affiliate, we earn on qualifying purchases.
Importance of Brightness

How essential is brightness in cosplay photography? Brightness, measured in lumens, plays a significant role in determining the clarity and vibrancy of your projected images. Projectors typically range from 150 to 3000 lumens, and opting for higher brightness levels can dramatically enhance your photos.
With a brighter projector, you can use quicker shutter speeds and lower ISO settings, which helps reduce noise and graininess in your final shots. Additionally, understanding the importance of refrigeration cycle concepts can parallel the need for ideal settings in photography to achieve the best results.
In brightly lit environments, projected images can easily appear washed out, so it's critical to select a projector with adequate lumens. Aim for at least 2000 lumens if you're working in home or outdoor settings. This will guarantee that your images maintain effective visibility and contrast, making your cosplay stand out.
Additionally, brightness impacts how pixels appear on skin tones. A projector with sufficient brightness and resolution minimizes pixelation, guaranteeing your characters look their best.

120PCS XHF Adhesive Cable Wire Clips White, Cable Staples Outdoor Cable Management Wire Organizer Cord Holder for Under Desk, Car, Wall, TV PC Ethernet Cable
High quality material:XHF Adhesive Cable Clips are manufactured from Strong Adhesive and PA66 nylon
As an affiliate, we earn on qualifying purchases.
Managing Image Quality
Managing image quality is vital for capturing stunning cosplay photography. Start by making sure you use high-resolution images for projection. Grainy backdrops can detract from the intricate details of costumes and lower the overall quality of your photos.
Opt for darker color palettes in your projected images to avoid washed-out effects; this will enhance the richness and realism of your cosplay shots. Additionally, consider the role of color accuracy in projectors as it greatly influences how the colors of the costumes are represented on screen.
When selecting a projector, choose mid-range models rather than low-cost options. Mid-range projectors typically offer better brightness and image clarity, which are essential for effective photography.
Keep an eye on the lumens output; projectors with higher brightness levels, like 3000 lumens, give you more flexibility with exposure settings. This helps achieve clearer images, even in varying lighting conditions.
Lastly, implement keystone correction on your projector. This feature helps maintain image quality by avoiding distortion when projecting from angles. It guarantees that your backdrop aligns perfectly with the model, enhancing the overall composition of your cosplay photography.
![Outdoor-Projector-4K with WiFi and Bluetooth: [3000 Brightness/50W DoIby/Built-in APPs] Portable-Projector Smart OS 2.0&AI Auto Focus, ONOAYO Movie Proyector Compatible with Netflix/YouTube/PrimeVideo](https://m.media-amazon.com/images/I/41YCwa1cXcL._SL500_.jpg)
Outdoor-Projector-4K with WiFi and Bluetooth: [3000 Brightness/50W DoIby/Built-in APPs] Portable-Projector Smart OS 2.0&AI Auto Focus, ONOAYO Movie Proyector Compatible with Netflix/YouTube/PrimeVideo
[Stream Without Limits - Built-in APPs, Compatible with Netflix] The ONO3Pro 2.0 outdoor projector brings the world’s top...
As an affiliate, we earn on qualifying purchases.
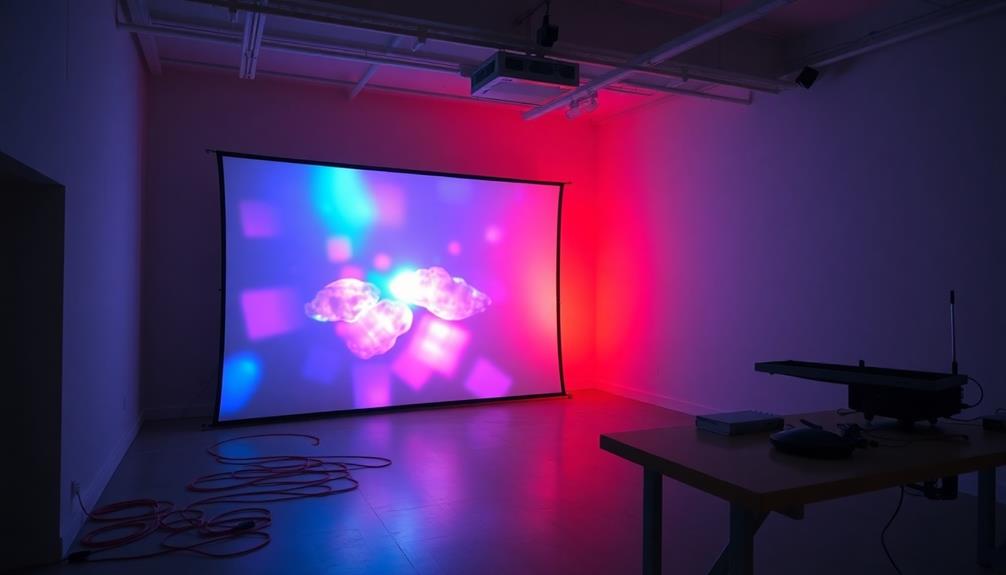
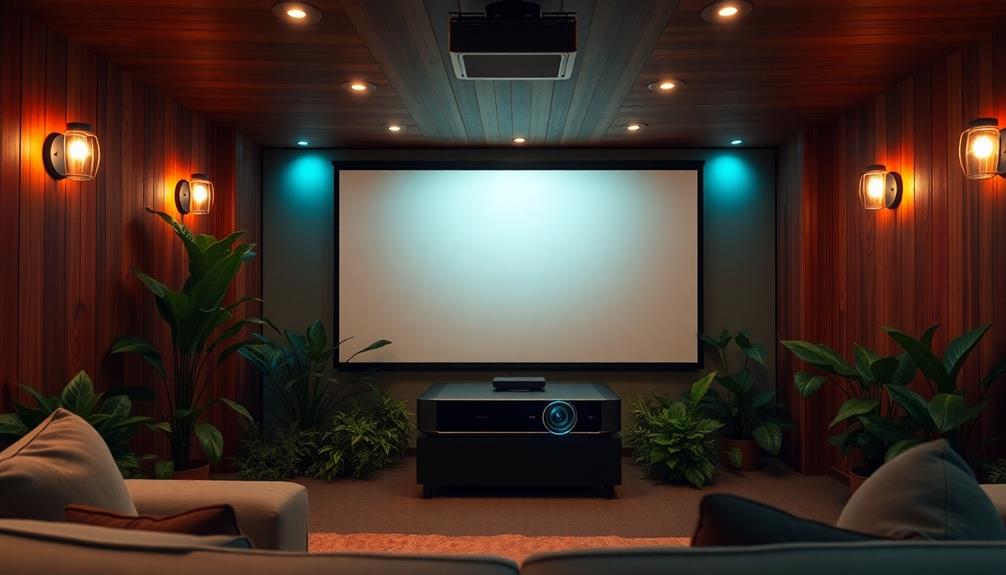
Setting Up Your Projector
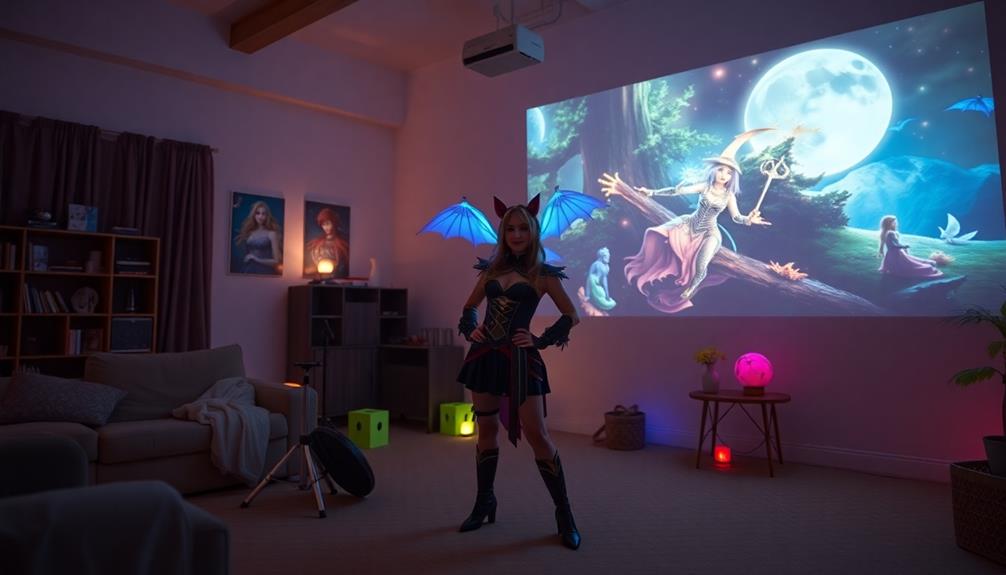
Positioning your projector correctly is key to achieving a stunning backdrop for your costume photography. You should position the projector above your model's eye level and at a distance of 8-10 feet. This setup helps achieve ideal image coverage and prevents unflattering shadows.
If you're using a ceiling-mounted projector for a fixed setup, that's great! Alternatively, you can place a standing projector behind the model to keep shadows from interfering with the projected image.
Make certain to darken the room to enhance image clarity and depth, as projected images can look washed out in bright environments. It's also important to utilize keystone correction to maintain image quality and prevent distortion, especially when projecting from an angle.
Avoid direct front projection to keep shadows off the model.
Lastly, test your projector's compatibility with various image file formats, and always use high-resolution images to prevent graininess in the projected backdrop. By following these steps, you'll guarantee that your projector setup contributes beautifully to your costume photography.
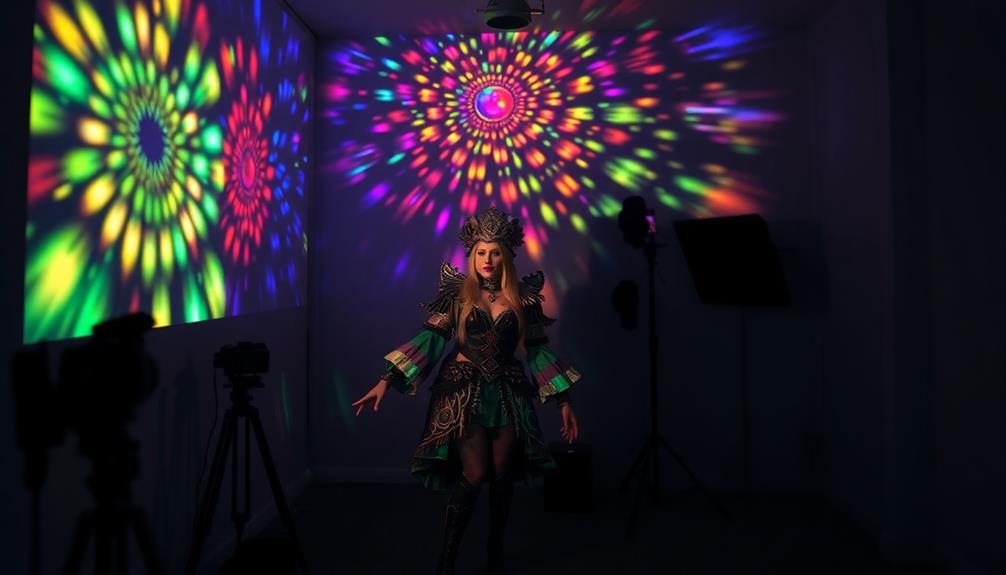
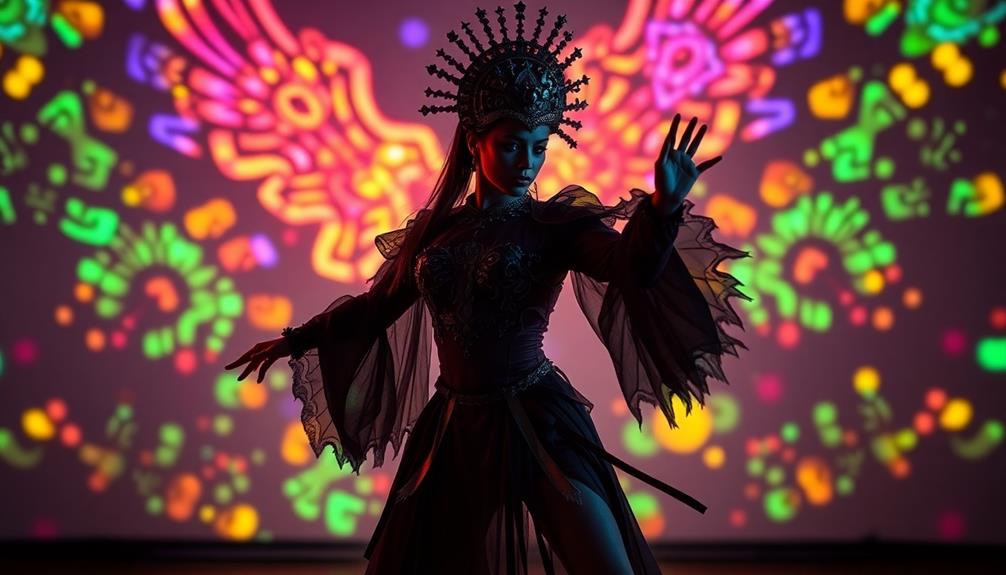
Optimal Lighting Techniques

When aiming for stunning costume photography, ideal lighting techniques play an essential role in enhancing the projected images. Start by darkening the room; bright environments can wash out your projections, diminishing their clarity and depth.
Position your projector above the model's eye level to avoid unflattering shadows and guarantee even coverage of the projected image. Control additional lighting carefully to prevent it from overpowering the projector's visuals. Using modifiers like reflector dishes can direct light effectively while minimizing background spill.
For the best exposure settings, aim for a shutter speed of 1/60 sec, an f4 aperture, and an ISO of 200. These settings help capture the projected images crisply.
To create a cohesive lighting setup, consider utilizing gels, such as CTO for your flashes. This will help match the color temperatures between your projector and other light sources, ensuring a harmonious look throughout the shoot.
Choosing Effective Backdrops
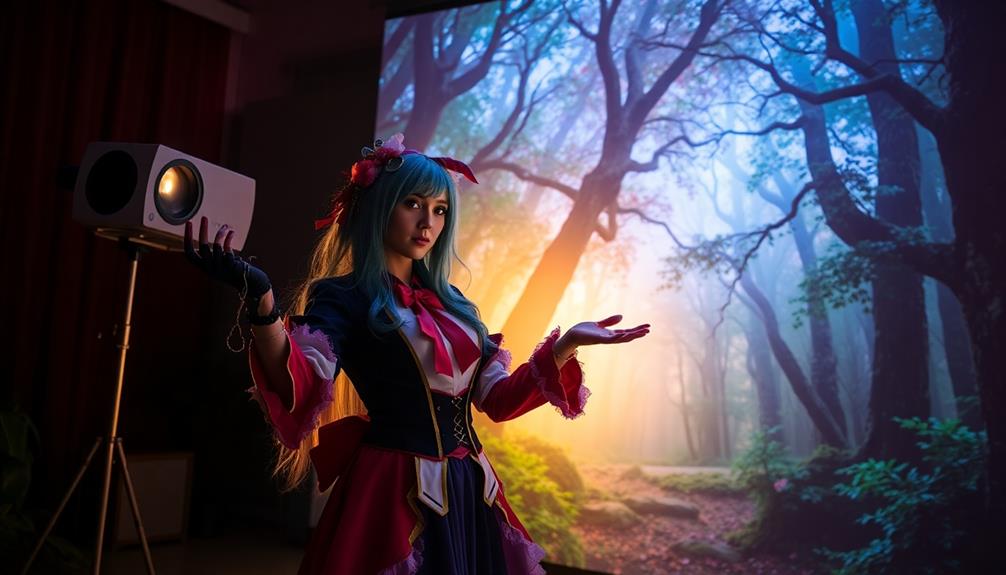
After perfecting your lighting setup, it's time to focus on selecting the right backdrops to complement your costume photography. Start by choosing high-resolution images to guarantee your projections are clear and vibrant. Graininess can detract from the overall quality, so prioritize sharp visuals that enhance your cosplay.
Consider using darker color schemes for your backdrop images. These tones not only elevate the fantasy aspect of your costumes but also help prevent any washed-out effects caused by your lighting setup. Additionally, double-check that your chosen backdrop images are compatible with your projector's file formats. This step is essential, as it directly influences the quality of your projections.
When shooting in dimly lit environments, opt for projectors with higher brightness levels measured in lumens. This guarantees that the details of your selected backdrops shine through, enhancing the overall clarity of your images.
Experimenting With Composition

As you experiment with composition, try shooting from various angles to add visual interest and tell a story through your images.
Pay attention to how backgrounds integrate with your subjects, ensuring they enhance rather than distract from the narrative.
Layer your shots with a mix of close-ups and wide angles to create a more dynamic and engaging experience for your viewers.
Dynamic Angles Exploration
Exploring dynamic angles in costume photography can dramatically elevate your images, especially when capturing the essence of characters like superheroes.
The integration of metaverse gaming into photography can also inspire unique environments and backgrounds. By experimenting with different perspectives, you'll enhance your shots and create more engaging compositions.
Here are some techniques to contemplate:
- Low Angles: Shoot from below to give characters a powerful, larger-than-life presence.
- High Angles: Capture from above to convey vulnerability or a dramatic overview of the scene.
- Wide-Angle Lenses: Use a 20mm f/1.8 for expansive backgrounds, creating a sense of environment and context.
- Telephoto Lenses: An 85mm f/1.4 isolates your subject beautifully, allowing for a shallow depth of field that emphasizes detail.
Incorporate movement by allowing characters to 'enter' the frame, which adds a dynamic quality to your shots.
Framing techniques like the Rule of Thirds or leading lines can also enhance visual interest.
By utilizing these dynamic angles when shooting, you not only capture stunning images but also tell compelling stories through your cosplay photography.
Experiment, and watch your work transform!
Background Integration Techniques
When you're integrating backgrounds into your costume photography, think about how the projected images can enhance your character's narrative. Experiment with different angles and perspectives for your projector placement. Low or high angles can create depth and intrigue, transforming the overall composition. Avoid static positioning; instead, allow your characters to 'move into' the frame, making the scene more dynamic.
Use keystone correction to maintain image quality, especially when projecting from an angle. This technique prevents distortion, ensuring that your composition remains visually appealing. Darker colors work best for projected images, as they minimize washed-out effects in bright environments, enhancing the fantasy aspect of your cosplay scene.
To further improve your results, adjust the projector placement to be above the model's eye level. This helps avoid unflattering shadows and creates a more engaging composition, elevating the storytelling in your photographs.
Layered Visual Storytelling
Integrating layered visual storytelling in your costume photography can elevate the narrative impact of your images. Using a projector, you can create immersive backgrounds that enhance your character's story.
Here are some tips to experiment with composition:
- Angles and Perspectives: Position the projector at various angles to let characters 'move into' the frame, adding depth and a cinematic feel.
- Contrasting Colors: Select projected backdrops with contrasting colors that resonate with your character's costume, strengthening the visual connection and creating a cohesive story.
- Dynamic Poses: Encourage cosplayers to adopt poses and expressions that showcase their character's actions and motivations, ensuring each shot adds to the overall narrative.
- Multiple Projectors: Use more than one projector to layer visuals, crafting complex backgrounds that interact with the cosplayers in innovative ways.
Techniques for Posing Models
When posing models for costume photography, start by researching the character's actions and motivations to create authentic poses that tell a story.
Encourage your models to interact with their surroundings, which can add energy and depth to the shot.
Clear communication about emotions and scene context will also help your models connect with their characters, enhancing the overall impact of the photograph.
Character Research and Posing
Understanding a character's background, actions, and motivations can greatly enhance your posing techniques during costume photography. By engaging in thorough character research, you can inform poses that reflect their personality and narrative.
Here are some tips to elevate your posing:
- Embody their essence: Think about how your character stands, walks, or reacts in different situations.
- Convey emotions: Use facial expressions and body language that resonate with the character's feelings in the scene.
- Maintain immersion: Have your model gaze just over your shoulder, as this avoids breaking the fourth wall and enhances authenticity.
- Communicate effectively: Guarantee you and the cosplayer understand the narrative context so that every pose contributes to the story.
Dynamic Interaction With Background
Engagement is key to creating enchanting costume photography that draws viewers into the narrative. Start by researching your character and their actions; this knowledge informs your posing decisions and helps you interact dynamically with the projected background.
Encourage your models to engage with their surroundings—leaning against or reaching toward the projected elements can create more immersive and visually interesting images.
Utilize feedback during the shoot since cosplayers can't see themselves while posing. Direct communication helps you achieve natural expressions and authentic character portrayals.
Experiment with different angles and perspectives, like low or high shots, to capture the interaction between the model and the projected background. This approach adds depth and a cinematic quality to your images.
Adjust the eye line for your models to just above the camera. This technique maintains immersion and enhances the connection between the character and the projected scene, keeping the fourth wall intact.
Communicating Emotions and Expressions
Communicating emotions effectively is essential in costume photography, as it breathes life into your characters.
To achieve authentic portrayals in cosplay photography, consider these techniques for posing models:
- Research the Character: Understand their motivations and emotions. This knowledge will guide your model's expressions and poses.
- Engage with Surroundings: Encourage models to interact with the environment. This creates dynamic compositions that tell a story and enhance emotional depth.
- Clear Communication: Maintain an open dialogue with your cosplayer. Since they can't see themselves, guide them to achieve natural expressions and emotional resonance.
- Ideal Eye Line: Direct models to look just over your shoulder. This maintains immersion and prevents breaking the fourth wall, keeping the viewer engaged.
Color Management Strategies

Color management is essential in cosplay photography, especially when using a projector. Understanding the color temperature of your projector is vital, as it may differ from other light sources. This difference often requires you to adjust the custom white balance on your camera for accurate color representation.
Start your experiments with bright images that contain large white sections; these serve as a solid baseline for establishing color and exposure settings.
If your projector has a warmer color tone, consider using CTO gels on your flashes. These gels help achieve consistent color tones across all your light sources, ensuring a harmonious look in your photos.
Shooting in RAW format also gives you more flexibility, allowing you to adjust color balance and temperature during editing without losing quality.
Post-Processing Considerations

When it comes to post-processing, you'll want to focus on color grading techniques to set the right mood for your cosplay images.
Enhancing image sharpness can also make a big difference, ensuring details pop without sacrificing quality.
Color Grading Techniques
Mastering the art of color grading can transform your cosplay photography from ordinary to extraordinary. By adjusting the color palette to match the source material, you create a cohesive visual narrative that enhances the mood of your images.
Here are some techniques you can use:
- Selective Color Correction: Use software like Adobe Lightroom or Photoshop to target specific hues, making adjustments without affecting the whole image.
- LUTs (Look-Up Tables): Apply LUTs to streamline your color grading process, achieving cinematic effects that resonate with the character portrayal.
- Color Temperature Adjustments: Experiment with color temperature to harmonize your projector's output with the ambient lighting, ensuring your characters look natural and integrated.
- Consistent Grading: Apply a consistent color grading technique across a series of images to reinforce thematic elements and establish a recognizable style.
Image Sharpness Enhancements
After perfecting your color grading, sharpening your images is the next step to elevate your costume photography.
Begin by using sharpening filters in your editing software. These tools help define edges and enhance overall clarity without introducing unwanted noise. It's crucial to start with the highest resolution files available to minimize pixelation during adjustments.
While implementing image sharpness enhancements, don't overlook the power of adjusting the contrast levels. Increasing contrast can greatly improve perceived sharpness, making edges stand out more distinctly in your final image.
Consider using selective sharpening techniques. Focus on key areas of the costume and background, drawing attention to important details while keeping other regions softer. This approach creates a more dynamic composition that captures the viewer's eye.
Regularly check your image at 100% zoom during editing. This practice helps you identify any soft areas or artifacts that need correction, ensuring your final output remains crisp and professional.
Background Integration Strategies
Integrating projected backgrounds into your costume photography can transform your images, creating a cohesive and visually striking composition.
To maximize the impact of your projector in post-processing, consider these background integration strategies:
- Color Matching: Use software tools to adjust colors, ensuring your subject and background harmonize perfectly. This enhances visual coherence and keeps the focus on your cosplay.
- Selective Color Adjustments: Fine-tune the hues of both the subject and the background. This maintains a harmonious palette that reflects the essence of your original source material.
- Depth of Field Manipulation: Isolate your subject from the background by adjusting the depth of field. This creates a cinematic feel, pulling the viewer's attention directly to your cosplay.
- Subtle Motion Effects: Consider adding slight motion blur or overlays to the projected background. This mimics the dynamic nature of the original media, adding a layer of excitement to your composition.
Frequently Asked Questions
Can You Use a Projector for Photography?
Yes, you can use a projector for photography. It adds depth and creativity to your images by projecting backgrounds or themes. Just guarantee your setup avoids shadows and maintains high resolution for clarity in your shots.
How to Show Photos on a Projector?
To showcase your images beautifully, guarantee your projector's compatible with your files. Use high-resolution visuals, adjust brightness for your setting, position it correctly, and correct any distortions to keep everything looking sharp and professional.
How to Use a Projector for Backdrops?
To use a projector for backdrops, choose high-resolution images and position the projector 8-10 feet away from your subject. Adjust lighting and angles to enhance clarity, avoiding direct projection to prevent shadows on your backdrop.
How to Plan a Cosplay Photoshoot?
To plan a cosplay photoshoot, start by choosing a theme that reflects the character. Scout locations with good lighting, clarify your vision with cosplayers, and create a shot list to guarantee a smooth session.
Conclusion
Using a projector for costume and cosplay photography opens up a world of creative possibilities. You can enhance your images with vibrant visuals, create unique backgrounds, and bring your characters to life. By mastering brightness, managing image quality, and experimenting with composition, you'll elevate your photography skills. So, light up your imagination, focus your creativity, and capture stunning shots that celebrate your passion. With practice, you'll transform your photos into enchanting works of art!