
Using pink noise and test tones helps you calibrate your audio system accurately. Pink noise provides a consistent sound across all frequencies, allowing you to check if your system delivers a flat, balanced response. Test tones target specific frequencies, helping identify dips or peaks that need adjustment. By measuring and fine-tuning these sounds, you ensure your setup sounds its best and performs reliably. Keep exploring to learn how to use these tools effectively for perfect calibration.
Key Takeaways
- Pink noise provides a broad, flat sound spectrum ideal for assessing overall frequency response during calibration.
- Test tones target specific frequencies, helping identify dips, peaks, or irregularities in the audio system.
- Using a sound level meter, measure sound levels at various points to verify consistent and flat frequency response.
- Adjust system components like equalizers and speaker placement based on pink noise and test tone analysis.
- Proper calibration with pink noise and test tones ensures accurate sound reproduction and maintains audio quality over time.
Calibrating your audio system is vital to achieve accurate sound reproduction, and using pink noise and test tones is one of the most effective methods. When you take the time to properly calibrate, you guarantee that your equipment delivers a balanced frequency response, meaning all audio frequencies are reproduced correctly without any particular range sounding overly loud or faint. This process is essential for equipment testing because it helps identify issues like uneven speaker response, phase problems, or amplifier deficiencies. By using pink noise, which contains equal energy per octave, you get a broad, flat sound that reveals how your system handles the entire audible spectrum.
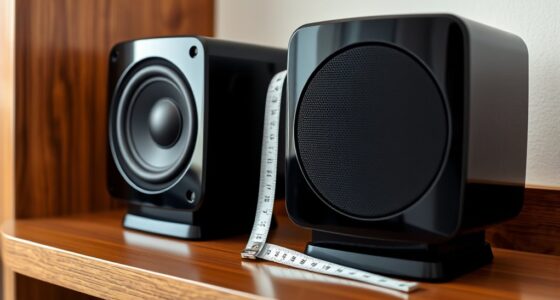
To start, you’ll need a reliable sound level meter or a calibration microphone connected to your measurement device. Play pink noise through your speakers or headphones at a moderate volume. As the noise plays, use your meter to measure the sound levels at different points in the room or at each speaker. This step allows you to verify whether the frequency response of your setup is flat, meaning it reproduces all frequencies evenly. If certain areas show deviations—say, bass is too boomy or treble is weak—you can adjust your system accordingly, either by tweaking equalizers or repositioning speakers. This guarantees your equipment testing is thorough and your calibration exact. Additionally, understanding the importance of frequency response can help you interpret your measurements more effectively.
Test tones are equally important because they allow you to target specific frequencies. Playing sine wave test tones at various frequencies—such as 125Hz, 500Hz, 2kHz, and 8kHz—helps you pinpoint issues like dips or peaks in the frequency response. Listening carefully while measuring with your meter, you can identify if particular tones are too prominent or too suppressed. This information guides you to make necessary adjustments, ensuring your system accurately reproduces sound across the entire spectrum. Using test tones regularly during calibration allows you to maintain consistency over time, especially when upgrading or modifying your setup.

Epson Home Cinema 980 3-Chip 3LCD 1080p Projector 4,000 Lumens Color and White Brightness, Streaming/Gaming/ Media Room, Built-In Speaker, Auto Picture Skew, 16000:1 Contrast, 2 HDMI Ports
Exceptional Picture Quality — Provides stunning, detailed 1080p images and fast data processing that’s optimized for fast-action sports,...
As an affiliate, we earn on qualifying purchases.
Frequently Asked Questions
How Often Should I Recalibrate My Audio System?
You should recalibrate your audio system every 6 to 12 months to maintain ideal sound quality. Regular calibration helps extend your speakers’ lifespan by preventing overuse and ensuring balanced performance. If you notice sound quality issues, like distortion or unbalanced audio, it’s time for a recalibration. Consistent calibration frequency keeps your system performing at its best, allowing you to enjoy clear, accurate sound for years to come.
Can Pink Noise Damage My Speakers?
Pink noise itself doesn’t damage your speakers if used correctly. Some believe pink noise limitations can cause speaker damage, but that’s not usually true if volume levels stay within safe limits. The key is avoiding prolonged exposure to high volume levels, as excessive power can harm your speakers. So, as long as you use pink noise at appropriate levels, it’s a safe and effective way to calibrate your audio system without risking damage.
What Equipment Is Necessary for Accurate Calibration?
You need measurement tools like a precision sound level meter and a calibrated microphone for accurate calibration. These tools help you follow proper calibration procedures, ensuring your audio system performs ideally. Use a digital audio interface for precise input and output control. By combining these with test tones or pink noise, you can fine-tune your speakers and receiver, achieving balanced sound across your setup.
How Do Test Tones Differ From Pink Noise?
Test tones are like sharp, focused beams of light, pinpointing specific frequencies in the spectrum, while pink noise is like a gentle waterfall, covering the entire frequency spectrum evenly. Test tones target individual frequencies to check sound accuracy, helping you identify issues with sound uniformity. Pink noise provides a broad overview, ensuring the overall balance of your audio system. Both are essential tools for precise calibration.
Is Professional Calibration Necessary for Home Audio?
Professional calibration isn’t always necessary for your home audio, but it can substantially improve sound quality. Consumer equipment varies, and your listening environment can impact audio performance. If you notice uneven sound or poor clarity, investing in calibration helps optimize your setup. It ensures your speakers and system are tuned to your space, providing a richer, more balanced listening experience without needing to hire a pro.

Official Licensed Google TV Smart Projector, HAPPRUN 4K UHD Home Theater with Dolby Sound, Wi-Fi & Bluetooth, Built-in Streaming Apps, Compatible with Games Consoles & Smartphone, Indoor & Outdoor Use
[ Built-in Official Licensed Google TV ] - Without additional equipment, the smart projector can directly access Netflix,...
As an affiliate, we earn on qualifying purchases.
Conclusion
By harnessing pink noise and test tones, you gain the power to perfect your audio setup, turning chaos into clarity. Think of these tools as your secret weapons, transforming your listening experience from muddled to pristine. Don’t let subpar sound steal your enjoyment—take control and calibrate with confidence. After all, isn’t it worth ensuring every note and nuance echoes exactly as intended? Your perfect sound awaits—just a calibration away.

2000 ANSI 4K Decoding Projector with WiFi and Bluetooth, HAPPRUN Movie Home Theater with Auto Focus, 300'' Display for Indoor/Outdoor, Smart Proyector Compatible with Phone/TV Stick/PC/PS5
[EASIER OPERATION: AI Smart Screen Adjustment] HAPPRUN projector comes with auto focus and 6D auto-keystone technology, enjoy a...
As an affiliate, we earn on qualifying purchases.

Rockville Rock Shaker 15" Powered Subwoofer, 1000W Peak / 500W RMS, Class-D, MDF Enclosure, RCA, Speaker Inputs, Phase & Crossover Control, Black, for Home Theater & Studio
POWERFUL 1000W SUBWOOFER - 1000 watts peak / 500 watts RMS delivers deep, thumping bass ideal for home...
As an affiliate, we earn on qualifying purchases.