Before starting your projector setup, understanding throw ratio is key to achieving the right image size and quality. Make certain you know your projector’s throw ratio to position it correctly relative to your screen, avoiding distortion or improper sizing. Check for common issues like lens distortion or misalignment and troubleshoot early. Following a clear checklist will help you get professional results and optimize your setup. Keep exploring these tips to master your projection system completely.
Key Takeaways
- Verify projector placement and distance to match the recommended throw ratio for accurate image size.
- Use test patterns to check for distortion, misalignment, or black bars indicating setup issues.
- Ensure the projector is level and aligned properly with the screen before calibration.
- Adjust lens settings or reposition the projector to correct image stretching or warped edges.
- Regularly calibrate and maintain the projector to sustain optimal image quality and prevent distortion.
Understanding Throw Ratio Basics and Its Impact on Setup

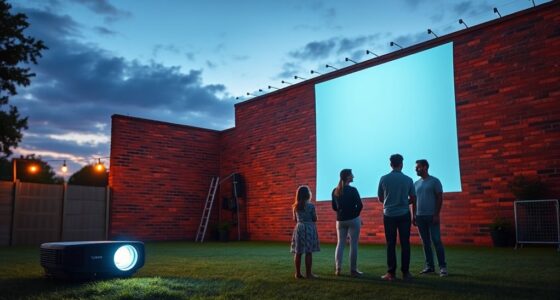
Understanding the basics of throw ratio is essential because it directly affects how you set up your projector. A proper grasp of throw ratio helps you determine the right distance between your projector and screen, ensuring a clear, well-proportioned image. When planning your setup, consider projection calibration to fine-tune image quality and alignment. Lens selection plays a critical role, as different lenses offer varying throw ratios that influence placement and image size. If your projector has a short throw ratio, you’ll position it closer to the screen, which is ideal for small spaces. Conversely, a long throw ratio requires more distance. Knowing these factors helps you optimize your setup, avoid distortion, and achieve the best picture quality from your projector. Understanding throw ratio basics is also important because it impacts your overall setup flexibility and the compatibility with your available space. Additionally, familiarizing yourself with industry trends can help you choose the right equipment and setup strategies for your specific needs. Being aware of regional resource availability can also influence your choice of professional installation services or troubleshooting options.
Common Throw Ratio Issues and How to Identify Them

Many common throw ratio issues stem from incorrect projector placement or lens choices, which can lead to distorted images or improper sizing. Lens distortion may cause images to appear stretched or skewed, while an incorrect image aspect ratio can result in black bars or cropped visuals. To identify these problems, check for:
- Signs of lens distortion, such as curved or warped edges
- Mismatch between projected image size and expected dimensions
- Discrepancies in image aspect ratio, causing letterboxing or stretching
These issues often stem from improper placement or lens selection, affecting the overall picture quality. Recognizing these symptoms early helps prevent further distortion or sizing errors, ensuring your setup delivers a clear, correctly proportioned image aligned with your throw ratio specifications.
Step-by-Step Troubleshooting for Accurate Projection Size

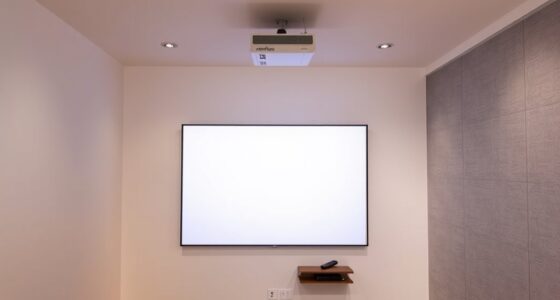
To achieve an accurate projection size, start by verifying your projector’s placement relative to the screen. Proper positioning ensures the image isn’t affected by lens distortion, which can skew the size and shape. Check that the projector is aligned straight with the screen to maintain correct image alignment, preventing keystone or trapezoidal distortion. Adjust the projector’s height and distance if needed to match your desired throw ratio. Use test patterns to identify any image misalignment and correct it by fine-tuning the lens or repositioning the projector. Regularly review the projected image to ensure it remains sharp and proportionate. Addressing lens distortion and maintaining proper image alignment are essential for achieving precise projection size and a professional viewing experience. Additionally, understanding the importance of throw ratio can help troubleshoot and optimize your projection setup effectively. Properly managing your projector bulb and keeping it well-maintained can also influence image brightness and clarity, ensuring consistent image quality. Being aware of appliance maintenance tips can help prevent unnecessary issues with your projection equipment and prolong its lifespan. Ensuring the projector’s calibration is accurate can also significantly improve image fidelity and color accuracy, contributing to a better viewing experience. Furthermore, keeping track of your financial aspects related to equipment maintenance can help budget for future upgrades or repairs to maintain optimal performance.
Frequently Asked Questions
How Do I Calculate the Ideal Throw Ratio for My Room?
To calculate the ideal throw ratio for your room, measure your projection distance—the distance from your projector to the screen. Decide on your desired screen size, then divide the projection distance by the screen width. For example, if your projection distance is 10 feet and you want a 6-foot-wide screen, your ideal throw ratio is approximately 1.67 (10 ÷ 6). This guarantees a perfect fit for your space.
Can Changing the Lens Affect the Throw Ratio?
Changing the lens can definitely affect the throw ratio, as different lenses have varying focal lengths. You need to make certain lens compatibility with your projector and consider your projector mounting setup. Switching lenses may alter how far back or forward you position your projector, impacting the throw ratio. Always verify the lens specifications and compatibility to maintain ideal image size and quality in your room setup.
What Are Signs of a Mismatched Throw Ratio?
If your projector shows signs of image distortion or a blurry image, you might have a mismatched throw ratio. You’ll notice the image doesn’t fit the screen properly, either being too small or too large, and details appear unclear. These issues indicate the throw ratio isn’t aligning with your setup. Double-check your lens and distance settings to make certain your projector’s throw ratio matches your screen size and room layout.
Is a Higher or Lower Throw Ratio Better for Small Rooms?
A lower throw ratio is better for small rooms, acting like a tightrope walker balancing perfectly. It allows you to place the projector closer to the screen, making it easier to achieve the desired screen size without crowding the space. With a lower throw ratio, you can optimize projector placement and maximize your screen size, ensuring a clear, crisp image without sacrificing valuable room real estate.
How Do Ambient Light Conditions Influence Throw Ratio Choices?
Ambient light conditions greatly influence your throw ratio choice because bright rooms require a projector with higher brightness to combat glare, while darker rooms let you choose a lower throw ratio for a more compact setup. In well-lit spaces, opt for a projector with higher lumens and possibly a shorter throw ratio to ensure a clear, vivid image. Controlling ambient light boosts image quality regardless of your throw ratio.
Conclusion
Now that you know the basics and troubleshooting steps for throw ratio, you’re better equipped to set up your projector accurately. Remember, understanding your throw ratio helps you achieve the perfect image size without guesswork. Are you ready to troubleshoot with confidence and enjoy a flawless projection experience? With these tips, you’ll quickly identify issues and get your setup just right every time. Happy projecting!