To avoid guessing, start by measuring your room’s size, noting windows, doors, and furniture that could block your projection. Choose a strategic spot that minimizes distortion and glare, considering throw distance, screen size, and projector height. Proper alignment and keystone correction help sharpen the image, while seating should be positioned for ideal viewing angles. Adjusting lights, sound, and calibration will improve clarity. Keep exploring these steps to guarantee you set up your projector the right way.
Key Takeaways
- Measure room dimensions and throw distance to select the optimal projector placement for clear, focused images.
- Position the projector to minimize keystone distortion and shadows, considering ceiling height and room layout.
- Use test setups and calibration to fine-tune projector alignment, focus, and image quality before final installation.
- Ensure proper seating and speaker placement for synchronized audio-visual experience and minimal glare or reflections.
- Adjust ambient lighting and window coverings to reduce glare and enhance image contrast in small room environments.

2000 ANSI 4K Decoding Projector with WiFi and Bluetooth, HAPPRUN Movie Home Theater with Auto Focus, 300'' Display for Indoor/Outdoor, Smart Proyector Compatible with Phone/TV Stick/PC/PS5
[EASIER OPERATION: AI Smart Screen Adjustment] HAPPRUN projector comes with auto focus and 6D auto-keystone technology, enjoy a...
As an affiliate, we earn on qualifying purchases.
Assessing Your Room Dimensions and Layout
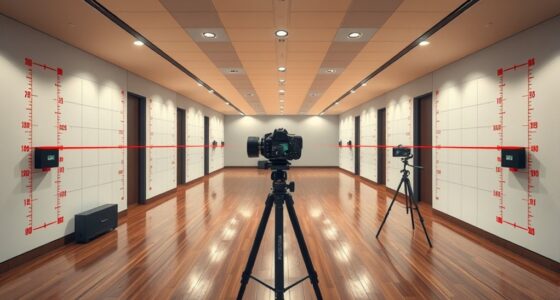
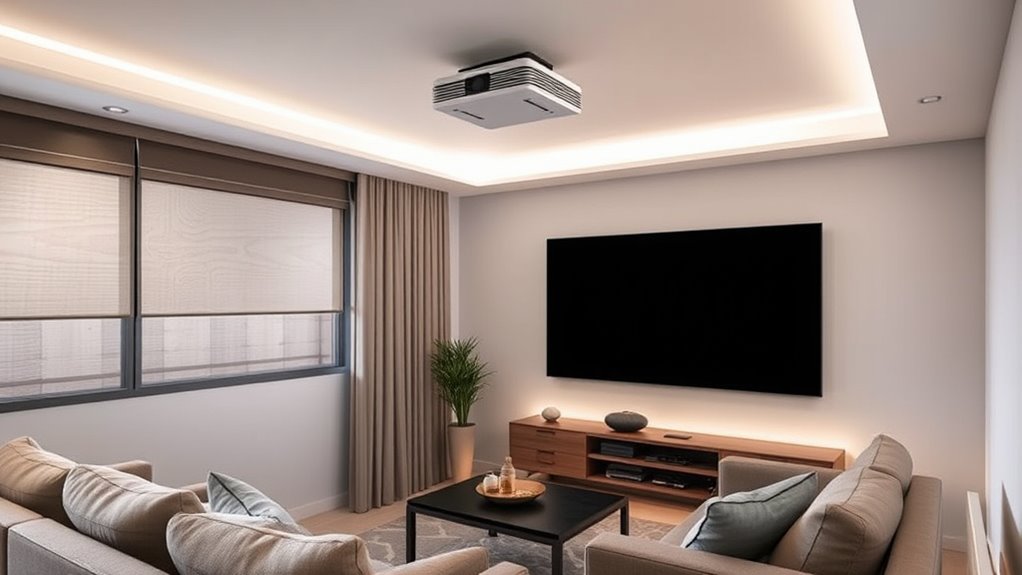
Before choosing a projector placement, you need to measure your room’s dimensions and understand its layout. Start by noting the room’s length, width, and ceiling height, as these factors influence projection distance and image size. Consider your wall color, since darker walls improve contrast and image clarity, while lighter walls may require adjustments. Knowing the ceiling height helps determine if you can mount the projector overhead or need a tabletop setup. Take note of windows, doors, and furniture that could block the projection path. Understanding these elements allows you to plan for ideal placement, ensuring the projector’s image fills the screen without distortion or glare. Proper assessment of your space sets the foundation for a successful projector setup in a small room. Additionally, understanding Honda Tuning options such as suspension upgrades can help optimize your setup for better stability and image alignment. Considering room acoustics can also enhance your viewing experience by reducing sound distortion and echo. Furthermore, evaluating the lighting conditions in your room can help determine the need for blackout curtains or additional lighting control to improve image visibility. Conducting a space analysis can reveal potential challenges and opportunities for optimal projector positioning, and performing quick projection distance tests can help confirm your placement choices before final installation.

ViewSonic LS740W 5500 Lumens WXGA Laser Projector with 1.3X Optical Zoom, H/V Keystrone, 360 Degrees Projection for Auditorium, Conference Room, and Education
High Brightness Laser Projector: WXGA (1280x800p) resolution with a 1.2-1.5 throw ratio and 5,500 ANSI lumens for clear,...
As an affiliate, we earn on qualifying purchases.
Choosing the Optimal Projection Location

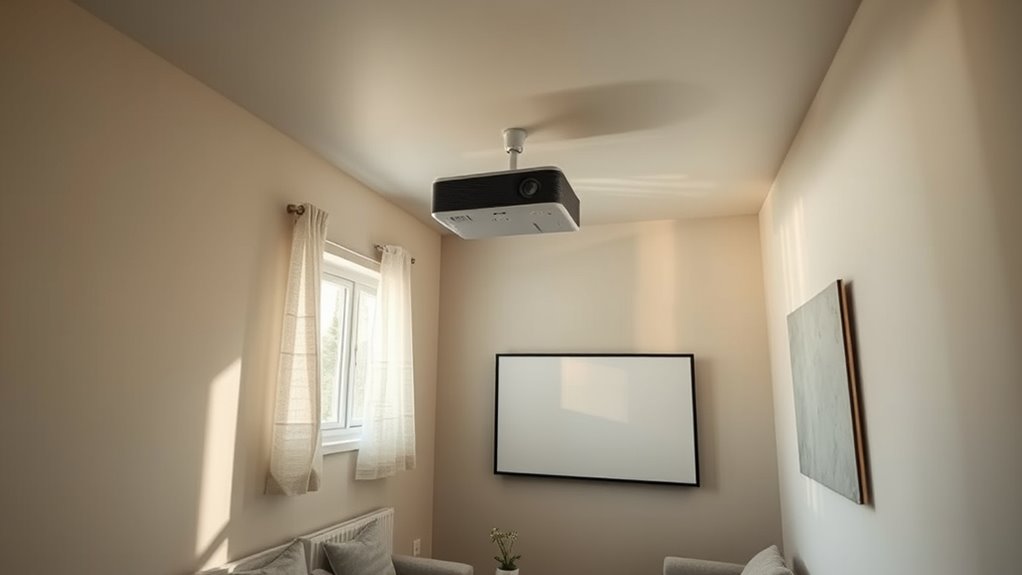
Once you’ve assessed your room’s dimensions and layout, the next step is to identify the best spot for your projector. Positioning it correctly guarantees superior image quality and minimizes distortion. Consider the projector’s throw distance and angle to avoid shadows and keystone effects. Additionally, think about your audio setup—good speaker placement and audio calibration are essential for immersive sound. Place speakers where they can evenly distribute sound without obstruction, and calibrate your audio system to match your room’s acoustics. Proper projector placement can significantly enhance your viewing experience by ensuring optimal focus and clarity. Adjusting the projection angle and height aids in achieving the best image alignment and reduces the need for keystone correction. This coordination between projection and sound setup creates a seamless viewing experience. Avoid placing the projector too close to walls or windows that could cause glare or reflections. Being aware of regional legal resources can help if you need professional assistance in setting up or troubleshooting your home theater system. Additionally, consulting professional installation services can ensure optimal setup and compliance with safety standards. A well-placed projector also minimizes the need for extensive calibration, which can be time-consuming and impact image quality if not done properly. With careful placement, you’ll enhance both picture clarity and sound quality, making your small room a perfect home theater.

Epson Home Cinema 980 3-Chip 3LCD 1080p Projector 4,000 Lumens Color and White Brightness, Streaming/Gaming/ Media Room, Built-In Speaker, Auto Picture Skew, 16000:1 Contrast, 2 HDMI Ports
Exceptional Picture Quality — Provides stunning, detailed 1080p images and fast data processing that’s optimized for fast-action sports,...
As an affiliate, we earn on qualifying purchases.
Calculating the Correct Throw Distance

Calculating the correct throw distance is essential to achieving a clear, well-sized image in your small room. You need to match your projector’s throw ratio with your room dimensions to avoid distorted or blurry images. Consider your screen resolution—higher resolutions like 4K require precise placement to preserve image sharpness. Proper throw distance guarantees your projector can project at the ideal size without sacrificing quality. Additionally, accurate placement supports effective color calibration, helping you achieve natural and vibrant colors. Keep in mind that a too-close or too-far projector can lead to uneven focus and compromised image clarity. Take the time to measure and plan your throw distance carefully, ensuring your projector fits your room’s size and provides the best viewing experience possible. Understanding projector specifications is also crucial for optimal placement and performance.

Klipsch R-12SW Powerful Deep Bass Front Firing 12" Copper-Spun Driver 400W Digital Power Subwoofer 14" X 18.5" X 16"
Powerful 12" copper-spun front-firing woofer
As an affiliate, we earn on qualifying purchases.
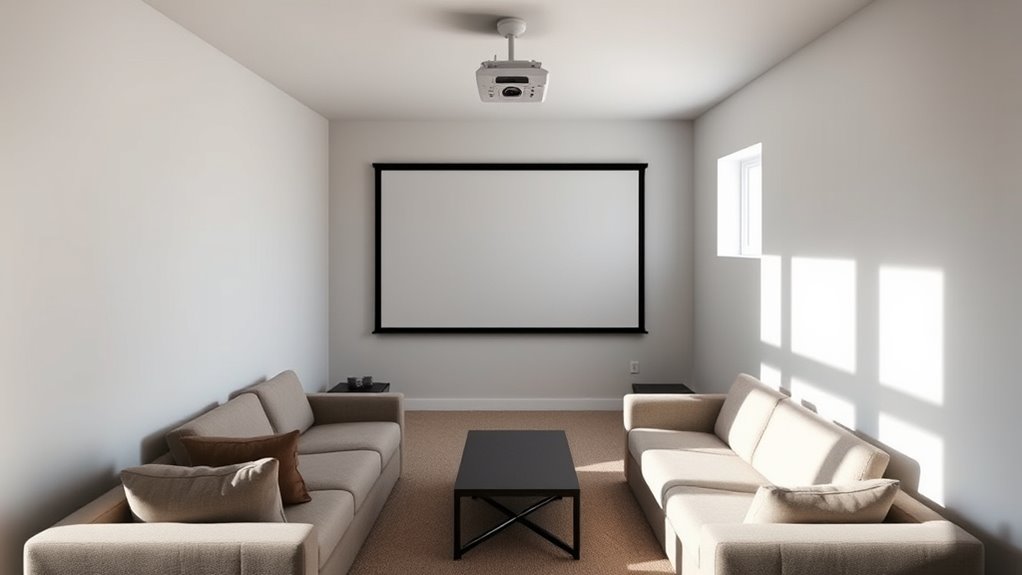
Selecting the Right Screen Size and Placement
Choosing the right screen size and placement is essential to creating an immersive viewing experience in a small room. You need to balance the screen dimensions with your projector’s brightness and the room’s size. You also should consider the ventilation considerations to prevent heat buildup from the projector, especially in enclosed spaces. A larger screen offers more immersion but requires sufficient brightness to prevent dull images. Consider the room’s layout and viewing distance to avoid eye strain. The screen material also impacts image quality; matte surfaces reduce glare and enhance contrast. Use this table to help select the ideal screen size:
| Room Size | Ideal Screen Size | Recommended Projector Brightness |
|---|---|---|
| Small | 80-100 inches | 2,000-3,000 lumens |
| Medium | 100-120 inches | 3,000-4,000 lumens |
| Large | 120+ inches | 4,000+ lumens |
Choosing wisely ensures a clear, vibrant picture without sacrificing comfort. Additionally, proper projector placement can optimize image quality and viewing comfort. Considering the recent market shifts in digital technology, investing in the right projector and screen setup can significantly enhance your viewing experience. Being aware of projection distance and how it interacts with your room’s dimensions can further improve your setup. For optimal sound quality, pairing your projector with suitable headphones can create an immersive experience without disturbing others.
Managing Ambient Light and Glare Issues
Proper management of ambient light and glare plays a vital role in ensuring your projected image remains sharp and vibrant. Too much ambient lighting can wash out your projection, making details hard to see. To combat this, control ambient lighting by dimming or turning off unnecessary lights during viewing. Use curtains or blinds to block sunlight and reduce natural light interference. Glare control is equally important; avoid placing light sources directly behind or near the projector or screen. Position lights away from the viewing area and consider using matte finishes on walls to minimize reflections. Additionally, understanding how light interference impacts image quality can help you make more informed adjustments. Employing consistent messaging in your setup instructions can help ensure everyone understands how to optimize the environment. By managing ambient light and glare effectively, you’ll enhance image clarity and color accuracy, creating a more immersive viewing experience even in small rooms.
Considering Mounting Options and Adjustments
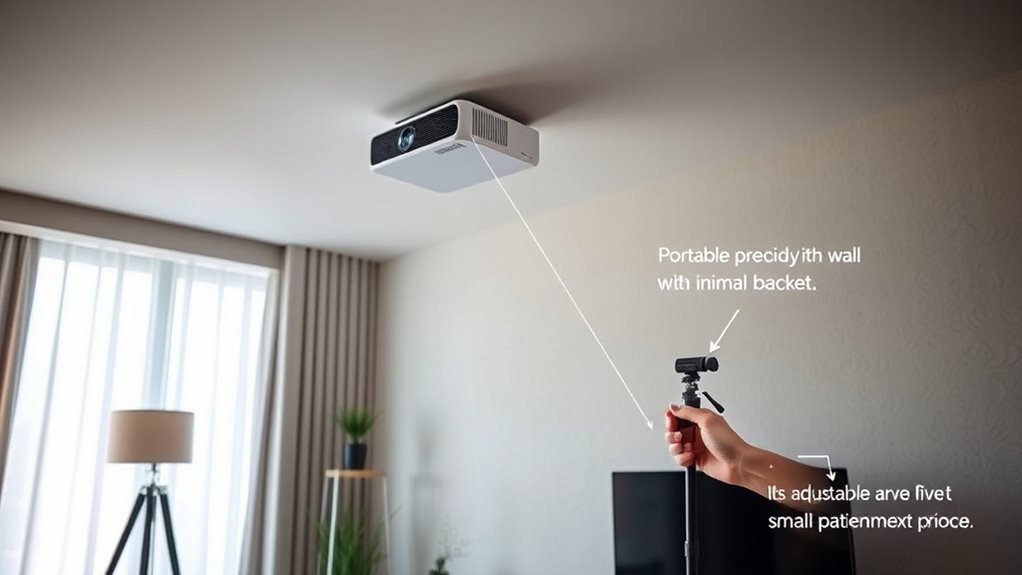
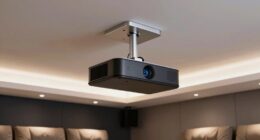
When choosing how to mount your projector, consider a ceiling mount for flexibility and saving space. Look for options that let you adjust the projection height easily to get the perfect image size. These adjustments help you fine-tune the setup for ideal viewing in a small room.
Ceiling Mount Flexibility
Ceiling mount flexibility is essential when setting up a projector in a small room, as it determines how easily you can adjust the image for ideal viewing. A good ceiling mount offers flexible positioning, allowing you to fine-tune the projector’s angle and distance without hassle. This flexibility enables you to adapt to room constraints and furniture placement, ensuring the image is perfectly aligned on your screen or wall. Look for mounts that support tilt, swivel, and extension adjustments, giving you control over the projector’s orientation. By choosing a versatile ceiling mount, you simplify setup and make future adjustments quick and effortless. Additionally, considering health implications such as proper setup can help prevent fatigue and ensure comfortable viewing angles. An adjustable mount can also help you avoid discomfort or strain during extended viewing sessions. Opting for a mount with adjustability features can further enhance your setup’s versatility and ease of use. Ensuring your mount has multi-directional movement capabilities can improve your overall viewing experience and accommodate any unforeseen room layout changes.
Adjustable Projection Height
Adjustable projection height is essential for achieving the perfect image alignment, especially in small rooms where space is limited. With adjustable projection height, you can fine-tune your projector’s position to ensure a clear, centered image without straining your neck or sacrificing space. A customizable mounting setup allows you to easily modify the height as needed, accommodating different screen sizes or room configurations. This flexibility helps prevent distorted images or keystone effects, providing a sharper picture. When selecting a mount, look for options that offer smooth height adjustments and secure locking mechanisms. By choosing the right adjustable projection height and a customizable mounting system, you create a versatile setup that adapts to your room’s unique layout, ensuring ideal viewing comfort and image quality.
Ensuring Proper Projector Alignment and Keystone Correction
To get the best picture, you need to position your projector ideally, ensuring it’s centered and at the right height. Use keystone correction techniques to fix any distortion caused by off-angle placement, but avoid overdoing it. Keep your projector properly aligned to maintain a sharp, clear image without unnecessary adjustments.
Optimal Projector Positioning
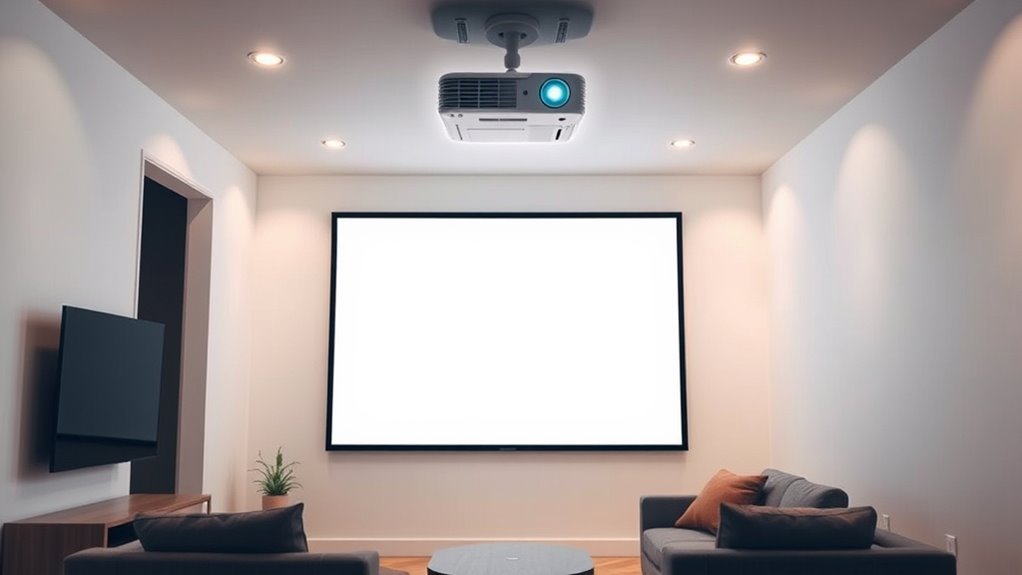
Achieving a clear and properly aligned projection requires careful positioning of your projector. Proper placement guarantees ideal projector brightness and a sharp image. First, position your projector at the right distance from the screen to maximize brightness without causing distortion. Second, choose a stable surface or mount that keeps the projector aligned with your screen material. Third, ensure the lens is centered for even light distribution and avoid obstructions. Fourth, verify the projector’s height and angle to prevent keystone distortion, even if keystone correction isn’t your focus now. Correct positioning reduces the need for digital adjustments and enhances image clarity. Remember, the right placement makes a significant difference in image quality and viewing experience, especially in small rooms where space is limited.
Keystone Correction Techniques
Since perfect projector placement isn’t always possible, keystone correction techniques help you achieve a properly aligned image. Keystone correction adjusts for image distortion caused by projecting at an angle, ensuring your picture remains rectangular. While digital correction is convenient, overusing it can reduce image clarity. To optimize results, use manual keystone correction when possible. Here’s what to keep in mind:
| Tip | Benefit | Caution |
|---|---|---|
| Position projector | Minimize keystone correction needed | Keep it centered |
| Use lens shift (if available) | Avoid image distortion without distortion | Limit to slight adjustments |
| Adjust tripod angle | Reduce keystone correction requirements | Maintain proper alignment |
| Keep projector level | Prevent skewed images | Check regularly |
| Use built-in correction | Fine-tune image shape | Avoid excessive correction |
Maintaining Proper Alignment
Proper alignment is essential for a clear, distortion-free image, and ensuring your projector is correctly positioned can save you time and effort in adjustments later. To maintain proper alignment, focus on these key steps:
- Check that your projector is centered and level with the screen, avoiding decorative lighting that could cast shadows or cause glare.
- Use keystone correction sparingly, as excessive adjustments can distort the image; prefer physical placement over digital fixes.
- Adjust the projector’s height and angle to minimize the need for frequent keystone correction, especially in small rooms with limited space.
- Incorporate soundproofing methods to prevent external noise from distracting you during adjustments, ensuring a steady focus on perfect alignment.
Consistent checks keep your setup ideal, enhancing image quality and viewing experience.
Accounting for Seating Arrangements and Viewing Angles

To make certain everyone enjoys a clear and comfortable viewing experience, you need to consider how seating arrangements and viewing angles interact with your projector placement. Properly aligned seats ensure optimal image quality and seating comfort, reducing neck strain. Additionally, think about audio integration—seating positions should allow sound to reach everyone equally. Here’s a quick guide:
| Seat Position | Viewing Angle | Audio Access |
|---|---|---|
| Front Center | Direct, level | Clear |
| Middle Rows | Slight upward | Good |
| Back Rows | Steeper angle | May need speakers |
| Off-Center | Distorted image | Reduced sound |
Align seats to minimize distortion and maximize comfort, ensuring everyone has a great experience.
Testing and Fine-Tuning Your Setup
Before your projector is ready for regular use, conducting a thorough test of the setup is vital. This step guarantees ideal image quality and audio clarity. First, verify your speaker placement; position speakers at ear level and equidistant from the seating area for balanced sound. Second, adjust the projector’s focus and keystone correction for a sharp, aligned image. Third, assess soundproofing strategies by checking for sound leaks and adding soft materials or soundproof panels if needed. Fourth, test the entire system together—view the image from different angles and listen for audio consistency. Fine-tuning these elements guarantees a seamless viewing experience and minimizes distractions, helping you enjoy your small room setup without guesswork.
Troubleshooting Common Placement Challenges

Even with careful planning, you might encounter common placement challenges that can affect your projector’s performance. One issue is color calibration; improper placement can cause color distortions or uneven brightness, making images look dull or skewed. Adjust your projector’s position or settings to improve calibration for accurate colors. Another challenge is audio synchronization; if your projector is far from your audio source, sound may lag or be out of sync with the picture. To fix this, consider repositioning speakers or using an audio delay feature. Also, watch out for glare or reflections, which can wash out the image. Regularly check your setup and make small adjustments to optimize picture quality, color accuracy, and sound sync—these steps are vital for a seamless viewing experience.
Frequently Asked Questions
How Do I Choose a Projector Suitable for My Budget?
To choose a projector suitable for your budget, consider your options within different budget ranges and compare their features. Look for affordability tips like opting for entry-level models with good reviews or waiting for sales. Prioritize essential features such as brightness and resolution to get the best value. Remember, you don’t have to overspend—there are plenty of affordable options that deliver quality performance tailored to your needs.
Can I Install a Projector in a Ceiling With Limited Height?
Did you know that nearly 60% of home theater setups struggle with ceiling height issues? You can install a projector in a ceiling with limited height by choosing a compact, short-throw model. Look into various mounting options, such as adjustable brackets or wall mounts, to guarantee proper positioning. Measure your ceiling height carefully and select a projector that fits within those constraints to avoid space issues and attain ideal projection.
What Safety Considerations Are There for Projector Mounting?
When mounting your projector, prioritize mounting safety by ensuring the bracket is securely fixed to studs or appropriate anchors. Check electrical grounding to prevent electrical hazards, making sure all wiring is properly grounded and insulated. Avoid placing the projector where it could fall or be bumped, and double-check the stability of the mount regularly. Taking these safety steps helps protect both your equipment and everyone in the room.
How Often Should I Clean or Maintain My Projector?
You should clean your projector at least once a month to keep it in top shape, but more frequent cleaning might be needed if you use it daily. Follow a regular cleaning schedule and maintenance tips like dusting vents, wiping the lens with a soft cloth, and checking filters. This routine prevents overheating, maintains image quality, and extends your projector’s lifespan. Always unplug before cleaning for safety.
Are Wireless Projectors Better for Small Rooms?
Wireless projectors are often better for small rooms because they offer wireless connectivity and portability options, making setup easier without tangled cables. You can easily move them around or mount them discreetly, saving space and reducing clutter. Plus, their wireless features allow seamless streaming from devices, enhancing your viewing experience. If you prioritize flexibility and simplicity, a wireless projector suits small rooms perfectly, providing convenience and a clean setup.
Conclusion
Remember, your projector is the lighthouse guiding your movie nights through the darkness. With careful placement, it becomes the beacon that transforms your small space into a cinematic haven. Trust your planning, fine-tune your setup, and let your room’s true potential shine. When everything aligns just right, you’ll feel the magic of effortless immersion—proof that the right placement isn’t just technical, but a symbol of your dedication to creating unforgettable moments.