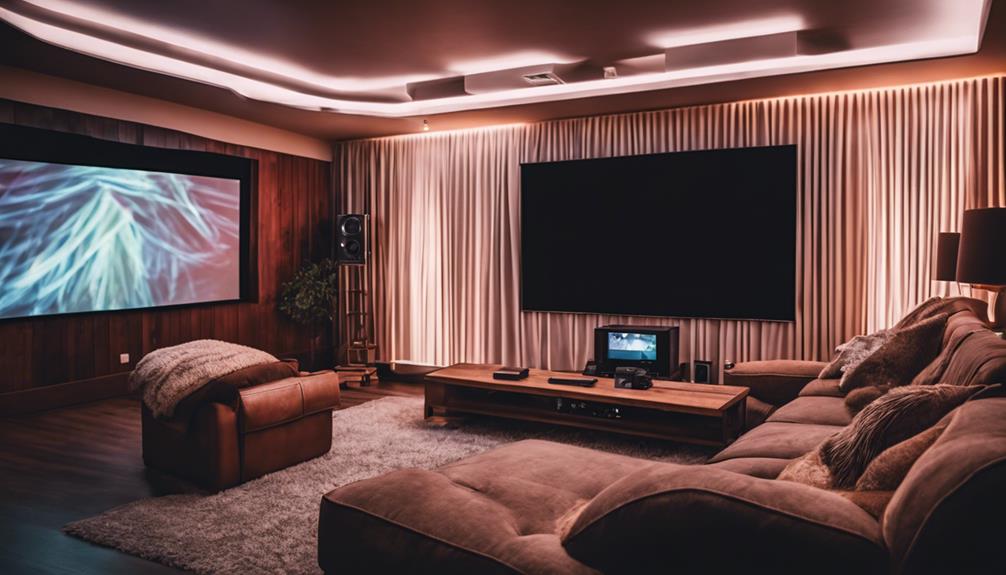
To calibrate your projector for ideal picture quality, start by positioning it correctly to achieve the desired screen size. Adjust the focus to sharpen the image, then tweak brightness, contrast, and color settings for accuracy. Use test patterns to fine-tune these settings and gather feedback to guarantee a great viewing experience. Save your preferred settings in User Mode for easy access later. Remember, regular recalibration is crucial as room lighting and projector position change over time. If you want to discover additional techniques for maximizing your projector's performance, there's plenty more to explore.
Key Takeaways
- Position the projector correctly to achieve the desired screen size and avoid distortion for optimal viewing experience.
- Use test patterns to calibrate brightness and contrast settings effectively, ensuring accurate picture representation.
- Adjust color temperature to maintain accurate skin tones and prevent oversaturation in images.
- Regularly clean the lens and filters to prevent dust buildup and ensure consistent image clarity.

BenQ W4100i 4K HDR Smart Home Theater Projector, 3200 Lumens, 100% DCI-P3, Rec.709, Factory-Calibrated, Android TV with Netflix, 4-Way Lens Shift, HDR10+ & HLG Support, LED Long Lifespan
PROJECTOR-OPTIMIZED TRUE 4K UHD and HDR: HDR-PRO technology exclusive Local Contrast Enhancer and Tone Mapping for perfect details...
As an affiliate, we earn on qualifying purchases.
Understanding Calibration Basics

Calibration is essential for maximizing your projector's performance, guaranteeing you see accurate colors, contrast, and brightness in every image.
When you set up your projector, understanding the basics of calibration helps you achieve ideal picture quality. Proper calibration involves fine-tuning various settings, including Keystone adjustments, which correct the image shape, and Lens Shift, which positions the image correctly on the screen.
Additionally, using a high-quality headphone extension cable can enhance sound quality and reduce interference, complementing your visual setup.
Additionally, focusing your hardware enhances sharpness, making details pop. Each projector comes with unique video settings, and tweaking these settings systematically allows you to tailor the display to your specific environment.
Remember, the room's lighting and the projector's position can greatly impact your viewing experience. If you move your projector or change the screen, recalibration becomes necessary to maintain picture quality.
Regular checks and adjustments guarantee your visuals remain sharp and vibrant, especially if you haven't used the projector for a while.

Epson Home Cinema 2350 4K PRO-UHD Smart Gaming Projector with Android TV, 3-Chip 3LCD, HDR10, HLG, 2,800 Lumens, Low Latency, 10 W Speaker, Bluetooth, Streaming Capability
4K PRO-UHD (1) — An amazing 4K experience utilizing advanced processing for resolution enhancement, color and image processing;...
As an affiliate, we earn on qualifying purchases.
Essential Calibration Steps

To achieve the finest picture quality, start by positioning your projector to get the desired screen size and correct any distortion with Keystone or Lens Shift adjustments. After that, fine-tune the hardware focus using the projector's dial for a sharp and clear image before diving into software settings.
Next, utilize the projector's settings to adjust brightness, contrast, color, and sharpness. It's best to get feedback from a viewer to guarantee an accurate picture representation. If you change the projector's location or screen, remember to recalibrate to maintain peak picture quality.
Lastly, save your adjusted settings as User Mode. This way, you can easily access your personalized projector calibration preferences in future sessions.
| Calibration Step | Action Required | Purpose |
|---|---|---|
| Positioning | Adjust projector placement | Achieve desired screen size |
| Focus Adjustment | Use hardware focus dial | Guarantee sharp and clear image |
| Settings Adjustment | Change brightness, contrast, etc. | Enhance overall picture quality |
1500 ANSI Official Licensed Google TV Smart Projector, HAPPRUN 4K Full HD Home Theater with Auto Focus, Dolby Sound, Wi-Fi Bluetooth, Built-in Apps, Compatible with Phone & PC, Indoor & Outdoor Use
[ Built-in Officially Licensed Google TV ]-Enjoy the reliability of an officially certified Google TV projector. Stream Netflix,...
As an affiliate, we earn on qualifying purchases.
Importance of Regular Calibration

Regularly calibrating your projector is important for maintaining high-quality image quality, as settings can shift over time or vary with different viewing conditions. You need to calibrate your projector not just when you first set it up, but also periodically to guarantee it delivers superior performance. Factory settings may not suit your specific environment, so initial calibration is essential to get the best results.
If your projector has been unused for weeks, it's wise to perform a quick check and recalibrate it. Dust accumulation and changes in lighting can affect clarity and color accuracy, diminishing your viewing experience. Regular calibration helps you adapt to these environmental shifts, making sure your projector remains in prime condition.
While you might feel satisfied with the image quality for a while, neglecting regular calibration can lead to a decline in clarity and color over time. By committing to this practice, you can maximize your investment in the projector, whether you're watching movies, gaming, or giving presentations. Ultimately, regular calibration enhances your overall viewing experience, making it a crucial part of projector maintenance.

Official Licensed Google TV Smart Projector, HAPPRUN 4K UHD Home Theater with Dolby Sound, Wi-Fi & Bluetooth, Built-in Streaming Apps, Compatible with Games Consoles & Smartphone, Indoor & Outdoor Use
[ Built-in Official Licensed Google TV ] - Without additional equipment, the smart projector can directly access Netflix,...
As an affiliate, we earn on qualifying purchases.
Cost Considerations for Calibration

When it comes to projector calibration, understanding the costs involved can help you make informed decisions about how to maintain ideal image quality. You might find that DIY calibration is a cost-effective option, allowing you to adjust your settings without incurring any additional expenses. This approach not only saves money but also empowers you to customize the viewing experience to your preferences.
However, periodic recalibration is necessary. Over time, your projector's settings may drift, and you'll need to recalibrate to guarantee peak performance. Here's a quick comparison of calibration options:
| Calibration Method | Cost | Notes |
|---|---|---|
| DIY Calibration | $0 | Accessible for all budgets |
| Hiring Professionals | $100-$300 | May not be necessary for most users |
| Software Tools | $20-$50 | Some tools can enhance DIY calibration |
| Calibration Kits | $50-$150 | Can provide advanced adjustment options |
| Periodic Recalibration | $0 | Recommended every 6-12 months |
Techniques for Optimal Picture Quality

Achieving ideal picture quality involves a series of adjustments that can dramatically enhance your viewing experience. Start by positioning your projector to get the right screen size. Use Keystone or Lens Shift to fix any image distortion.
Next, utilize a test pattern to calibrate brightness and contrast settings. This guarantees dark areas reveal details without becoming too uniform, while bright areas maintain natural detail without washing out.
Here are some key techniques to take into account:
- Adjust the color temperature for accurate skin tones and avoid oversaturation.
- Fine-tune sharpness to keep text clear and image edges well-defined.
Once you've made these adjustments, save your settings as a User Mode. This makes it easy to access and tweak your settings in the future, especially as your viewing environment changes.
Additional Settings for Gaming Projectors

When you're setting up your gaming projector, focusing on HDMI connection quality is essential for a seamless experience.
Make sure to select the right game modes and fine-tune your color settings to enhance your gameplay.
These adjustments can greatly elevate your gaming sessions, making them more responsive and visually stunning.
HDMI Connection Quality
To guarantee the best gaming experience, prioritize using HDMI 2.1 cables and connecting directly to non-ARC/eARC ports for ideal video quality. This direct connection minimizes latency and maximizes the capabilities of your gaming console.
When you set up your projector, consider the following:
- Verify HDMI ports support maximum bandwidth to prevent signal degradation, especially with 4K content.
- Choose the right length of HDMI cables; excessive lengths can lead to signal loss.
Game Mode Selection
Selecting the right game mode on your projector can greatly enhance your gaming experience by reducing input lag and improving responsiveness. Game mode is specifically designed for fast-paced gameplay, making it essential for competitive gaming. Make certain to enable this feature to get the best performance.
Here's a quick reference table to help you select the best game mode for your needs:
| Game Genre | Recommended Mode | Key Features |
|---|---|---|
| First-Person Shooter | FPS Mode | Reduced lag, enhanced motion clarity |
| Racing Games | Racing Mode | High refresh rate, vibrant colors |
| Sports Simulation | Sports Mode | Quick response, smooth visuals |
| Action/Adventure | Action Mode | Balanced settings for diverse gameplay |
| RPG | RPG Mode | Rich color saturation and detail |
Additionally, verify your HDMI ports are set for maximum bandwidth to support high refresh rates, especially with next-gen consoles. Use your projector's built-in calibration tools to fine-tune brightness and contrast for gaming. Regularly check and adjust settings based on different gaming conditions, ensuring you maintain peak performance throughout your sessions.
Color Calibration Techniques
Color calibration techniques are key for optimizing your gaming projector, ensuring that visuals are both vibrant and accurate for an immersive experience. To achieve this, you'll want to employ a few essential strategies:
- Adjust the color temperature to around 6500K for natural skin tones and realistic visuals.
- Utilize test patterns to fine-tune hue and saturation, avoiding oversaturation while keeping colors lively.
For Manual Calibration, explore your projector's color management system (CMS). This allows you to adjust the primary colors—red, green, and blue—individually, achieving precise color accuracy.
Once you're satisfied with the adjustments, save your customized settings in User Mode. This feature enables quick retrieval of your tailored settings, which can be particularly useful for different gaming genres or varying lighting conditions.
Key Features of Gaming Projectors

When choosing a gaming projector, look for features like low input lag and high refresh rates that guarantee a smooth and responsive gaming experience. These elements are essential for making certain your gameplay is as fluid as possible, especially during fast-paced action scenes.
Additionally, consider the following key features when selecting your gaming projector:
| Feature | Importance |
|---|---|
| Low Input Lag | Guarantees quick responsiveness in gameplay |
| High Refresh Rate | Enhances motion smoothness |
| Brightness Ratings | Higher lumens provide clarity in bright rooms |
| 4K HDR Support | Offers sharper images and vibrant colors |
| Advanced Connectivity | Multiple HDMI ports for compatibility |
With higher brightness ratings, even well-lit environments won't hinder your gaming experience. You'll also want to prioritize projectors that support 4K HDR content, elevating your visual experience to the next level. Finally, advanced connectivity options, including HDMI 2.1 support, guarantee compatibility with various gaming consoles, optimizing your setup for the best performance. With these features in mind, you're well on your way to selecting the perfect gaming projector!
Maintenance for Long-term Performance

To keep your gaming projector performing at its best over time, regular maintenance is key. By taking a few simple steps, you can guarantee that your projector delivers peak picture quality for years to come. Here are some essential maintenance tips:
- Clean the lens and filters regularly to prevent dust buildup that can diminish brightness and clarity.
- Check and recalibrate your projector settings periodically, especially after it's been inactive for a while, to maintain the finest image quality.
Additionally, updating your projector's firmware can enhance performance and fix any bugs, leading to a better user experience.
Don't forget to use a surge protector to shield your projector from power surges that could damage its internal components.
By incorporating these practices into your routine, you not only protect your investment but also enjoy maximum performance.
Regular maintenance can make all the difference, so take the time to care for your projector and reap the benefits of superior image quality.
Screen Selection and Setup

Choosing the right projector screen can dramatically improve your viewing experience by enhancing image detail, color accuracy, and contrast. A proper screen not only prevents loss of detail but also elevates the overall quality of your projection. When it comes to screen selection, consider the screen type, as options like motorized, manual pull-down, or tensioned screens can affect the image surface's flatness.
Here's a quick comparison to help you choose:
| Screen Type | Advantages | Best Use Case |
|---|---|---|
| Motorized | Convenient, hides when not in use | Home theater setups |
| Manual Pull-down | Cost-effective, easy to set up | Budget-friendly options |
| Tensioned | Smooth surface for best image | Dedicated viewing rooms |
Additionally, black edges on projector screens enhance perceived contrast, making images pop. For well-lit rooms, higher gain screens reflect more light and deliver brighter images. Ultimately, investing in a quality projector screen with appropriate materials will enhance your viewing experience, far exceeding the performance of a simple white wall or sheet.
Picture Processing Enhancements

When you're calibrating your projector, picture processing enhancements can make a noticeable difference in image quality.
Techniques like Dynamic Black, frame interpolation, and super resolution can boost contrast, reduce motion blur, and sharpen details.
Dynamic Black Technology
Dynamic Black Technology greatly boosts your projector's contrast ratio by automatically adjusting lamp brightness based on the displayed content. This innovative feature works by analyzing the incoming video signal, reducing light output during dark scenes, and increasing it during bright scenes. As a result, you'll enjoy deeper blacks and vibrant colors, enhancing your viewing experience.
Here are a few key benefits of Dynamic Black Technology:
- Achieves impressive contrast ratios, sometimes as high as 1,000,000:1.
- Improves detail visibility in shadows, giving you a more immersive experience.
While this technology can greatly enhance black levels and image depth, it's crucial to use it wisely. Some projectors may exhibit artifacts like flickering or input lag, especially at high intensity settings.
Make sure to test various configurations to find the right balance for your specific content and viewing conditions. By understanding and calibrating Dynamic Black Technology, you can access the full potential of your projector, transforming your home theater experience into something truly spectacular.
Frame Interpolation Techniques
Frame interpolation techniques enhance motion clarity by inserting calculated frames between original ones, reducing judder and motion blur in fast-paced scenes. This method is particularly effective in sports and action films, creating a smoother viewing experience that mimics higher frame rates from lower frame rate sources.
When calibrating your projector, it's important to experiment with different frame interpolation settings. While higher settings can improve fluidity, they may also introduce flicker and unwanted artifacts. To find the best balance, start with mid-strength settings and adjust according to your preferences and the source material.
Using test patterns can help you assess the impact of frame interpolation on your projector. By observing how various settings affect motion clarity and overall picture quality, you can make informed adjustments. Remember that different projectors utilize various algorithms for frame interpolation, which can influence the effectiveness and quality of the enhancement.
Ultimately, it's crucial to evaluate your viewing habits and tastes; some viewers may prefer a cinematic feel, while others might prioritize smoother motion. Tailoring these settings will guarantee you achieve the best picture quality for your unique viewing experience.
Super Resolution Benefits
Super Resolution enhances your viewing experience by boosting image sharpness and detail without needing higher native resolution from your source material. This advanced technology analyzes the incoming video signal and intelligently creates additional pixels, enhancing edges and fine details for a clearer image.
Here are some key benefits you'll enjoy with Super Resolution:
- Improved clarity: It reduces motion blur and judder, especially during fast-paced scenes, making it ideal for action movies and sports.
- Customizable settings: You need to use mid-strength settings to strike a balance, as overly aggressive adjustments may introduce flicker or artifacts.
For the best results, make sure your projector is bright enough to take full advantage of this feature.
Frequently Asked Questions
How to Get the Best Picture Quality on a Projector?
To get the best picture quality on your projector, adjust its position, focus the image, and fine-tune brightness and contrast settings. Always work in a dark room for clearer, more vibrant visuals. Regularly check adjustments, too.
How to Calibrate a Projector Image?
Think of your projector as a canvas; to create a masterpiece, position it right, adjust focus, and tweak brightness and contrast. Use test patterns to refine details, then save your settings for future viewing.
Do Projectors Need to Be Calibrated?
Yes, projectors need calibration to guarantee the finest picture quality. If you move your projector, change screens, or haven't used it in a while, recalibrating helps maintain brightness, contrast, and color accuracy for a superior viewing experience.
Why Is the Picture Quality Poor on My Projector?
If your projector's picture quality is poor, it could be due to incorrect brightness and contrast settings, ambient light interference, focus misalignment, or a need for recalibration after moving it or changing the screen.
Conclusion
In summary, taking the time to calibrate your projector can greatly enhance your viewing experience.
Did you know that properly calibrated projectors can improve color accuracy by up to 30%?
By following essential calibration steps and maintaining your setup, you'll enjoy stunning picture quality that brings your favorite movies and games to life.
Don't overlook this vital process—regular calibration not only optimizes performance but also prolongs the life of your projector for many memorable viewing nights ahead.