You can easily create a stunning home planetarium with a projector and some simple materials, transforming your space for indoor stargazing. Start by gathering stiff cardboard, an LED torch, and matte black paint to build your projector. Once assembled, project your favorite star patterns onto a smooth ceiling. Make sure to choose a dark room for ideal visibility and experiment with lighting conditions. You can even enhance the experience with software like Stellarium for realistic star images. If you're curious about tips for personalizing your setup and fun stargazing activities, there's plenty more to explore!
Key Takeaways
- Gather essential materials like stiff cardboard, a 3W LED torch, and black paint for constructing your projector.
- Use Stellarium software for realistic sky images and celestial labeling to enhance your stargazing experience.
- Set up the projector in a dark room with smooth, light-colored surfaces for optimal projection quality.
- Regularly test and adjust projection distance and focus to ensure clarity of star patterns and constellations.
- Engage in fun activities like constellation identification and themed sessions to deepen your understanding of astronomy.

SOULWIT 50Pcs Self Adhesive Cable Management Clips, Cable Organizers Wire Clips Cord Holder for TV PC Ethernet Cable under Desk Home Office (Black)
🔷SUPER EASY TO USE: Stick to clean surface, open tab, insert multiple cables, close the tab, enjoy the...
As an affiliate, we earn on qualifying purchases.
Importance of a Home Planetarium

A home planetarium is invaluable for anyone interested in astronomy. It allows you to observe celestial phenomena without the limitations of classroom settings or the interference of light pollution. By creating a controlled environment, you can explore the night sky in comfort and clarity, enhancing your understanding of constellations and celestial movements. Incorporating a high-quality projector can greatly improve your experience, providing clear images and vibrant colors that mimic the night sky with top projectors for gaming enthusiasts.
Using a home planetarium serves as an effective educational tool, turning stargazing into an immersive experience. You'll find that regular use nurtures a deeper interest in the universe, making it a great way to bond with family or friends through group activities centered around exploration.
DIY planetarium projects not only promote hands-on learning but also let you engage creatively with astronomy. As you build your own planetarium, you'll gain practical skills in construction, making the entire process rewarding.
Moreover, access to resources like monthly star charts and planetarium videos enhances your learning experience, making astronomy more accessible. Whether you're a novice or a seasoned enthusiast, having a home planetarium transforms your understanding of the cosmos and opens up endless possibilities for exploration.

SOULWIT 50 Pcs Self Adhesive Cable Management Clips, Cable Organizers Sticky Wire Clips Cord Holder for TV PC Laptop Ethernet Cable Desktop Home Office (Black)
🔷EASY TO USE: Simply peel and stick, making your home look tidier.
As an affiliate, we earn on qualifying purchases.
Essential Materials for Construction

To build your home planetarium, you'll need a few essential materials and tools.
Start by gathering stiff cardboard, a strong light source, and some black foil for the star slides.
Let's explore a recommended materials list, budget-friendly alternatives, and the tools that'll help you put it all together.
Required Tools Overview
What materials do you need to construct a home planetarium? To create your own planetarium projector, gather these vital tools and materials. They'll make the assembly process smoother and help you achieve stunning star projections.
Incorporating a quiet heat pump system can also enhance your comfort while enjoying your indoor stargazing experience, as modern heat pumps are designed for quieter operation.
- Stiff cardboard: This will form the box and slide frames.
- Hot-melt glue gun or strong tape: These are essential for securely assembling your projector.
- 3W white LED torch: This light source projects the stars onto your ceiling or walls.
- Foil painted matt black: Use this to create your star pinhole slides. Tiny 1mm holes will represent stars.
- Heavy base: You'll need a stable base to support your LED torch and prevent movement during use.
Additionally, consider painting the inside of your box with a mixture of sawdust and matt black paint to minimize internal reflections.
If you're working with metal parts, tools like a center punch, hammer, and drill will be helpful. An optional jigsaw can also make cutting shapes easier.
With these materials ready, you'll be well on your way to building an impressive home planetarium!
Recommended Materials List
Creating your own home planetarium requires specific materials to guarantee an effective and enjoyable stargazing experience. Here's a recommended materials list to get you started:
| Material | Purpose |
|---|---|
| Stiff cardboard | For constructing the projector box and slide frames |
| 3W white LED | Serves as the light source |
| Foil painted matt black | Used for creating star pinhole slides |
| Hot-melt glue gun or strong tape | For assembling components securely and assuring a light-tight base |
| Sawdust mixed with matt black paint | Coats interior surfaces to minimize reflections |
| Heavy base | Stabilizes the torch within the projector |
| Drill, jigsaw, center punch | For creating holes in various materials |
These materials will help you build a sturdy projector that effectively projects stars onto your ceiling. Remember, a well-constructed projector assures that your indoor stargazing experience is both immersive and visually stunning. With the right tools and materials, you'll be well on your way to creating your very own home planetarium.
Budget-Friendly Alternatives
Building a home planetarium on a budget is entirely possible with some clever choices in materials. You don't have to spend a fortune to create a stunning star projector that lights up your living room.
By embracing the art of decluttering strategies in your space, you can also guarantee that your new projector doesn't add to the chaos of your environment. Here are some essential materials that won't break the bank:
- Stiff cardboard: Use it to construct the projector box and slide frames.
- LED torch: An affordable light source that works perfectly for projection.
- Pull-out all-sky chart: Get one from BBC Sky at Night Magazine to skip pricey star maps.
- Sawdust mixed with matte black paint: This combo helps eliminate reflections inside the box, enhancing your star projections.
- Foil painted matte black: Perfect for crafting star pinhole slides that create detailed constellations.
With a simple assembly method using hot-melt glue or strong tape, you can put everything together easily. No specialized tools are needed, making it accessible even for DIY enthusiasts.
120 PCS Cable Clips, Adhesive Cord Clips for Wires on Wall, Strong Wire Clips Holders Cord Organizer for Cable Management, Christmas Lights, USB, Phone Charger, Cat 6, Car Dash Cam (Small, Black)
What You Get: Our cable clips package comes with 120 pcs black wire clips, they are nicely organized...
As an affiliate, we earn on qualifying purchases.
Step-by-Step Assembly Guide

Now that you've gathered your essential materials, it's time to jump into the assembly process.
You'll want to follow a straightforward guide to guarantee everything fits together perfectly.
Let's break down the steps so you can create your own stunning home planetarium.
Required Materials Checklist
To construct your home planetarium, you'll need a few key materials that will guarantee an effective and enjoyable projection experience.
Here's a checklist to help you gather everything you need:
- Stiff cardboard for the box and slide frames
- Foil painted matte black for creating star pinhole slides
- A 3W white LED torch to serve as your light source
- Hot-melt glue gun or strong tape for assembly
- A heavy base to stabilize the torch
Start by cutting the cardboard to the appropriate dimensions based on the distance from the torch to the chart.
Confirm the interior surfaces are painted black to minimize unwanted reflections.
Use the foil to create tiny pinholes that represent stars; remember, these should be about 10-20 times smaller than the size of the projected stars for accuracy.
Finally, include a heavy base inside the box to keep the torch steady and aligned properly with the ceiling.
With these materials, you'll be well on your way to creating a stunning home planetarium that brings the magic of star gazing indoors!
Assembly Process Overview
With your materials gathered, you're ready to begin assembling your home planetarium. Start by measuring the distance from the LED torch to your projection surface. This measurement will help you determine the appropriate dimensions for your cardboard box assembly.
Next, cut and assemble the box using stiff cardboard. Be sure to paint the inside surfaces matt black to minimize reflections.
Now, create your star pinhole slides. Glue foil to a piece of cardboard and carefully puncture small holes to represent stars, focusing on the main constellation stars for an authentic sky experience.
Once your slides are ready, securely mount the LED torch inside the box, ensuring it's positioned lower than the bowl lip and aligned to project effectively onto the ceiling.
After final assembly, test your projection. Adjust the torch zoom to the widest setting for ideal star visibility, ensuring the holes maintain a size that keeps the stars distinct.
You should now have a functional home planetarium that brings the beauty of the night sky into your living room. Enjoy your indoor stargazing adventures!
![Smart 4K Projector [Google TV Stick Built-in & 360° Stand] with WiFi 6, Bluetooth 5.3, HDR10, 30W Hi-Fi, AI Auto Focus, Outdoor Portable Short Throw Movie Projector for Home Theater Bedroom Ceiling](https://m.media-amazon.com/images/I/41zno6cZMFL._SL500_.jpg)
Smart 4K Projector [Google TV Stick Built-in & 360° Stand] with WiFi 6, Bluetooth 5.3, HDR10, 30W Hi-Fi, AI Auto Focus, Outdoor Portable Short Throw Movie Projector for Home Theater Bedroom Ceiling
[Google TV Built-in | 10,000+ Apps | Voice Control] The smart projector with wifi and bluetooth features Google...
As an affiliate, we earn on qualifying purchases.
Proper Usage Techniques

Positioning your home planetarium projector correctly is crucial for achieving a stunning display of the night sky. Start by placing the projector at an ideal distance from the ceiling, usually based on your room's height, to guarantee a clear and focused projection.
Use a single LED light source, which is a small light source, set to the widest zoom setting for maximum coverage and visibility of stars.
To improve your celestial display, keep the following tips in mind:
- Align the projector with compass points to accurately reflect the constellations' real positions.
- Paint the projector's interior surfaces matte black to minimize internal reflections that can distort images.
- Regularly update your knowledge by consulting monthly star charts from reputable sources like BBC Sky at Night Magazine.
- Test and adjust the projection after each setup to guarantee clarity and focus.
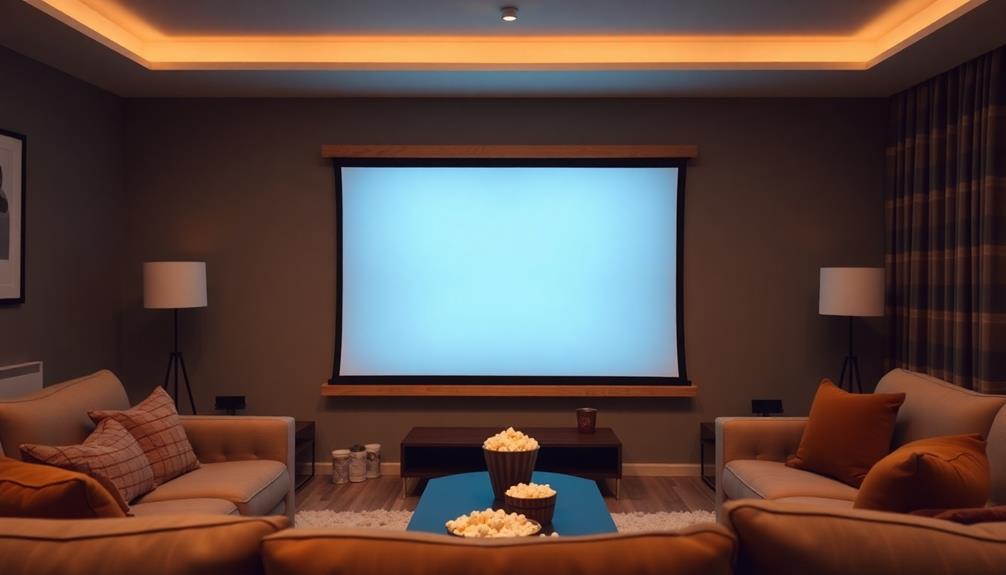
Enhancing Your Viewing Experience

To truly enhance your viewing experience, pay attention to your lighting conditions and the surface you project onto.
A darkened room will amplify the clarity of your star images, while a smooth, light-colored surface can improve the overall quality of the display.
Optimal Lighting Conditions
Creating the right lighting conditions can make or break your home planetarium experience. To truly enjoy the wonders of the night sky, you'll want to set up in a dark room with minimal ambient light.
Even small amounts of light can greatly diminish your viewing experience, so take these steps to enhance your stargazing:
- Use blackout curtains or shades to block out streetlights and moonlight.
- Position your projector away from direct light sources and reflective surfaces.
- Adjust the projector's brightness settings for a balance between clarity and comfort.
- Consider using colored LED lights or dimmable lamps to create an atmospheric setting.
- Keep the room tidy to minimize distractions while you're immersed in the stars.
Projection Surface Selection
Once you've established the right lighting conditions, the next step is selecting an ideal projection surface for your home planetarium. For best projection quality, choose a smooth, light-colored surface like a white ceiling or wall. This enhances the brightness and clarity of the projected stars, making your stargazing experience more vivid.
Consider the size and curvature of your projection surface. A larger area can create a more immersive experience, while a domed surface effectively simulates a true night sky. Make sure the projection surface is free from obstructions and reflections; imperfections can distort the image and detract from your overall viewing pleasure.
Don't forget to experiment with different projection angles and distances from the projector to the surface. Finding the best setup minimizes distortion and maximizes the visibility of constellations.
Finally, use blackout curtains or similar materials to darken the room. Reducing ambient light enhances the contrast of the projected stars against the background, further improving your home planetarium experience.
Recommended Software and Projectors

When setting up your home planetarium, choosing the right software and projector is crucial for an enchanting experience. One of the most highly recommended software options is Stellarium. It allows you to project realistic sky images, manipulate time, and label celestial bodies, all enhancing your educational experience.
For the finest results, consider using HD digital projectors. They greatly improve clarity and detail, making the night sky come alive on your dome or ceiling.
Here are some key features to look for in your setup:
- Image Warping: Crucial for fitting the projected image onto a hemispherical dome.
- Mobile Carts: Many projectors can be easily positioned on carts for flexible setup.
- Compatibility: Confirm the software works with various projector models for customization.
- Adjustable Placement: Choose projectors that allow easy adjustments for ideal alignment and focus.
- Budget-Friendly Options: Look for projectors that fit your budget while still delivering a great experience.
With the right combination of recommended software and projectors, you'll create an immersive stargazing experience right in your living room.
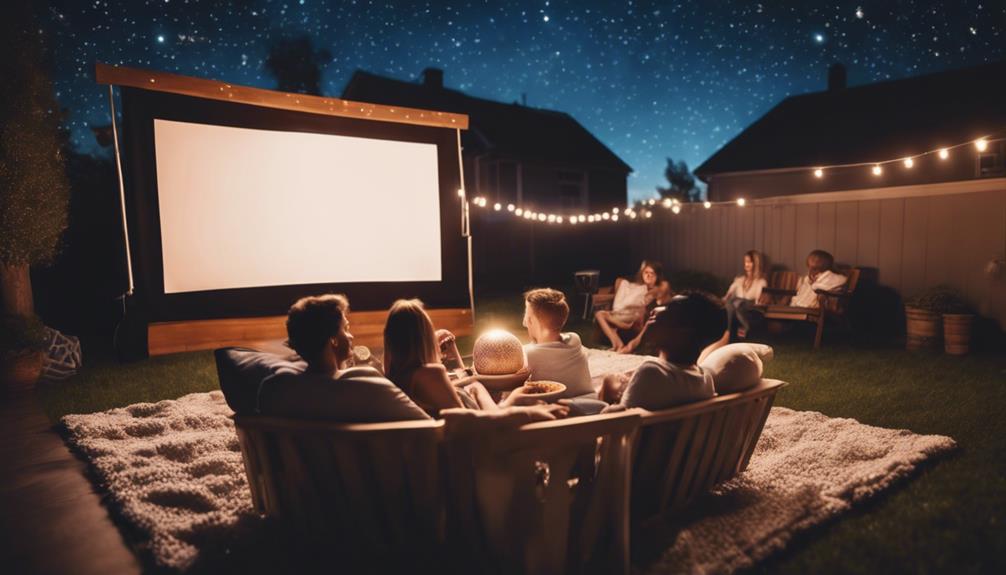
Fun Activities for Stargazing

Stargazing can be a thrilling experience, especially when you add fun activities to enhance your connection with the night sky. Organizing constellation identification nights using star charts is a great way to learn about bright stars and their mythological backgrounds. You can also create themed sessions, like "The Great Summer Triangle," focusing on stars Vega, Deneb, and Altair while discussing their significance.
Here are some engaging activities you can try:
| Activity | Description | Benefits |
|---|---|---|
| Constellation Nights | Use star charts to identify constellations | Educational experience |
| Themed Stargazing | Focus on specific star groups, like the Summer Triangle | Deepens understanding of stars |
| DIY Astrophotography | Capture images of the night sky with a telescope | Document your stargazing journey |
| Star Storytelling | Share personal or cultural stories linked to constellations | Builds community connections |
Utilizing Stellarium during indoor sessions makes astronomy interactive. You can simulate celestial movements and learn about phenomena like the analemma, making your stargazing activities even more enjoyable.
Exploring Constellations and Patterns

Exploring the night sky reveals a tapestry of constellations that tell stories and guide navigation. These groups of stars form recognizable patterns and often draw inspiration from mythological figures.
You'll find that the visible constellations change with the seasons and your geographic location, offering a fresh view each time you look up.
Here are some notable constellations to observe:
- Orion: Recognizable by its three-star belt, it's one of the most famous and easily identifiable.
- Cassiopeia: Look for its distinctive W shape in the northern sky.
- Ursa Major: Home to the Big Dipper, it helps in locating the North Star.
- Scorpius: With its curved tail, it's prominent in summer evenings.
- Taurus: Featuring the bright star Aldebaran, it's a winter favorite.
Additional Resources and Tools

To enhance your home planetarium experience, a variety of resources and tools are at your fingertips. Monthly star charts available in BBC Sky at Night Magazine can keep you updated on constellations and celestial events, making it easier to identify what's visible, even amid city lights.
For a more immersive experience, consider using Stellarium software, which allows you to simulate realistic night skies. With features like time manipulation and celestial labeling, it can elevate your educational journey.
If you're feeling crafty, there are numerous DIY planetarium projects that cater to different budgets and skill levels. Many use materials like cardboard and digital projectors to create engaging stargazing environments.
Investing in a quality digital projector is essential for displaying high-definition images on your dome or screen, ensuring you achieve ideal projection quality.
To further enrich your experience, explore interesting resources like printable space-themed activity packs. These packs offer a range of educational activities related to astronomy, constellations, and the solar system, providing a well-rounded experience that complements your indoor stargazing adventures.
With these tools, you can transform your home into a fascinating universe, regardless of the city lights outside.
Personalizing Your Planetarium Experience

Creating a unique planetarium experience at home is all about personal touches that reflect your interests and enhance the ambiance.
You can customize your setup to create your ideal night sky, making stargazing indoors more enjoyable.
- Use different star chart templates to project constellations that fascinate you or align with the current season.
- Incorporate colored LEDs for dynamic visual effects, mimicking celestial phenomena like nebulae or auroras.
- Adjust the size and number of pinholes in your projection slides for varying levels of detail; smaller holes offer a more intricate star field.
- Include interactive elements, like a star map guide or a journal, to document your observations and deepen your learning.
- Experiment with the projector's orientation and distance to tailor the scale and positioning of the star field on your ceiling.
Frequently Asked Questions
Can You Use a Projector as a Planetarium?
Yes, you can use a projector as a planetarium. It displays realistic sky images, especially when enhanced with software. Just make certain you're in a dark space for the best visibility of stars and constellations.
How to Make a Planetarium at Home?
To make a planetarium at home, gather materials like cardboard, paint, and an LED light source. Construct a light-tight box, create star slides, and align everything for an immersive stargazing experience right in your living room.
What Is the Projector in a Planetarium Called?
Like a magician revealing stars, the projector in a planetarium's called a "star projector." It illuminates the night sky, showcasing celestial wonders. You'll find both simple and advanced models, each bringing the cosmos closer to you.
Is There an Accurate Star Projector?
Yes, there are accurate star projectors available. They use advanced optics and precise star maps, allowing you to experience a realistic night sky. Look for models with adjustable focus and built-in databases for the best experience.
Conclusion
You've successfully transformed your living space into a celestial wonderland, where the stars are always within reach—no need to worry about cloudy nights! By following the steps to create your home planetarium, you've opened the door to endless nights of exploration and discovery. So, gather your loved ones, cozy up, and let the cosmic journey begin. With just a flick of a switch, you'll plunge into the universe right from your couch, creating memories that are truly out of this world!