To optimize your projector's image quality, start by controlling ambient light for clearer visuals. Choose a dedicated screen that reflects light effectively. Select the right projector type for your space, and guarantee you adjust the focus regularly. Fine-tune the sharpness and calibrate colors to match your content. Use high-quality sources to maintain clarity, and regularly clean and maintain your equipment. Experiment with different picture modes to find what suits your viewing needs best. By following these steps, you'll enhance your projection experience, and there's more valuable insight waiting for you.
Key Takeaways
- Control ambient light by using heavy curtains or blackout shades to enhance projector performance and image clarity.
- Choose a dedicated projection screen with higher gain levels to improve light reflectivity and brightness.
- Regularly clean the projector lens to prevent dust and smudges from degrading image quality.
- Adjust projector focus and sharpness settings to ensure clear and detailed images tailored to the viewing environment.
- Use high-quality HD or 4K source material to maximize the projector's capabilities and maintain sharpness.

ViewSonic LS740W 5500 Lumens WXGA Laser Projector with 1.3X Optical Zoom, H/V Keystrone, 360 Degrees Projection for Auditorium, Conference Room, and Education
High Brightness Laser Projector: WXGA (1280x800p) resolution with a 1.2-1.5 throw ratio and 5,500 ANSI lumens for clear,...
As an affiliate, we earn on qualifying purchases.
Control Ambient Light
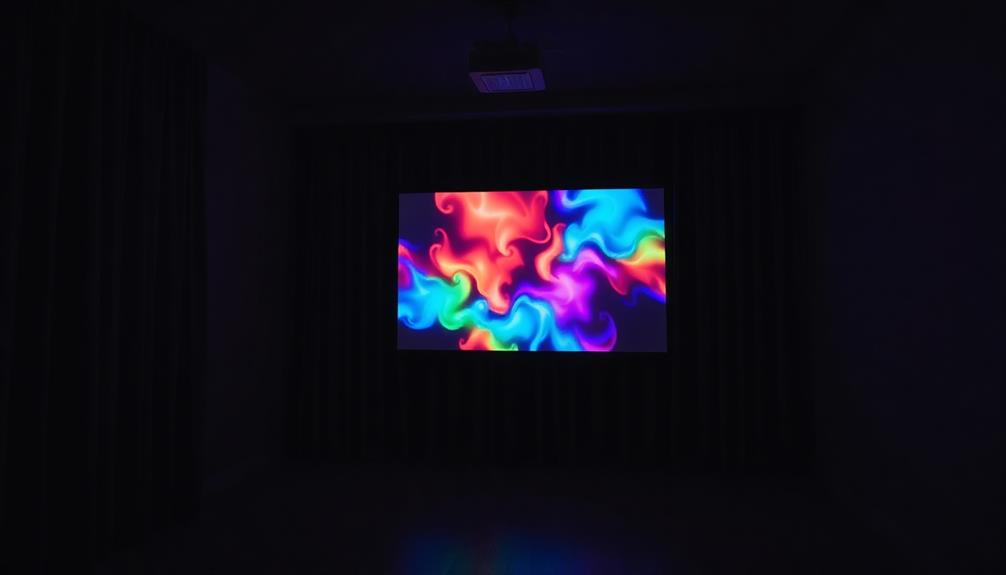
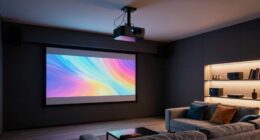
When it comes to enhancing your projector's image quality, controlling ambient light is essential. A dimmed room dramatically boosts your projector's performance, with complete blackout providing the best viewing conditions.
By draping windows with heavy curtains or blackout shades, you can effectively minimize any light interference. This creates a darker environment, resulting in better contrast and depth in the images you project. Additionally, just as efficient toilet flushing can enhance water conservation, toilet maintenance guarantees peak functionality in your home setup.
Consider investing in light dimmers to make quick adjustments to your room's lighting. This flexibility guarantees that your projection remains clear and vibrant, even if the natural light changes throughout the day.
Additionally, the color of your walls plays a role in image quality. Opt for dark, neutral walls that won't distract from your viewing experience, as bright colors and patterns can detract from the overall impact.
For peak results, aim for a room with minimal ambient light. The less light there is, the more vibrant and clear your projected images will appear.

2000 ANSI 4K Decoding Projector with WiFi and Bluetooth, HAPPRUN Movie Home Theater with Auto Focus, 300'' Display for Indoor/Outdoor, Smart Proyector Compatible with Phone/TV Stick/PC/PS5
[EASIER OPERATION: AI Smart Screen Adjustment] HAPPRUN projector comes with auto focus and 6D auto-keystone technology, enjoy a...
As an affiliate, we earn on qualifying purchases.
Choose the Right Screen

Choosing the right screen can dramatically improve your projector's image quality. A dedicated projection screen reflects light more effectively than plain walls, resulting in brighter and clearer visuals.
When selecting your screen, consider the gain level; higher gain numbers indicate better reflectivity, which is vital for maximizing brightness in various lighting conditions. Additionally, wide color gamuts in projection screens can enhance the overall visual experience, making colors more vibrant and lifelike.
If you're setting up a home theater, fixed frame screens with white material are the standard choice. However, if your room has side light interference, Ambient Light Rejecting (ALR) screens are ideal.
For ultra short throw projectors, consider Ceiling Light Rejecting (CLR) screens, which help minimize overhead light issues and improve viewing clarity.
Don't forget to confirm that the screen size matches your projector's output capabilities. This step is essential to avoid image distortion and to maximize the viewing experience, especially if you're accommodating a larger audience of up to 500 attendees.

NexiGo Aurora Pro MKII, 4K Tri-Color Laser UST Projector, 30000:1 Contrast Ratio, Dynamic Iris & Laser Dimming, 0.21:1 Throw Ratio, Dolby Vision & Atmos, HDR10+, 3D, 4.2ms ~ 8ms Low Latency (Renewed)
【Scene Adapt Engine】Enjoy higher-contrast visuals with our Scene Adapt Engine (SAE), the technology behind Dynamic Iris and Dynamic...
As an affiliate, we earn on qualifying purchases.
Select Optimal Projector Type

After ensuring you have the right screen, the next step is to select the best projector type for your setup. Your choice directly impacts the projector's image quality and overall viewing experience.
If you're working with a large room, a long throw projector is your best bet. It can project images from greater distances, making it ideal for bigger screens or larger audiences. Additionally, favorable air quality using an air purifier can enhance your viewing experience by reducing distractions from allergens and odors.
Conversely, in smaller spaces, a short throw projector shines. It can project large images from close distances, which minimizes shadows and saves space. If you need versatility, consider a portable projector; it's perfect for various settings, including outdoor events or impromptu presentations.
For bright environments, laser projectors are the way to go. They offer superior brightness and color accuracy, ensuring your presentations stand out even in well-lit rooms.
Finally, if you're aiming for enhanced resolution, look into 4K projectors. They deliver clearer and more detailed images, especially beneficial for high-definition content.
NexiGo Aurora Pro MKII, 4K Tri-Color Laser UST Projector, 30000:1 Contrast Ratio, Dynamic Iris & Laser Dimming, 0.21:1 Throw Ratio, Dolby Vision & Atmos, HDR10+, 3D, 4.2ms ~ 8ms Low Latency
【Scene Adapt Engine】Enjoy higher-contrast visuals with our Scene Adapt Engine (SAE), the technology behind Dynamic Iris and Dynamic...
As an affiliate, we earn on qualifying purchases.
Adjust Projector Focus

To get the best image quality from your projector, you'll need to adjust the focus using the focus adjustment ring around the lens.
Make sure to fine-tune it based on the distance from the projector to the screen, as this can greatly impact clarity.
Regularly checking the focus guarantees that your images remain sharp and details are easy to see.
Focus Adjustment Techniques
Adjusting your projector's focus is essential for achieving a sharp and clear image. To do this, locate the focus ring, usually found around the projector's lens. Turning this ring allows you to manually fine-tune the image sharpness by adjusting the distance between the lens components.
If your images appear blurry, especially with larger projections—like those reaching 100 inches diagonally—it's likely time to make some focus adjustments.
Make it a habit to check and adjust the focus regularly, particularly when switching between different content or image sizes. A well-focused image not only enhances visual clarity but also improves contrast and depth, making details pop.
Remember that every time you reposition the projector or experience notable changes in lighting or screen type, you should perform a focus adjustment.
Taking a moment to adjust the focus ring can greatly elevate your viewing experience, ensuring that you enjoy the full detail of your content.
Distance and Clarity
Achieving ideal clarity in your projected images hinges on the distance between the projector and the screen. When you adjust the focus, you're fine-tuning the sharpness of your image to match this distance. A common rule of thumb is to guarantee that your focus aligns with how far the projector is from the screen. Otherwise, you might end up with blurry images.
To enhance your projector's clarity, keep these points in mind:
- Check the focus regularly to adapt to any changes in projector positioning.
- Refocus after increasing the distance to maintain sharpness, especially with larger images.
- Adjust the focus ring around the lens to achieve that perfect clarity, particularly with large projected images, like a 100-inch diagonal.
As the distance increases, remember that clarity can quickly diminish if you don't refocus.
By regularly checking your focus settings, you'll guarantee that your images remain sharp and vibrant, delivering a quality viewing experience.
Fine-Tune Sharpness Settings
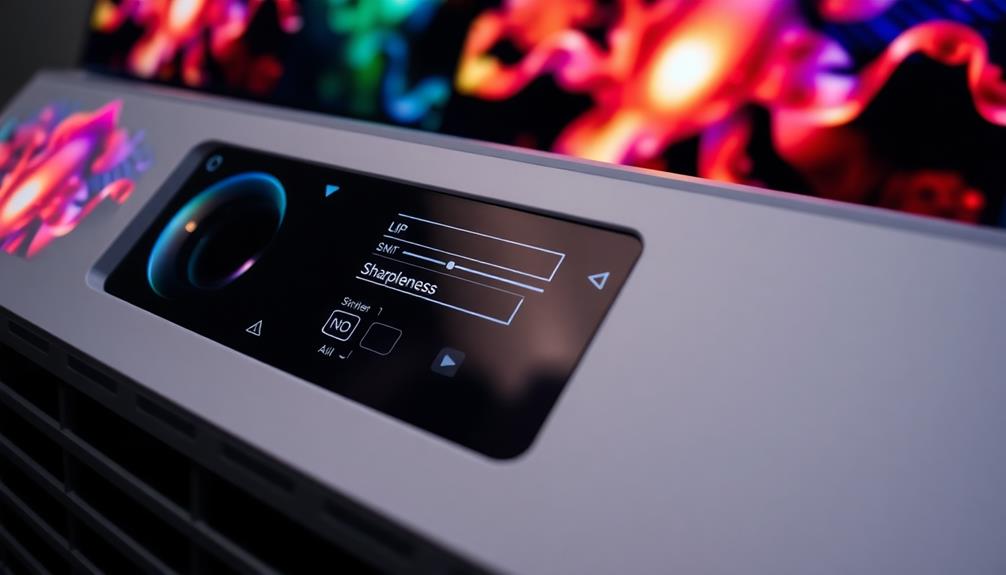
Finding the right sharpness settings on your projector can make a noticeable difference in image quality. Adjusting the sharpness in your projector's menu enhances clarity and contrast, helping to correct washed-out visuals and improve detail perception.
It's vital to find the right balance; too much sharpness can introduce unwanted artifacts, while too little can leave your images looking dull and lacking detail.
To optimize your viewing experience, regularly review and adjust sharpness settings based on the content type. For example, high-definition sources often benefit from finer adjustments.
It's also essential to perform these adjustments in a dimly lit environment. This way, you can accurately assess the clarity and detail of the projected image.
Clean the Projector Lens

Keeping your projector lens clean is essential for perfect image quality. Dust, fingerprints, and other obstructions can cause blurriness, greatly degrading your viewing experience. To guarantee your lens stays in top shape, make it a habit to regularly inspect and clean the projector lens.
- A crystal-clear image that captivates your audience
- Vibrant colors that pop and enhance your content
- A professional presentation that leaves a lasting impression
Use a microfiber cloth specifically designed for optical surfaces to gently clean the lens. Avoid abrasive materials that could scratch the glass. For stubborn spots, lightly dampen the cloth with a lens cleaning solution or distilled water, confirming the projector is turned off and cooled down beforehand.
Clean the lens monthly or as needed, especially in dusty environments.
Always make sure the lens is completely dry before turning the projector back on to avoid moisture-related issues.
Position Projector Correctly

After verifying your projector lens is clean, the next step is to position the projector correctly for best image quality. Start by placing the projector at the appropriate distance from the screen, as this affects the image size and clarity. Long throw projectors, for instance, may need to be up to 12 feet away for a 100-inch image.
It's also crucial to position the projector at the ideal height. Align the lens with the center of the screen to prevent trapezoidal distortion. Adjust the horizontal and vertical alignment to avoid image distortion, and consult a distance calculator or the manufacturer's guidelines to verify you've got it right.
Lastly, make sure there are no obstructions between the projector and the screen, as furniture or seating can block the beam and compromise your image quality.
Here's a quick reference table to help you:
| Factor | Importance |
|---|---|
| Distance to Screen | Determines image size |
| Height of Projector | Prevents trapezoidal distortion |
| Alignment | Avoids image distortion |
| Obstructions | Guarantees uninterrupted viewing |
| Manufacturer Guidelines | Confirms ideal placement |
Implement Keystone Correction

To get the best image from your projector, you need to understand keystone distortion and how it affects your display.
There are two types of keystone correction—vertical and horizontal—that help adjust for any misalignment.
Understanding Keystone Distortion
Keystone distortion can greatly impact your viewing experience, making it crucial to understand and correct this issue. This distortion occurs when your projector is misaligned vertically or horizontally, causing the image to appear trapezoidal instead of rectangular. To combat this, it's essential to utilize keystone correction effectively.
Consider these factors when dealing with keystone distortion:
- The projector's position: Confirm it's level and centered for best results.
- Vertical adjustments: Use vertical keystone correction if the projector is positioned above or below the screen.
- Horizontal adjustments: Apply horizontal correction for off-center placements.
Most modern projectors come equipped with built-in keystone correction settings, easily accessed through the projector's menu.
However, be cautious—excessive keystone correction can reduce image quality by stretching or compressing pixels.
For the finest results, aim to position your projector as level and centered to the screen as possible before making any minor adjustments.
Types of Keystone Correction
When misalignment occurs between your projector and screen, understanding the types of keystone correction can help you restore image quality.
There are two primary types of keystone correction to take into account: vertical and horizontal. Vertical keystone correction adjusts for height differences, ensuring that the image isn't distorted when the projector is placed above or below the screen. On the other hand, horizontal keystone correction compensates for off-center placement, making sure the image isn't skewed when the projector is positioned to the side.
Most modern projectors come equipped with digital keystone correction, allowing you to easily make adjustments through the projector's menu settings.
However, be cautious—excessive keystone correction can reduce image quality by stretching or compressing the image. It's best to use these corrections minimally and in conjunction with proper projector placement.
Some projectors even offer automatic keystone correction, which utilizes built-in sensors to detect distortion and adjust the projection accordingly. This feature can save you time and effort while ensuring a superior viewing experience.
Adjusting for Optimal Fit
Misalignment can detract from your viewing experience, but implementing keystone correction effectively can restore the image to its intended shape. This feature compensates for distortion that occurs when you project images at an angle, ensuring your visuals remain crisp and rectangular.
To get the best results, consider these tips:
- Position your projector as level and centered as possible to reduce distortion.
- Utilize vertical and horizontal corrections wisely to fine-tune the image without excessive adjustments.
- Access the projector's menu settings for an easy digital keystone correction, but be cautious—overusing this feature can impact image quality.
Set the Proper Resolution
Achieving ideal image quality starts with setting the proper resolution on your projector. First, verify that your projector's resolution matches its native resolution, like 1920×1080 for Full HD. This alignment is vital for achieving the best clarity and detail in your images.
When connecting your projector to a computer, check that the display settings output the highest possible resolution compatible with your projector. Down-scaling can lead to a noticeable loss in sharpness.
Opt for HDMI connections whenever possible, as they automatically transmit the highest resolution signal, enhancing your image quality compared to older connection types like VGA.
Regularly check and adjust the resolution settings on both your projector and any connected devices. Some devices might default to lower resolutions, which you want to avoid.
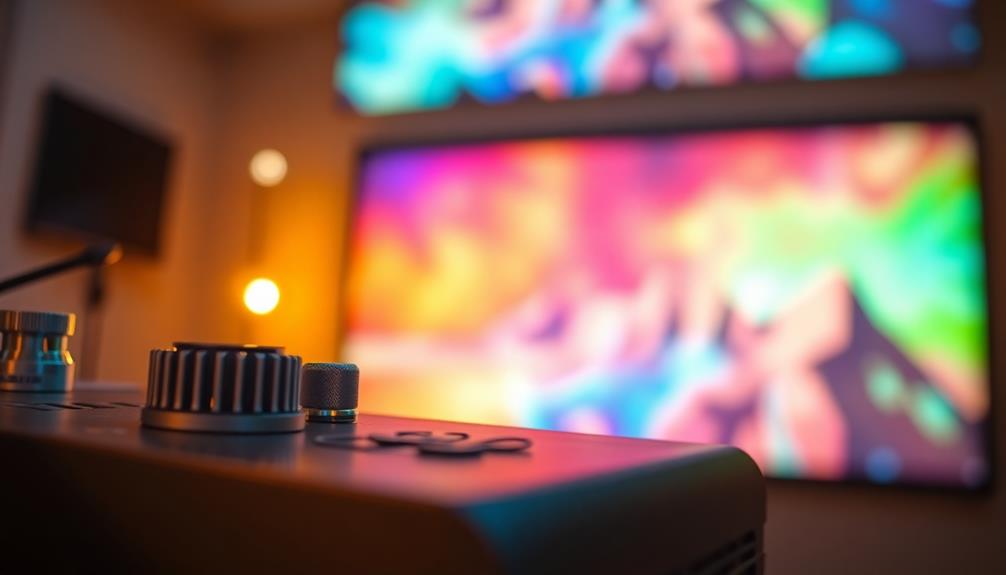
Enhance Color Calibration

To truly elevate your projector's image quality, enhancing color calibration is essential.
Begin by adjusting the color settings using the projector's menu. Opt for true color modes to achieve more accurate colors, although this might reduce brightness. Don't forget to utilize calibration wizards or test patterns—these tools help guarantee whites appear bright and skin tones look natural.
Here are some tips to enhance your color calibration:
- Regularly check the color temperature settings; aim for a standard range between 6500K to 7500K for the best viewing experience.
- Experiment with different color profiles available in the projector's settings to find the perfect match for your content—be it movies, presentations, or gaming.
- Consider using external calibration tools, like colorimeters, for professional-level color accuracy.
Use High-Quality Source Material

To get the best image quality from your projector, you need to use high-definition (HD) or 4K source material.
This guarantees you're taking full advantage of your projector's capabilities, delivering clearer and more detailed visuals.
Source Material Resolution
High-quality source material is essential for getting the most out of your projector. When you use high-definition (HD) or 4K content, you maximize your projector's capabilities, guaranteeing sharp and detailed images, especially on larger screens.
Low-resolution source material, like standard definition (SD) videos, can lead to pixelation and a lack of clarity, ruining your viewing experience.
To optimize your image quality, keep these points in mind:
- Choose HD or 4K content: This guarantees your source resolution matches or exceeds your projector's native resolution.
- Adjust output settings: When using computers or streaming devices, set the output resolution to the highest possible level.
- Update software regularly: Keeping your source devices' software and firmware up to date enhances compatibility and performance, leading to improved image quality.
Content Quality Impact
Choosing the right content greatly impacts your viewing experience. When you use high-definition (HD) or 4K source material, you're maximizing your projector's capabilities, guaranteeing clearer and more detailed images. Low-resolution materials can lead to pixelation and fuzziness, so it's vital to select content that matches or exceeds your projector's native resolution for peak performance.
Confirm the output from your source device is set to the highest resolution supported by your projector. This prevents down-scaling, which can notably degrade image quality. Streaming platforms and Blu-ray discs usually offer high-quality options, so opt for these over lower-quality formats to enhance your viewing experience.
Additionally, don't overlook the importance of regularly updating software and firmware on both your projector and source devices. This not only improves compatibility but also boosts performance, further enhancing the content quality impact on your images.
Integrate Quality Audio Systems

A fascinating visual experience demands equally impressive audio, and integrating a quality audio system is key to achieving that balance.
To truly enhance your project's performance, consider the following audio options:
- Surround sound systems that wrap you in rich, dynamic audio, immersing you in the action.
- Bluetooth-enabled soundbars for a sleek, cable-free experience, delivering clear sound without the clutter.
- Adjustable audio settings that adapt to different content types, ensuring dialogue remains clear and impactful.
Regularly Maintain Equipment

Maintaining your projector is essential for ensuring it delivers the best image quality over time. One of the easiest ways to do this is by regularly cleaning the projector lens with a microfiber cloth. Dust and fingerprints can notably impact image clarity, so don't overlook this simple task.
You should also check and replace the air filter as needed. Proper ventilation is vital to prevent overheating, which can lead to performance issues.
To keep internal components clean, use compressed air to gently blow out dust from vents and fans. This helps maintain ideal airflow and performance.
Updating your projector's firmware periodically is another important step. These updates often come with performance enhancements and bug fixes that can improve image quality.
Lastly, monitor the lamp life and replace it as recommended by the manufacturer. A worn-out lamp can result in dim or poor-quality images, making it essential to stay on top of this maintenance.
Experiment With Picture Modes

To get the best image quality from your projector, you should explore the different picture modes it offers.
Each mode is designed for specific content and lighting conditions, so switching based on what you're watching can really enhance your experience.
Don't hesitate to experiment with these settings to find what works best for your environment.
Explore Different Picture Modes
Your projector's picture modes can dramatically enhance your viewing experience, tailoring the image to suit different content and lighting conditions.
To fully optimize your projector's potential, it's crucial to explore different picture modes. Each mode is designed to improve brightness, contrast, and color saturation, allowing you to adjust the settings for your specific environment.
Consider these common picture modes:
- Cinema: Perfect for a dark room, providing rich colors and deep blacks.
- Vivid: Great for bright environments, boosting brightness and saturation for daytime viewing.
- Game: Ideal for fast-paced action, reducing input lag for smooth gameplay.
Regularly testing these modes during different viewing scenarios—like daytime versus nighttime—can reveal significant differences in image quality.
You might find that certain modes enhance the visibility of details in both dark and bright scenes. Experimenting with these settings helps guarantee your projector delivers the best possible image, no matter what you're watching.
Adjust Based on Content
Adjusting your projector based on the content you're viewing can make a world of difference in image quality. By experimenting with different picture modes—like Cinema, Vivid, and Dynamic—you can greatly enhance your viewing experience.
Many projectors come equipped with pre-set modes that automatically adjust settings such as brightness, contrast, and color saturation, improving performance for specific scenarios like movies or presentations.
Utilizing the correct picture mode helps prevent image distortion and guarantees accurate color representation, especially for visually rich content like films and games. If you're watching a bright, vibrant movie, a Vivid mode might be ideal, while a more subdued setting could enhance a dramatic film.
Switching between modes allows you to adapt your projector's settings according to ambient light conditions, improving visibility and detail. Regularly reviewing and adjusting picture modes helps maintain a peak viewing experience, as different types of content benefit from distinct settings.
Seek Expert Recommendations
Finding the right projector can greatly enhance your viewing experience, so seeking expert recommendations is essential. Consulting industry expert reviews will guide you toward top-performing projector models that fit your specific needs and budget constraints.
When you seek expert recommendations, consider professionals who specialize in home theater systems. They can help you select a projector that maximizes image quality based on your room size and lighting conditions.
Here are a few ways to tap into expert insights:
- Engage with online communities: Forums focused on projector technology often share valuable insights and user experiences.
- Explore calibration techniques: Learn from experts about optimizing your projector's performance and maintaining image quality over time.
- Consider accessories: Get advice on screens and audio systems to enhance your overall viewing experience.
Frequently Asked Questions
How to Improve Projector Image Quality?
To improve your projector's image quality, adjust the focus for sharpness, clean the lens regularly, use keystone correction, choose a dedicated screen, and match the projector's resolution settings with your source device's capabilities.
How to Make a Projector High Quality?
To transform your projector into a visual masterpiece, calibrate its resolution, choose a vibrant screen, clean the lens, tweak focus settings, and embrace the shadows of a dimly lit room for stunning clarity.
How Can I Make My Projector Show Better?
To make your projector show better, focus the lens for sharpness, clean the lens regularly, adjust keystone settings to eliminate distortion, set the resolution correctly, and consider investing in a quality projection screen for enhanced clarity.
How to Get the Best Picture Out of a Projector?
To get the best picture out of your projector, adjust the focus and use keystone correction. Clean the lens regularly, invest in a quality screen, and set it to native resolution for maximum clarity.
Conclusion
By following these 15 steps, you can transform your projector's image quality dramatically. Did you know that a well-calibrated projector can enhance brightness by up to 50%? This means you'll not only enjoy sharper images but also more vibrant colors, making your movie nights or presentations come to life. So, take the time to optimize your setup, and you'll be amazed at the difference it can make in your viewing experience. Happy projecting!