
To calibrate your SPL meter for accurate speaker levels, you should use a known sound source like a calibrator emitting 94 dB or 114 dB at 1 kHz. Place the calibrator over the microphone securely, power both devices on, and match the SPL meter’s reading with the calibrator’s level following the instructions. Conduct the process in an environment similar to your measurement setting. Keep in mind that proper calibration guarantees precise results, and there’s more to take into account for ideal accuracy.
Key Takeaways
- Use a calibration tone (94 dB or 114 dB at 1 kHz) with a calibrator placed securely over the SPL meter microphone.
- Ensure the SPL meter is set to the correct measurement setting and powered on before calibration.
- Position the calibrator at the same height and distance as the speaker during actual measurements for consistency.
- Adjust the SPL meter’s calibration setting or note the discrepancy to ensure readings match the known calibrator level.
- Perform calibration in the same environment where speaker measurements will occur, accounting for environmental factors.

An SPL (Sound Pressure Level) meter is an vital tool for accurately measuring sound levels in various environments. Whether you’re setting up a home theater, recording studio, or live sound system, understanding how to perform proper sound level measurement guarantees your audio is balanced and safe for listeners. One key aspect of effective sound level measurement is calibration, which guarantees that your SPL meter provides accurate readings. Calibration techniques are critical because even minor inaccuracies can lead to misjudging loudness levels, potentially causing hearing damage or compromised audio quality.
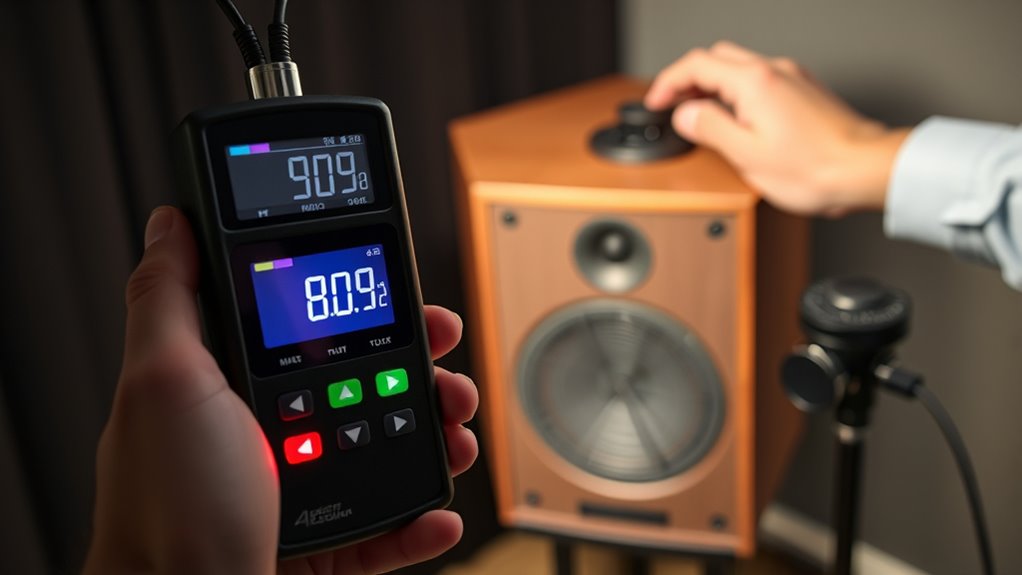
To begin, you’ll want to check if your SPL meter has a calibration setting or if it requires external calibration. Many professional-grade meters come with a calibration procedure that involves using a known sound source, such as a calibrator that emits a precise, standardized tone—usually 94 dB or 114 dB at a specific frequency, like 1 kHz. When performing calibration, you’ll place the calibrator over the microphone of your SPL meter, ensuring a tight seal to prevent sound leakage. Power on both the calibrator and the SPL meter, then follow the device instructions to match the meter’s reading with the calibrator’s known level. This process guarantees your measurements are accurate and reliable.
Check if your SPL meter has a calibration setting or requires external calibration with a known sound source at 94 dB or 114 dB.
Once calibrated, it’s vital to understand and implement proper calibration techniques during sound level measurement. For instance, always perform calibration in the environment where you’ll be measuring sound. Environmental factors like background noise, wind, or temperature fluctuations can affect readings, so conducting calibration in similar conditions helps maintain accuracy. Additionally, regularly verify your calibration, especially after moving the SPL meter or if it has been used extensively. This ongoing check prevents drift in measurement accuracy over time. Using a quality calibration device or following manufacturer guidelines can further enhance precision.
Another effective calibration technique involves using a smartphone app or a known reference sound level generator to verify your SPL meter’s accuracy periodically. While these methods may not replace professional calibration, they offer quick checks to ensure your device remains reasonably accurate. When measuring sound levels, keep the microphone pointed directly at the sound source and at a consistent distance, typically at ear level, to ensure uniform readings. Also, avoid covering the microphone or placing objects nearby that could influence the sound pressure.
![Outdoor-Projector-4K with WiFi and Bluetooth:[3500 Bright/60W Dolby Audio/Official Licensed Apps],Smart-Projector with AI Auto Focus,ONOAYO ONO5Pro 2.0 Movie Projector for Indoor/Outdoor 2026New](https://m.media-amazon.com/images/I/41fylkjOTIL._SL500_.jpg)
Outdoor-Projector-4K with WiFi and Bluetooth:[3500 Bright/60W Dolby Audio/Official Licensed Apps],Smart-Projector with AI Auto Focus,ONOAYO ONO5Pro 2.0 Movie Projector for Indoor/Outdoor 2026New
[Hear the Difference–Hollywood-Grade Dual 60W Dolby Audio] Why spend more on a TV + soundbar or settle for...
As an affiliate, we earn on qualifying purchases.
Frequently Asked Questions
Can SPL Meters Measure Sound Quality or Only Volume?
An SPL meter measures sound volume, not sound quality. It gauges loudness levels, helping you achieve proper volume calibration. While it doesn’t directly assess sound fidelity or frequency response, it guarantees your speakers are balanced at safe levels. To evaluate sound quality, you need to listen critically or use specialized tools that analyze frequency response and audio clarity, since SPL meters focus solely on loudness rather than tonal accuracy.
How Often Should I Recalibrate My SPL Meter?
Think of your SPL meter as a musical instrument needing tuning. You should recalibrate it every few months, especially if environmental factors like temperature or humidity change. Regular calibration guarantees your readings stay true, like a lighthouse guiding your audio setup. Keep an eye on how often you use it and any environment shifts—these are clues that your calibration frequency might need a boost to keep your sound measurements accurate.
Are There Specific Settings for Different Speaker Types?
Yes, different speaker types require specific calibration techniques. For ideal results, consider speaker placement first, ensuring each speaker is positioned correctly for even sound distribution. Adjust your SPL meter settings accordingly—lower frequencies may need different calibration settings than higher ones. Always tailor your calibration techniques to the speaker’s size, type, and environment, ensuring accurate level matching across your system for balanced, high-quality sound.
Can SPL Meters Be Used for Outdoor Sound Calibration?
Yes, SPL meters can be used for outdoor sound calibration. You’ll measure sound pressure levels accurately in outdoor environments, helping you adjust speaker levels properly. Keep in mind, outdoor settings can introduce variables like wind and ambient noise, so you might need to account for these factors. Use the SPL meter consistently to guarantee your sound pressure levels are balanced, providing clear audio across your outdoor space.
What Is the Ideal SPL Level for Home Theater Systems?
Did you know that the ideal SPL level for home theater systems is around 75 dB? You should aim for this level to guarantee clear sound without discomfort. When calibrating, consider speaker placement and room acoustics, as they markedly influence perceived loudness. Using an SPL meter helps you achieve consistent levels, and adjusting your system to this target provides a balanced, immersive experience that’s comfortable for prolonged viewing.
![Smart Projector 4K [VIDAA Live TV & 36W Dolby & Voice Control] with WiFi6 and Bluetooth, Short Throw Projector Compatible with Netflix, AI Auto Focus, HDR10, Home Theater Proyector for Outdoor Movies](https://m.media-amazon.com/images/I/51LPK2IYH0L._SL500_.jpg)
Smart Projector 4K [VIDAA Live TV & 36W Dolby & Voice Control] with WiFi6 and Bluetooth, Short Throw Projector Compatible with Netflix, AI Auto Focus, HDR10, Home Theater Proyector for Outdoor Movies
[2026 Fastest VIDAA Smart OS: Faster, Smoother, More Reliable] TOPTRO A2 4K projector runs exclusive VIDAA Smart OS,...
As an affiliate, we earn on qualifying purchases.
Conclusion
Now that you know how to use an SPL meter to calibrate your speakers, you’ll guarantee every movie night sounds perfect. Imagine hosting a home theater and discovering your front left speaker was 10 dB too loud—causing fatigue. By calibrating with an SPL meter, you avoid this, creating balanced sound that immerses you in the action. Take control of your audio setup and enjoy crisp, consistent sound every time you press play.
![Smart 4K Projector [Google TV Stick Built-in & 360° Stand] with WiFi 6, Bluetooth 5.3, HDR10, 30W Hi-Fi, AI Auto Focus, Outdoor Portable Short Throw Movie Projector for Home Theater Bedroom Ceiling](https://m.media-amazon.com/images/I/41zno6cZMFL._SL500_.jpg)
Smart 4K Projector [Google TV Stick Built-in & 360° Stand] with WiFi 6, Bluetooth 5.3, HDR10, 30W Hi-Fi, AI Auto Focus, Outdoor Portable Short Throw Movie Projector for Home Theater Bedroom Ceiling
[Google TV Built-in | 10,000+ Apps | Voice Control] The smart projector with wifi and bluetooth features Google...
As an affiliate, we earn on qualifying purchases.
![[Built-in Apps/4K Support] Smart Outdoor Projector with WiFi and Bluetooth, Movie Projector, DoIby Audio with Dual Speaker, Auto Focus w/ YouTube&PrimeVideo Proyector, Upgrad P62 Pro](https://m.media-amazon.com/images/I/51yAGv8VI7L._SL500_.jpg)
[Built-in Apps/4K Support] Smart Outdoor Projector with WiFi and Bluetooth, Movie Projector, DoIby Audio with Dual Speaker, Auto Focus w/ YouTube&PrimeVideo Proyector, Upgrad P62 Pro
[Upgraded Classic – P62 Pro Movie Projector] Building on the reliability and low return rate of the classic...
As an affiliate, we earn on qualifying purchases.