Connect with us

Home Cinema

Home Cinema Decor Tips

Published

on

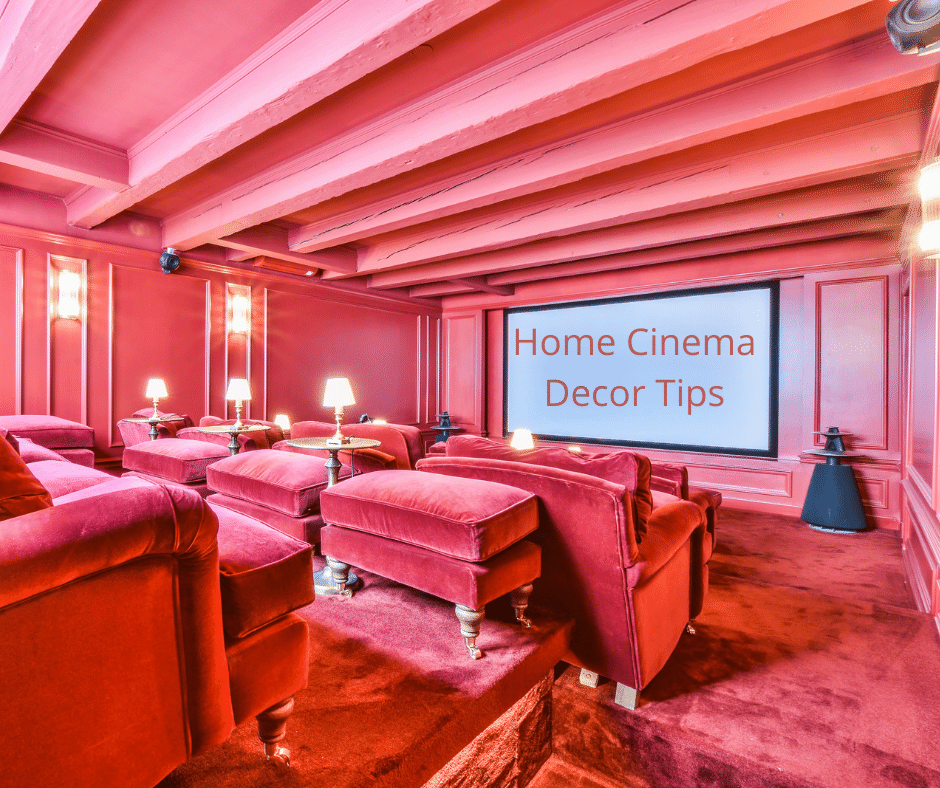
A seating layout with armchairs positioned in a semicircle around a large curved couch is an excellent setup for your home theater. If necessary, you can include extra chairs, and armchairs with adjustable arms can convert into a sizable curved couch when not in use. Unlike traditional movie theaters with expansive screens, a smaller TV is suitable for a home cinema room, so consider ways to utilize the surrounding space around the screen.

Decorating a Home Cinema Room

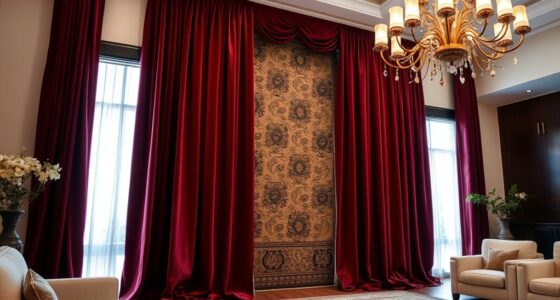
To create the ultimate movie-watching experience, you must decorate your home cinema room with the proper lighting. Lighting is just as important as the TV and sound system, and the wrong style can ruin the entire experience. Bright lighting can interfere with viewing, while low lighting can make it difficult to get comfortable while snacking. A free-standing lamp with a fabric shade is a great choice, as it delivers a welcoming glow.

You can also add flair by hanging movie posters. You can hang them around the entrance of your home cinema room or within the cinema room itself. You can hang them in different colors, depending on your favorite films. You can also use color-coded frames and switch them out seasonally. You can even display vintage flicks on vintage posters if you have them. If you want to display a large collection of movie posters, consider using light boxes to house them.

While a home cinema room is an excellent choice for family movie nights, the design should be appropriate for adults and children. Find the right space and acoustic design so you won’t disturb neighbors or guests. You can even add extras such as a hidden projector that drops from the ceiling to provide better acoustics. If you can afford it, a home cinema room is ideal for making your house more comfortable.

While choosing colors for a home cinema room is entirely up to you, remember that dark colors work best for cinema rooms. Generally, you should choose a color palette that is as dark as the movies to ensure the best viewing experience. Also, try to avoid contrasting colors. Choosing dark colors will make the room look dimmer. It will be more comfortable for you and your guests to watch movies.

Advertisement

Choosing a Projector

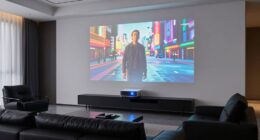
The first thing to consider when choosing a projector is the size and type of screen you want. The larger the screen size, the more expensive the projector will be. In addition, there are several features to consider for the room’s lighting, including contrast ratio and brightness. You may want to consider a blackout curtain as well. This will allow you to watch movies in your room without any distractions.

You can use a home projector screen calculator to determine which size screen you need. In most cases, the screen will be between ninety-two and ten inches in size. If the screen is too large for the room, you may want to choose a smaller screen or go for a smaller one. Measure the screen size to ensure you get the proper lens size.

A projector’s specifications should be based on the type of application it will be used for. A higher-end projector will produce crisper images and better contrast. They are also heavier and need a mount. If you don’t have a mount, you can hire a company to do the installation for you. A Geek Squad can also help you set up your new projector. They will even offer a one-time bulb replacement.

In addition to size, the screen fabric will also play an important role. The high gain screen fabric will produce a brighter image, while low-gain screens will allow for wider viewing angles. You may also want to consider the projector’s position in relation to the screen. There are two common projection positions: rear projection and front projection. You should choose the screen that matches this position. This will ensure that the screen is the right size for the screen.

Choosing Furniture

When choosing furniture for your home cinema, you should first consider the size of the room and the number of guests in attendance. If the room is large, you can choose traditional cinema seating, or go for a big sofa that can accommodate a large group. In a home cinema, comfort should be the top priority. For the best viewing experience, you should also consider the color scheme and other interior design elements.

Advertisement

Choosing Accessories

Creating a comfortable seating area and proper lighting are essential parts of the home cinema decor. While it’s tempting to stack up home theater accessories and go overboard, choosing exciting items that are thoughtfully placed throughout the room is much more effective. This way, you’ll create the ambiance you want without worrying about crowding the space. Here are some tips to help you make the right decision.

Home cinema decor accessories can be as simple as a small decorative item to a full-fledged movie experience. The right accessory can make a room seem homier and inviting or even serve a practical purpose. For instance, a riser or platform can help viewers in the back row see the screen as clearly as those sitting in front of it. An ideal home theater layout allows for multiple people to watch the movie comfortably.

Choosing to Light

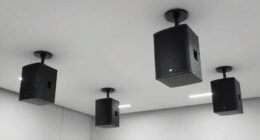
One of the best ways to illuminate a home cinema is with ambient lighting. You can choose from sconces or other classic movie house fixtures, or you can create an entirely different look by using cove lighting, which directs light up into the ceiling for low-profile illumination. This type of lighting is best for home theaters because it will not cast a glare on the screen. You can also choose floor lighting, which is another movie house-inspired option.

The ambiance created by ambient lighting in a home cinema decor can be soothing. It can help reduce eye strain while providing uniform focus. It is best to choose simple white lights that are not too bright or colored. The color temperature should be lower than 5000K. This will enhance the contrast in the images on the screen. Lighting is integral to creating a comfortable home cinema experience, so make sure you choose the right kind of light for the room.

Recessed lighting cans are a low-cost option that adds elegance to a home cinema decor. These lights are installed flush with the ceiling and can be dimmed. You can dim the lighting while watching a movie or when you need to get snacks. Recessed lighting is also great for home theaters, as it allows you to control the intensity of the light. If you’re decorating a home theater with stairs, you can also add stairwell lighting so guests don’t trip.

Advertisement

Another option for a home cinema decor is to add a dramatic effect to the ceiling. Using a fiber-optic light system can dramatically dim a room, but it can be distracting if your ceiling is too low. A cove, however, will create an impressive effect. Additionally, you can use column lighting and wall sconces to add visual flair to your room. And remember that functional lighting is a good option for any room, especially a home theater.

Conclusion

It may seem weird to think about creating a home cinema room, but after watching a movie in one, I’m never returning to standard TVs again. The living room and kitchen screens were so passé. The in-home cinema setup lets you immerse yourself into the action of movies, especially those with surround sound. What are some of your favorite home cinema setups? Let us know!

Tom is the Editor-in-Chief of 1home Theatre Projector, a website that provides news and reviews on the best home cinema experiences. With over 10 years of experience in the industry, Tom knows what makes a great home theatre projector and wants to make it easy for everyone to build the perfect setup for their needs. When he's not busy writing or testing projectors, Tom enjoys watching classic films and spending time with his family.

Continue Reading
Advertisement

Home Cinema

How to Create a Budget-Friendly Home Theater With a Projector

Join us to discover how to create a budget-friendly home theater with a projector, and unlock the secrets to an unforgettable cinematic experience!

Published

on

budget home theater projector setup

You can create a budget-friendly home theater with a projector by focusing on essential equipment and smart choices. Start with an affordable projector like the Optoma HD28HDR for stunning visuals at about $649. Pair it with an 80-inch pull-down screen for just $72 and a Roku Streambar for sound at $100. Don't forget necessary accessories like an HDMI cable and cable concealers to keep things organized. With a setup cost around $963, you'll enjoy a great cinematic experience at home while saving money. Want tips on maximizing your setup? There's plenty more to explore!

Key Takeaways

  • Choose an affordable projector like the Optoma HD28HDR, priced at $649, for high-quality visuals and 4K input compatibility.
  • Invest in an 80-inch pull-down screen for $72 to create a larger viewing area than standard TVs.
  • Enhance audio with a Roku Streambar for $100, eliminating the need for more expensive sound systems.
  • Utilize essential accessories such as a 25-foot HDMI cable, switcher, and cable concealer for a tidy setup at minimal cost.
  • Optimize your room's lighting with dimmable sconces and blackout curtains to enhance the viewing experience.

Equipment and Setup Guide

setup and equipment instructions

When setting up a budget-friendly home theater, choosing the right equipment is essential for an immersive experience. Start with a high-quality projector like the Optoma HD28HDR, which offers 4K input compatibility while projecting at 1080p resolution. Priced at $649, this projector guarantees vibrant visuals that elevate your home theater setup.

To make certain your home is also secure while enjoying your new theater, consider the cost of home security systems, which can be budget-friendly with various options available. Next, invest in an 80-inch pull-down projector screen for $72 from Amazon. Make sure to follow the installation process carefully, using toggle bolts for secure mounting and alignment.

To enhance your audio quality, integrate a Roku Streambar priced at $100. This audio equipment boosts sound over built-in projector speakers and provides options for adding a wireless subwoofer and speakers later.

For mounting your projector, utilize a universal mount like the Optoma OCM818W-RU for $59, keeping in mind that you might face alignment challenges and drywall maintenance during the installation.

Don't forget about effective wire management! Use an HDMI cable for $15, an HDMI switcher for $12, and a cable concealer for $17 to keep your setup tidy and organized. With these components, you'll achieve an impressive home theater experience without breaking the bank.

Advertisement

Budget Breakdown and Cost Efficiency

cost efficiency budget analysis

When you're setting up a budget-friendly home theater, understanding the cost breakdown is vital.

You'll see how smart choices on equipment and accessories can lead to significant long-term savings.

Let's explore the essential components and affordable options that can enhance your cinematic experience without breaking the bank.

Equipment Cost Overview

Setting up a budget-friendly home theater doesn't have to break the bank. You can create an impressive home theater setup for as low as $963, which is well under your $1,000 budget. Here's a quick overview of essential equipment costs:

Equipment Item Cost
Projector Optoma HD28HDR $649
Sound System Roku Streambar $100
Screen DIY or budget screen $100
Accessories HDMI Cable $15
HDMI Switcher $12
Cable Concealer $17

When choosing your projector and sound system, prioritize quality to enhance your cinematic experience. The Optoma HD28HDR delivers stunning visuals, while the Roku Streambar guarantees excellent audio. Don't forget the accessories—they're vital for effective wire management and can be quite affordable. With this equipment, you can enjoy a fantastic home theater experience without overspending.

Long-term Savings Potential

Investing in a budget-friendly home theater can lead to substantial long-term savings, transforming your entertainment experience while keeping costs down. By spending around $963 on a complete setup, including a projector and screen, you circumvent the need for expensive large-screen TVs.

Advertisement

For instance, the Optoma HD28HDR projector, priced at $649, delivers a stunning 1080p viewing experience without breaking the bank. Additionally, one can consider features like various toilet types that enhance the comfort and functionality of your home, making it a more enjoyable place for movie nights.

Moreover, enhancing your setup with a Roku Streambar for just $100 provides high-quality sound, eliminating the need for costly separate audio systems. This smart allocation of funds allows you to create an all-encompassing home theater system that doesn't sacrifice quality.

Additionally, investing in an HDMI switcher and cable concealer for about $29 keeps your setup tidy and saves you from professional installation fees.

With a budget-friendly home theater, you can enjoy regular family movie nights without the expense of frequent trips to the cinema. Over time, these savings accumulate, making your home theater a financially savvy choice. Embrace the convenience and enjoyment of a home theater while reaping the long-term savings it offers.

Affordable Accessory Recommendations

How can you enhance your budget-friendly home theater setup without overspending? Start by investing in essential accessories that won't break the bank.

Advertisement

An HDMI cable, like the Amazon Basics version for just $15, guarantees high-quality video and audio from your devices to the projector. Additionally, consider the convenience of using a robot vacuum to keep your home theater area clean and inviting, making certain you can enjoy your movie nights without distractions.

Next, consider adding an HDMI switcher, such as the Techole model for $12. This handy device lets you switch easily between multiple input sources, boosting the functionality of your setup.

To keep your space tidy, use a cable concealer like the UMTELE option for $17. It'll help you manage and hide those pesky cables, creating a clean and organized atmosphere for your movie nights.

When you add these affordable accessory recommendations together, you'll find the total cost is around $44—well under the $50 mark.

Enhancing the Viewing Experience

improving audience engagement techniques

To elevate your home theater experience, consider a few key upgrades that can make a world of difference. Start by investing in an 80-inch pull-down screen for just $72. This upgrade enhances the viewing experience by providing a larger, clearer image compared to standard TVs. Pair it with the Optoma HD28HDR projector, which offers 4K input and projects at 1080p resolution with a 120Hz refresh rate, ensuring your image quality remains bright and sharp for movies and gaming.

Creating a cozy atmosphere also plays an essential role. Use dimmable wall sconces and blackout curtains to minimize outside light interference, improving immersion. Don't forget about sound; a Roku Streambar at $100 greatly enhances audio quality, offering a richer sound experience than built-in projector speakers.

Advertisement

Here's a quick overview of your key upgrades:

Upgrade Price Benefit
80-inch Pull-Down Screen $72 Larger, clearer image
Optoma HD28HDR Projector $XX Bright, sharp visuals
Dimmable Wall Sconces $XX Minimize light interference
Cable Concealers $17 Tidy setup, no clutter
Roku Streambar $100 Enhanced audio experience

Setup Considerations and Tips

effective setup strategies summary

When setting up your home theater, projector placement is essential for the best viewing experience.

You'll also want to manage your cables effectively to keep everything neat and tidy.

Don't forget to take into account room lighting, as it can greatly impact your picture quality and overall enjoyment.

Projector Placement Strategies

Finding the right spot for your projector is essential for achieving the best viewing experience. Start by calculating the throw distance, which is typically 1.5 to 2.5 times the screen width. This guarantees a clear image without distortion.

For ideal projector placement, consider using a ceiling mount or a sturdy shelf to keep the projector stable. Position the lens at the same height as the top of the screen for the best viewing angle.

Advertisement

Don't forget about ventilation; your projector needs enough airflow to prevent overheating, especially during long movie marathons. Make sure there's space around it for air circulation.

Next, take into account the room's ambient light. Place the projector away from direct sunlight, or use blackout curtains to improve picture quality dramatically.

Cable Management Solutions

After setting up your projector for best viewing, it's time to tackle cable management to keep your home theater looking sharp. A clean setup not only enhances aesthetics but also prevents issues like signal loss. Start by using a 25-foot HDMI cable for long distances between your HD projector and source devices. This guarantees your signals remain strong, especially in larger rooms.

Invest in a cable concealer, such as the UMTELE model, to hide and manage your cables neatly along walls or baseboards. Here's a quick guide to help you:

Tip Benefit
Use extension cords Accommodates multiple devices
Plan cable routing Avoids tangling
Label each cable Simplifies troubleshooting

Consider incorporating power strips with surge protection to maintain safety while minimizing clutter. Planning your cable layout before installation can make future adjustments easier, giving you more control over your home theater room. With these cable management strategies, you'll achieve a sleek, organized space that enhances your movie-watching experience.

Advertisement

Room Lighting Considerations

Creating the perfect ambiance in your home theater is essential for an immersive experience. When tackling room lighting considerations, focus on soft dimmable lighting that enhances your viewing while minimizing glare on the screen. Wall sconces provide an elegant option for ambient lighting control, setting the mood without overpowering the cinematic atmosphere.

Avoid bright overhead lights that can disrupt your cozy environment. Instead, choose energy-efficient LED lights with adjustable brightness and a warm color temperature. These options create a welcoming atmosphere and keep the focus where it belongs: on the screen.

Incorporating blackout curtains or thick velvet drapes will block natural light from windows, ensuring a darker space that boosts picture quality during daytime viewing.

You can also enhance the overall ambiance by using LED strip lights around the screen or behind furniture, adding a subtle glow without distracting from your movie or game.

Make sure to position lighting controls within easy reach, allowing for quick adjustments. This way, you can create the perfect atmosphere for movie nights or gaming sessions without interrupting your entertainment flow.

Advertisement

Future Enhancements and Upgrades

upcoming improvements and developments

As your home theater evolves, consider a few enhancements that can elevate your viewing experience. Investing in a 4K projector can greatly enhance picture quality, creating a more cinematic feel. With prices dropping, it's an achievable upgrade that will impress guests and family alike.

A wireless subwoofer is another smart addition that improves sound depth without the hassle of tangled wires. This flexibility allows you to rearrange your space effortlessly. Moreover, incorporating acoustic panels can dramatically reduce echoes, enhancing audio clarity and making your home theater sound like a professional setup.

To create a enthralling atmosphere, think about adding LED strip lighting around the screen or along the walls. This feature not only adds visual appeal but also immerses you deeper into your movie-watching experience. Finally, curating a personal library of films and streaming services guarantees your home theater remains a versatile entertainment hub.

Here's a helpful table summarizing these enhancements:

Enhancement Description
4K Projector Upgrade resolution for a cinematic experience.
Wireless Subwoofer Enhances sound depth without cumbersome wires.
Acoustic Panels Reduces echoes, improving overall audio quality.
LED Strip Lighting Creates an immersive atmosphere for movie nights.
Personal Library Expands viewing options for varied entertainment.

Home Theater Design and Layout

custom home theater setup

To achieve an ideal home theater experience, you should carefully consider the design and layout of your space. Start with a rectangular room shape and include a 10-inch riser for back row seating. This guarantees every guest has a clear view of the screen.

For your home theater design, opt for a dark, inviting color scheme like Iron Ore from Sherwin Williams, but be certain to choose a lighter carpet to avoid a dungeon-like feel.

Position your projector 7-10 feet from the screen for best viewing distance. Make sure it's securely mounted to prevent any damage during installation.

Advertisement

To enhance the viewing experience, incorporate dimmable wall sconces. These will allow you to control the lighting elegantly, creating an ambiance that complements your film without causing glare on the screen.

Frequently Asked Questions

How to Set up a Budget Home Theater?

To set up a budget home theater, start with a quality projector, invest in a decent screen, enhance audio with good speakers, and manage cables neatly. Keep your total costs under $1,000 for the best experience.

How to Connect Home Theatre With Projector?

To connect your home theater with a projector, use an HDMI cable from the projector to the AV receiver. Check compatibility, and if needed, add an HDMI switcher for multiple devices. Guarantee proper power access, too.

How to Create a Cinema Room on a Budget?

Imagine a cozy cinema room, complete with plush seating and dim lighting. You'll want budget-friendly essentials like a projector, screen, soundbar, and smart cable management to transform your space into an inviting movie haven.

How to Make a Home Theater DIY?

To make a home theater DIY, start with a projector and an appropriate screen. Add sound equipment, manage your cables for a clean look, and guarantee comfortable seating for an enjoyable viewing experience.

Advertisement

Conclusion

Creating a budget-friendly home theater with a projector is totally doable and can bring the cinema experience right into your living room. Imagine transforming your spare room into a cozy movie haven with just a few smart purchases. For instance, you could snag a high-quality projector for under $300 and build a DIY screen using a simple white sheet. With some comfy seating and dim lighting, you'll be ready for movie nights without breaking the bank!

Continue Reading

Home Cinema

Troubleshooting Guide: Fixing White Dots on Your Projector Screen

Be prepared to tackle those frustrating white dots on your projector screen with our troubleshooting guide that reveals crucial steps for a clearer viewing experience.

Published

on

fixing projector screen dots

If you're seeing white dots on your projector screen, don't worry—many issues can lead to this. Start by checking for dust on the lens and filters, as cleaning them may solve the problem. Next, inspect your input sources to verify the issue isn't coming from the devices you're using. If the dots persist, it could be pixel issues, so observe a uniform screen to identify dead or stuck pixels. Regular maintenance, including cleaning filters and components, can help you avoid this problem in the future. Want to explore more tips to tackle those pesky white dots?

Key Takeaways

  • Check different input sources to determine if white dots persist across all devices, indicating an internal issue.
  • Inspect the projector lens and filters for dust; clean them regularly to maintain image quality.
  • Use a uniform background to identify dead or stuck pixels by observing the projector output.
  • Ensure all cables are securely connected and free from visible damage to prevent signal issues.
  • Consider professional repair for persistent pixel issues or internal component cleaning, especially for DMD chip problems.

Understanding White Dots

interpreting white dot patterns

When it comes to white dots on your projector screen, pinpointing the cause can help you tackle the issue effectively. These white dots can often stem from dust or debris that accumulates on the optical components or lens.

Regular maintenance, similar to the care needed for robot vacuum cleaners, can prevent dust buildup that exacerbates white dot problems. When light scatters off these particles, it creates those noticeable patches you see.

In the case of DLP projectors, white dots may indicate problems with the DMD chip, where dead or stuck pixels fail to display correctly due to heat or damage.

You'll notice that these white dots persist across different input sources, which suggests there's an internal issue rather than a problem with your image feed. Regular maintenance is essential; cleaning filters and internal components can prevent dust buildup that exacerbates white dot problems.

If you find yourself struggling with persistent white dots, it's often best to seek professional help. They can assist in identifying and replacing malfunctioning DMD chips or conduct a thorough internal cleaning to restore your projector to its best performance.

Advertisement

Understanding the nature of these white dots is your first step toward a clearer, more enjoyable viewing experience.

Common Causes of White Dots

white dots causes explained

White dots on your projector screen can be frustrating, and understanding their common causes is vital to fixing the issue. One major culprit is dust and debris accumulation on internal components. When these particles scatter light, they create visible white dots during projection.

Regular maintenance, similar to the upkeep of heat pumps, can prevent dust buildup and enhance overall performance efficient energy use.

Another common cause is dead pixels, which are pixels that fail to display correctly and often result in stationary white dots. Stuck pixels can also appear as white patches because they remain in the "on" position.

Additionally, unclean filters can distort images and contribute to white patches. Regular maintenance and cleaning are important to prevent these problems.

Hardware malfunctions, including issues with the projector's internal components, may also create white dots, signaling potential failures that require professional attention.

Advertisement

Finally, connection problems, such as faulty cables or loose connections, can lead to image abnormalities like white spots. It's essential to inspect all cables and ports to guarantee everything's functioning properly.

Initial Troubleshooting Steps

start with basic checks

Start by checking your input sources to see if the white dots appear across all of them; this helps pinpoint whether the issue is with the signal.

If the issue persists, consider how the projector's performance can be affected by factors such as budget management or the quality of your cables.

Next, inspect the projector for any dust on the lens and filters, as even a small amount can scatter light and create those annoying white patches.

Taking these initial steps can save you time and lead you toward a solution more quickly.

Check Input Sources

To tackle the issue of white dots on your projector screen, begin by checking all input sources. This initial step is essential in pinpointing whether the problem lies within the projector or a specific device.

Advertisement

Follow these steps to effectively troubleshoot:

  1. Test Different Devices: Connect a different input source, like a laptop or DVD player, to see if the white dots persist.
  2. Check Connections: Verify all cables connecting the projector to the input sources are secure and undamaged. Faulty connections can lead to image issues.
  3. Use a Blue Screen: Display a blue or blank screen to better visualize those pesky white dots. They're usually easier to spot against a uniform background.
  4. Isolate the Problem: If the white dots only appear with one device, test that source on another display to rule out any issues with it.

Inspect for Dust

Dust buildup on your projector can greatly impact image quality, often leading to the appearance of white dots on the screen.

Start by examining the projector's lens for any visible dust or smudges. Even minor contaminants can scatter light, affecting the clarity of your images. Use a microfiber cloth to gently wipe the lens, ensuring it's free from dust and debris that could interfere with your viewing experience.

Next, check the air intake and exhaust vents for dust buildup. Blocked airflow can cause overheating and exacerbate internal dust issues, which might also contribute to those pesky dots on the screen.

Regularly clean or replace the filters according to the manufacturer's guidelines—usually every 100 hours of use—to prevent dust accumulation and maintain peak performance.

Cleaning Techniques for Projectors

projector maintenance cleaning methods

Cleaning your projector regularly is crucial for maintaining its performance and image quality. Neglecting this task can lead to unsightly white dots on your projector screen and diminish your viewing experience.

Here are some effective cleaning techniques to keep your projector in top shape:

Advertisement

  1. Clean the lens: Use a microfiber cloth with a few drops of glass cleaner or degreaser. This helps remove smudges and enhances clarity.
  2. Check air filters: Clean or replace the air filters every 100 hours to prevent dust buildup, which is a common culprit for those pesky white dots.
  3. Use compressed air: Blow dust out of vents and inaccessible areas without disassembling your projector. This quick step can greatly reduce dust accumulation.
  4. Consider professional help: If you're facing complex issues, don't hesitate to hire a professional service. They can guarantee thorough cleaning and maintenance of your projector's internal components.

Inspecting for Pixel Malfunctions

identifying pixel defects issues

Even with regular maintenance and cleaning, you might still encounter white dots on your projector screen. These dots can often be attributed to dead pixels on the DMD chip. Dead pixels fail to display correctly and remain unresponsive, while stuck pixels continuously show as white, creating visible disturbances.

To diagnose the issue, observe the projector's output against a uniform color background. This simple test can help you distinguish between dead pixels and potential dust or dirt interference.

Issue Type Description
Dead Pixels Unresponsive pixels that don't display at all.
Stuck Pixels Continuous white display, creating stationary dots.
Dust/Dirt Interference Moving dots suggest external contaminants.

If you identify dead pixels, professional replacement of the DMD chip may be your best option, as repairing individual pixels isn't feasible. Regular monitoring for pixel malfunctions is essential to prolong your projector's lifespan and maintain peak image quality. Keep an eye out for any changes, and address issues promptly to enjoy the best viewing experience possible.

Checking Optical Components

inspecting optical equipment thoroughly

A thorough inspection of the optical components is crucial for resolving white dots on your projector screen.

These white spots can often be traced back to issues within the projector's lens and other optical parts. Here's what you should check:

  1. Projector Lens: Inspect for dust or smudges. Cleaning with a microfiber cloth can greatly improve image quality.
  2. Filters: Look for dust accumulation. Regularly cleaning or replacing filters every 100 hours is necessary to maintain peak performance.
  3. Physical Damage: Examine the optical components, including the light path and lens. Any damage or misalignment could distort images and create those pesky white patches.
  4. Component Connections: Verify all optical elements are properly seated and connected. Loose components can lead to inconsistent light transmission and image quality.

Evaluating Hardware Connections

assessing device linkages efficiency

Properly evaluating hardware connections is essential for identifying and resolving issues like white dots on your projector screen. Start by ensuring that all cables connecting your projector to external devices are securely plugged in. Loose connections can lead to image abnormalities, including those pesky white dots.

Next, inspect the cables and ports for any visible damage, as faulty hardware connections can disrupt signal transmission, causing display issues. It's also important to use high-quality, compatible cables to minimize the risk of connection problems that contribute to white dots or other image artifacts.

Take a moment to check your projector's input source settings, ensuring they're correctly configured. Incorrect settings can sometimes mimic hardware connection issues, leading you to think there's a more significant problem.

Advertisement

If you're using adapters or converters, verify that they're functioning properly, as these can introduce connectivity problems that affect image quality. By thoroughly examining these aspects of your hardware connections, you can often pinpoint the cause of the white dots and take the necessary steps to fix them.

Professional Repair Options

expert restoration services available

When dealing with persistent white dots on your projector screen, seeking professional repair options is often the best course of action.

These experts can accurately diagnose whether the issue stems from dust accumulation or a failing DMD chip, guaranteeing you get the right fix.

Here are four reasons to evaluate professional repair services:

  1. Expert Diagnosis: Technicians can pinpoint the exact cause of the problem, saving you time and frustration.
  2. Thorough Cleaning: Professionals guarantee internal components are cleaned properly, reducing the risk of further issues.
  3. Cost-Effective: Repairing or replacing a DMD chip typically costs between $200 and $300, which is worthwhile given your projector may be worth around $1000.
  4. Support Access: Many brands, like Casio, offer dedicated customer support lines, helping you navigate your repair options.

Engaging local technicians who specialize in projector repairs can lead to detailed quotes and insights into necessary maintenance or replacements.

Preventative Maintenance Tips

essential maintenance best practices

To keep your projector in top shape, establish a regular cleaning schedule for its filters and internal components.

Make sure to maintain an ideal environment by reducing dust around the projector, which can minimize potential image distortion.

Regular Cleaning Schedule

Regularly cleaning your projector is essential for maintaining its performance and image quality. A solid cleaning schedule not only helps prevent projector white dots but also extends the life of your device.

Advertisement

Here's how to keep your projector in prime shape:

  1. Clean filters every 100 hours of use to prevent dust accumulation that can affect image clarity.
  2. Use compressed air to blow out dust from vents and internal components—it's effective without needing disassembly.
  3. Wipe the projector lens with a microfiber cloth to avoid scratches and guarantee peak light transmission.
  4. Inspect air intake and exhaust vents regularly to maintain proper airflow, as blocked vents can lead to overheating.

If you're in a high-dust environment, consider cleaning filters every 50 hours instead.

By sticking to this cleaning schedule, you'll not only enhance your projector's performance but also minimize the chances of encountering those pesky white dots on your screen.

Your projector deserves this care, so don't let dust ruin your viewing experience!

Optimal Environment Settings

Creating an ideal environment for your projector is crucial for preventing issues like white dots on the screen. By focusing on the best environment settings, you can greatly reduce the risk of damage to critical components like the DMD chip.

Here are some key tips to maintain a projector-friendly environment:

Advertisement

Tip Description Benefits
Regular Cleaning Dust and vacuum regularly to minimize dust accumulation. Reduces chances of internal dust.
Proper Ventilation Maintain a few inches of space around the projector. Prevents overheating and damage.
Use Air Purifiers Employ air purifiers to lower airborne particles. Keeps lens and internals clean.
Avoid Direct Sunlight Position the projector away from direct sunlight. Protects components from UV damage.

Maintaining a clean environment, guaranteeing adequate airflow, and protecting your projector from sunlight can help preserve its lifespan and performance. Regularly checking and cleaning filters every 100 hours will further enhance your projector's functionality, keeping those pesky white dots at bay.

Proper Filter Maintenance

Maintaining the filters of your projector is just as important as guaranteeing a clean environment. Neglecting them can lead to dust accumulation, resulting in those pesky white dots on your screen.

Here are some essential tips for proper filter maintenance:

  1. Clean or replace filters every 100 hours of use. This simple step prevents image quality degradation.
  2. Use the right filters. Confirm compatibility with your projector model to maintain peak performance and airflow.
  3. Gently vacuum the filters to remove dust without causing damage. Alternatively, use compressed air to blow out dust from the vents.
  4. Inspect for wear and tear. If your filters look excessively dirty or torn, replace them to guarantee your projector runs smoothly.

Community Resources and Support

local assistance and guidance

Finding reliable community resources and support can greatly ease the troubleshooting process for projector issues like white dots. One excellent place to start is AVForums, where you'll find an engaged community discussing projector problems. With over 60,700 views on related threads, you can tap into a wealth of shared experiences and advice.

Look for dedicated threads tagged "white dots" to uncover insights and troubleshooting tips from users who've faced similar challenges.

Another valuable resource is the JustAnswer platform, which provides 24/7 access to verified experts. You can get quick responses and expert guidance on projector maintenance and repair, ensuring you have the right information at your fingertips.

Advertisement

Engaging with online forums and communities not only offers real-time support but also gives you diverse perspectives on troubleshooting your projector.

Don't overlook YouTube channels that focus on projector repair. These can enhance your understanding of maintenance techniques and provide DIY solutions tailored to your specific issue.

Frequently Asked Questions

Why Is My Projector Showing White Spots?

Your projector's showing white spots likely due to dust on internal components or dead pixels. Regular cleaning and maintenance can help prevent this issue, but persistent spots may require professional assessment for potential damage.

What Causes White Pixels on Projector?

White pixels on your projector can stem from dead or stuck pixels, dust accumulation, or a failing DMD chip. Overheating and neglecting maintenance can worsen these issues, leading to an unsatisfactory viewing experience.

What Are the Speckles on My Projector?

Those speckles on your projector could be dust on the lens or inside components. They might also indicate dead pixels on the DMD chip. Regular cleaning can help you maintain clear image quality and minimize distractions.

Advertisement

How to Fix Dead Pixels on a Projector?

When you notice those pesky little stars on your projector, it's time to act. First, test with a solid color. If they persist, consider replacing the DMD chip or seek professional help for a smoother viewing experience.

Conclusion

To sum up, tackling those pesky white dots on your projector screen doesn't have to feel like climbing a mountain. By following the troubleshooting steps and staying proactive with maintenance, you can restore your viewing experience to its former glory. Remember, a little care goes a long way; much like a garden needs tending to flourish, your projector requires attention to keep its brilliance alive. Don't hesitate to seek help if needed—your screen deserves the best!

Continue Reading

Home Cinema

The Pros and Cons of Short Throw vs. Long Throw Projectors

Compare the pros and cons of short throw and long throw projectors to discover which best suits your needs and budget for your next presentation.

Published

on

short vs long throw projectors

When you're choosing between short throw and long throw projectors, you've got to evaluate your specific needs. Short throw projectors are perfect for small spaces, providing large images from just a few feet away, but they can be pricier. They also reduce shadows and glare, making them great for interactive uses. On the other hand, long throw projectors are more budget-friendly and excel in larger venues, though they require more distance to project big images. Each type has its benefits and drawbacks, and you'll find more insights to guide your decision ahead.

Key Takeaways

  • Short throw projectors are ideal for small spaces, offering large images from distances of 3 to 8 feet, enhancing viewer engagement.
  • Long throw projectors are more budget-friendly, generally costing between $500 to $2,000, making them suitable for larger venues.
  • Short throw models minimize shadows and glare, allowing for ease of movement during presentations without blocking the screen.
  • Long throw projectors produce high-quality images over greater distances, supporting larger screen sizes, typically above 100 inches.
  • The choice between projector types hinges on space requirements, budget, and intended use, each offering distinct advantages and disadvantages.

Understanding Projector Throw Types

types of projector throws

Understanding projector throw types is essential for achieving the best viewing experience. The projector throw refers to the distance between the projector lens and the screen, which directly affects the size of the projected image.

You'll often hear about short throw projectors and long throw projectors, each serving different needs based on their throw ratios.

Short throw projectors typically have a throw ratio between 0.4 and 1.0. This means you can create large images from close distances, making them perfect for small spaces where you can't place a projector far away.

On the other hand, long throw projectors generally have a throw ratio greater than 1.0. They require distances of six feet or more to project ideal image sizes, making them better suited for larger venues like auditoriums or outdoor settings.

Characteristics of Short Throw Projectors

compact design wide projection

Short throw projectors are perfect for tight spaces, allowing you to create large images without needing a lot of room.

They reduce shadow interference, so you can move around during presentations without blocking the view.

Advertisement

Plus, their ease of installation and portability makes them a great choice for both classrooms and home theaters.

Space Efficiency Benefits

In tight spaces, short throw projectors shine by offering impressive image sizes from just a few feet away. With a throw ratio between 0.4 and 1.0, these devices can project large images even in cramped environments. This space efficiency makes them ideal for small classrooms, home theaters, or conference rooms, particularly when considering the role of color accuracy in enhancing visual experiences.

Here are some compelling benefits of using a short throw projector:

  1. Versatile Placement: You can set it up close to the screen, saving valuable floor space.
  2. Enhanced Visibility: With minimal shadow interference, everyone can see the presentation clearly.
  3. Flexible Installation: Their compact design fits seamlessly into various room layouts without extensive setup.
  4. Reduced Glare: Less direct light means greater eye comfort, allowing viewers to focus longer without strain.

While short throw projectors might be pricier due to their specialized lens technology, their ability to deliver large images and maximize space efficiency makes them a worthy investment for anyone facing spatial constraints.

You'll appreciate how they transform your viewing experience without the hassle of a long throw setup.

Shadow Interference Reduction

One of the standout features of short throw projectors is their ability to greatly reduce shadow interference. With a throw ratio ranging from 0.4 to 1.0, these projectors can create large images from as close as 3 to 8 feet away. This close placement means you won't have to worry about shadows being cast by presenters or objects in the room, which notably enhances visibility during your presentations.

Advertisement

Additionally, short throw projectors minimize direct light reaching the audience, resulting in a more comfortable viewing experience. You'll notice less glare and reduced eye strain, making it easier for everyone to focus on the content. This is especially beneficial in interactive settings, like classrooms or meetings, where engagement is essential.

The compact design of short throw projectors also complements their shadow interference reduction capabilities. You can quickly set them up and reposition them as needed, which is perfect for spaces where flexibility is key.

Installation and Portability Ease

When you're working with limited space, short throw projectors shine for their ease of installation and portability. You can set them up just a few feet away from the screen, making them perfect for cramped rooms.

Plus, they usually need less ceiling height than long throw projectors, so you can place them almost anywhere with ease.

Here are some reasons why you'll love short throw projectors for installation and portability:

Advertisement

  1. Quick Setup: You can have everything ready in no time, allowing you to start your presentation or movie without unnecessary delays.
  2. Compact Design: Their smaller size means you can easily move them from room to room or venue to venue.
  3. Versatile Mounting: Most models are designed for table-top or wall-mounted installation, simplifying the process considerably.
  4. Minimal Space Requirements: You won't have to sacrifice valuable floor or ceiling space to enjoy a great viewing experience.

With short throw projectors, you get a hassle-free installation and incredible portability, making them a fantastic choice for any setting!

Advantages of Short Throw Projectors

compact space big visuals

When you choose a short throw projector, you're making the most of limited space while enjoying a superior viewing experience.

These projectors allow you to set up in tight areas without sacrificing image quality, reducing shadows and enhancing visibility.

Plus, their compact design means you can easily integrate them into your home or classroom without complicated installations.

Space Efficiency Benefits

Short throw projectors are a game-changer for anyone dealing with limited space. If you're working with small rooms, these projectors can transform your setup without cramping your style. Here are some of the space efficiency benefits you'll appreciate:

  1. Project Large Images: You can enjoy stunning visuals up to 120 inches from just 11.7 inches away, perfect for tight spaces.
  2. Minimized Shadows: You won't have to worry about casting shadows while moving around, making presentations fluid and engaging.
  3. Flexible Layouts: With their compact design, short throw projectors fit easily into various room configurations, freeing up valuable floor space.
  4. Quick Setup: Setting up is a breeze, meaning less disruption during events and more time for what truly matters.

Not only do short throw projectors maximize space efficiency, but they also blend seamlessly with your home decor. You can mount them on walls or place them on furniture without extensive modifications.

Enhanced Viewing Experience

One of the standout advantages of short throw projectors is their ability to create impressive large images—up to 100 inches—from just a few feet away. This makes them perfect for small rooms where every inch counts.

You'll enjoy an enhanced viewing experience as these projectors greatly reduce shadow interference, allowing you to move freely in front of the screen without blocking the image. Additionally, regular maintenance, such as projector bulb maintenance, can further enhance the overall performance and longevity of your projector.

Advertisement

Short throw projectors maintain brightness and clarity even in ambient light conditions. The closer distance to the screen means less light loss, ensuring vibrant visuals without the need for complete darkness.

Many models, like the XGIMI Aura, offer advanced features such as 4K UHD resolution and high ANSI lumens, delivering sharp images that captivate any audience.

You'll also appreciate how easily short throw projectors integrate into your home decor. Their compact design eliminates the need for complex installation setups, making it simple to mount them close to the screen.

All these factors combine to provide an unparalleled viewing experience that brings your movies, games, and presentations to life, regardless of your room's lighting.

Disadvantages of Short Throw Projectors

limited throw distance issues

While many appreciate the convenience of short throw projectors, they come with several notable disadvantages.

First, you should know that these projectors typically cost more than their long throw counterparts due to their specialized lens technology. This means you'll be making a larger investment upfront.

Advertisement

Additionally, you may find that short throw projectors produce increased fan noise. This noise can be distracting, especially in quiet settings where you want to focus on the presentation.

Moreover, image distortion can arise if you set up the projector on uneven surfaces. You'll need to take extra time to guarantee the placement is perfect, or risk a less-than-clear image.

Lastly, the limited projection distance of short throw projectors can be a significant drawback. They're less versatile for larger rooms or venues that require bigger image sizes.

Here's a quick summary of the disadvantages:

  1. Higher cost compared to long throw projectors.
  2. Increased fan noise that can distract.
  3. Potential image distortion on uneven surfaces.
  4. Limited versatility for larger spaces.

These factors may impact your overall experience and satisfaction.

Characteristics of Long Throw Projectors

long throw projector features

Long throw projectors require you to set them up at a significant distance, often needing over 8 feet to project a 100-inch image.

This makes them ideal for larger spaces.

Advertisement

They're usually more affordable than short throw options, providing great value for budget-conscious users.

However, keep in mind that their setup can be more complex due to distance calculations and potential obstructions.

Distance Requirements and Setup

For ideal performance, long throw projectors require significant distance from the screen, typically needing over six feet to project a 100-inch image. This setup is well-suited for larger spaces like auditoriums or conference rooms. The throw ratio often exceeds 1.0, emphasizing the necessity for ample space between the projector and the screen.

When considering distance requirements and setup, keep these points in mind:

  1. Space Matters: You'll need enough room to accommodate the projector's distance from the screen for optimal image size.
  2. Careful Calculations: Installation can be tricky, as precise measurements are crucial to avoid image distortion.
  3. Ambient Light Awareness: Be mindful of the lighting conditions; glare can severely impact the image quality.
  4. Flexibility in Sizes: Long throw projectors can handle larger images, projecting effectively from distances of 10 feet or more.

While long throw projectors excel in larger venues, they demand careful planning and setup to guarantee a satisfying viewing experience. Make sure you understand these requirements before committing to a purchase.

Cost-Effectiveness and Affordability

When it comes to cost-effectiveness, long throw projectors often present a more budget-friendly option compared to their short throw counterparts.

Advertisement

You'll find that long throw projectors typically range from $500 to $2,000, making them generally more affordable than short throw models, which can easily exceed $1,000 for similar features.

Basic long throw models provide a cost-effective solution for large spaces, delivering high-quality images without the premium pricing associated with short throw technology.

Additionally, their installation costs can be lower since they usually require standard mounting equipment and don't need specialized lenses, unlike short throw projectors.

Long throw projectors also shine when it comes to image sizes. They can project larger images, making them perfect for big audiences without the need for expensive upgrades or multiple projectors, ensuring better value in larger venues.

Moreover, you'll likely face lower ongoing maintenance costs with long throw projectors, as they're less susceptible to issues like fan noise and heat management, which can be more prevalent in short throw models.

Advertisement

Advantages of Long Throw Projectors

enhanced image quality projection

In large venues like auditoriums and conference halls, the advantages of long throw projectors become clear. These projectors are specifically designed to project large images, making them ideal for big audiences.

Here are four key benefits you'll appreciate:

  1. Cost-Effective: Long throw projectors are often more budget-friendly than short throw models, allowing you to save money while still delivering quality presentations.
  2. Impressive Image Size: Capable of producing a 100-inch display from distances greater than 8 feet, these projectors guarantee everyone in the audience can see clearly.
  3. Portability: Generally lighter and smaller in design, long throw projectors are easy to transport and set up in various locations, making them convenient for multiple events.
  4. Superior Image Quality: They're less susceptible to image distortion from ambient light and obstructions, providing a clearer, more stable image during your presentations or film screenings.

With the ability to support higher resolutions, including 4K, long throw projectors enhance the overall viewing experience.

You'll find that investing in these projectors can greatly elevate your presentations and engage your audience effectively.

Disadvantages of Long Throw Projectors

long throw projector drawbacks

Long throw projectors come with notable disadvantages that can impact your setup and viewing experience.

First off, these projectors require more than six feet of distance to project a 100-inch image, making them unsuitable for small rooms or spaces with limited installation options. You may also face challenges with obstructions and shadows, which can interfere with image quality, especially in less controlled environments.

Installation can get complicated, as you'll need precise distance calculations, and ceiling mounts or specialized setups might be necessary. This added complexity can be a hassle, particularly if you're setting up in a tight space.

Moreover, long throw projectors are generally more susceptible to glare from ambient light, which can greatly affect image clarity and contrast during presentations or screenings. If your environment isn't perfectly controlled, you might find it hard to enjoy a clear picture.

Advertisement

Comparing Short and Long Throw Projectors

projector throw distance comparison

Whether you're setting up a home theater or planning a presentation, understanding the differences between short throw and long throw projectors can considerably influence your choice.

Here's what you need to evaluate when comparing these two types:

1. Space Requirements: Short throw projectors can project large images from just 3 to 8 feet away, perfect for small rooms.

Long throw projectors need more space, often requiring over 6 feet for a 100-inch image.

2. Image Quality: While short throw projectors are great for minimizing shadows and glare, long throw projectors generally offer superior image quality, especially for larger screens and 4K resolutions.

3. Cost: Short throw projectors tend to be pricier due to their advanced technology, whereas long throw models are usually more budget-friendly.

Advertisement

4. Installation Ease: Short throw projectors are easier to install, needing less precise calculations, while long throw projectors might require careful planning and more complex setups.

Best Uses for Each Projector Type

projector type applications guide

Choosing the right projector can make all the difference in how effectively you deliver a presentation or enjoy a movie night.

If you're working with limited space, short throw projectors are ideal for use in classrooms or home theaters. They can project large images up to 120 inches from as close as 3 feet, making them perfect for small environments. Plus, their design minimizes shadow interference, which is great for interactive presentations.

On the other hand, if you're planning an event in a larger venue, long throw projectors are your best bet. They're designed to project high-quality images over distances greater than 8 feet, accommodating screen sizes of 100 inches and above.

This makes them ideal for auditoriums or conference halls, where you need to reach a larger audience. Additionally, long throw projectors are often more cost-effective for these expansive settings, providing a budget-friendly solution for quality projection.

Recommended Projectors for Different Needs

tailored projector suggestions available

When it comes to selecting the perfect projector for your specific needs, you've got a range of fantastic options to contemplate. Depending on whether you prefer short throw or long throw projectors, here are some recommendations that can enhance your viewing experience:

  1. XGIMI HORIZON Pro – If you're after an immersive movie experience, this 4K UHD projector with 2200 ANSI lumens is a stellar choice for your home theater.
  2. XGIMI Elfin – For compact spaces, this 1080p FHD projector delivers flexibility with a maximum screen size of 200 inches, perfect for versatile setups.
  3. XGIMI Aura – Want to save space? This ultra-short throw projector produces a stunning 120-inch display from just 11.7 inches away, offering 4K UHD resolution at 2400 ANSI lumens.
  4. WEMAX Nova 4K UHD – Ideal for cinematic experiences, it projects stunning images up to 150 inches, ensuring you won't miss any details.

Whether you choose XGIMI projectors to meet your personal or professional needs, you'll find that the right projector can transform any space into an unforgettable viewing experience.

Frequently Asked Questions

Which Is Better, a Short or Long Throw Projector?

When deciding which projector's better, think about your space. If you're tight on room, a short throw might suit you well. For larger areas, a long throw projector could be your best option.

Advertisement

What Is the Downside of a Short Throw Projector?

Isn't it frustrating when your projector's fan noise distracts from your movie? Short throw projectors can be noisy, require careful placement to avoid image warping, and might not fit well in smaller spaces.

What Is the Benefit of a Short Throw Projector?

Short throw projectors let you enjoy large images in small spaces, reducing shadows and enhancing your viewing experience. Their sleek design integrates seamlessly into your decor, making them a stylish and functional choice for any room.

What Are the Advantages of a Long Throw Projector?

A long throw projector lets you project larger images from a distance, making it perfect for spacious venues. You'll enjoy superior image quality, more brightness, and flexibility in screen size, enhancing your viewing experience.

Conclusion

In the battle of short throw vs. long throw projectors, the choice boils down to your space and needs. Short throw projectors can transform your wall into a movie theater in a flash, while long throw projectors might evoke the classic drive-in experience with their expansive displays. Whether you're hosting a cozy film night or presenting in a large auditorium, knowing the pros and cons will help you find the perfect projector to light up your world.

Advertisement

Continue Reading
Advertisement

Affiliate disclaimer

As an affiliate, we may earn a commission from qualifying purchases. We get commissions for purchases made through links on this website from Amazon and other third parties.

Advertisement

Vetted

top electrostatic headphones 2024 top electrostatic headphones 2024
Vetted2 months ago

The 10 Best Electrostatic Headphones of 2024 – Ultimate Sound Experience Unveiled

Unlock the ultimate sound experience with the top electrostatic headphones of 2024—discover which models will elevate your audio journey to...

concert earplugs for hearing protection concert earplugs for hearing protection
Vetted2 months ago

15 Best Earplugs for Concerts: Protect Your Hearing Without Missing the Music

Check out the 15 best earplugs for concerts that protect your hearing while enhancing your music experience—discover which ones are...

comfortable earbuds for small ears comfortable earbuds for small ears
Vetted2 months ago

14 Best Earbuds for Small Ears That Offer Comfort and Sound Quality

Mysterious and comfortable, discover the 14 best earbuds for small ears that elevate your sound experience like never before!

best earbuds for calls best earbuds for calls
Vetted2 months ago

14 Best Earbuds for Phone Calls in 2024 – Crystal Clear Sound and Comfort

Discover the crystal-clear sound and comfort of the 14 best earbuds for phone calls in 2024, and find out which...

kid friendly safe earbuds kid friendly safe earbuds
Vetted2 months ago

15 Best Earbuds for Kids: Safe, Durable, and Perfect for Little Ears

Attention parents: Discover the 15 best earbuds for kids that prioritize safety and fun, but which one will be the...

top dynamic mics 2024 top dynamic mics 2024
Vetted2 months ago

15 Best Dynamic Microphones for Every Sound Engineer in 2024

Achieve the perfect sound with our top 15 dynamic microphones of 2024, tailored for every sound engineer's needs—discover your ideal...

top drum mics 2024 top drum mics 2024
Vetted2 months ago

15 Best Drum Mics of 2024 – Elevate Your Sound With These Top Picks

The ultimate guide to the 15 best drum mics of 2024 reveals top picks that will transform your sound—find out...

ultimate sound quality headphones ultimate sound quality headphones
Vetted2 months ago

15 Best Drum Headphones for Ultimate Sound Quality and Comfort

Browse our top 15 drum headphones for superior sound quality and comfort—discover which pair will elevate your drumming experience to...

ski helmet audio accessories ski helmet audio accessories
Vetted2 months ago

15 Best Ski Helmet Headphones to Enhance Your Slopes Experience

Immerse yourself in the slopes with the 15 best ski helmet headphones that promise unmatched sound quality and comfort—discover which...

top dj headphones 2024 top dj headphones 2024
Vetted2 months ago

15 Best DJ Headphones of 2024 – Ultimate Sound Quality and Comfort

Discover the top 15 DJ headphones of 2024 that promise unmatched sound quality and comfort—find out which models made the...

Trending