
To place a projector in a small room effectively, start by measuring the distance from the mounting point to the screen to match the projector’s throw ratio. Choose the right screen size based on this distance and room dimensions, and consider aspect ratio for content. Guarantee proper clearance for ventilation, and use lens shift and keystone correction carefully to avoid distortion. If you continue, you’ll gain essential tips to optimize your setup and avoid common pitfalls.
Key Takeaways
- Measure the distance from the projector to the screen to match the recommended throw ratio for sharp, bright images.
- Calculate the optimal screen size based on room dimensions and throw distance for comfortable viewing.
- Ensure ceiling or wall mounting provides sufficient clearance for ventilation, cables, and unobstructed projection.
- Use keystone correction and lens shift settings to align the image without distortion, minimizing quality loss.
- Check for furniture and décor placement to prevent obstruction of the projector’s lens, ventilation, or sound pathways.

SOULWIT 50Pcs Self Adhesive Cable Management Clips, Cable Organizers Wire Clips Cord Holder for TV PC Ethernet Cable under Desk Home Office (Black)
🔷SUPER EASY TO USE: Stick to clean surface, open tab, insert multiple cables, close the tab, enjoy the...
As an affiliate, we earn on qualifying purchases.
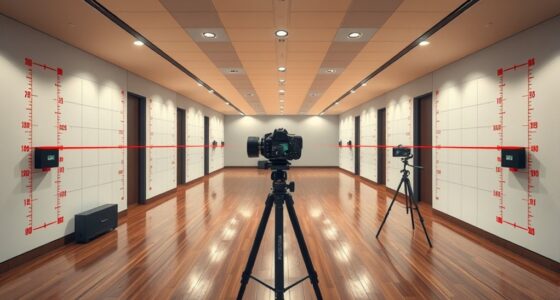
Determining the Ideal Throw Distance

To achieve a clear and bright image, you need to determine the ideal throw distance for your projector. For small rooms, ceiling mount or wall installation options can help maximize space. Measure the distance from where you plan to mount your projector to the screen area, guaranteeing it falls within the projector’s recommended throw ratio. This ratio tells you how far back the projector should be to produce the desired image size. If you’re using a ceiling mount, guarantee the projector is positioned at the correct height and distance for peak focus. Wall installation might require additional adjustments to attain the perfect throw distance. Remember, staying within the recommended range guarantees sharpness, brightness, and an immersive viewing experience in your small space. Additionally, understanding the essential oil blends can enhance your relaxation or focus during setup or viewing sessions.
SOULWIT 50 Pcs Self Adhesive Cable Management Clips, Cable Organizers Sticky Wire Clips Cord Holder for TV PC Laptop Ethernet Cable Desktop Home Office (Black)
🔷EASY TO USE: Simply peel and stick, making your home look tidier.
As an affiliate, we earn on qualifying purchases.
Calculating the Screen Size and Aspect Ratio

Once you’ve determined the appropriate throw distance, the next step is to figure out the right screen size and aspect ratio to match your space. Your projection angle influences how large the image appears without distortion, so selecting a size that fits comfortably within your room is essential. Keep ambient light in mind, as too much can wash out the image, requiring a larger or brighter screen. An aspect ratio, typically 16:9 for most content, should complement your viewing preferences and room dimensions. To optimize clarity and minimize distortion, choose a screen size that balances projection angle and ambient light conditions. Additionally, understanding projection angles can help prevent image warping and ensure a comfortable viewing experience. Being aware of relationship dynamics can also aid in creating a more engaging and comfortable environment for shared viewing. Considering room size can further refine your setup to ensure the projector fits well within the available space, avoiding overcrowding or insufficient projection distance. Incorporating proper installation techniques can improve overall image quality and stability. Moreover, selecting the appropriate Gold IRA options can help diversify your investment portfolio, providing additional financial security for the future. This ensures your small room can deliver a sharp, immersive viewing experience without sacrificing comfort or image quality.

XHF 120 PCS Adhesive Cable Wire Clips Black, Outdoor Christmas Light Clips, Cable Management Wire Organizer Cord Holder for Under Desk, Car, Wall, TV PC Ethernet Cable
High quality material:XHF Adhesive Cable Clips are manufactured from Strong Adhesive and PA66 nylon
As an affiliate, we earn on qualifying purchases.
Measuring Room Dimensions for Optimal Placement

How do you guarantee your projector fits perfectly in a small room? First, measure your space’s length, width, and height accurately. Knowing these dimensions helps determine the best placement method—whether wall mounting or ceiling mounting. For wall mounting, measure the distance from the wall to where you want the projector to sit, ensuring enough clearance for ventilation and connections. For ceiling mounting, check the ceiling height and weight capacity to support your projector’s weight. Keep in mind the throw distance needed for your projector model. Precise measurements prevent placement errors that could lead to distorted images or limited viewing angles. Taking these measurements ensures your projector is ideally positioned for the best viewing experience in your small room. Additionally, understanding room dimensions can help optimize your overall home entertainment setup for comfort and efficiency. Being aware of remote work benefits can also motivate you to create the perfect viewing environment for relaxation after work hours.

120PCS XHF Adhesive Cable Wire Clips White, Cable Staples Outdoor Cable Management Wire Organizer Cord Holder for Under Desk, Car, Wall, TV PC Ethernet Cable
High quality material:XHF Adhesive Cable Clips are manufactured from Strong Adhesive and PA66 nylon
As an affiliate, we earn on qualifying purchases.
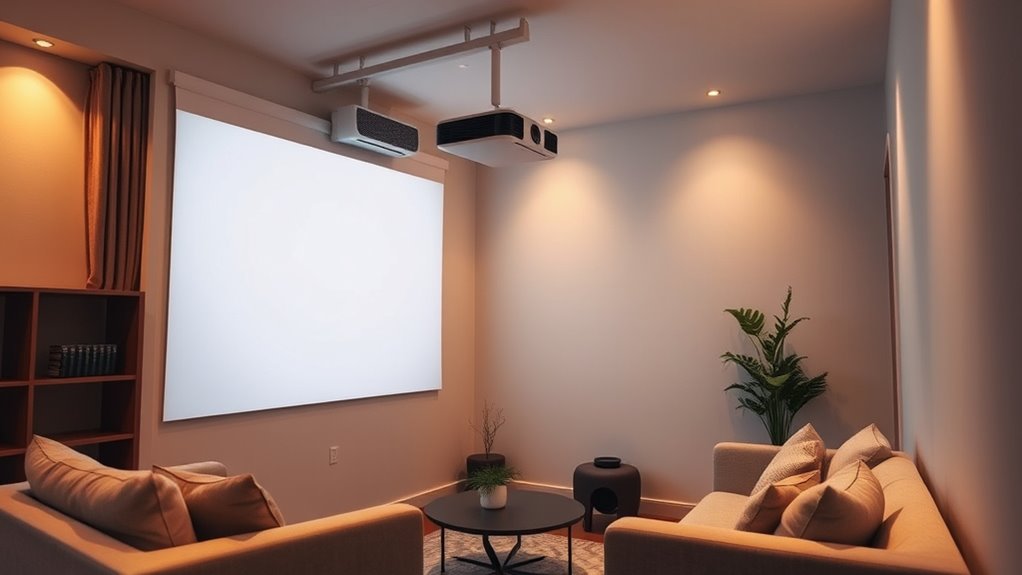
Adjusting for Keystone Correction and Lens Shift

Adjusting for keystone correction and lens shift is essential for achieving a properly aligned image in small rooms. Keystone correction helps fix distorted images caused by the projector’s angle, ensuring the picture remains rectangular. However, excessive keystone correction can reduce image quality, so it’s best to minimize its use. Lens shift allows you to move the projected image vertically or horizontally without tilting the projector, helping you align the image precisely on your screen. When planning your setup, consider your projector’s lens shift capabilities; a wider shift range offers more flexibility in positioning. Combining minimal keystone correction with effective lens shift adjustments ensures a sharp, correctly proportioned image, even in tight spaces. Proper calibration reduces eye strain and enhances your viewing experience. Additionally, understanding projection setup can motivate you to optimize your space for a better viewing environment. Being aware of image distortion and how to counteract it can further improve your setup and viewing pleasure. Knowing how to calculate optimal placement ensures you maximize your projector’s performance within limited spaces, and considering ambient light conditions can help maintain image clarity and contrast.
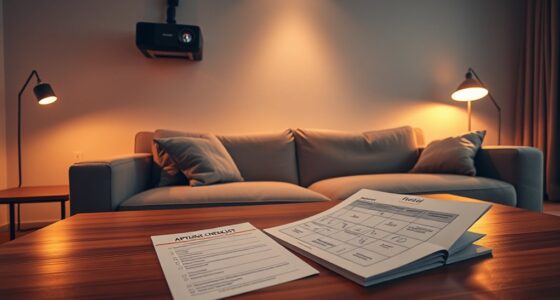
Ensuring Proper Clearance and Avoiding Obstructions

To guarantee ideal projector performance in small rooms, you need to prioritize proper clearance and avoid obstructions. Ensure your projector is placed where nothing blocks the lens or ventilation areas, which can cause image distortion or overheating. Keep cables organized with effective cable management to prevent tripping hazards and accidental disconnections. Good cable routing also helps maintain a clean look and prevents interference with the sound system. When integrating a sound system, position speakers carefully to avoid blocking the projector’s airflow or view. Be mindful of furniture, décor, and other objects that could interfere with the projection path or sound clarity. Proper clearance and thoughtful setup create a seamless viewing experience, reducing the need for adjustments and ensuring your equipment works efficiently. Regularly check ventilation areas and consider airflow management to prevent overheating and maintain optimal performance. Additionally, understanding vital shelf life information about your equipment can help you schedule maintenance and replacements proactively. Being aware of tuning options for your specific projector model can also significantly enhance its longevity and performance in a small space.
Frequently Asked Questions
How Does Ambient Light Affect Projector Placement Decisions?
Ambient light substantially impacts your projector placement choices by increasing light interference, which can wash out the image. To minimize this, you should avoid placing the projector where window placement allows direct sunlight or bright reflections onto the screen. Instead, position it in a spot with minimal exposure to ambient light, and consider blackout curtains or shades to control light interference, ensuring a clear, vibrant projection.
What Are the Best Mounting Options for Small Rooms?
Coincidence often leads you to the best setup. For small rooms, wall mountings with adjustable brackets are ideal, offering flexibility and space efficiency. They let you position the projector precisely, minimizing shadows and optimizing image quality. Choose sturdy, ceiling-mounted options that secure the projector firmly while allowing tilt and swivel adjustments. This way, you guarantee a clear, comfortable viewing experience without sacrificing room aesthetics or functionality.
How Do Ceiling Height and Wall Material Impact Projection Quality?
Ceiling height and wall material substantially impact your projection quality. A higher ceiling can cause the image to appear smaller or skewed if not adjusted properly, so you should choose a projector with suitable throw distance. Wall material affects reflectivity; smooth, matte surfaces prevent glare and ensure sharp images. You need to take these factors carefully to optimize your setup, ensuring bright, clear visuals without distortion or unwanted reflections.
Can Portable Projectors Be Effectively Used in Small Rooms?
Absolutely, portable projectors can be a great fit for small rooms because of their setup flexibility. They’re easy to move around and set up quickly, making the most of limited space. Just keep in mind that image quality may vary compared to larger, fixed projectors. If you choose a high-quality portable model, you can enjoy a big-screen experience without the hassle of permanent installation—truly killing two birds with one stone.
What Are the Safety Considerations for Projector Installation?
You should prioritize electrical safety by ensuring all wiring and outlets are properly grounded and inspected regularly. Check ventilation requirements to prevent overheating, especially in small rooms where airflow may be limited. Secure the projector firmly to avoid accidental falls, and keep cords out of walkways to prevent tripping hazards. Following these safety considerations helps protect you and prolongs the lifespan of your projector.
Conclusion
Think of your projector setup as planting a seed in a small pot. You need to find the perfect spot — not too close or far, with just the right angle — to help it grow into a vibrant display. By measuring carefully, adjusting settings, and avoiding obstructions, you’re nurturing your visual garden. With patience and precision, your small room transforms into a lush landscape of sharp, immersive images.