Avoid placing your projector too close or too far from the screen, which can cause blurry images or eye strain. Don’t ignore room lighting—bright ambient light washes out the picture, so control sunlight or opt for a high-lumen projector. Incorrect height or angle leads to keystone distortion, making images trapezoidal. Also, place the projector where shadows and obstructions are minimized for clearer viewing. If you keep these mistakes in mind, you’ll create an ideal setup for a flawless picture.
Key Takeaways
- Avoid placing the projector too close or too far from the screen, which can cause image size issues and pixelation.
- Do not ignore ambient light; excessive lighting washes out images, reducing contrast and clarity.
- Ensure the projector is mounted or positioned at the correct height and angle to prevent keystone distortion.
- Prevent shadows by choosing a placement that minimizes obstructions between the projector and screen.
- Do not disregard proper alignment; misaligned projectors result in blurry, distorted images and reduced viewing quality.

Proper projector placement is essential for a seamless viewing experience, yet many people overlook common mistakes that can compromise image quality. One of the most critical factors is choosing the right screen size. If the projector is too close to the screen, the image will be disproportionately small, causing you to strain your eyes or sit uncomfortably to see the details clearly. Conversely, placing it too far away results in a blurry or pixelated image, diminishing clarity and making it difficult to enjoy movies or presentations. To avoid this, you should measure your room carefully and select a projector with a throw ratio that aligns with your available space. This ensures that the projected image fits your screen size perfectly, providing sharpness and clarity across the entire viewing area. Proper projector placement also involves considering the best location for the device to minimize shadows and obstructions during use. Room lighting plays a significant role in how well your projector image appears. Many people underestimate how ambient light can wash out the picture, making it look dull or difficult to see. If your room has bright windows, using heavy curtains or blackout shades can help control the lighting and improve contrast. Additionally, avoid placing the projector where natural or artificial light directly hits the lens or screen, as this can cause glare or reflections that distort the image. If you can’t control the room lighting completely, consider investing in a high-lumen projector, which is designed to produce bright images even in well-lit environments. However, keep in mind that increasing brightness isn’t a substitute for proper room lighting control, as excess light can still diminish contrast and color accuracy. In addition to screen size and room lighting, you should also focus on the projector’s placement height and angle. Positioning the projector too high or low can cause keystone distortion, where the image appears trapezoidal rather than rectangular. This not only affects the aesthetic but also impacts your viewing experience, forcing you to adjust your viewing angle unnaturally. To prevent this, align the projector with the center of the screen and ensure it’s at an appropriate height, ideally at or slightly above the top edge of the screen. Using a projector mount or adjustable stand can help achieve perfect alignment. Ultimately, paying attention to these details—screen size, room lighting, and proper placement—can make all the difference. When you get these right, you’ll enjoy a crisp, clear image that transforms your space into a true home theater or presentation zone, without the frustration of blurry images, glare, or distorted proportions. Avoiding these common placement mistakes ensures you maximize your projector’s potential and fully appreciate the immersive experience it’s meant to deliver.

BenQ W4100i 4K HDR Smart Home Theater Projector, 3200 Lumens, 100% DCI-P3, Rec.709, Factory-Calibrated, Android TV with Netflix, 4-Way Lens Shift, HDR10+ & HLG Support, LED Long Lifespan
PROJECTOR-OPTIMIZED TRUE 4K UHD and HDR: HDR-PRO technology exclusive Local Contrast Enhancer and Tone Mapping for perfect details...
As an affiliate, we earn on qualifying purchases.
Frequently Asked Questions
How Does Ambient Light Affect Projector Placement Choices?
Ambient light substantially impacts your projector placement choices because lighting interference can wash out the image, making it hard to see. To minimize this, you should place your projector where natural or artificial light won’t cause screen glare or reflections. Positioning it away from windows and bright lights helps reduce these issues, ensuring a clear, sharp picture. Proper placement enhances your viewing experience by controlling ambient light effectively.
Can Wall Color Impact Projected Image Quality?
Think of your wall color as the canvas for your projected masterpiece. Bright or dark walls can turn your projected image into a blurry shadow or a vibrant display. Light-colored walls reflect more light, making images clearer, while dark walls absorb light, reducing brightness. To get the best projected image, choose a neutral or matte wall color that enhances contrast and sharpness, turning your space into a true visual gallery.
What’s the Ideal Height for Mounting a Ceiling Projector?
You should mount your ceiling projector at a height that aligns with the projector’s lens center, typically around 4 to 6 feet from the floor. This suitable mounting height ensures proper ceiling placement for clear projection and minimizes keystone correction. Measure your room’s dimensions and consider the projector’s throw distance to find the ideal height, improving image quality and avoiding shadows or obstruction issues.
How Often Should I Adjust Projector Alignment?
You should adjust your projector alignment whenever you notice alignment issues, like distorted images or keystone effects. Regular calibration techniques help keep the image sharp and properly aligned. Check and re-align the projector every few months or after moving it to a new location. Consistent adjustments ensure ideal picture quality, so don’t wait too long—keeping your setup calibrated prevents image problems and enhances your viewing experience.
Are There Specific Placement Tips for Short-Throw Projectors?
Placing a short-throw projector is like fitting a puzzle piece perfectly. Keep it close to the screen, usually 3-5 feet away, to enjoy its short-throw benefits. Use a level to guarantee proper projector calibration, avoiding keystone distortion. Aim the lens straight at the screen’s center, and test the image size before final placement. This setup minimizes shadows and maximizes clarity, giving you a seamless viewing experience.

Epson Home Cinema 2350 4K PRO-UHD Smart Gaming Projector with Android TV, 3-Chip 3LCD, HDR10, HLG, 2,800 Lumens, Low Latency, 10 W Speaker, Bluetooth, Streaming Capability
4K PRO-UHD (1) — An amazing 4K experience utilizing advanced processing for resolution enhancement, color and image processing;...
As an affiliate, we earn on qualifying purchases.
Conclusion
Avoiding these projector placement mistakes is like steering a ship clear of rocks—you’ll guarantee smooth sailing for your movie nights or presentations. Take the time to position your projector correctly, considering distance, angle, and surface, so your image stays sharp and clear. Remember, even small errors can cause big frustrations, so double-check your setup. With the right placement, your projector will perform at its best, turning any space into an impressive viewing or presentation area.
![Projector with 5G WiFi and Bluetooth, Native 1080P Projector[Projector Screen Included], Full HD 18000LM Movie Projector, 100" Display Home Theater, Compatible with Phone/Laptop/TV Stick](https://m.media-amazon.com/images/I/51tJ+dTl5qL._SL500_.jpg)
Projector with 5G WiFi and Bluetooth, Native 1080P Projector[Projector Screen Included], Full HD 18000LM Movie Projector, 100" Display Home Theater, Compatible with Phone/Laptop/TV Stick
【2.4G/5G Dual-Band Wifi & Bluetooth Connection】 Roconia projector supports screen mirroring on iOS, Android and Windows devices without...
As an affiliate, we earn on qualifying purchases.
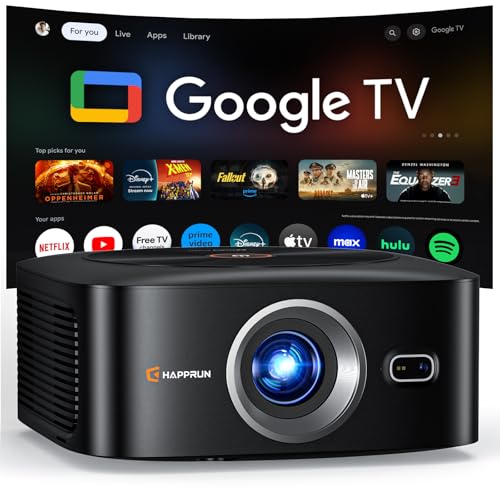
1500 ANSI Official Licensed Google TV Smart Projector, HAPPRUN 4K Full HD Home Theater with Auto Focus, Dolby Sound, Wi-Fi Bluetooth, Built-in Apps, Compatible with Phone & PC, Indoor & Outdoor Use
[ Built-in Officially Licensed Google TV ]-Enjoy the reliability of an officially certified Google TV projector. Stream Netflix,...
As an affiliate, we earn on qualifying purchases.