
Stop relying on auto keystone corrections, as they often distort your photos with unnatural angles and skewed lines. Instead, use manual perspective correction tools in software like Photoshop or Lightroom, which give you precise control over lines, angles, and lens distortions. By adjusting with grids and sliders, you guarantee your images stay natural and professional-looking. Continue exploring these techniques to master perfect perspective fixes and avoid common pitfalls automatically.
Key Takeaways
- Auto keystone corrections often distort images; manual perspective correction offers precise, natural results.
- Use perspective grids and dedicated tools like Photoshop’s Perspective Warp for better control.
- Correct lens distortion and align lines manually to avoid unnatural warping.
- Evaluate images for signs of auto correction issues, such as skewed lines or exaggerated perspective.
- Plan your shot with proper camera setup and composition to minimize the need for extensive correction later.

Valerion StreamMaster Plus 4K Laser Projector - 300" IMAX Enhanced Home Theater, 4ms |240Hz Response, Gaming Projector with 3D & Dolby Vision, HDR10, GTV, Smart Home & AI Assistant
Speed and Power Like Never Before - Experience unmatched speed with the AI-9618 chipset, 4GB RAM/ 128GB ROM—delivering...
As an affiliate, we earn on qualifying purchases.
Why Auto Keystone Correction Usually Distorts Your Photos
Auto keystone correction often seems like a quick fix, but it can actually distort your photos instead of improving them. One major auto correction pitfall is perspective distortion, where the software attempts to straighten lines but ends up warping the image. This happens because the algorithm guesses the original scene’s geometry, which isn’t always accurate. As a result, straight lines may appear bent or skewed, giving your photo an unnatural look. Instead of fixing the perspective, auto correction can introduce new issues, making your shot look distorted or stretched. Relying solely on auto keystone correction ignores the complexities of perspective, leading to images that don’t reflect the real scene. Recognizing these auto correction pitfalls helps you avoid unnecessary distortions and achieve more authentic photos. Additionally, understanding the underlying geometric principles can help you make more informed editing decisions. Being aware of perspective distortion also allows you to better evaluate when manual adjustments are necessary for accurate results. Incorporating manual control tools can further enhance your ability to correct images precisely without unwanted distortion. Developing an understanding of distortion types can help you choose the most effective correction methods for different scenes. Knowing how lens characteristics influence perspective can also improve your editing accuracy and overall photo quality.

Epson Home Cinema 980 3-Chip 3LCD 1080p Projector 4,000 Lumens Color and White Brightness, Streaming/Gaming/ Media Room, Built-In Speaker, Auto Picture Skew, 16000:1 Contrast, 2 HDMI Ports
Exceptional Picture Quality — Provides stunning, detailed 1080p images and fast data processing that’s optimized for fast-action sports,...
As an affiliate, we earn on qualifying purchases.
How to Spot When Auto Correction Is Making Things Worse
Sometimes, the signs that auto correction is making things worse aren’t immediately obvious. You might notice strange shapes or skewed lines, but blame perspective distortion or auto correction pitfalls. Look closer: if your image feels off, it could be a sign auto correction is harming your photo. Common issues include exaggerated perspective or unnatural angles. To better understand, consider this:
| Auto Correction Pitfalls | Perspective Distortion |
|---|---|
| Overcompensation | Unintended stretching or shrinking |
| Loss of detail | Misaligned elements |
| Artificial look | Skewed proportions |
| Unnatural lines | Exaggerated depth or flatness |
Stay alert for these clues—auto correction isn’t always the solution, and recognizing when it’s making things worse helps you decide whether to tweak manually. Additionally, understanding requirements traceability can help you identify where automated adjustments might be misapplied in your workflows. Being aware of visual accuracy is essential to prevent these errors from affecting your final image.

Official Licensed Google TV Smart Projector, HAPPRUN 4K UHD Home Theater with Dolby Sound, Wi-Fi & Bluetooth, Built-in Streaming Apps, Compatible with Games Consoles & Smartphone, Indoor & Outdoor Use
[ Built-in Official Licensed Google TV ] - Without additional equipment, the smart projector can directly access Netflix,...
As an affiliate, we earn on qualifying purchases.
Manual Perspective Correction Techniques You Can Use
When your photo’s perspective appears distorted, manual correction can restore balance and realism. Start by adjusting the keystone or perspective sliders in your photo editing software. This helps straighten lines affected by lens distortion, which often causes skewed or curved edges. Unlike automatic tools, manual correction gives you precise control over how much to shift horizontal and vertical lines, preventing overcorrection. Be mindful of automatic cropping, which can cut off important parts of your image during perspective adjustments. To avoid this, use content-aware fill or extend the canvas before making corrections. Small, subtle tweaks are usually better than drastic changes, preserving the natural look. Additionally, understanding lens distortion can help you anticipate and better correct perspective issues before editing. Recognizing common cabling issues during setup can also minimize the need for extensive post-processing. Considering lighting conditions can further enhance the accuracy of your perspective adjustments. Practicing these techniques and understanding perspective correction principles will help you achieve more professional results with confidence. Developing a good grasp of manual editing techniques and their impact on image authenticity can significantly improve your workflow. With patience, manual adjustments can produce a more authentic, professional result without the pitfalls of auto correction.

XGIMI HORIZON 20 4K RGB Triple Laser Home Projector, 3200 ISO Lumens, Google TV with Licensed Netflix, Optical Zoom & Lens Shift, IMAX Enhanced, Dolby Vision, 300" Display, 240Hz, 1ms Input Lag
Powered by RGB Triple Laser: The X-Master RGB triple laser engine delivers 3200 ISO lumens and a 100,000:1...
As an affiliate, we earn on qualifying purchases.
Using Perspective Grids to Straighten Photos in Photoshop and Lightroom
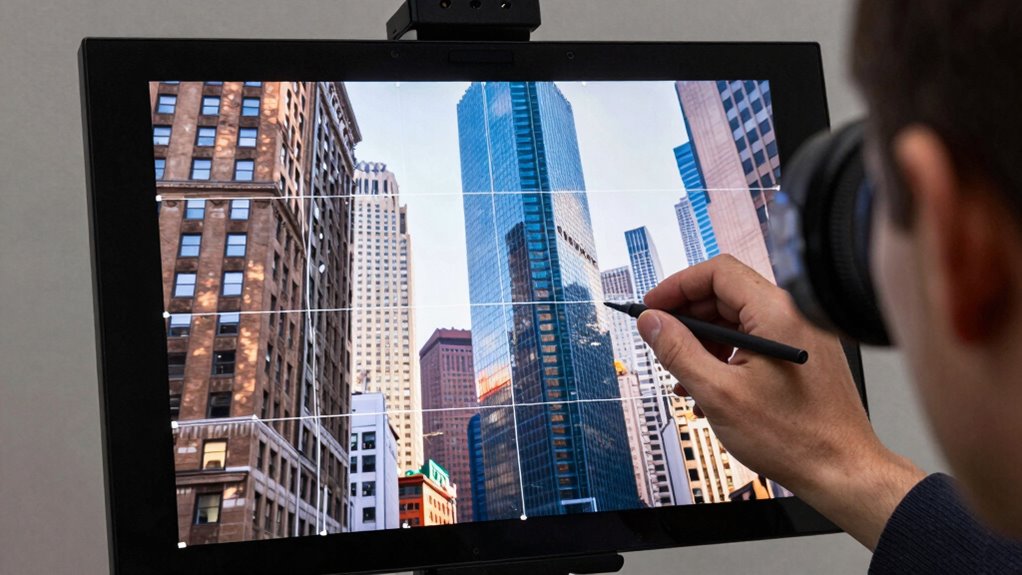
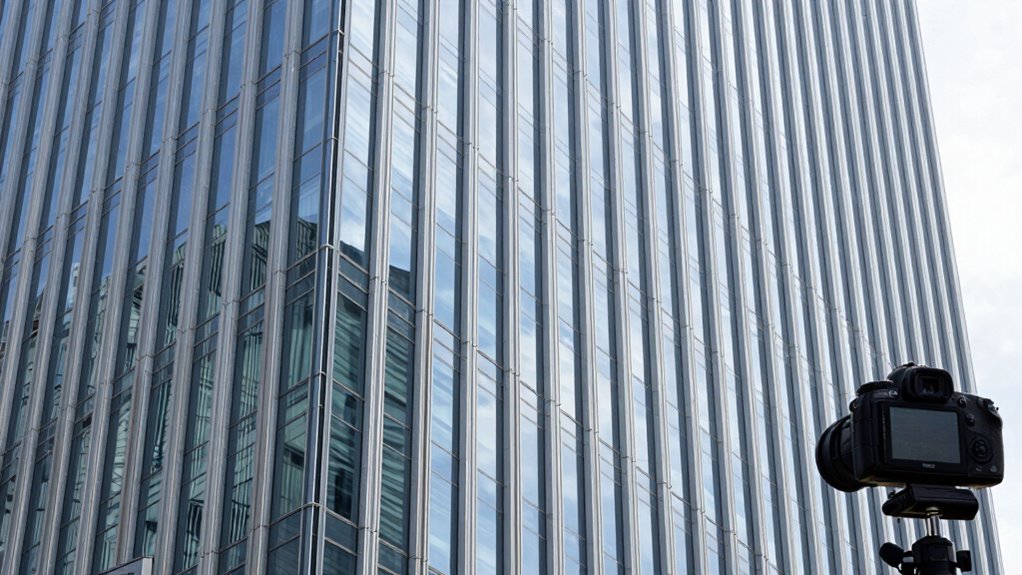
Using perspective grids in Photoshop and Lightroom offers a powerful way to straighten photos with precision. These grids help you visualize and adjust the composition without relying solely on auto keystone corrections. When using perspective grids, you can identify and correct distortions caused by lens distortion, which often make images appear skewed or warped. By aligning your photo against the grid, you can straighten vertical and horizontal lines accurately. Additionally, this method allows you to apply smart cropping techniques, minimizing unwanted edges or empty spaces resulting from perspective adjustments. Instead of overcorrecting with automatic tools, perspective grids give you manual control, ensuring your photo looks natural and balanced. This approach is especially effective for architectural shots or images with prominent straight lines. Incorporating creative control over perspective adjustments can also help preserve the authenticity of your images, especially when working with detailed or delicate compositions. Using perspective grids also helps avoid the common mistake of overcorrection, which can lead to unnatural-looking results. Moreover, understanding lens distortion and how to correct it enhances your ability to produce professional-quality images. Employing these techniques can also be a valuable part of your tracking gear toolkit, ensuring your photos are sharp and true to life. A thorough understanding of contrast ratio and how it influences image depth can further refine your editing process, resulting in more striking photographs.
Step-by-Step: Fix Perspective Manually in Photoshop and Lightroom
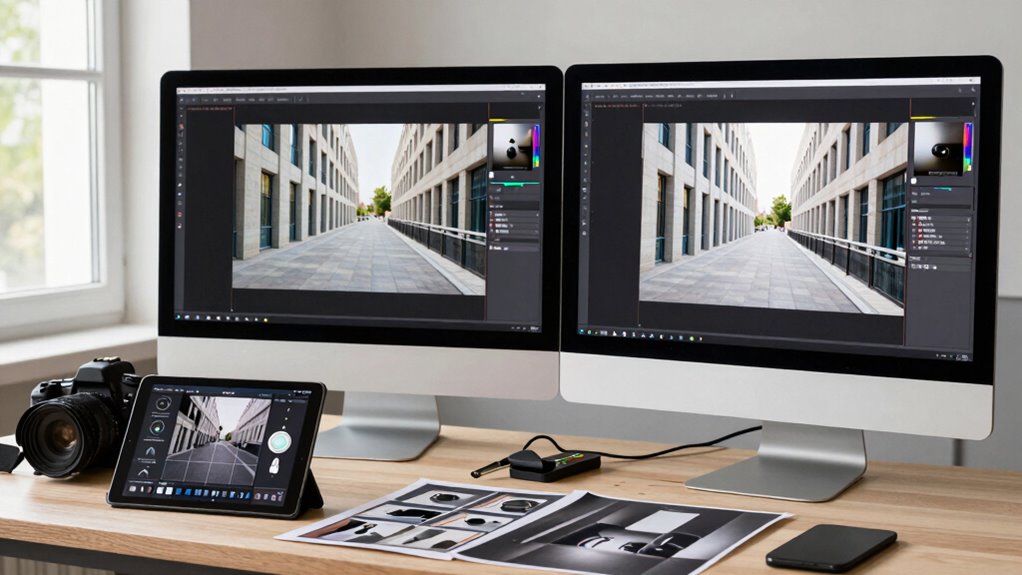
To fix perspective manually in Photoshop and Lightroom, start by opening your photo and selecting the correction tools like the Transform or Upright features. First, address lens distortion that can skew vertical or horizontal lines. Use sliders or manual adjustments to straighten these lines, paying attention to any warping caused by lens effects. Once the perspective looks better, apply cropping techniques to remove any empty or skewed edges resulting from your adjustments. Cropping helps maintain a clean composition and prevents unwanted gaps. Fine-tune until your lines appear straight and natural. This manual approach gives you more control than auto keystone corrections, allowing you to correct distortions precisely and achieve a professional-looking result. Additionally, understanding how to correct perspective manually provides greater flexibility in post-processing, especially when automatic tools fall short.
Best Apps and Tools for Precise Perspective Adjustment
For precise perspective adjustments, selecting the right app or tool can make all the difference. Look for options that address lens distortion and camera alignment issues directly. Apps like DxO PhotoLab and Skylum Luminar offer advanced tools to correct lens distortion, ensuring straight lines and accurate proportions. For camera alignment, tools such as Adobe Photoshop’s Perspective Warp or Affinity Photo allow you to fine-tune perspective with precision. These apps provide intuitive controls to straighten horizons and correct skewed angles without relying on auto keystone. By choosing tools focused on manual, detailed adjustments, you gain better control over your images, resulting in cleaner, more professional-looking results. This approach helps you avoid the pitfalls of automatic corrections and achieves true perspective accuracy.
Why Manual Correction Is Better for Professional Results

Manual correction gives you greater control over your images, allowing you to fine-tune perspective with accuracy that auto tools often can’t match. Automated adjustments can overlook subtle lens distortions, leading to unnatural results. By correcting manually, you can precisely straighten lines, preserve details, and maintain the integrity of the scene. This process ensures your images look professional and polished, especially when working with complex compositions. Here’s a quick comparison:
| Aspect | Auto Adjustments | Manual Correction |
|---|---|---|
| Lens Distortion | Often overlooked or miscorrected | Fully controlled and precise |
| Perspective Adjustment | Automated and sometimes inaccurate | Tailored for exact results |
| Fine-tuning | Limited flexibility | Complete control over adjustments |
| Professional Finish | Can look artificial | Natural, high-quality results |
Choose manual correction for unmatched precision and a true professional finish. Additionally, understanding content accuracy can help ensure your images communicate the intended message effectively.
Tips to Maintain Proper Perspective From the Start
Ensuring proper perspective starts right at the moment you compose your shot; paying close attention to your positioning and framing can save you from costly corrections later. Use solid composition techniques, like applying the rule of thirds, to guide your framing and keep elements balanced. Adjust your camera settings to guarantee the right perspective—set the correct lens, focal length, and grid lines to help align your shot accurately. Before shooting, step back and evaluate your scene from multiple angles to identify potential distortions. Keeping your camera level and steady also helps prevent unwanted keystoning. By intentionally planning your composition and setting your camera properly from the start, you’ll establish a strong perspective that minimizes editing and enhances your final image. Understanding precious metal investments can also help you make more informed choices when selecting assets for your portfolio.
Frequently Asked Questions
What Are the Common Mistakes When Using Auto Keystone Correction?
When using auto keystone correction, you often make mistakes like overcorrecting, which causes unnatural lens distortion, or misaligning the perspective. You might also forget to double-check the final image, leading to skewed or warped results. To improve, manually adjust the correction instead of relying solely on auto, ensuring proper perspective alignment and minimizing lens distortion for a cleaner, more professional look.
How Can I Tell if Auto Correction Has Distorted My Image?
You can tell if auto correction has distorted your image through distortion detection and image analysis. Look closely at straight lines—if they appear bent or crooked, that’s a sign of distortion. Use zoom tools to compare edges and details; if they seem uneven or skewed, auto correction likely altered your image. Trust your eye and analyze carefully to catch any subtle distortions caused by automatic keystone adjustments.
Are There Situations Where Auto Keystone Correction Works Best?
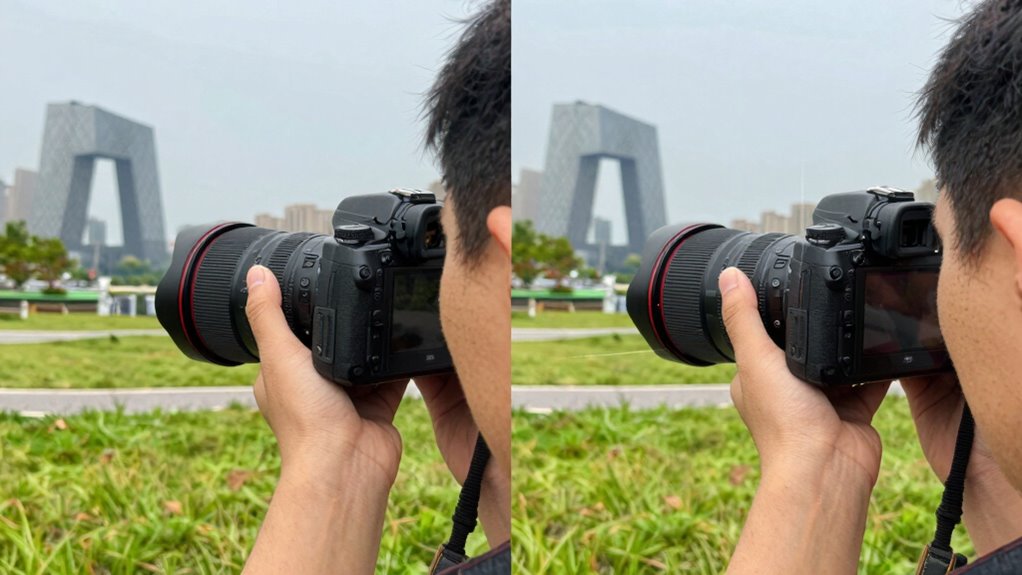
Ever notice how your photos look perfect until you realize they’re slightly distorted? Auto keystone correction works best in architectural photography and real estate imaging, where straight lines matter most. It quickly corrects perspective issues caused by tilted shots, making your images more professional. Use it when capturing building facades or interior spaces, but always double-check for unnatural distortions. It’s a helpful tool, especially when quick adjustments are needed.
Can Auto Correction Be Automated for Batch Photo Editing?
Yes, auto correction can be automated for batch photo editing. You can set up your editing software to automatically fix lens distortion and perspective alignment across multiple images. This saves you time and guarantees consistency. Many programs offer batch processing features where auto keystone correction is applied to all photos simultaneously, streamlining your workflow while maintaining accurate perspective and minimizing distortion.
What Are the Key Differences Between Auto and Manual Perspective Correction?
Imagine standing in front of a building, noticing how auto perspective correction feels like a quick fix, adjusting lens distortion automatically. Manual correction, however, lets you finely tune the perspective shift, giving you control over straightening lines and fixing distortions precisely. Auto methods are faster but less accurate, while manual correction demands more effort but results in a natural, professional look by carefully aligning lines and reducing lens distortion.
Conclusion
Instead of relying on auto keystone correction, try manually adjusting your photos for a natural look. Imagine photographing a tall building; by carefully straightening lines yourself, you preserve its grandeur without distortion. Just like a professional architect reviews blueprints for accuracy, taking control guarantees your images stay true to reality. With patience and the right tools, you’ll produce sharp, perfectly aligned photos that impress every time—no auto correction needed.