When setting up dual projectors, you should carefully align them by adjusting height, tilt, and position to match images seamlessly. Use test patterns and alignment tools to make certain the images blend perfectly in size, shape, and brightness. Mount projectors securely, ideally on ceilings or adjustable stands, and manage cables neatly to prevent shifts. Minimize ambient light and choose the right surface for sharp visuals. If you keep these tips in mind, you’ll create a flawless, immersive display.
Key Takeaways
- Ensure precise alignment of projectors using test patterns and adjustable mounts for seamless image blending.
- Position projectors at optimal angles and distances to minimize keystone distortion and match brightness.
- Use stable ceiling mounts or adjustable stands for secure, flexible placement and easy fine-tuning.
- Select projection surfaces that support clear images and control ambient light for better contrast.
- Neatly manage cables and consider room layout to prevent shifts and optimize overall setup stability.

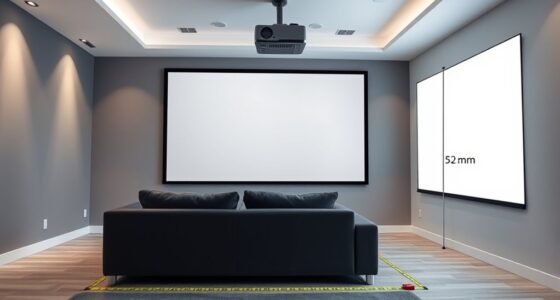
Setting up dual projectors can critically enhance your viewing experience, but proper placement is essential for seamless images. When you’re working with two projectors, your primary goal is to achieve perfect alignment so that the images blend seamlessly without overlapping or gaps. This demands careful attention to alignment strategies, which involve precise positioning to ensure the images match in size, shape, and brightness. Start by considering your room layout and how the projectors will interact with the surface you’re projecting onto. You’ll want to position them at ideal angles and distances to minimize keystone distortion and ensure the images overlap precisely.
Achieve seamless dual projector images with precise placement, alignment, and room considerations for optimal viewing.
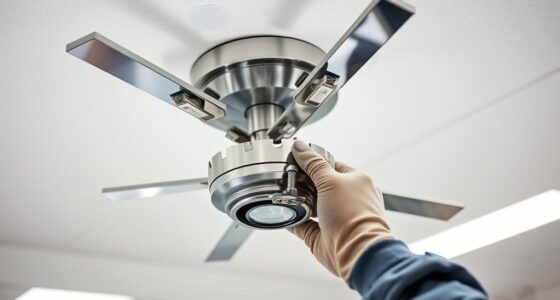
Mounting considerations play a fundamental role in achieving that perfect setup. You need to decide whether to mount the projectors on the ceiling, walls, or use adjustable stands. Ceiling mounting often provides the most stable platform, reducing vibrations and movement that could disrupt alignment. When mounting, ensure the fixtures are secure and capable of fine adjustments, so you can tweak the projector angles easily. If you’re using wall mounts, choose sturdy brackets that allow for tilt and swivel adjustments, giving you more control over image placement.
Once mounted, you should focus on fine-tuning the projector placement. Use alignment tools or test patterns to check how well the images blend. Adjust the height, tilt, and lateral position until both images align perfectly, paying close attention to keystone correction settings to keep the images rectangular and consistent. Remember, the goal is to minimize any discrepancies in size or aspect ratio, which can distract viewers and diminish the immersive experience. Additionally, proper setup can help prevent common issues like image distortion or mismatched brightness that detract from the overall viewing quality.
In addition to physical positioning, consider the environment’s lighting conditions. Ambient light can affect image clarity and contrast, so positioning projectors where they are less affected by external light sources will improve overall picture quality. Make sure cables are managed neatly to prevent accidental shifts and to keep the setup clean and safe.

Epson Home Cinema 980 3-Chip 3LCD 1080p Projector 4,000 Lumens Color and White Brightness, Streaming/Gaming/ Media Room, Built-In Speaker, Auto Picture Skew, 16000:1 Contrast, 2 HDMI Ports
Exceptional Picture Quality — Provides stunning, detailed 1080p images and fast data processing that’s optimized for fast-action sports,...
As an affiliate, we earn on qualifying purchases.
Frequently Asked Questions
How Do I Synchronize the Brightness of Two Projectors?
To synchronize the brightness of your two projectors, start with brightness matching by adjusting their lamp settings or menus so both emit similar light levels. Then, perform color calibration to ensure consistent color output, which can affect perceived brightness. Use a calibration tool or software if available, and regularly fine-tune both projectors to maintain uniformity. This process guarantees your dual projector setup looks seamless and evenly lit.
What Are the Best Screen Materials for Dual Projectors?
Choosing the best screen materials for dual projectors starts with considering screen enhancement and material durability. You want a surface that boosts brightness and contrast, like high-gain or matte white screens, which evenly distribute light. Durability matters too, so opt for sturdy materials that resist scratches and wear. By matching your setup with these qualities, you’ll achieve sharp, vibrant images, making your dual projection seamless and visually stunning.
How Can I Minimize Keystone Distortion Between Projectors?
To minimize keystone distortion between projectors, use lens shift to adjust the image alignment without tilting the projectors. Additionally, perform precise projector calibration to guarantee both images match perfectly in size and position. Keep the projectors at the same height and angle, and use a level to check alignment. Regularly recalibrate as needed, especially if you move or reposition the projectors, to maintain a seamless, distortion-free display.
What Safety Precautions Should I Consider for Ceiling-Mounted Setups?
Think of your ceiling mount as the backbone of your setup—sturdy and reliable. To guarantee safety, check that the mount has excellent ceiling mount stability and is securely fastened. Follow electrical safety considerations by turning off power before installation, avoiding overloaded circuits, and using proper wiring. Regularly inspect the mount for wear or damage, and always follow manufacturer instructions to prevent accidents and keep your setup safe.
How Do I Troubleshoot Image Alignment Issues?
To troubleshoot image alignment issues, start by checking your lens calibration to make certain each projector’s lens is properly aligned. Adjust the focus and position as needed. If images still don’t blend seamlessly, fine-tune the image blending settings in your projector’s menu. Use test patterns to identify misalignments, then make precise adjustments to achieve a seamless, unified display. Regular calibration helps prevent future alignment problems.
![Projector with 5G WiFi and Bluetooth, Native 1080P Projector[Projector Screen Included], Full HD 18000LM Movie Projector, 100" Display Home Theater, Compatible with Phone/Laptop/TV Stick](https://m.media-amazon.com/images/I/51tJ+dTl5qL._SL500_.jpg)
Projector with 5G WiFi and Bluetooth, Native 1080P Projector[Projector Screen Included], Full HD 18000LM Movie Projector, 100" Display Home Theater, Compatible with Phone/Laptop/TV Stick
【2.4G/5G Dual-Band Wifi & Bluetooth Connection】 Roconia projector supports screen mirroring on iOS, Android and Windows devices without...
As an affiliate, we earn on qualifying purchases.
Conclusion
With these placement tips, your dual projector setup will transform your space into an epic cinematic universe. Get creative with your positioning, and don’t be afraid to experiment—your perfect setup is just a few adjustments away. Remember, the right alignment can elevate your viewing experience from good to mind-blowingly spectacular. So, take your time, stay patient, and soon you’ll be enjoying visuals so stunning, they’ll make the entire universe seem dull in comparison!

Official Licensed Google TV Smart Projector, HAPPRUN 4K UHD Home Theater with Dolby Sound, Wi-Fi & Bluetooth, Built-in Streaming Apps, Compatible with Games Consoles & Smartphone, Indoor & Outdoor Use
[ Built-in Official Licensed Google TV ] - Without additional equipment, the smart projector can directly access Netflix,...
As an affiliate, we earn on qualifying purchases.

TOWOND Projector Screen and Stand, 150 inch Indoor Outdoor Projection Screen, Portable 16:9 4K HD Rear Front Movie Screen with Carry Bag Wrinkle-Free Design for Home Theater Backyard Cinema
Projector Screen with Stand. 150-inch diagonal, 160°wide viewing angle, aspect ratio 1:1 and 16:9 4k HD portable projector...
As an affiliate, we earn on qualifying purchases.