
To avoid keystone distortion, keep your camera level and shoot straight-on to your subject. Use a tripod with a bubble level for stability and avoid shooting at angles that skew vertical lines. Choose lenses carefully; wide-angle lenses can exaggerate distortion, so pick one suited for your scene. Use natural or diffused lighting to highlight perspective issues during capture. Proper setup minimizes editing later, and if you’re interested, there’s more to learn about perfecting your shots.
Key Takeaways
- Keep the camera level and parallel to the subject to prevent skewed lines.
- Use a tripod with a bubble level for precise, stable positioning during shooting.
- Choose appropriate focal lengths and avoid wide-angle lenses when possible to reduce distortion.
- Adjust your vantage point to shoot head-on, minimizing the need for post-processing corrections.
- Use natural or diffused lighting to clearly identify and address perspective issues on-site.

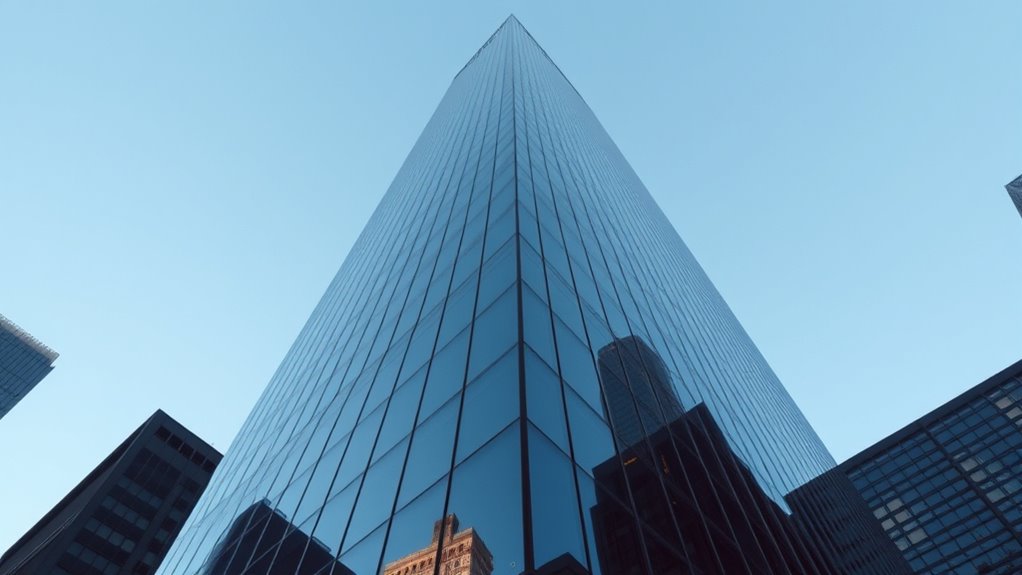
Have you ever noticed how a photograph can look distorted, with straight lines appearing tilted or skewed? This common issue is known as keystone distortion, and it often happens when you shoot at an angle rather than head-on. When you tilt your camera upward or downward to capture a scene, vertical lines such as building edges can seem to lean inward or outward, creating a skewed effect that distracts from your subject. To avoid this, you need to be mindful of your camera angles. Keep your camera as level as possible to ensure that vertical lines stay straight. Using a tripod with a built-in bubble level can help maintain proper alignment, especially when shooting architecture or interior shots. By adjusting your camera’s position and keeping it parallel to your subject, you prevent the unnatural converging or diverging lines that characterize keystone distortion.
Lighting techniques also play a role in how your photos appear. Proper lighting can help you identify distortions more easily and make adjustments on the fly. For example, natural light coming from the side can highlight the skewed lines caused by bad angles, alerting you to straighten your camera. Conversely, diffused lighting can minimize harsh shadows that might exaggerate distortion. When working indoors or in controlled environments, using softboxes or reflectors ensures even lighting, making it easier to see and correct perspective issues. Bright, consistent lighting also improves your ability to review your shot and identify distortions before taking multiple exposures. Additionally, understanding focal length and its impact on perspective can help you choose the right lens to minimize distortion.
Combining strategic camera angles with effective lighting techniques empowers you to produce more accurate and visually pleasing images. Instead of relying solely on post-processing to fix distortion, you take control during the shoot itself. When setting up a shot, consider your vantage point carefully—stand directly in front of your subject whenever possible. If you need to shoot from an angle, be aware of the potential for keystone distortion and plan to correct it later with software if necessary, or better yet, adjust your camera setup to avoid it altogether. Remember, keeping your camera level and paying attention to lighting conditions can make a significant difference. These simple steps will help you capture true-to-life images that showcase your subject without unwanted skewing, giving your photos a professional touch and a clean, straight appearance.

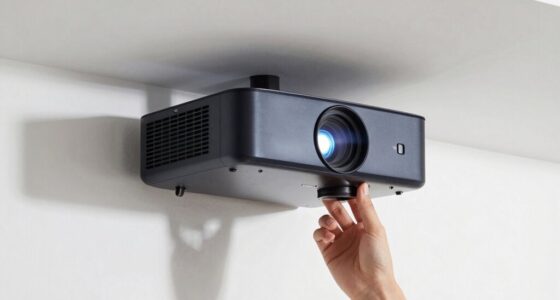
Epson Home Cinema 980 3-Chip 3LCD 1080p Projector 4,000 Lumens Color and White Brightness, Streaming/Gaming/ Media Room, Built-In Speaker, Auto Picture Skew, 16000:1 Contrast, 2 HDMI Ports
Exceptional Picture Quality — Provides stunning, detailed 1080p images and fast data processing that’s optimized for fast-action sports,...
As an affiliate, we earn on qualifying purchases.
Frequently Asked Questions
What Are Common Tools Used to Correct Keystone Distortion?
You use image correction tools like built-in software features or dedicated photo editing programs to fix keystone distortion. These tools often include perspective correction options that straighten skewed lines. Lens calibration is also essential, allowing you to adjust your camera’s settings for accurate images. By combining image correction techniques with proper lens calibration, you guarantee your photos are geometrically accurate and free from keystone effects.
How Does Lens Type Affect Keystone Distortion?
You notice that lens type greatly influences keystone distortion, especially when you’re shooting architectural photography. Wide-angle lenses, known for their expansive lens characteristics, tend to exaggerate lines and corners, creating more distortion. Conversely, telephoto lenses with longer focal lengths minimize this effect, making straight lines appear more natural. When choosing your lens, consider how its characteristics align with your scene to reduce unwanted keystone distortion and achieve cleaner, more accurate images.
Can Software Fix Keystone Distortion After Shooting?
Yes, software correction can fix keystone distortion after shooting. Using post processing techniques, you can adjust the image’s perspective and straighten lines that appear skewed. Many editing programs, like Adobe Lightroom or Photoshop, offer perspective correction tools that effectively reduce keystone effects. Just import your photo, apply the correction, and fine-tune until everything looks straight. This approach saves you from needing perfect alignment during shooting, giving you flexibility in editing.
What Is the Ideal Camera Angle to Prevent Keystone Distortion?
To prevent keystone distortion, set your camera at an eye-level height and keep the lens straight towards your subject. Use a tripod to guarantee stability, positioning it so that the camera remains level and centered. Avoid tilting the camera up or down, as this causes distortion. Proper tripod positioning and maintaining a consistent camera height make your shots look natural without the need for software correction.
How Does Distance From the Subject Influence Keystone Effects?
When you move closer to your subject, keystone effects become more pronounced because of a perspective shift. For instance, if you’re photographing a tall building from ground level, standing farther away helps reduce distortion. Using framing techniques like positioning the camera parallel to the subject also minimizes keystone effects. Staying at an ideal distance ensures your image remains proportionate, making your shot look natural without requiring heavy correction later.

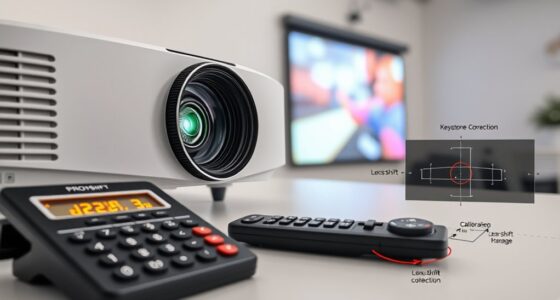
2000 ANSI 4K Decoding Projector with WiFi and Bluetooth, HAPPRUN Movie Home Theater with Auto Focus, 300'' Display for Indoor/Outdoor, Smart Proyector Compatible with Phone/TV Stick/PC/PS5
[EASIER OPERATION: AI Smart Screen Adjustment] HAPPRUN projector comes with auto focus and 6D auto-keystone technology, enjoy a...
As an affiliate, we earn on qualifying purchases.
Conclusion
Think of your camera as a sturdy bridge spanning a river. When you distort the keystone, it’s like bending the bridge, causing the structure to wobble and wobble. But if you align your lens carefully, you keep the bridge straight and strong, supporting a clear, stable path. By avoiding keystone distortion, you’re building a perfect arch that guides the eye smoothly, ensuring your photo stands tall and true—like a well-constructed bridge that invites others to cross without hesitation.
![[Official Google TV]Smart Projector 4K Supported with WiFi & Bluetooth, Built-in Official Apps, GoogIe Voice, Outdoor Movie Projector with DoIby Audio, Auto Focus, Home Theater Proyector WIMIUS G1](https://m.media-amazon.com/images/I/515NcMYy-FL._SL500_.jpg)
[Official Google TV]Smart Projector 4K Supported with WiFi & Bluetooth, Built-in Official Apps, GoogIe Voice, Outdoor Movie Projector with DoIby Audio, Auto Focus, Home Theater Proyector WIMIUS G1
[All-in-One Google TV Built-In] G1 Smart projector comes fully integrated Google TV—no website version, no stripped-down system. Access...
As an affiliate, we earn on qualifying purchases.

4K Projector with Built-in Apps, 1500ANSI Auto Focus&6D Keystone Dolby Audio Kogata Smart Projector with WiFi 6 Bluetooth Outdoor Movie Proyector for Home Theater HDR10+ UPGRADE
【UPGRADE Version】Unlimited Streaming –Compatible with Netflix & Dolby Audio& DTS Audio: The Kogata GC357 home projector comes with...
As an affiliate, we earn on qualifying purchases.