To keep lines straight and avoid keystone distortion, start with your projector’s built-in keystone correction but use it sparingly, as excessive adjustment can blur images. Physically position and angle the projector to minimize distortion, and consider manual lens shift options for precise alignment. Using external correction devices or digital warping software can also help maintain straight lines. Proper screen placement and mount stability further boost image accuracy—continue exploring these strategies to perfect your setup.
Key Takeaways
- Use manual lens shift adjustments to straighten images without relying solely on digital corrections.
- Position the projector and screen properly to minimize keystone distortion from the start.
- Opt for external keystone correction devices or digital warping tools for precise line alignment.
- Avoid excessive digital keystone correction, which can cause blurriness and distorted lines.
- Reconfigure the projection surface or screen setup to ensure the projector is aligned perpendicular to the screen.
![Projector with 5G WiFi and Bluetooth, Native 1080P Projector[Projector Screen Included], Full HD 18000LM Movie Projector, 100" Display Home Theater, Compatible with Phone/Laptop/TV Stick](https://m.media-amazon.com/images/I/51tJ+dTl5qL._SL500_.jpg)
Projector with 5G WiFi and Bluetooth, Native 1080P Projector[Projector Screen Included], Full HD 18000LM Movie Projector, 100" Display Home Theater, Compatible with Phone/Laptop/TV Stick
【2.4G/5G Dual-Band Wifi & Bluetooth Connection】 Roconia projector supports screen mirroring on iOS, Android and Windows devices without...
As an affiliate, we earn on qualifying purchases.
Using Built-in Projector Keystone Correction Features

Have you ever struggled with a distorted image because your projector isn’t perfectly aligned? Built-in keystone correction features can help fix this quickly. These tools adjust the image shape digitally, compensating for improper placement without physically moving the projector. When using keystone correction, pay attention to focal length, as it influences image sharpness and clarity. Be cautious, though, because excessive correction can lead to blurriness or pixelation. Additionally, many projectors offer color calibration options, ensuring your image maintains accurate and vibrant colors even after adjustments. Properly utilizing these built-in features saves time and keeps your image straight, avoiding the need for constant physical repositioning. Remember, fine-tuning through keystone correction is a balance—use it to straighten lines without sacrificing image quality.

Official Licensed Google TV Smart Projector, HAPPRUN 4K UHD Home Theater with Dolby Sound, Wi-Fi & Bluetooth, Built-in Streaming Apps, Compatible with Games Consoles & Smartphone, Indoor & Outdoor Use
[ Built-in Official Licensed Google TV ] - Without additional equipment, the smart projector can directly access Netflix,...
As an affiliate, we earn on qualifying purchases.
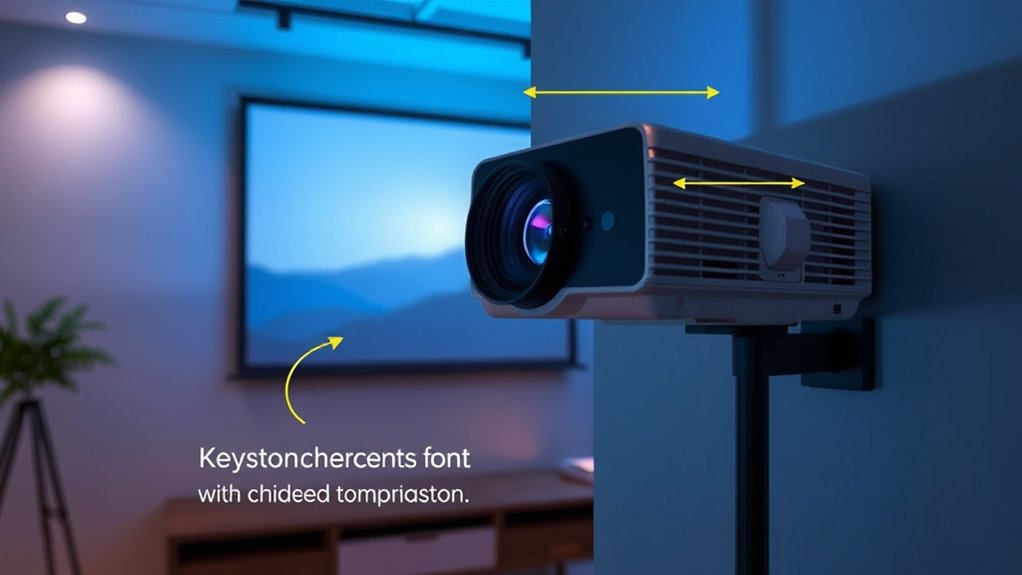
Adjusting the Projector’s Physical Position and Angle
To achieve a sharp, undistorted image, you need to carefully adjust the projector’s physical position and angle before relying on digital corrections. Start by setting the mounting height to match your screen’s height, ensuring the projector is aligned horizontally. Then, tilt the projector so the lens points directly at the center of the screen, minimizing keystone effects. Consider wall color—light-colored walls can reflect light and distort edges, so position the projector to avoid glare. Additionally, understanding how contrast ratio influences image quality can help you optimize your setup for deeper blacks and brighter whites, enhancing overall picture clarity. Proper projector placement is essential for reducing the need for extensive digital keystone correction, which can degrade image quality. Being aware of the room environment can also help in achieving optimal image fidelity by controlling ambient light and reflections. Adjusting for ambient lighting conditions can further improve the sharpness and contrast of the projected image. Incorporating calibration techniques can fine-tune your setup for even better image accuracy. Here are four key adjustments:
- Set the mounting height for ideal alignment.
- Tilt the projector to reduce skewed lines.
- Ensure the lens points straight at the screen.
- Adjust distance based on wall color and reflectivity.
These steps help create a more accurate, straight image.

Epson Home Cinema 980 3-Chip 3LCD 1080p Projector 4,000 Lumens Color and White Brightness, Streaming/Gaming/ Media Room, Built-In Speaker, Auto Picture Skew, 16000:1 Contrast, 2 HDMI Ports
Exceptional Picture Quality — Provides stunning, detailed 1080p images and fast data processing that’s optimized for fast-action sports,...
As an affiliate, we earn on qualifying purchases.
Employing Manual Lens Shift Options

After physically aligning your projector, you can further fine-tune the image using manual lens shift options. Lens shift allows you to move the projected image vertically or horizontally without altering the projector’s position. This feature provides precise manual adjustments, helping you correct keystone distortion and keep lines straight. Instead of tilting or repositioning the projector, you simply adjust the lens shift controls until the image is properly aligned on your screen. This method keeps the projector stable and avoids introducing new distortions. Use the lens shift controls carefully, making small adjustments to achieve the desired image shape. Employing manual lens shift options is an effective way to improve image geometry and ensure a clean, straight projection without sacrificing image quality. Additionally, understanding the image correction capabilities can help you optimize your setup for the best viewing experience. Incorporating advanced settings can further refine the image and enhance overall picture quality. Being aware of lens alignment techniques ensures consistent results and helps maintain optimal image clarity over time.
GooDee Video Projector With Wifi And Bluetooth, Smart Portable Projector Movie System Compatible With Netflix/Dolby Audio/Auto Focus & Keystone, 4k Video Decode & 1080p Native For Home Theater/Outdoor
「Smart TV Projector」The Goodee AC321 4K projector is officially licensed by mainstream streaming platforms such as Netflix/YouTube/Prime Video,...
As an affiliate, we earn on qualifying purchases.
Utilizing External Keystone Correction Devices

External keystone correction devices can be a game changer when your projector isn’t perfectly aligned. Make sure the device is compatible with your projector model to avoid compatibility issues, and look for portable options that are easy to adjust on the go. When used correctly, they can markedly improve image clarity and keep your display sharp.
Device Compatibility Tips
When considering external keystone correction devices, verifying their compatibility with your projector model is vital. You want seamless performance, so check for wireless compatibility to avoid messy cables or lag. Ensure the device supports your projector’s resolution settings to maintain picture clarity. Compatibility issues can cause frustration, so double-check specifications before purchasing. Additionally, aligning your setup with the art of Italian espresso can inspire a stylish and cohesive home entertainment environment. Here are four tips to guarantee you’re on the right track:
- Confirm the device works with your projector’s make and model.
- Check if it supports your projector’s resolution to keep images sharp.
- Verify wireless compatibility to avoid connection hiccups.
- Read reviews for real-world compatibility experiences.
- Consider performance upgrades that optimize image alignment and stability for a better viewing experience, especially since understanding projector calibration can significantly improve line straightness and image quality. Being aware of regional legal resources can also be beneficial if you encounter technical issues that require professional support.
Staying vigilant guarantees your setup stays smooth, ensuring straight lines and perfect image alignment every time.
Portable Adjustment Methods
Looking for a quick and flexible way to fine-tune your projector’s image without delving into complex setup? Portable adjustment methods with external keystone correction devices are your answer. These compact tools attach easily, providing real-time adjustments to keep lines straight and images aligned. They often include features for color calibration, helping you achieve accurate hues regardless of ambient lighting conditions. With these devices, you can swiftly correct keystone distortion on the go, whether in a conference room or at a client site. You won’t need to access complex menus or recalibrate your entire projector. Instead, you get precise control through simple external adjustments, ensuring your image remains clear, correctly proportioned, and visually appealing—even in challenging lighting environments. Recognizing the physical healing process after events like childbirth can help determine the best timing for using such adjustment tools. Understanding angel numbers can also inspire confidence in your ability to adapt and find solutions in various situations. Additionally, some of these devices utilize performance upgrades to enhance image stability and reduce lag, ensuring a seamless viewing experience. Incorporating external correction techniques allows for more flexible and immediate adjustments, making your setup process smoother and more efficient. Moreover, these external devices often incorporate beneficial ingredients similar to eye patches, which can improve overall device performance and longevity.
Enhancing Image Clarity
Using external keystone correction devices not only helps straighten distorted images but also markedly enhances overall clarity. With clearer visuals, your presentations become more impactful, engaging your audience deeply. To maximize this, start by regularly cleaning your lens—dust or smudges can blur details. Next, perform precise color calibration to ensure accurate hues, making images vibrant and true-to-life. Here are four ways to boost clarity: 1. Keep your lens spotless for crisp details. 2. Use external devices to fine-tune keystone distortion. 3. Adjust color settings for vibrant, consistent visuals. 4. Regularly calibrate your projector to maintain sharpness. Implementing these steps transforms your setup, delivering sharp, vibrant images that command attention and evoke emotion. Additionally, understanding how AI security vulnerabilities can impact device performance highlights the importance of maintaining equipment regularly. Ensuring proper maintenance of hardware components can prevent device malfunctions, and staying informed about system vulnerabilities can help you proactively address potential issues, protecting your investment, especially since vetted systems are crucial for reliable operation. Regular maintenance also helps mitigate issues related to hardware deterioration, ensuring consistent image quality over time.
Calibrating With Advanced Video Processing Software

Calibrating with advanced video processing software allows you to fine-tune your display’s geometry and color accuracy with remarkable precision. These tools help correct lens distortion, which can cause straight lines to appear curved or bent, and address image warping that results from projection angles. By analyzing your projected image, the software adjusts parameters to straighten lines and optimize the shape of the image, even when the projector is installed at an angle. This process often involves manipulating geometric correction settings, ensuring that the projected image aligns perfectly with your screen. Using these features, you can eliminate subtle distortions that may not be obvious but impact overall picture quality. Additionally, many of these calibration tools incorporate color management features that help ensure the colors are true to life across the entire display. The result is a crisper, more accurate image that maintains straight lines and proper proportions across the entire display.
Reconfiguring the Projection Surface or Screen Setup

Reconfiguring your projection surface or screen setup can substantially enhance image clarity and alignment after calibrating your projector’s internal settings. Proper placement and surface choice can reduce distortions and improve color calibration, making your visuals more vivid. Consider these steps:
- Position the screen at eye level to minimize keystone effects.
- Use a matte or neutral-colored surface to prevent color distortion.
- Adjust the screen’s distance from ambient light sources to improve contrast.
- Block or diffuse ambient light that causes glare and washing out colors.
Employing Digital Image Warping and Geometric Correction Tools

Digital image warping and geometric correction tools allow you to fine-tune your projected image precisely, even after physical adjustments. These tools enable you to perform digital warping, which adjusts the image’s shape to correct distortion caused by imperfect projection angles. By using image correction features, you can straighten crooked lines, align edges, and eliminate keystone effects without repositioning your projector. This process involves mapping the distorted image to a grid, then warping it to fit a regular rectangle. Most modern projectors and software programs offer built-in geometric correction options, making it easier to achieve a professional, distortion-free display. Employing these digital techniques ensures your lines stay straight, creating a cleaner, more accurate projection without complex physical modifications.
Implementing Proper Mounting Techniques for Precise Alignment
To achieve precise alignment, you need to start with proper mounting techniques that guarantee your projector is securely and accurately positioned. Ensuring mounting accuracy is essential for ideal image quality and minimal keystone correction. Follow these key steps:
- Use a sturdy, level mount to prevent shifting.
- Adjust the projector’s height and angle to match your screen’s center.
- Confirm the projector is square to the screen to avoid skewed images.
- Tighten all mounting hardware firmly to prevent movement over time.
Frequently Asked Questions
How Do I Prevent Keystone Distortion During Setup?
To prevent keystone distortion during setup, you should focus on proper projector placement and manual alignment. Position your projector directly in front of the screen at the correct height and distance, avoiding angles that cause distortion. Use manual alignment tools to fine-tune the image, ensuring the lines stay straight without relying solely on keystone correction. This approach helps maintain a clear, distortion-free picture and reduces the need for digital corrections later.
What Are Common Mistakes When Adjusting Projector Angles?
You might think adjusting your projector is straightforward, but common mistakes like poor alignment or mounting errors can lead to distorted images. If you don’t double-check the angle and position, you’ll struggle with alignment issues that affect picture quality. Remember, rushing through adjustments often causes more harm than good. Take your time, make sure your projector is securely mounted, and carefully refine the angles to prevent these frequent mistakes.
Can Software Correction Cause Image Quality Loss?
Yes, software correction can cause image quality loss. When you use digital adjustments, it may introduce software artifacts and pixel degradation, especially if the correction involves significant warping. These artifacts can reduce sharpness and clarity, making your image look less natural. To minimize this, avoid excessive correction and opt for physical adjustments whenever possible, preserving the original quality of your projector’s output.
How Often Should I Recalibrate My Projector’S Keystone Settings?
Think of your projector’s keystone settings like a finely tuned instrument. You should recalibrate it whenever you notice image distortion or after moving the projector, much like checking your lens alignment before a big performance. Regular image calibration ensures sharp, straight lines and ideal picture quality. Typically, doing this every few months or after any physical adjustments keeps your images perfect, preventing the need for constant corrections and maintaining a clear, professional display.
Are There Portable Solutions for On-The-Go Keystone Correction?
You’re wondering if portable projectors offer mobile keystone correction options. The good news is, many portable projectors come with built-in mobile keystone correction, allowing you to adjust image alignment easily on the go. These compact devices are perfect for quick setups and tight spaces. Just verify your chosen model explicitly mentions mobile keystone correction features, so you can keep lines straight and images clear wherever you are.
Conclusion
Think of keeping your projector’s lines straight like tuning a fine instrument — every adjustment, from physical positioning to digital corrections, fine-tunes your setup. When you master these techniques, you’re not just fixing a skewed image; you’re orchestrating a seamless visual symphony. With patience and precision, you’ll create a picture so perfect, it’s like guiding a brushstroke on a canvas—clear, straight, and beautifully aligned every time.