When you use a larger screen, your images may appear dimmer because the increased size spreads out light and colors, reducing their vibrancy. Without proper calibration or increased brightness settings, visuals can look washed out or dull. Factors like ambient lighting and viewing distance also influence how bright and sharp images seem. To keep images vivid on bigger screens, it’s essential to adjust your settings properly—discover more tips to get the best display experience.
Key Takeaways
- Larger screens spread brightness over more pixels, causing images to appear dimmer if not properly calibrated.
- Increasing screen size without adjusting brightness settings reduces perceived vibrancy and visual clarity.
- Larger displays require higher brightness levels or calibration to maintain color richness and prevent dull appearance.
- Failing to recalibrate for increased screen size results in washed-out or muted images.
- Ambient lighting and display coatings influence how larger screens distribute light, impacting perceived image brightness.
Samsung 43-Inch Class Crystal UHD U8000H Series Samsung Vision AI Smart TV (2026 Model, 43U8000H) Crystal Processor 4K, Endless Free Content, Motion Xcelerator, Color Booster, Alexa Built-in
CRYSTAL PROCESSOR: Powerful processor enhances colors and sharpens details for a vibrant 4K viewing experience. Experience every shade...
As an affiliate, we earn on qualifying purchases.
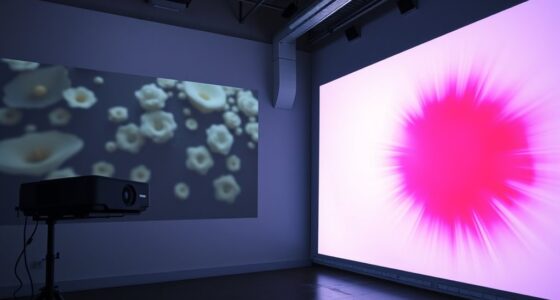
Why Do Larger Screens Make Images Look Dim?
When you increase the size of a screen, the images on it often appear dimmer, and this happens because larger displays require more light to maintain brightness levels. As the screen size grows, the same amount of light is spread over a greater area, which can reduce image clarity. This phenomenon is related to the brightness distribution across the display, meaning that larger screens need more illumination to keep images vivid and sharp. Without additional brightness adjustments, the image may look dull or washed out. Additionally, screen resolution can influence how bright and crisp images appear on larger displays. The bigger the screen, the more challenging it becomes to preserve brightness and clarity without increasing screen brightness or adjusting other display settings. To compensate for these effects, many displays incorporate automatic brightness adjustment features that optimize luminance based on screen size and ambient lighting conditions. Furthermore, understanding display calibration can help improve image brightness and color accuracy on larger screens. Ultimately, larger screens need more light to ensure images stay crisp and vibrant.

Hisense 43" E6 Cinema Series Hi-QLED 4K UHD Smart Fire TV (43E6QF) - AI Light Sensor, Dolby Vision · Atmos, Voice Remote with Alexa, Motion Rate 120, HDR 10+ Adaptive, Game Mode Plus
HI-QLED COLOR: Experience a visual treat with Hi-QLED Color. Every frame is rich, vibrant, and true-to-life, ensuring that...
As an affiliate, we earn on qualifying purchases.
How Screen Resolution and Brightness Settings Affect Image Brightness
Your screen resolution can influence how bright images appear, with higher resolutions sometimes making details seem dimmer. Adjusting your brightness settings helps improve visibility, but setting them too high can wash out colors. On larger screens, colors often appear more diluted, which can further reduce the perceived brightness of images. Additionally, proper lighting conditions in your environment can help optimize screen visibility and reduce eye strain.
Resolution’s Impact on Brightness
Higher screen resolution can make images appear sharper, but it can also cause them to look dimmer if brightness settings aren’t adjusted accordingly. As resolution increases, pixel density rises, packing more pixels into the same screen space. This can lead to a perception of reduced brightness because each pixel emits less light, especially if your display isn’t properly calibrated. Screen calibration ensures your device’s brightness, contrast, and color settings are optimized for the resolution, preventing dimness caused by mismatched settings. When you upgrade to a higher resolution, don’t forget to recalibrate your screen. Otherwise, the increased pixel count might make images seem duller, even if your brightness is set to maximum. Proper calibration balances sharpness and brightness, ensuring your images appear vibrant and clear. Additionally, understanding display protocols can help you optimize your screen settings for the best visual experience. Recognizing visual perception principles can also help you adjust settings for a more accurate display, especially as display technology evolves. Paying attention to battery performance can further ensure your device maintains optimal display brightness without unnecessary power drain. Moreover, adjusting ambient light conditions can significantly improve how your screen appears in different environments.
Brightness Settings Adjustments
Adjusting your brightness settings is key to maintaining vibrant images, especially as screen resolution increases. Proper display calibration ensures your screen’s brightness isn’t too dim or overly bright, which impacts image clarity. To optimize, tweak brightness levels to match ambient lighting, and perform color calibration for accurate color reproduction. Keep in mind that overly high brightness can wash out details, while too low makes images look dull. Use this table as a quick guide:
| Setting Adjustment | Effect on Brightness |
|---|---|
| Increase brightness | Makes images more vivid but risks glare |
| Decrease brightness | Reduces eye strain and glare |
| Calibrate display | Ensures consistent color and brightness |
Additionally, understanding screen resolution can help you better appreciate how display quality affects image appearance. Recognizing how display calibration impacts overall image quality allows for more precise adjustments, ensuring your visuals remain sharp and lively. Properly adjusting brightness settings can prevent the “bigger screen” trap of dim images, keeping visuals sharp and lively. For optimal results, consider how ambient lighting influences perceived brightness and contrast, adjusting settings accordingly.
Larger Screens Dilute Colors
As screen resolution increases, larger displays often cause images to appear less vibrant because the available brightness is spread across more pixels. This dilution makes colors seem duller, especially if your device isn’t properly color calibrated. Poor calibration can lead to inaccurate color representation, making images look faded or washed out. Additionally, display coatings, such as matte or glossy finishes, influence how light reflects off the screen, affecting perceived brightness and color richness. Higher resolutions require careful adjustments to brightness and color settings to maintain vividness. Without proper calibration and ideal display coatings, your images may appear less intense on larger screens, tricking your eye into perceiving dimmer, less colorful visuals even if the hardware is capable of more vibrant output.

INSIGNIA 43" Class F50 Series LED 4K UHD Smart Fire TV, Voice Remote with Alexa, Stream Live TV Without Cable
4k Ultra HD (2160p resolution): Enjoy breathtaking HDR10 4K movies and TV shows at 4 times the resolution...
As an affiliate, we earn on qualifying purchases.
How Ambient Light and Viewing Distance Change Your Perception

Your surroundings and how far you sit from the screen considerably influence how bright or dim images appear. Bright ambient light can wash out details, making images seem duller, while dim settings make screens look more vivid. Additionally, sitting closer or farther away alters your perception of contrast and color, impacting your overall viewing experience. Being aware of how airborne pollutants like microplastics interact with indoor environments can also help you optimize your space for better visual comfort. Maintaining good indoor air quality by reducing indoor pollutants can further enhance your viewing environment and protect your health. Understanding the impact of ambient light on screen visibility allows you to adjust your environment for a more comfortable viewing experience. Furthermore, managing indoor air quality can prevent visual fatigue caused by poor environmental conditions. Recognizing how environmental factors influence visual perception empowers you to create a healthier, more comfortable space for extended viewing.
Ambient Light Effects
Ambient light and viewing distance play essential roles in how you perceive images on screens. When ambient light is too bright, it can wash out colors, making images appear dull regardless of proper color calibration. Conversely, dim environments enhance contrast, making colors pop more vividly. Your viewing distance also influences perception; sitting too close can cause you to notice pixelation or flickering, especially if the refresh rate isn’t high enough. A higher refresh rate helps reduce motion blur and eye strain in bright or dynamic lighting conditions. Additionally, display calibration is crucial to ensure colors stay true and images remain sharp and vibrant, regardless of the lighting conditions around you. Being aware of lighting conditions can help you optimize your viewing setup for maximum clarity and comfort. Furthermore, understanding how visual perception adapts to different ambient conditions can assist in selecting the best display settings for your environment. Recognizing the impact of ambient lighting on your viewing experience can also guide you in adjusting your environment for optimal clarity.
Viewing Distance Impact
When you sit too close to a screen, your eyes are forced to process more pixels, which can make images appear less sharp and more pixelated, especially if the display’s resolution isn’t high enough. Your viewing distance considerably impacts how you perceive screen size and image clarity. Sitting too close can distort the true scale of the content, making everything seem overly large and less detailed. Conversely, sitting too far away may cause you to miss fine details, reducing clarity. The best viewing distance depends on your screen size; larger displays require you to sit farther back to maintain sharpness and avoid dim, blurry images. Adjusting your distance helps you see images as intended, ensuring clarity without the dimming illusion caused by improper positioning.

INSIGNIA 55-inch Class F50 Series LED 4K UHD Smart Fire TV with Alexa Voice Remote (NS-55F501NA26)
4k Ultra HD (2160p resolution): Enjoy breathtaking HDR10 4K movies and TV shows at 4 times the resolution...
As an affiliate, we earn on qualifying purchases.
Easy Ways to Adjust Your Display for Brighter, Sharper Images
Adjusting your display settings is one of the simplest ways to achieve brighter, sharper images. Start with screen calibration to enhance contrast and brightness, ensuring your display isn’t dim or washed out. Use color calibration tools to fine-tune color accuracy, making images pop with vibrant hues. Here are four quick tips:
- Increase brightness and contrast settings for a more luminous display.
- Use built-in calibration tools or software for precise adjustments.
- Adjust color temperature to enhance clarity and reduce dullness.
- Regularly revisit your calibration to maintain ideal image quality.
Common Mistakes That Dim Your Large Screen Display
One common mistake that dims your large screen display is setting the brightness or contrast too low, often in an attempt to reduce eye strain or save power. This can actually make images appear dull, especially on bigger screens where lighting nuances matter. Many believe that larger screens require less brightness, a screen size myth that leads to underwhelming visuals. Proper color calibration is essential; without it, colors may look muted or washed out. Additionally, adjusting brightness without considering ambient lighting results in dim images. Here’s a quick snapshot:
| Mistake | Effect | Fix |
|---|---|---|
| Ignoring color calibration | Colors look off | Calibrate colors for accurate display |
| Relying on screen size myths | Dim, dull images | Adjust brightness based on environment |
| Setting brightness too low | Dull visuals | Use appropriate brightness, not just low settings |
| Skipping contrast adjustments | Loss of image depth | Fine-tune contrast for better clarity |
Tips to Optimize Your Screen for Vivid, Clear Images
Optimizing your screen for vivid, clear images involves more than just turning up the brightness. To get the best picture quality, focus on proper color calibration and understanding your screen coating. Accurate color calibration ensures colors appear natural and vibrant, avoiding dullness. Additionally, check your screen’s coating—matte or glossy—as it affects glare and contrast. Here are four tips to enhance your display:
- Use a calibration tool or software to fine-tune colors.
- Adjust contrast and gamma settings for better depth.
- Clean your screen gently to prevent dust and smudges from dulling images.
- Consider your screen coating; a glossy surface can boost vibrancy, while matte reduces glare.
Implementing these tips helps you achieve bright, crisp visuals without the dimness caused by improper setup.
Frequently Asked Questions
Can Screen Size Alone Cause Perceived Dimness Regardless of Settings?
Yes, screen size alone can cause perceived dimness, especially if you experience resolution issues or have ambient lighting that washes out the display. Larger screens may make images appear dimmer because your eyes struggle to maintain focus across the entire display, and poor resolution can make colors look dull. Additionally, bright ambient lighting can reduce contrast, making the screen seem less vibrant regardless of your settings.
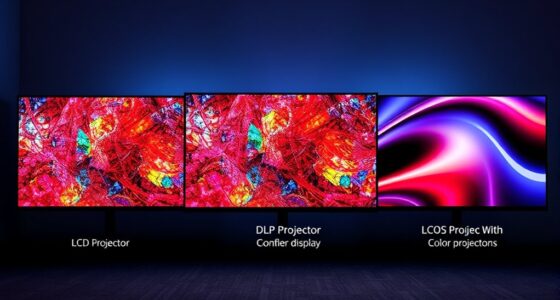
Do Different Screen Technologies Impact How Images Appear on Large Displays?
Ever wonder if different screen technologies affect image quality? They definitely do. For instance, OLED screens often deliver better contrast and deeper blacks, enhancing visual contrast, while LCDs might struggle with ambient reflections that wash out colors on large displays. You’ll notice that high-quality tech minimizes reflections and maximizes contrast, making images appear brighter and clearer. So, choosing the right screen tech can drastically improve how vivid and sharp your visuals seem.
How Does Color Calibration Affect Image Brightness on Bigger Screens?
Color calibration directly impacts image brightness on bigger screens by ensuring color accuracy and proper contrast. When you use calibration techniques like adjusting gamma, brightness, and contrast settings, you maximize the display’s output, making images appear brighter and more vibrant. Without calibration, images can look dim or washed out, especially on large screens where the scale amplifies any color inaccuracies. Regular calibration helps maintain ideal image brightness and color fidelity.
Are There Specific Lighting Environments That Worsen Image Dimness on Large Displays?
Yes, ambient lighting and viewing angles can worsen image dimness on large displays. Bright ambient light washes out screen images, making them appear duller. Poor viewing angles also cause color and brightness loss, especially on bigger screens where you might sit off-center. To improve visibility, use controlled lighting and position yourself directly in front of the display. Adjusting screen settings and choosing displays with wider viewing angles can also help.
What Role Does Display Aging or Panel Quality Play in Image Brightness Issues?
You’ll notice that display aging and poor panel quality contribute substantially to brightness issues. Panel degradation, caused by prolonged use, reduces image clarity and makes screens dimmer. Similarly, backlight aging weakens the illumination, resulting in lower brightness levels. If your display is older or of lower quality, these factors can cause images to appear less vibrant. Upgrading or maintaining your panel and backlight can help restore brightness and improve your viewing experience.
Conclusion
When you step back and look at your large screen, it’s like gazing through a foggy window—images appear dim and dull. But with a few simple adjustments—boosting brightness, refining settings, or shifting ambient lighting—you can cut through the haze. Imagine your display shining like a spotlight, each color vivid as a painter’s brushstroke. Take control, and turn your screen into a window filled with crisp, vibrant images that truly captivate your eyes.