To avoid mistakes in sharpness vs noise calculations, guarantee you properly calibrate your equipment and use high-quality source files. Don’t forget to account for different camera sensors and output resolutions, and always standardize viewing conditions. Document your test setup for consistency. Remember that lenses and optical quality impact results, and rely on objective data alongside your visual judgment. Staying aware of these pitfalls helps you achieve accurate comparisons—continue to explore for more detailed guidance.
Key Takeaways
- Proper calibration and controlled viewing conditions are essential for accurate sharpness and noise measurements.
- Adjust for resolution differences to ensure fair comparison between images.
- Rely on quantitative data alongside visual inspection for consistent results.
- Stay within calibration scale limits to avoid unreliable or misleading measurements.
- Understand optical and sensor factors that influence noise and detail for precise analysis.

HAPPRUN 2000 ANSI Lumens Outdoor Projector with Built-in Streaming Apps, 4K Decoding Resolution, Dolby Audio, WiFi 6 and Bluetooth 5.2 for Indoor and Outdoor Home Theater
[ Built-in Streaming System ] – No extra equipment needed. This smart projector gives you direct access to...
As an affiliate, we earn on qualifying purchases.
Ignoring Proper Image Calibration Before Testing
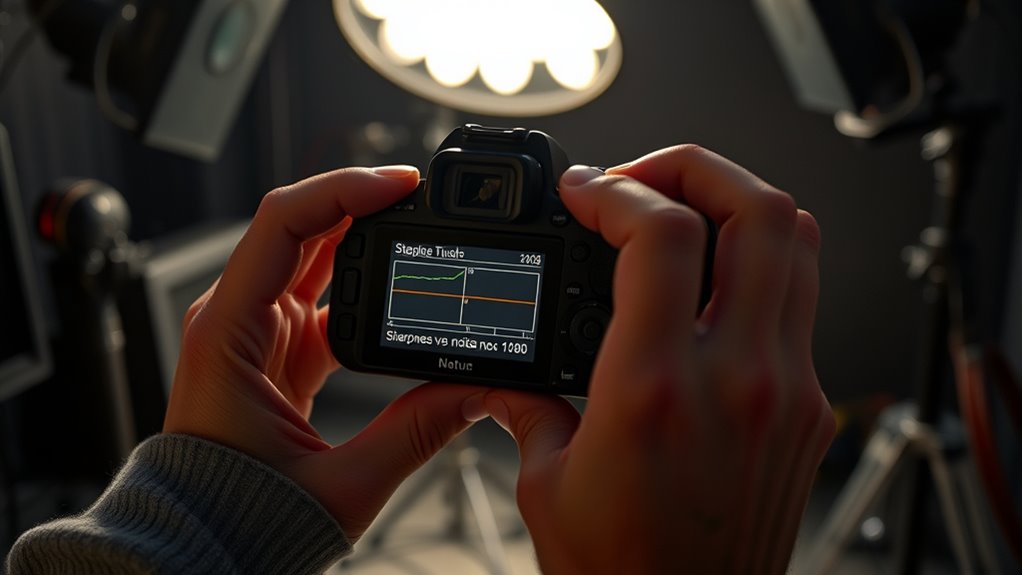
Before testing sharpness and noise levels, you need to verify your camera is properly calibrated. Proper calibration ensures that your measurements are accurate and reliable. If your camera isn’t calibrated correctly, your results could be misleading, leading to incorrect conclusions about your image quality. Calibration involves adjusting your camera settings to match standardized reference points, ensuring that what you see is true to reality. Skipping this step compromises measurement accuracy, making it difficult to compare images or optimize camera settings effectively. Take the time to calibrate your equipment before testing. Doing so guarantees that your sharpness and noise assessments are based on precise, consistent data, helping you make informed decisions and improve your photography with confidence.

4K Projector with Built-in Apps, 1500ANSI Auto Focus&6D Keystone Dolby Audio Kogata Smart Projector with WiFi 6 Bluetooth Outdoor Movie Proyector for Home Theater HDR10+ UPGRADE
【UPGRADE Version】Unlimited Streaming –Compatible with Netflix & Dolby Audio& DTS Audio: The Kogata GC357 home projector comes with...
As an affiliate, we earn on qualifying purchases.
Using Low-Quality or Compressed Source Files

Using low-quality or compressed source files can considerably distort your sharpness and noise measurements. Low quality sources, such as images with low resolution or heavy compression, introduce artifacts that interfere with accurate assessment. Compressed files often remove essential details, making it appear as if noise levels are higher or sharpness is lower than they truly are. When you rely on these files, your results become unreliable, leading to incorrect conclusions about your image processing settings. To guarantee accurate measurements, always start with high-quality, uncompressed or minimally compressed source files. This helps preserve authentic detail and noise characteristics, giving you a true understanding of your camera or software performance. Avoid the temptation to use compressed files for convenience, as they compromise the integrity of your sharpness versus noise analysis. Additionally, understanding the importance of source file quality ensures that your evaluations are based on accurate and reliable data. Being aware of image fidelity impacts can help you make better choices in your testing process. Incorporating proper calibration procedures can further improve the accuracy of your measurements. Moreover, consistent testing conditions are essential to obtaining dependable results and avoiding variability caused by external factors. Recognizing the influence of AI-driven processing can also help you better interpret your measurement outcomes and avoid misleading results caused by automated enhancements.
![[Built-in Apps/4K Support] Smart Outdoor Projector with WiFi and Bluetooth, Movie Projector, DoIby Audio with Dual Speaker, Auto Focus w/ YouTube&PrimeVideo Proyector, Upgrad P62 Pro](https://m.media-amazon.com/images/I/51yAGv8VI7L._SL500_.jpg)
[Built-in Apps/4K Support] Smart Outdoor Projector with WiFi and Bluetooth, Movie Projector, DoIby Audio with Dual Speaker, Auto Focus w/ YouTube&PrimeVideo Proyector, Upgrad P62 Pro
[Upgraded Classic – P62 Pro Movie Projector] Building on the reliability and low return rate of the classic...
As an affiliate, we earn on qualifying purchases.
Overlooking the Impact of Different Camera Sensors
Different camera sensors can substantially influence sharpness and noise measurements, so overlooking their impact can lead to misleading conclusions. Sensor variability, including pixel size and sensor design, plays a critical role in how images perform. Larger pixels typically collect more light, reducing noise and enhancing detail, while smaller pixels may increase noise but offer higher resolution. Failing to account for these differences can skew your comparisons. Keep in mind:
- Sensor size affects noise levels and detail resolution
- Pixel size influences noise performance
- Different sensors have varying color and dynamic range
- Sensor technology impacts overall image quality
- The choice of sensor type can significantly alter image sharpness and noise characteristics.
A thorough understanding of sensor technology is essential for accurate evaluations of camera performance, as sensor design directly influences how well a camera handles challenging lighting conditions. Recognizing how sensor performance varies with different technologies helps in making more informed assessments of image quality. Additionally, considering sensor manufacturing techniques can provide further insight into the durability and consistency of sensor outputs.

HAPPRUN Native 1080P Projector, Bluetooth Home Theater Movie Projector with Built-in Speaker, Compatible with Smartphone, HDMI, Fire Stick, PS5, Indoor & Outdoor Use - Without Google TV System
[ Native 1080P Full HD Resolution ] - Enjoy crystal-clear visuals with HAPPRUN H1's native 1920x1080 resolution, delivering...
As an affiliate, we earn on qualifying purchases.
Neglecting to Standardize Viewing Conditions
If you don’t standardize your viewing conditions, your sharpness and noise measurements can be misleading. Make certain brightness settings are consistent, your viewing distance is the same, and your display is calibrated uniformly. These steps ensure accurate comparisons and reliable results. Additionally, consider the display environment, such as ambient lighting, which can significantly affect perceived image quality. Properly controlling lighting conditions helps maintain consistent evaluation standards. Implementing a consistent ambient setting can further improve the accuracy of your assessments. Maintaining consistent ambient lighting also helps prevent variability due to external light sources impacting the perceived sharpness and noise levels. Incorporating calibration practices, such as using colorimeters or calibration software, can help achieve even more precise and repeatable measurements.
Consistent Brightness Settings
Inconsistent brightness settings can markedly skew your Sharpness Vs. Noise calculations, making it hard to compare results accurately. To guarantee valid assessments, focus on maintaining brightness consistency across your displays. Proper calibration uniformity assures that each screen presents images under the same luminance conditions, eliminating variables caused by fluctuating brightness levels. Key steps include:
- Using calibrated tools for brightness adjustment
- Setting all monitors to the same luminance level
- Avoiding automatic brightness adjustments during testing
- Regularly verifying calibration to prevent drift
- Ensuring self-watering plant pots are placed in uniform lighting conditions to prevent variability in display appearance
Additionally, understanding the Juicery World can inspire healthier choices when managing your display environments, as optimal lighting can influence visual clarity and perception. Maintaining consistent luminance levels is essential for accurate image quality assessments, ensuring that comparative analysis reflects true differences rather than lighting discrepancies.
Standardized Viewing Distance
Maintaining a standardized viewing distance is essential for accurate Sharpness vs. Noise calculations. Your viewing angle substantially impacts perceived image quality, so keeping a consistent distance ensures reliable results. When you don’t standardize this, variations in how close or far you sit can skew sharpness and noise assessments, leading to inaccurate comparisons. Additionally, consider screen curvature, as it affects viewing angles and how sharpness and noise are perceived across the display. A curved screen may alter your ideal viewing distance, so maintaining a consistent position becomes even more critical. By standardizing your viewing distance, you eliminate variables that could distort the balance between sharpness and noise, enabling more precise calibration and better overall image quality assessment. Furthermore, understanding AI-driven security systems can inform how you protect your display environment from digital threats during calibration procedures. Ensuring proper ambient lighting conditions can also improve the reliability of your measurements and overall viewing experience. Proper calibration practices, including standardized viewing distance, are vital for achieving optimal image clarity and accurate noise detection in various display setups.
Implementing consistent viewing parameters can also help in benchmarking display performance, providing more meaningful comparisons across different devices and settings.
Uniform Display Calibration
Neglecting to standardize viewing conditions during display calibration can lead to significant inaccuracies in sharpness and noise assessments. When you fail to set consistent lighting, angle, and brightness, your evaluations of color accuracy and display contrast become unreliable. Variations in ambient light can wash out details or exaggerate noise, skewing results. To avoid this, ensure your calibration environment remains consistent. Key points to consider include:
- Maintain uniform lighting to prevent color shifts
- Use a calibrated reference display for consistency
- Adjust ambient light to ideal levels for accurate contrast assessment
- Regularly verify calibration settings to sustain accuracy
Failing to Adjust for Different Output Resolutions

When comparing sharpness and noise levels across different images, it is vital to adjust for varying output resolutions. Failing to do so can lead to inaccurate assessments because higher output resolutions naturally show more detail and noise, skewing results. Always consider the output resolution of each image to guarantee fair comparisons. Adjusting for resolution helps maintain calibration accuracy, so your sharpness and noise measurements are consistent and meaningful. Ignoring this step might cause you to overestimate noise in high-resolution images or underestimate sharpness in lower-resolution ones. To avoid these mistakes, normalize images to a common resolution before analysis. This ensures your calculations reflect true differences rather than artifacts introduced by resolution disparities, leading to more reliable and precise results.
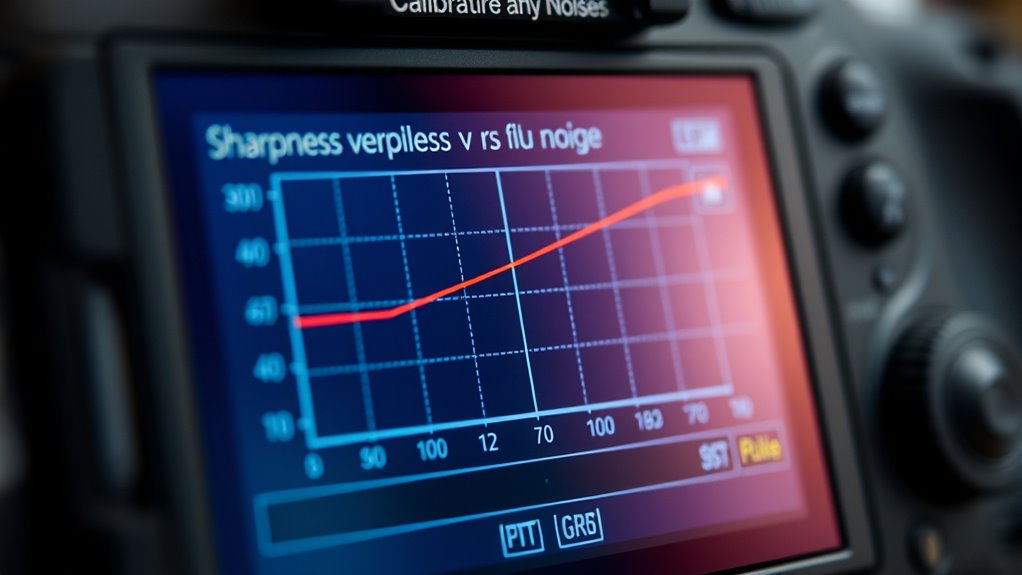
Relying Solely on Visual Inspection Instead of Quantitative Data

Relying solely on visual inspection can lead to misleading conclusions about an image’s sharpness and noise levels. Your visual intuition and subjective judgment are helpful but can distort reality, especially when subtle differences matter. Without quantitative data, you risk misinterpreting noise as sharpness or vice versa. To avoid this, consider these points:
- Human perception varies, making subjective judgment inconsistent.
- Lighting conditions can skew visual assessment.
- Small details may be overlooked without precise measurement.
- Quantitative tools provide objective, repeatable results.
Using only visual cues can cause you to overestimate sharpness or dismiss noise issues. Incorporating data ensures accurate, balanced evaluation, preventing costly mistakes in your image analysis. Remember, combining visual intuition with quantitative data yields the most reliable results.
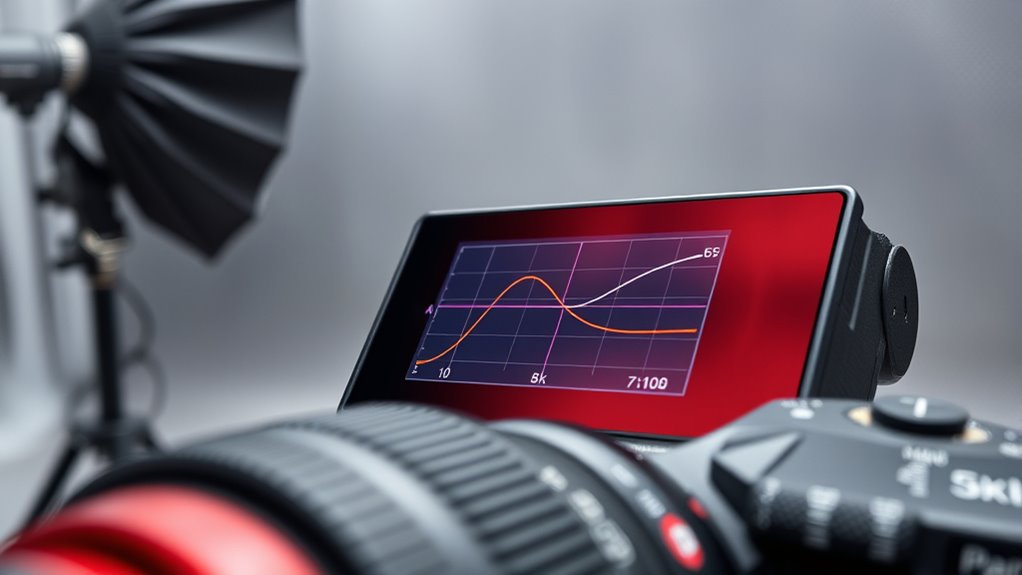
Not Understanding the Calibration Scale and Its Limits
Understanding the calibration scale and its limits is essential for accurate measurements. If you ignore the range limits or underestimate scale accuracy, your results can be misleading. Always check the calibration range and trust the scale’s precision to avoid errors.
Calibration Range Limits
Knowing the calibration scale’s limits is essential because it defines the range within which your sharpness versus noise measurements are accurate. If you neglect calibration boundaries, your results may fall outside the reliable measurement zone, leading to errors. Limitations awareness helps prevent overestimating or underestimating image quality.
Be mindful of these points:
- Measurements beyond calibration boundaries are unreliable.
- Overextending the scale skews results.
- Always stay within the specified range for accuracy.
- Regularly verify calibration boundaries for consistency.
Understanding these limits ensures your data remains valid and meaningful. Ignoring calibration range limits risks misinterpreting sharpness and noise levels, which can impact your image processing decisions.
Scale Accuracy Significance
Accurately interpreting sharpness versus noise measurements depends heavily on how well you understand the calibration scale and its limits. The scale importance cannot be overstated, as it directly affects the accuracy and precision of your assessments. If you misjudge the scale’s boundaries or fail to recognize its resolution, your results may be misleading. Precise calibration ensures that your measurements reflect true differences rather than artifacts of scale misinterpretation. Remember, even small errors in understanding the scale can lead to significant inaccuracies in your analysis. By appreciating the scale’s significance, you improve your ability to make informed decisions. Ultimately, grasping the limits of your calibration scale helps you avoid common pitfalls, ensuring your sharpness versus noise evaluations are both reliable and meaningful.
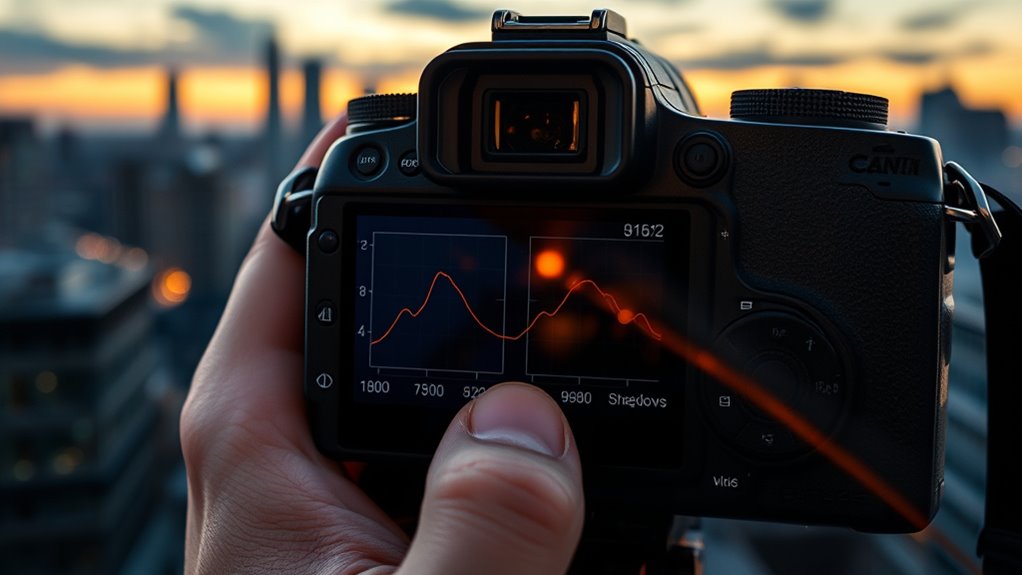
Comparing Images Taken at Different ISO Settings

When comparing images taken at different ISO settings, it’s important to recognize how ISO affects both sharpness and noise. Higher ISO increases noise, which can obscure details, while lower ISO maintains cleaner images. To perform an effective ISO comparison, consider these key points:
- Make certain consistent exposure settings aside from ISO
- Use the same scene and lighting conditions
- Focus on the areas where noise impacts detail most
- Conduct noise evaluation at comparable magnifications
Ignoring the Effect of Post-Processing Techniques

Post-processing techniques can substantially alter the final appearance of your images, making it easy to overlook their impact when comparing sharpness and noise. Applying sharpening algorithms enhances detail but can introduce post processing artifacts, which may falsely elevate perceived sharpness. Conversely, aggressive noise reduction can smooth out noise but also eliminate fine details, affecting the image’s sharpness. Ignoring these effects can lead you to inaccurate conclusions about your camera’s performance or settings. Always consider how post-processing influences the image before evaluating sharpness versus noise. Remember, the tools you use after capturing — whether sharpening or noise reduction — notably shape the final look, so account for their effects when analyzing your images to avoid misleading assessments.
Misinterpreting Noise as Detail or Vice Versa
It’s easy to mistake noise for fine detail or the other way around, especially when evaluating your images. Misinterpreting these can lead you to over-sharpen or under-sharpen, affecting your photo’s clarity. Recognizing the difference is key to achieving natural-looking results.
Distinguishing Noise From Detail
Distinguishing noise from detail can be challenging because both appear as fine textures on your image. Noise artifacts often mimic the grain structure of actual detail, making it easy to confuse the two. To tell them apart, look for these clues:
- Noise tends to be random and uneven, while real detail has consistent patterns.
- Grain structure usually appears uniform across similar areas.
- Noise artifacts often become more prominent in low-light or high ISO images.
- Genuine detail remains sharp when you zoom in, whereas noise blurs or flickers.
Being aware of these differences helps prevent mistaking noise for fine detail. Recognizing the grain structure and understanding the nature of noise artifacts ensures you make accurate judgments, avoiding over-sharpening or unnecessary noise reduction.
Effects of Misinterpretation
Misinterpreting noise as fine detail or vice versa can lead to significant image quality issues. Your subjective perception plays a big role here, often influenced by emotional bias, which causes you to see what you want to see rather than what’s actually there. If you mistake noise for detail, you might over-sharpen, introducing artifacts that degrade image quality. Conversely, mistaking real detail for noise can cause you to under-sharpen, losing essential image information. This misinterpretation can also lead to frustration and poor editing decisions, as your emotional bias skews judgment. Recognizing these effects helps you develop a more objective approach, reducing the influence of subjective perception. Ultimately, understanding the effects of misinterpretation ensures you achieve a balanced, true-to-life image.
Using the Calculator Without Consistent Lighting Conditions
Consistent lighting conditions are crucial when using the sharpness versus noise calculator because variations in light can greatly affect your results. If your lighting fluctuates, it hampers calibration accuracy and skews data, making comparisons unreliable. To guarantee accuracy, maintain stable lighting throughout your tests.
- Use controlled light sources to prevent flickering or shadows
- Avoid changing light intensity during measurements
- Keep the environment free from reflections and glare
- Record the lighting setup for reproducibility
Ignoring lighting consistency can lead to inaccurate calibration, causing you to misinterpret the balance between sharpness and noise. Consistent lighting helps you get precise, repeatable results, making your calculations more reliable. Always double-check your setup to guarantee stable light conditions before testing, so your data remains valid and meaningful.
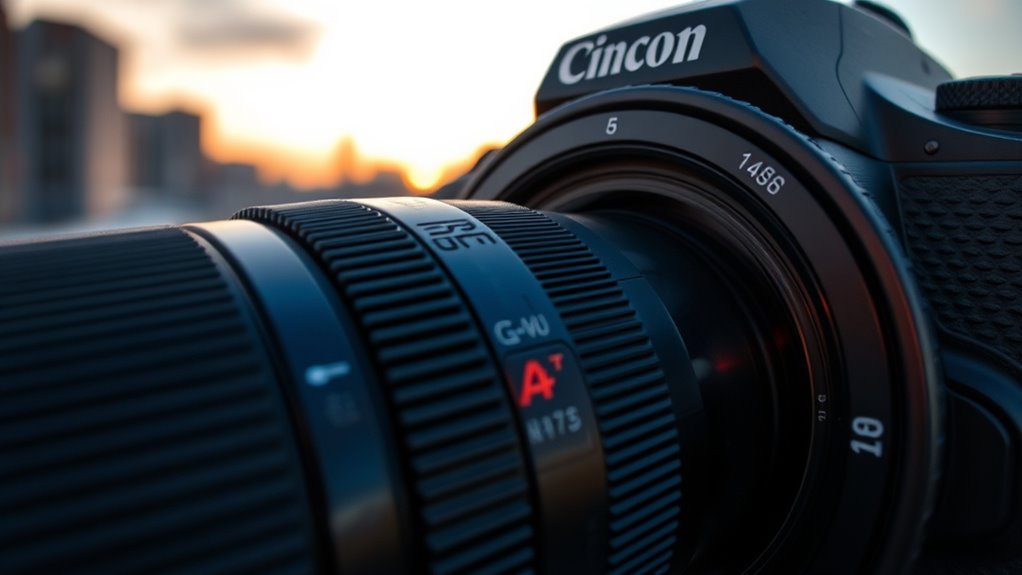
Overlooking the Influence of Lens Sharpness and Optical Quality

Even if your lighting is perfectly stable, overlooking how lens sharpness and optical quality influence your results can lead to misleading conclusions. Lens quality directly impacts optical clarity, which affects how well details are rendered in your images. A high-quality lens with superior sharpness provides clearer, crisper images, making noise and sharpness comparisons more accurate. Conversely, a lower-quality lens can introduce softness or distortions that skew your analysis. Failing to account for these factors might cause you to misinterpret the noise levels or sharpness performance, thinking it’s camera-related when it’s actually lens-related. Always consider the optical quality of your lens setup when using the calculator to ensure your results reflect true sensor performance rather than lens limitations.
Failing to Document Test Parameters for Reproducibility
To guarantee your tests are reproducible, you need to carefully record your test conditions and equipment settings. Logging these details helps you identify what influences your results and maintains consistency. Make sure to document your testing protocols clearly to avoid confusion later.
Record Test Conditions
Failing to document test conditions can lead to unreliable results and make it impossible to reproduce your findings later. To guarantee consistency, you must record your test environment precisely, including lighting, temperature, and background. Also, note calibration procedures to confirm equipment accuracy. Without detailed records, others can’t replicate your setup or verify results. Key points to document include:
- Exact test environment details
- Calibration procedures performed before testing
- Camera settings and lens used
- Any environmental variations during testing
Log Equipment Settings
Accurately logging your equipment settings is essential for ensuring that your tests can be reliably reproduced. Record details like sensor calibration, which affects image quality and consistency, along with exposure settings such as shutter speed, aperture, and ISO. These parameters directly influence sharpness and noise levels, so documenting them helps you understand variations in your results. Make sure to note any adjustments made to sensor calibration or exposure settings during testing, as these can impact the outcomes. Keeping precise records allows you to replicate successful configurations and troubleshoot issues effectively. Without detailed documentation, it becomes difficult to determine whether differences in sharpness or noise stem from test conditions or equipment variations, undermining the reliability of your analysis.
Document Testing Protocols
Properly documenting your testing protocols guarantees that others can precisely replicate your procedures and verify results. This includes recording details like sensor artifacts, lighting conditions, and specific color profiles used during testing. Without clear documentation, variations in these parameters can lead to inconsistent sharpness and noise measurements. To ensure reproducibility, consider these key points:
- Record camera settings, including ISO, shutter speed, and aperture
- Note the specific sensor artifacts observed and how they’re managed
- Document the color profiles applied during image capture and processing
- Keep track of calibration procedures for accurate noise and sharpness assessment
Ignoring the Context of the Final Use of Images

When evaluating sharpness and noise levels, it’s essential to take into account how the final images will be used. Understanding the context relevance helps you determine the appropriate balance between sharpness and noise reduction. For example, images intended for large prints require higher sharpness, while images for web use may tolerate more noise. The final image purpose guides your choices, ensuring you don’t over-sharpen or overly smooth noise if it compromises the overall quality. Ignoring this context can lead to mistakes, such as over-processed images that look unnatural or details lost in noise reduction. Always consider where and how your images will be viewed to set realistic expectations and achieve the best visual outcome.
Relying Entirely on the Calculator Without Human Judgment
Relying solely on a sharpness and noise calculator can lead to overlooked nuances that impact your image quality. While calculators provide valuable data, they lack human intuition and subjective judgment. You might miss subtle details or overcorrect, resulting in unnatural images. Remember, your eyes and experience are essential for fine-tuning adjustments.
Consider these points:
- Calculators can’t interpret artistic intent or final use
- Automated suggestions may ignore context-specific needs
- Overreliance can cause loss of natural texture
- Human judgment ensures balanced sharpness and noise levels
Tools are helpful, but they shouldn’t replace your expertise. Trust your instincts and review results critically. Combining calculator data with subjective judgment yields the best image quality, avoiding mechanical errors.
Frequently Asked Questions
How Can Different Lighting Conditions Affect Sharpness Versus Noise Measurements?
Lighting impact notably influences sharpness versus noise measurements because poor lighting can cause your camera to increase ISO, reducing sensor sensitivity. As a result, noise levels rise, making images appear grainy, while sharpness may suffer due to lower contrast and detail. In well-lit conditions, sensor sensitivity stays lower, producing clearer images with less noise. Always consider lighting to accurately assess your camera’s sharpness and noise performance.
What Role Does Lens Quality Play in the Accuracy of the Calculator?
Lens quality directly impacts the accuracy of the calculator because high-quality lenses produce sharper images with less distortion, giving you more reliable sharpness measurements. Additionally, sensor size interacts with lens quality; larger sensors capture more detail and work better with premium lenses. When you use top-tier lenses, your measurements reflect true image quality, reducing errors caused by optical flaws and ensuring your calculations of sharpness versus noise are spot-on.
How to Account for Post-Processing Effects in Noise and Sharpness Evaluation?
You should carefully evaluate post-processing effects by identifying artifacts introduced during editing, such as oversharpening or noise reduction. When using digital sharpening techniques, verify you don’t overdo it, as artifacts can falsely inflate sharpness measurements. Consider comparing before-and-after images to distinguish genuine detail from processing effects. Adjust your noise and sharpness assessments accordingly, accounting for these post-processing artifacts to get an accurate evaluation of your image quality.
Why Is Consistent Calibration Important Across Multiple Testing Sessions?
Did you know that inconsistent calibration can lead to 30% variation in testing results? You need calibration consistency across multiple testing sessions to guarantee reliable, comparable data. When your calibration stays steady, your testing reliability improves, reducing errors caused by equipment drift or environmental changes. This consistency helps you make accurate decisions and maintain confidence in your sharpness versus noise evaluations, ultimately ensuring your results remain trustworthy over time.
How Does the Intended Final Output Influence Optimal Noise and Sharpness Settings?
Your intended final output directly influences the ideal noise and sharpness settings because higher image resolution demands sharper details without excessive noise, while color accuracy requires balanced noise reduction to preserve hues. If you’re aiming for print, prioritize sharpness and fine detail; for digital display, focus on maintaining color fidelity and minimizing noise. Adjust settings based on your target output to achieve the best balance between clarity and visual quality.
Conclusion
Think of the sharpness vs noise calculator as a compass guiding your image journey. If you ignore calibration, source quality, or context, it’s like sailing without checking the stars—your course becomes lost. By understanding each factor and trusting your judgment, you navigate the complex seas of image quality with confidence. Remember, tools can guide, but your eye and experience are the true captains steering you toward clarity and precision.