
To improve your photos, avoid relying on Vivid Mode, which can oversaturate colors and distort realism. Instead, shoot in natural light, adjust your camera’s white balance, and use proper settings like low ISO for sharper images. When editing, do subtle adjustments that enhance true colors without overdoing saturation. For vibrant results, consider capturing scenes during golden hour or using post-processing techniques that preserve authenticity. Keep exploring to uncover even more tips for better, genuine photos.
Key Takeaways
- Use natural lighting and golden hour conditions to capture true-to-life colors without relying on vivid mode.
- Adjust your camera’s white balance and color calibration settings for accurate color reproduction.
- Choose standard or neutral shooting modes, avoiding oversaturated presets, to maintain realistic tones.
- Employ subtle post-processing edits, like fine-tuning color balance and contrast, instead of heavy saturation boosts.
- Use vivid mode selectively for scenes that benefit from bold colors, and prioritize natural tones for authenticity.

Yaber K300s Ultra Short Throw Projector, 4K Support Triple Laser Projector, 100" Image at 9", Dolby Vision, 150% NTSC, Google TV, 30W JBL Speaker, for Home Theater Gaming
[Ultra Short Throw & Space-Saving Design] Experience a 100-inch giant screen from just 9 inches away with the...
As an affiliate, we earn on qualifying purchases.
Why Vivid Mode Can Hurt Your Photos’ Quality

Vivid mode might seem like a quick way to make your photos pop, but it often does more harm than good. This mode boosts saturation and contrast, which can distort color accuracy, making images look unnatural. While it may seem appealing initially, it limits your control over how colors appear, reducing your ability to fine-tune your photos with editing techniques later. Over-reliance on vivid mode can lead to oversaturated images that are hard to correct, resulting in a loss of detail and realism. Instead of using this shortcut, focus on capturing accurate colors from the start. Proper adjustments during editing—like tweaking saturation and contrast—help maintain natural tones and give you more flexibility to improve your photos without sacrificing quality. Additionally, understanding color accuracy is essential for achieving a balanced and true-to-life image.

Hisense PL2, Ultra Short Throw Home Theater Laser Projector, 80” – 150”, 4K UHD, 2,700 Lumens, 3000:1 Contrast, Dolby Vision & Atmos, 3D, Google TV, WIFI 6E
【X-Fusion Technology】With X-Fusion laser light, Laser Cinema has a uniquely cinematic feel. X-Fusion Laser Technology utilises a precise...
As an affiliate, we earn on qualifying purchases.
When Should You Avoid Vivid Mode and Use Natural Colors

You should avoid Vivid Mode when colors look overly exaggerated or unnatural, especially if you want a realistic photo. In environments where accuracy matters, like nature or documentary photography, natural tones provide a truer representation. Using subdued colors guarantees your images remain authentic and respectful of sensitive settings. Additionally, color calibration and proper lighting are essential when adjusting your camera settings to prevent misrepresentation or distortion. Proper paint dilution and application techniques also impact the final appearance, ensuring colors stay true to life. Being mindful of color accuracy can help you achieve more precise and realistic results in your photography. Moreover, understanding how air quality factors influence color perception can help in capturing images that truly reflect the environment.
When Colors Look Overdone
When colors appear overly intense or unnatural, it’s a clear sign that using Vivid Mode isn’t the best choice. Excessive color saturation can make images look artificial, distracting from the actual scene. Overdone hues often undermine the image’s authenticity, especially when you want a true representation. Relying on Vivid Mode for image enhancement in these situations can backfire, making photos seem exaggerated or garish. Instead, switch to natural colors to maintain balance and realism. This approach preserves the subtle nuances and true tones, ensuring your photos look genuine. Recognizing when colors look overdone helps you decide when to avoid Vivid Mode and opt for a more restrained, authentic color palette. Your images will appear more appealing and true to life.
For Realistic Photography
Overly intense colors can detract from the authenticity of your photos, especially when capturing scenes that rely on true-to-life representation. When aiming for realism, avoid vivid mode and opt for natural colors to preserve the scene’s true essence. This approach enhances your color grading flexibility and makes the dynamic range more accurate. Use natural tones for landscapes, portraits, and everyday moments, ensuring colors stay true without oversaturation. Here’s how different scenes respond:
| Scene Type | Recommended Mode | Key Benefit |
|---|---|---|
| Portraits | Natural | Accurate skin tones |
| Landscapes | Natural | True color preservation |
| Indoor Shots | Natural | Realistic lighting |
| Action Scenes | Natural | Better dynamic range |
Choosing natural colors ensures your photos reflect reality, making editing more straightforward.
In Sensitive Environments
In sensitive environments such as wildlife reserves, cultural sites, or medical settings, using vivid mode can lead to exaggerated colors that misrepresent the scene or distract from its importance. Accurate color reproduction relies on proper sensor calibration, ensuring that what you capture reflects reality. Vivid mode often enhances saturation, which can distort subtle details crucial in these contexts. Additionally, understanding the importance of sensor calibration can significantly improve the fidelity of your images. This approach not only preserves authenticity but also helps maintain the scene’s integrity. When working in these environments, avoid reliance on automatic enhancements and focus on setting your camera to eliminate oversaturation. Employing color management techniques ensures that your images stay true to life and serve their intended purpose. Maintaining true-to-life tones ensures your images serve their purpose without misleading viewers or compromising the scene’s authenticity.

ViewSonic LS901-4K UHD 4K Laser Projector with 5500 Lumens, 1.7X Optical Zoom, 4K HDR/HLG Support, 4 Corner Adjustment, H/V Keystone, 360 Degrees Projection for Home Theater and Commercial Venues
4K Home Theater Laser Projector: UHD (3840x2160p) 4K resolution with a 1.2-2.0 throw ratio and 5,500 ANSI lumens,...
As an affiliate, we earn on qualifying purchases.
How to Adjust Camera Settings for True-to-Life Photos

To capture true-to-life photos, you need to fine-tune your camera settings carefully. Start by adjusting your camera’s color calibration to guarantee accurate color reproduction, reflecting what your eyes see. Use the correct white balance setting for the lighting conditions to avoid unnatural color casts. Improving your camera’s sensor can also enhance image quality—look for options to reduce noise and increase dynamic range. Set your ISO as low as possible to prevent grain, and select a balanced aperture and shutter speed to maintain sharpness and proper exposure. Avoid overly saturated modes; instead, rely on these adjustments to achieve natural results. Regularly calibrate your camera and update firmware to benefit from sensor improvements, ensuring your photos remain true to life. Additionally, understanding comogenic ratings can help you choose settings and products that won’t cause skin issues or unwanted shine in your photos. For better color accuracy, consider using color profiling tools that help match your camera’s output to real-world colors. Paying attention to lighting conditions also plays a crucial role in capturing vivid, true-to-life images. Incorporating proper exposure techniques can further enhance the authenticity of your photos. Recognizing the importance of sensor calibration can also contribute to maintaining consistent image quality over time.

Official Licensed Google TV Smart Projector, HAPPRUN 4K UHD Home Theater with Dolby Sound, Wi-Fi & Bluetooth, Built-in Streaming Apps, Compatible with Games Consoles & Smartphone, Indoor & Outdoor Use
[ Built-in Official Licensed Google TV ] - Without additional equipment, the smart projector can directly access Netflix,...
As an affiliate, we earn on qualifying purchases.
Tips for Post-Processing Photos Without Overdoing Saturation

While adjusting camera settings helps achieve accurate colors, post-processing offers another opportunity to refine your photos. To avoid overdoing saturation, focus on subtle tweaks. Start with proper color calibration to ensure your colors are true-to-life. Use adjustment layers to control vibrancy carefully, avoiding exaggerated hues. When sharpening images, apply image sharpening sparingly to enhance details without creating noise or unnatural edges. Keep an eye on your histogram to maintain natural contrast. Remember, less is more—aim for balanced saturation that complements the scene. Additionally, understanding template compatibility can help ensure your editing workflow remains efficient across different software platforms. Practicing proper color calibration can significantly improve your editing results and reduce the temptation to oversaturate. Trust your eyes, not just sliders, to gauge color accuracy. Use selective adjustments to highlight specific areas. Regularly compare your edited image to the original. Keep an eye on skin tones and natural hues. Incorporating body piercing references into your editing process can help you recognize natural skin variations and avoid unnatural color casts. Developing an awareness of natural skin tones can also improve the authenticity of your edits. Being mindful of subtle color shifts during editing can prevent oversaturation and keep your images looking natural. Preview your edits on different screens for consistency.
Creative Techniques for Vibrant, Authentic Photos

To achieve vibrant, authentic photos, start by embracing natural light, which brings true color and depth. Use your post-processing skills to fine-tune images without over-saturating, and experiment with color balance to highlight the mood you want. These techniques help you create lively photos that feel genuine and compelling. Incorporating lifestyle photography cameras that suit your skill level can also significantly improve your results and capture moments more vividly. Additionally, understanding how aromatherapy benefits can influence mood and atmosphere may inspire your creative approach to capturing authentic scenes. Furthermore, selecting the right DIY tools and safety tips for your photography setup can ensure safe and efficient shoots, especially when setting up equipment or creating DIY backdrops. Recognizing signs of a twin flame connection can also help you tap into genuine emotional energy, enhancing the authenticity in your photos.
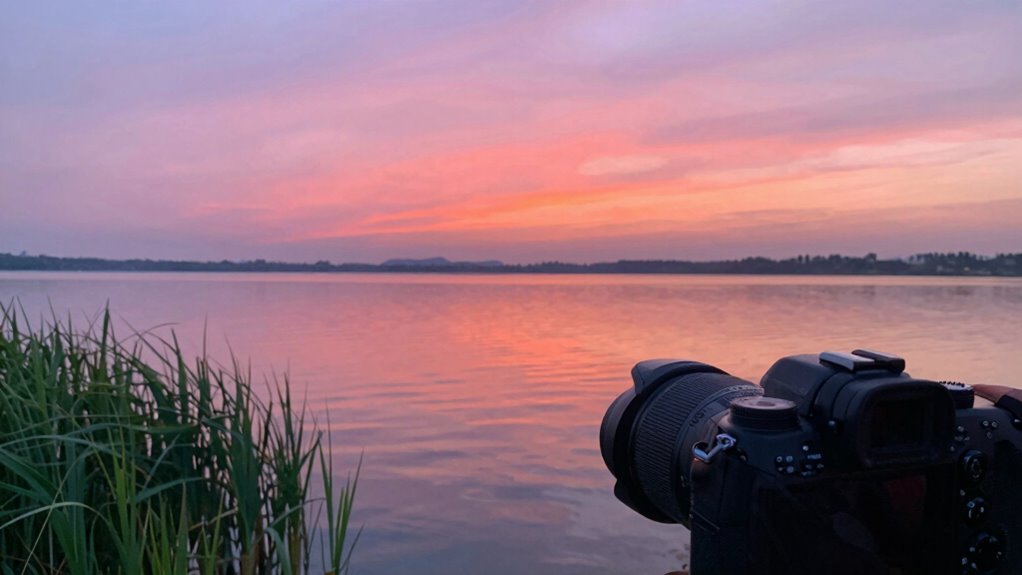
Embrace Natural Light
Natural light offers a beautiful and authentic way to elevate your photos without relying on artificial settings. By embracing natural light, you allow your images to capture real emotion and subtle nuances. Use soft, golden hours to enhance warmth, or shoot in diffused light to reduce harsh shadows. Incorporate film simulation for a nostalgic feel, and keep color grading minimal to preserve authenticity. When you work with natural light, your photos gain depth and vibrancy without overprocessing.
- Feel the warmth of sunlight on your skin and surroundings
- Capture genuine moments with soft, natural shadows
- Create mood and atmosphere through light and shade
- Enhance colors with subtle film simulation techniques
- Keep editing simple, emphasizing true-to-life tones
Use Post-Processing Skills
Mastering post-processing skills allows you to elevate your photos beyond basic captures, adding vibrancy and authenticity with creative techniques. With thoughtful color grading, you can enhance the mood and tone of your images, making them feel more alive and true to your vision. Photo filters offer a quick way to experiment with different looks, emphasizing certain colors or textures that might be subtle in the original shot. Instead of relying on vivid mode, use these tools to fine-tune your photos, preserving natural colors while boosting their impact. Focus on subtle adjustments to maintain authenticity, and avoid overprocessing. Developing your post-processing skills empowers you to craft images that are both vibrant and genuine, showcasing your unique style with precision and flair.
Experiment With Color Balance
Adjusting the color balance in your photos is a powerful way to create vibrant, authentic images that reflect your vision. Proper color calibration and accurate white balance guarantee your photos look natural and true to life. By experimenting with these settings, you can evoke deep emotions and highlight specific moods. Don’t be afraid to tweak the sliders to see how warm or cool tones impact your image’s feel. Fine-tuning white balance helps correct color casts and enhances overall vibrancy. When you get it right, your photos will resonate more with viewers, making them feel connected and engaged. Remember, subtle adjustments can make a big difference in capturing the authenticity and energy of your scene.
- Evoke warmth and nostalgia
- Enhance emotional depth
- Highlight specific colors or details
- Create mood and atmosphere
- Achieve true-to-life vibrancy
Lighting and Composition Tips for Better Color Accuracy

Lighting plays a crucial role in capturing true-to-life colors, so pay close attention to how your scene is illuminated. Good lighting ensures your camera’s sensor is recording accurate colors, reducing the need for heavy color grading later. Use natural light whenever possible, and avoid mixed light sources that can cause color casts. Position your subject to maximize even lighting and minimize shadows that distort colors. Proper sensor calibration also helps your camera interpret colors correctly, so regularly update your camera’s firmware and settings. When composing your shot, consider the angle and background to prevent color distortions caused by reflections or color spills. Clear, consistent lighting combined with thoughtful composition results in more accurate colors straight out of the camera, reducing reliance on post-processing.
Knowing When to Use Vivid Mode for the Best Results

Vivid mode can enhance your photos with bold, eye-catching colors, but it’s best used selectively rather than as a default setting. Knowing when to activate it depends on your scene and desired mood. Look for moments where color calibration is essential, like landscapes or lively events, to make images pop without overdoing saturation management. Use vivid mode sparingly to avoid unnatural tones, especially in portraits or subtle scenes.
Use vivid mode sparingly to enhance scenes with bold colors without risking unnatural tones.
Consider these cues:
- Capturing vibrant sunsets or nature scenes
- Highlighting dynamic urban environments
- Emphasizing colorful festivals or celebrations
- Creating bold, artistic effects intentionally
- Enhancing subjects that benefit from rich color intensity
Frequently Asked Questions
What Are the Alternatives to Using Vivid Mode?
Instead of vivid mode, you can use color profiles within your editing software to enhance images subtly. Choose profiles like sRGB or Adobe RGB for balanced tones, or experiment with custom profiles for specific looks. Editing software offers tools like curves and saturation adjustments, allowing you to control colors more precisely. This approach results in more natural, professional images without the oversaturation that vivid mode often causes.
How Does Vivid Mode Differ From Other Color Enhancement Settings?
Vivid mode emphasizes high color saturation, making colors pop more than other settings, but it can sometimes reduce image clarity. Unlike standard or natural modes, vivid boosts brightness and contrast, which may distort details. Other options, like cinema or standard modes, offer balanced color saturation and better image clarity. If you want vivid colors without sacrificing clarity, consider adjusting settings manually rather than relying solely on vivid mode.
Can I Achieve Vibrant Photos Without Using Vivid Mode?
You can achieve vibrant photos without vivid mode by focusing on proper color calibration and post-processing techniques. Imagine capturing a sunset scene with natural tones, then enhancing its richness in editing software by adjusting saturation and contrast. This approach gives you control and avoids oversaturation. By fine-tuning colors through calibration and edits, you create lively, realistic images that pop without relying solely on vivid mode’s automatic enhancements.
Does Vivid Mode Affect Battery Life or Camera Performance?
Vivid mode can impact your camera performance and battery life. It tends to increase battery drain because your device works harder to process enhanced colors and details. Additionally, using vivid mode may cause overheating, especially during extended shots or video recording. If you want to preserve battery and avoid overheating, consider switching to standard mode for more efficient use, while still capturing quality photos without the extra processing.
Are There Specific Scenes or Subjects Best Suited for Vivid Mode?
You’ll find vivid mode works best for outdoor scenes and landscape photography where bold colors enhance the image. It’s ideal for capturing vibrant sunsets, lush greenery, or colorful cityscapes. When photographing subjects with natural, rich hues, vivid mode makes details pop and colors more striking. Avoid it for portraits or scenes requiring subtle tones, as it can oversaturate and reduce the natural look of your photos.
Conclusion
Remember, restraint in vivid mode cultivates clearer, more engaging captures. By balancing brightness, boldness, and nuance, you can craft colors that truly pop without overpowering. When you resist the rush to ramp up saturation, your photos retain their real-world radiance and richness. So, stay subtle, set smart settings, and seize the scene’s true tones—transforming fleeting moments into flawless, fascinating photographs that faithfully reflect your vision.