When tackling HDR tone mapping, avoid one-size-fits-all methods and stay mindful of scene-specific needs. Overprocessing can strip natural details, so less often yields better results. You don’t need complex software—smart exposure blending and proper local adjustments can produce authentic images. Myth-busting these facts helps you manage tonal transitions smoothly and prevent artifacts. Keep exploring to gain effective strategies and create HDR photos that truly reflect the scene’s reality.
Key Takeaways
- Effective HDR tone mapping requires scene-specific exposure adjustments, not generic methods, to prevent unnatural results.
- Overprocessing HDR images can destroy natural details; subtle, balanced edits preserve realism.
- Proper exposure selection and careful blending are essential to achieve natural, seamless HDR images.
- Tone mapping alone cannot fix poor exposure choices or misaligned images; foundational techniques matter.
- Using simple, workflow-focused strategies and understanding limitations leads to more convincing HDR outcomes.
Debunking the “One-Size-Fits-All” Tone Mapping Technique
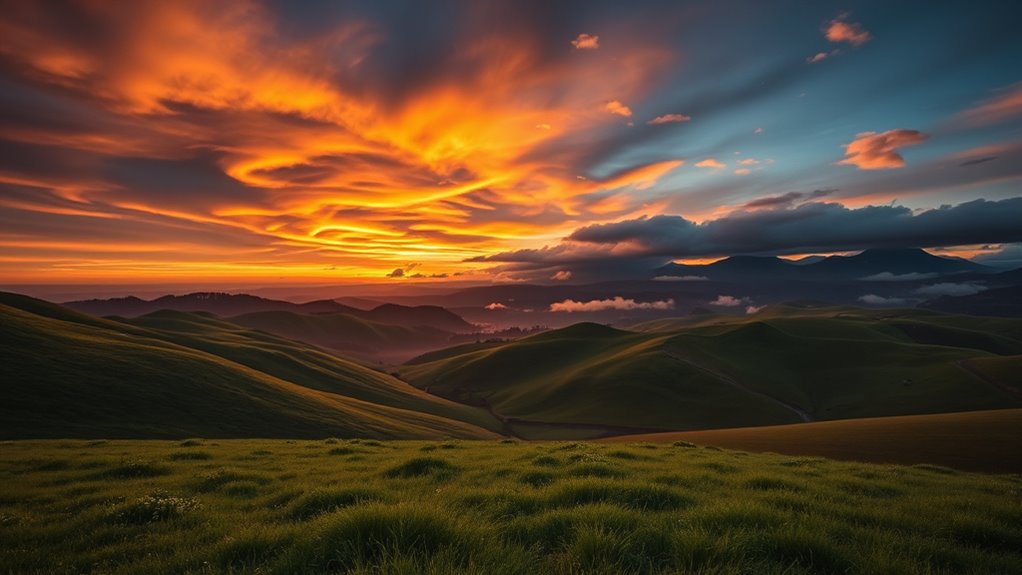
While a single tone mapping method might seem appealing for simplicity, it often falls short because every scene has unique lighting and contrast characteristics. You need adaptable exposure strategies to properly handle different scenes, ensuring details aren’t lost in shadows or highlights. You can improve color accuracy by adjusting your tone mapping approach according to scene-specific lighting, which helps prevent the unnatural, flat appearance that generic methods might produce. Relying on one-size-fits-all tone mapping can lead to unnatural results, making your footage look flat or overly processed. Instead, tailor your approach based on the scene’s lighting conditions. Proper color grading complements this by enhancing contrast and color accuracy without overdoing it. By customizing your tone mapping and exposure strategies, you preserve the scene’s integrity, creating a more natural and visually appealing image. This nuanced approach helps you achieve professional-quality HDR footage, avoiding the pitfalls of generic solutions. Additionally, understanding lighting and contrast is essential for effective HDR tone mapping, as it allows you to adapt your techniques to the specific scene, ensuring optimal results. Incorporating scene-specific adjustments can further improve the final output by matching the tone mapping to the unique visual context. Moreover, considering the aesthetic style you aim to achieve can guide your adjustments and ensure your footage aligns with your creative vision. Recognizing the potential for mechanical failures in your equipment can also help you troubleshoot issues that might affect your HDR process.
The Truth About Overprocessing: When Less Is More

Overprocessing your HDR footage can do more harm than good, often stripping away natural details and making images look artificial. When you push your edits too far, you risk losing the subtle nuances that give your scene realism. Instead, focus on subtle adjustments that enhance the image without overwhelming it. This delicate balance is essential for preserving the scene’s authenticity. Proper tone mapping ensures that highlights and shadows are blended smoothly, avoiding harsh *changeovers*. Overprocessing can create an overly stylized look that distracts rather than impresses. Remember, the goal is to enhance, not transform completely. By applying restraint, you maintain the integrity of your scene and produce more believable, visually appealing results. Additionally, understanding the headphone jacks and connectivity options can help you better review your footage with accurate sound. Recognizing the importance of data-driven strategies can guide you toward more consistent and effective editing techniques. Detecting passive voice can help you identify areas where your writing may unintentionally weaken your message. Incorporating proper tone mapping techniques ensures your images retain their natural appeal and avoid overprocessed artifacts.
Myth: HDR Always Requires Complex Software

Many believe that creating stunning HDR images demands expensive, complex software, but that’s a misconception. You can achieve excellent results with simple tools that emphasize software simplification and workflow efficiency. You don’t need elaborate programs to get started; many user-friendly options are available. Additionally, understanding best practices for tone mapping can significantly improve your results without adding complexity. Using workflow strategies helps streamline the process and reduce the learning curve. These approaches help you focus on capturing the shot rather than wrestling with complex software. Simplifying your tools allows you to work faster and more confidently, making HDR photography accessible without sacrificing quality. Incorporating holistic SEO principles into your workflow can further enhance your creative process and output. Remember, effective HDR isn’t about complexity—it’s about smart, efficient techniques.
Separating Fact From Fiction: the Role of Local vs. Global Tone Mapping

Understanding the difference between local and global tone mapping is essential for achieving the desired HDR effect. Global tone mapping applies adjustments uniformly across the entire image, ensuring global consistency and preserving overall contrast. It’s straightforward and works well for scenes with balanced lighting. On the other hand, local adjustment targets specific areas, enhancing details in shadows and highlights without affecting the whole image. This approach allows for more nuanced control, especially in scenes with high contrast or complex lighting. Recognizing when to use local versus global techniques helps you avoid over-processing and maintains natural-looking results. Additionally, understanding the balanced approach between these methods helps optimize image quality without sacrificing realism. Employing both methods thoughtfully can also reduce artifacts, leading to cleaner and more visually appealing HDR images. Incorporating adaptive algorithms can further refine the process by dynamically adjusting tone mapping based on scene content. Exploring the impact of scene complexity can guide you in choosing the most effective technique for varied lighting conditions. Moreover, understanding how human visual perception interacts with tone-mapped images can help you fine-tune your adjustments for more realistic results. Ultimately, balancing these methods ensures your HDR images look realistic while highlighting the details you want to emphasize.
Common Misconceptions About Dynamic Range and Exposure Blending

One common misconception about dynamic range and exposure blending is that combining multiple exposures automatically results in a perfect, high-contrast image. In reality, improper merging can introduce exposure artifacts and cause tonal compression, reducing image quality. To avoid these issues, you need to understand that:
- Over-merging can lead to unnatural tonal shifts and loss of detail.
- Misaligned exposures may create ghosting or halos.
- Rushing blending processes increases the risk of exposing exposure artifacts.
- Proper grounding in professional camper conversion services ensures that the blending of different tonal ranges maintains structural integrity and visual appeal.
- Additionally, selecting appropriate exposure ranges is essential for balancing highlights and shadows effectively during the HDR process.
- Understanding tonal management techniques helps in maintaining natural transitions and prevents unnatural artifacts during blending.
- Recognizing the importance of image alignment techniques is crucial to avoid misregistration issues that can degrade image quality.
Achieving a natural, balanced image requires careful selection of exposures and precise blending techniques. Remember, blending isn’t a cure-all; it’s about managing tonal transitions to prevent tonal compression and exposure artifacts, resulting in a seamless HDR image that truly reflects the scene.
Frequently Asked Questions
How Do I Choose the Best HDR Tone Mapping Method for My Scene?
To select the best HDR tone mapping method for your scene, consider the dynamic range you want to maintain and the tonal balance you aim for. Experiment with different algorithms, like global or local tone mapping, to see which preserves details in shadows and highlights. Adjust settings based on your scene’s lighting conditions, and preview results to guarantee a natural look. Ultimately, choose the method that best enhances your image’s clarity and depth.
Can Simple Tools Achieve Professional HDR Tone Mapping Results?
You can absolutely achieve professional HDR tone mapping results with simple tools—think of them as your secret weapon for stunning image enhancement. While software limitations exist, many user-friendly programs now deliver impressive tone mapping quality without complex setups. Don’t underestimate the power of straightforward tools; they can produce images that rival those made with high-end software, making your scenes burst with vibrant detail and dynamic range effortlessly.
What Are the Signs of Overprocessing in HDR Images?
You’ll notice overprocessing in HDR images through color artifacts and unnatural halos around objects. These signs indicate excessive adjustments, causing colors to appear oversaturated or bizarre. Halos can create a glowing outline, making the image look unnatural. If you see these issues, dial back your tone mapping or adjust your sliders more subtly. Striking a balance guarantees your HDR images look natural and professional without unwanted artifacts.
When Should I Prefer Local Over Global Tone Mapping?
Think of your HDR image as a symphony, where sometimes you need a soloist to shine. You should prefer local tone mapping when your scene has high contrast with varied lighting, requiring local adaptation. This approach maintains details in shadows and highlights, ensuring global consistency across the image. Use local tone mapping to bring out nuanced textures and avoid over-compressing bright or dark areas, creating a more natural, balanced result.
How Does Exposure Blending Differ From Traditional HDR Tone Mapping?
Exposure blending combines multiple exposures into a single image, allowing you to select the best parts from each shot, unlike traditional tone mapping techniques that compress high dynamic range into a single image. With exposure blending, you retain more natural details and avoid some of the artifacts often seen in tone mapping. It’s a more manual, precise process, giving you control to achieve realistic results without sacrificing image quality.
Conclusion
Remember, there’s no one-size-fits-all approach to HDR tone mapping—you’ll need to tailor techniques to each scene. Overprocessing can detract from authenticity, so sometimes less truly is more. Contrary to popular belief, you don’t always need complex software; simple tools can deliver stunning results. Did you know that studies show only 30% of photographers use local tone mapping techniques? Embrace the facts, dispel myths, and refine your HDR workflow to create images that truly stand out.