Connect with us

Home Cinema

Troubleshooting Focus Issues in Projectors: Causes and Solutions

Proven strategies to tackle projector focus issues await, but could a simple adjustment unlock the clarity you crave?

Published

on

projector focus troubleshooting guide

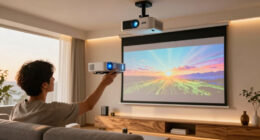
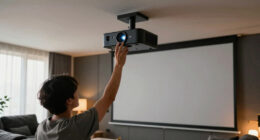
If you're facing focus issues with your projector, start by adjusting the focus dial. Check the projector's distance from the screen; being too far or too close can cause blurriness. Regularly clean the lens to eliminate dust and smudges that affect clarity. Ascertain your screen quality is high, and control ambient light for better contrast. Adjust resolution settings to match your projector's native resolution. If the issue persists despite these efforts, it may signal deeper problems needing professional help. Keep exploring to discover more effective troubleshooting techniques and maintenance tips to enhance your projector's performance.

Key Takeaways

  • Adjust the focus dial and verify lens alignment to correct initial blurriness.
  • Ensure the projector is at the proper distance from the screen to maintain focus.
  • Clean the projector lens regularly to eliminate dust and smudges affecting clarity.
  • Manage ambient light and use a high-quality screen for improved image visibility.

Common Causes of Blurriness

vision problems and distractions

Have you ever noticed blurriness in your projector images? This frustrating issue often stems from several common causes.

First, incorrect focus settings can lead to poor clarity. Make sure you adjust the focus wheel or digital controls to achieve a sharp image.

Additionally, the distance between your projector and the screen plays a vital role; if it's too far or too close, you might experience blurriness.

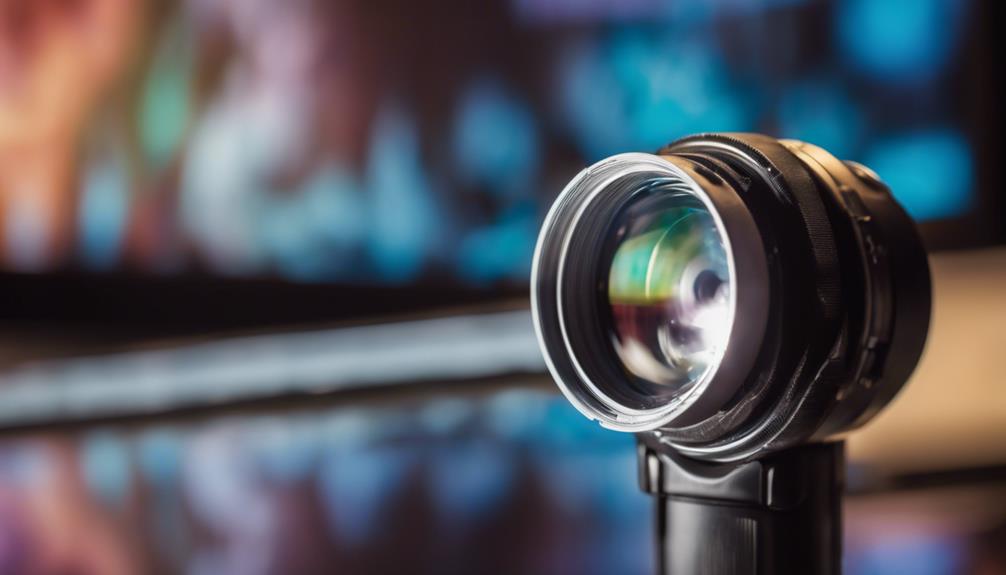
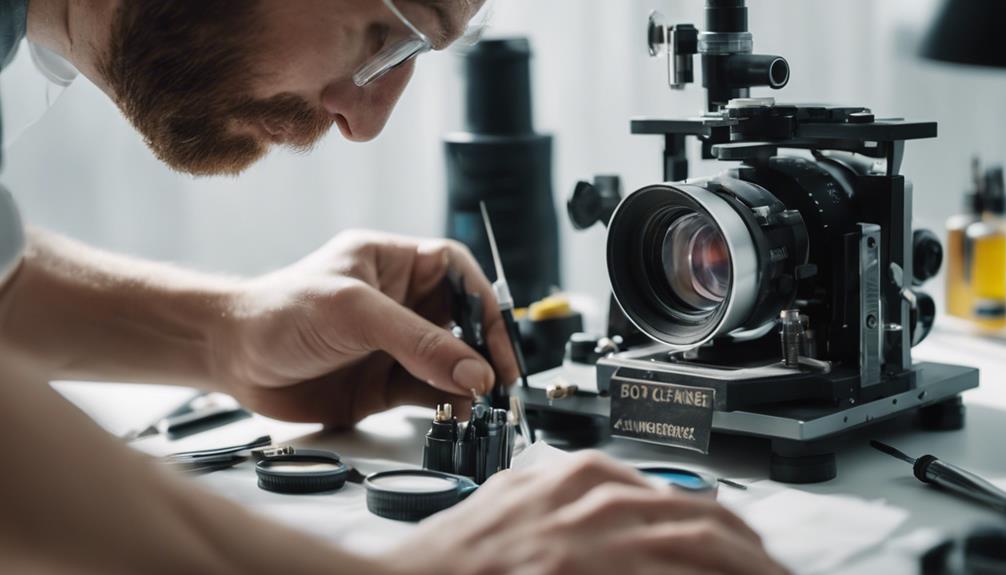
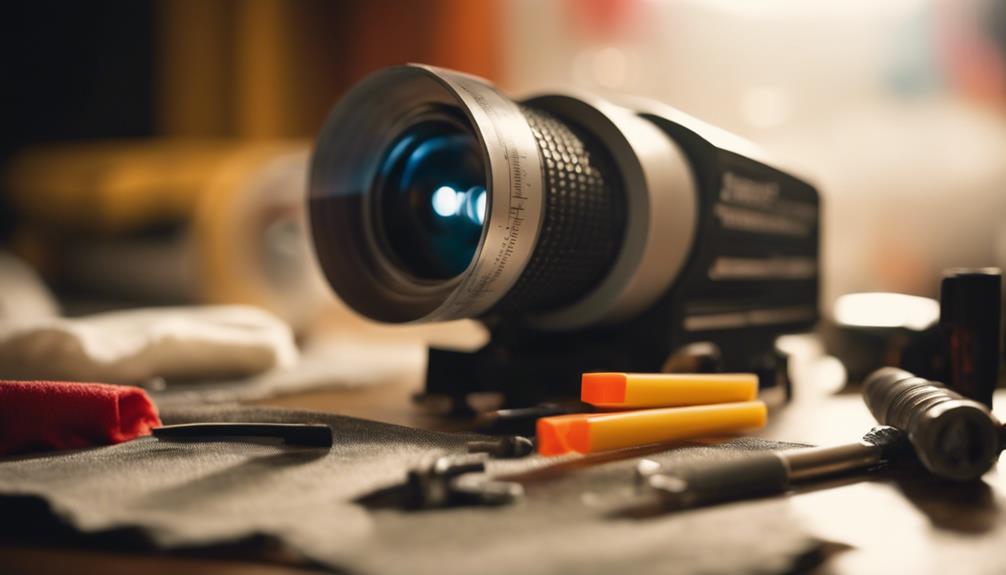
Another factor is the condition of your projector lens. Dust and fingerprints can obscure the image, so regularly clean the lens with a microfiber cloth.

Environmental elements also impact focus; excessive ambient light can wash out colors, while the quality of your screen surface can affect sharpness.

Advertisement

Lastly, be cautious with keystone correction. Overuse can distort edges, contributing to an overall blurry appearance. Instead, position your projector correctly to minimize the need for such digital adjustments.

Adjusting Resolution Settings

modifying display resolution options

Adjusting the resolution settings on your source device is vital for achieving the best image quality from your projector. To start, make sure the resolution on your computer matches the projector's native resolution, which is typically 1024 x 768 for most projectors. Mismatched resolutions can lead to blurry images, so it's important to check this first.

You can access the screen resolution settings by right-clicking on your desktop and selecting "Display settings." If you're using a high-resolution projector, like the Cosmos Max 4K UHD, verify that your source device is set to a compatible input resolution to reveal peak image quality.

Don't hesitate to experiment with different resolution settings on your source device. This can help you find the best configuration that works well with both the projector and the content you're displaying.

Additionally, regularly checking and adjusting these resolution settings can prevent issues related to image shape and size, guaranteeing your projected content fits the screen perfectly. By taking these steps, you can enhance your viewing experience and enjoy clearer, sharper images.

Importance of Proper Focus

significance of maintaining focus

Achieving proper focus is imperative for delivering clear, sharp images that enhance your viewing experience. When the focus isn't set right, you'll notice significant blurriness that detracts from even the best content. Regularly adjusting the focus wheel or using remote control features can help maintain ideal clarity, especially after repositioning the projector.

It's critical to verify your projector lens is aligned correctly, as misalignment can lead to uneven focus across the screen. During your projector troubleshooting, check for any optical issues and correct the positioning if necessary. Relying too much on digital keystone correction can distort your images, so prioritize proper placement to enhance focus quality.

Advertisement

Another essential aspect is keeping the lens clean. Dust and smudges can severely impact image clarity and hinder effective focus adjustments. Make it a habit to regularly inspect and clean the lens to guarantee the best possible viewing experience.

Screen and Environmental Considerations

sustainability in screen design

When you're setting up your projector, don't overlook the screen and the environment around it. A smooth, high-quality screen and managing ambient light can dramatically enhance image clarity and focus.

The type of screen you choose, whether fixed or retractable, plays a significant role in optimizing your viewing experience.

Additionally, using a projector maintenance tips approach to guarantee proper ventilation and cleanliness will further set the stage for a crisp and clear viewing experience.

Screen Surface Quality

The quality of your screen's surface plays an essential role in guaranteeing clear and vibrant images, as any wrinkles or imperfections can distort the projection considerably. A smooth, taut surface is vital for ideal screen surface quality; even minor flaws can compromise the overall projected image.

When using portable screens, make certain to fully extend and properly tension them to avoid sagging, which can lead to uneven image projection and focus issues.

Advertisement

Regularly inspect your screen for dust, damage, or imperfections. These can interfere with light reflection, resulting in a less clear image.

Additionally, verify that your projector is aligned correctly with the screen. Misalignment may cause trapezoidal distortion, making it difficult to achieve a sharp focus across the entire projected image.

Ambient Light Management

Managing ambient light effectively can drastically improve your projector's image quality by enhancing contrast and visibility. Proper control of lighting conditions is essential, as ambient light can considerably diminish clarity. Here are three key strategies to manage ambient light and enhance your viewing experience:

  1. Use Blackout Curtains: Install blackout curtains to block outside light sources, creating a darker environment for your projector screen. This helps improve contrast and overall image quality.
  2. Choose the Right Screen: Opt for a matte or high-gain projector screen. Matte screens reduce reflections, while high-gain surfaces reflect more light towards the audience, making images appear brighter in well-lit spaces.
  3. Maximize Screen Positioning: Position your projector screen at an ideal angle to minimize light spill. Confirm the projector is at an adequate distance from the screen to avoid distortion caused by excessive ambient light interference.

Maintenance Best Practices

effective maintenance strategies implemented

To keep your projector performing at its best, regularly clean the lens and check the air filters for dust buildup. This is one of the essential maintenance best practices you should follow.

Use a soft, lint-free microfiber cloth to wipe the lens, ensuring you remove any dust or smudges that could affect image clarity.

Don't forget to inspect the air filters and replace them as needed. Clogged filters can lead to overheating, which jeopardizes performance and shortens your projector's lifespan.

Advertisement

To further enhance performance, store your projector in a dust-free environment. This minimizes debris accumulation, allowing for ideal functioning.

Keeping the projector's firmware updated is also important; updates often include performance improvements and bug fixes that can enhance overall operation.

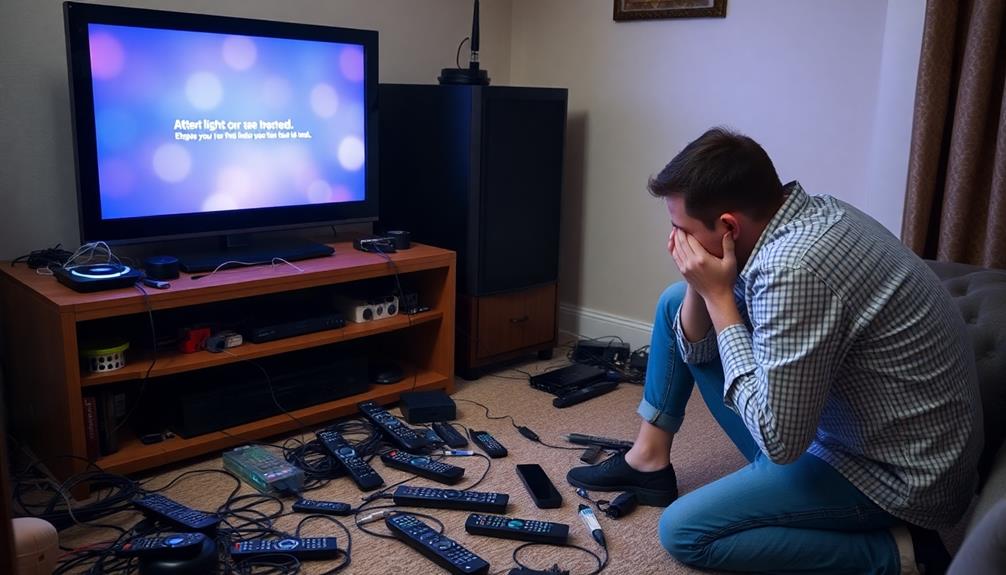
Troubleshooting Steps to Take

follow these troubleshooting steps

When you're facing focus issues with your projector, it's important to understand the common problems that could be at play.

You can take several adjustment techniques to tackle these issues effectively.

Let's explore the steps you can follow to improve your projector's focus quickly.

Common Focus Problems

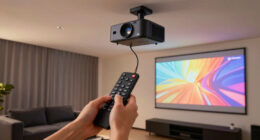
Adjusting the focus dial on your projector's lens is often the first step to resolving blurry images and achieving a sharp, clear projection. If you're still experiencing focus issues after making adjustments, consider these common problems:

Advertisement
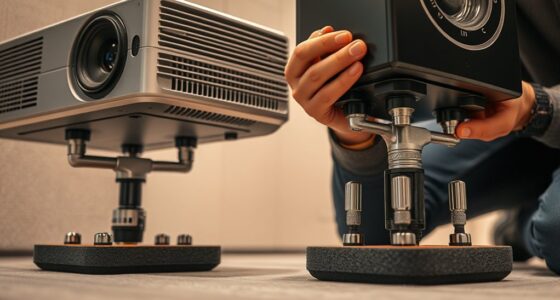
  1. Distance from Screen: Verify your projector is at the correct distance from the screen. Too much distance can lead to blurry images, especially in models that require precise placement for ideal focus.
  2. Lens Cleanliness: Regularly clean your projector lens with a microfiber cloth. Dust and smudges can greatly impact your focus quality, causing the projected image to appear blurry.
  3. Environmental Factors: Check the projection environment. Ambient light and irregularities on the screen surface can affect focus. Confirm you're projecting in a darkened room with a smooth surface for the best results.

Adjustment Techniques

Utilize the focus ring on your projector's lens for immediate adjustments, ensuring that the image sharpens with each small turn. This basic adjustment technique is essential for achieving the best focus quality. After making adjustments, always perform regular focus checks, especially if you've moved the projector.

Next, explore your projector's menu to enable sharpness enhancement features. Experiment with different projection modes, like cinema or presentation, to find the one that delivers ideal clarity for your content. Be mindful of keystone correction settings; excessive digital adjustments can distort images, so physically repositioning the projector may help minimize the need for these changes.

Verify that your projector is placed at the correct distance from the screen. Improper placement can lead to uneven focus across the image, which is frustrating to fix.

When to Seek Professional Help

know when to seek help

Persistent focus issues that don't improve with basic adjustments often signal it's time to seek professional help. If you've tried everything from adjusting the focus settings to recalibrating your projector's position and still face blurriness, it's wise to consult an expert.

Here are three key indicators that you should reach out for professional assistance:

  1. Unresolved Blurriness: If the image remains consistently blurry despite your efforts, there could be underlying hardware issues.
  2. Signs of Hardware Malfunction: Unusual noises, overheating, or any other strange behaviors can indicate serious problems that require a technician's expertise.
  3. Warranty Considerations: If your projector is still under warranty, contact the manufacturer or an authorized service center for inspection and repair options.

Don't forget to document all troubleshooting steps you've taken and any symptoms you've observed. This information will help the technician diagnose the issue more effectively.

Frequently Asked Questions

Why Is My Projector Not Focusing?

Your projector might not be focusing due to lens misalignment, dust on the lens, or incorrect positioning. Try cleaning the lens, adjusting the focus wheel, or repositioning the projector for clearer images.

How Can I Improve My Projector Focus?

To improve your projector's focus, regularly clean the lens, adjust the focus wheel, guarantee proper alignment with the screen, match resolutions, and test various surfaces. These steps will considerably enhance your viewing experience.

Advertisement

Why Is My Projector Out of Focus on One Side?

Your projector might be experiencing a slight optical misalignment, causing one side to appear less sharp. It's often due to placement or lens tilt. Consider adjusting its position or consulting a professional for assistance.

How Do You Troubleshoot a Projector Problem?

To troubleshoot a projector problem, check the power supply and connections, adjust settings like resolution, inspect the lens for dirt, and restart the devices. You'll often resolve issues with these straightforward steps.

Conclusion

In the world of projectors, achieving that crisp, clear image is like painting a masterpiece; every detail counts.

By understanding the common causes of blurriness and adjusting your settings, you can transform your viewing experience.

Remember, a well-maintained projector is like a finely tuned instrument, ready to deliver vibrant visuals.

Advertisement

If you've tried everything and the image still feels hazy, don't hesitate to reach out for professional help—sometimes, a fresh pair of eyes can work wonders.

Hello, I'm Art, and I'm excited to be a part of the 1Home Theatre Projector team. As a writer, I'm here to contribute my knowledge and insights to help you achieve the ultimate home cinema experience. I understand that making decisions in the world of home entertainment can be complex, and I'm here to simplify the process for you.

Continue Reading
Advertisement

Home Cinema

The Impact of Ambient Light on Projector Performance: Solutions and Tips

Prepare to transform your projector experience as we explore how ambient light affects performance and discover effective solutions to enhance your viewing pleasure.

Published

on

ambient light projector optimization tips

Ambient light can really impact your projector's performance by washing out colors and reducing clarity. If you're projecting in brighter settings, consider using ambient light rejecting screens to enhance contrast and color accuracy. Light-colored walls and surfaces reflect more light, so darkening your room with blackout curtains can help. It's also useful to regularly calibrate your projector to adapt to changing light conditions. Positioning your projector strategically can minimize glare and improve image quality. By implementing these tips, you'll elevate your viewing experience, and there's even more to discover about optimizing your setup.

Key Takeaways

  • Ambient light significantly affects projector image quality, washing out colors and reducing contrast, especially in bright environments.
  • Using ambient light rejecting (ALR) screens enhances contrast and color accuracy, improving image clarity in daylight conditions.
  • Implementing blackout curtains or shades minimizes excess ambient light, creating an ideal environment for projections.
  • Regularly calibrating projectors ensures optimal performance, adapting to varying ambient light levels throughout the day.
  • Strategic projector positioning helps reduce glare and reflections, enhancing overall image quality and viewing experience.

Understanding Ambient Light

exploring ambient light dynamics

When you think about watching a movie or giving a presentation, ambient light plays an essential role in how well you can see the projected images. Ambient light, whether from natural sources like sunlight or artificial sources such as lamps, can greatly affect the visibility of projected images. It alters the intensity and color perception, impacting the contrast and overall image quality.

If your space has light-colored walls or surfaces, you might notice that ambient light reflects off these surfaces, washing out colors and reducing clarity. This can lead to frustrating viewing experiences, especially when you can't fully control the lighting conditions.

Standard white screens tend to scatter light indiscriminately, worsening the problem.

To combat these challenges, consider using ambient light rejecting (ALR) screens. These light rejecting screens help enhance projector performance by improving black levels and reducing the impact of ambient light.

This can greatly enhance your viewing experience and lessen eye strain, allowing you to enjoy clear, vibrant projected images. By understanding the effects of ambient light, you can make informed choices to optimize your projector setup.

Advertisement

Effects of Ambient Light on Projectors

ambient light impact projectors

During daylight hours, ambient light can greatly impact projector performance, often washing out images and dulling colors. This results in reduced contrast and color accuracy, which can lead to a disappointing viewing experience.

As the intensity and color of ambient light fluctuate throughout the day, it's essential to assess these conditions before projecting content. Some projectors are better equipped to handle bright environments, so selecting a model tailored for higher brightness can help combat ambient light effectively.

Moreover, light-colored walls and surfaces can exacerbate the issue by reflecting excess light onto the projection surface, diminishing image quality. To improve image clarity, consider using light-rejecting projector screens designed to minimize the effects of ambient light. These screens can enhance contrast and color accuracy, providing a more vibrant viewing experience.

Implementing simple measures, like using shades or curtains, can greatly help maintain ideal ambient light levels for projection. By controlling light sources entering your space, you can create a more conducive environment for your projector, ensuring you get the best performance possible.

Strategies for Optimizing Performance

performance optimization strategies guide

To achieve ideal projector performance, you must assess and adjust various factors affecting your viewing environment. Here are some strategies to enhance your setup:

  1. Evaluate Ambient Light Levels: Before you project, check the ambient light in your room. Adjust projector settings such as brightness and contrast to guarantee peak image clarity and vibrancy.
  2. Implement Room Adjustments: Use blackout curtains or shades to control light entry. This reduces excessive ambient light, allowing for a more immersive viewing experience.
  3. Utilize an Ambient Light Rejecting Screen: Investing in a high-quality ALR screen can greatly enhance contrast and clarity, making it easier to enjoy your projector's performance in uncontrolled lighting conditions.
  4. Minimize Glare and Reflections: Position your projector away from direct light sources. This will help reduce glare and reflections, thereby improving overall image quality.

Additionally, remember to regularly calibrate your projector. This guarantees consistent performance and adaptation to varying ambient light conditions, ultimately enhancing your viewing experience.

Techniques to Enhance Image Quality

image quality enhancement techniques

Several techniques can greatly enhance your projector's image quality, guaranteeing an enchanting viewing experience.

Start by investing in an ambient light rejecting (ALR) screen. This type of screen selectively reflects the projected image while absorbing surrounding ambient light, which helps maintain contrast and color accuracy even in bright environments.

Next, regularly calibrate your projector settings to optimize performance based on current ambient light levels. Adjusting brightness, contrast, and color will considerably improve the image.

Advertisement

Consider room modifications, like installing blackout curtains or shades, to combat ambient light and enhance the overall viewing experience.

Position your projector strategically, keeping it away from direct light sources to reduce glare. This will improve image clarity and guarantee a better viewing angle.

Lastly, opt for high-quality, darker surfaces or specially formulated screen paints that absorb ambient light and reduce reflections.

These choices further enhance your projector's image quality in brightly lit settings. With these techniques, you'll create an optimized environment that allows your projector to shine, providing vibrant visuals that captivate your audience.

Future Trends in Projector Technology

advancements in projector technology

As projector technology evolves, you'll notice several exciting trends shaping the future of visual displays. These innovations aim to enhance your viewing experience, even in challenging ambient light conditions.

Here are four key trends to keep an eye on:

Advertisement
  1. Smart Projectors: With AI technology, these devices automatically adjust brightness and improved contrast based on your environment, ensuring peak image quality. This is particularly beneficial for top gaming projectors that require accurate color and detail in varied lighting.
  2. Ambient Light Rejecting Screen Materials: Recent advancements in these materials greatly enhance light absorption and reflection, allowing projectors to deliver clear images in brightly lit rooms.
  3. Increased Brightness Capabilities: New projectors are being designed to perform exceptionally well in high ambient light settings, making them perfect for both home theater and outdoor cinema experiences.
  4. Compact and Sustainable Projectors: The rise of portable projectors caters to users who want flexibility without sacrificing performance. Plus, eco-friendly designs focus on lower power consumption and longer lifespans, aligning with sustainable technology trends.

Embracing these trends not only improves your viewing experience but also adapts to the ever-changing environment, making projectors more versatile than ever.

Frequently Asked Questions

How Can I Improve My Projector Light?

To improve your projector light, adjust brightness and contrast settings, use an ambient light-rejecting screen, and control room lighting with blackout curtains. Regular calibration also helps maintain clarity and vibrancy in various lighting conditions.

How Can I Make My Projector Better in Daylight?

To make your projector better in daylight, try adjusting brightness settings, using an Ambient Light Rejecting screen, and positioning it away from sunlight. Blackout curtains can also help create a darker viewing environment for improved images.

How Can I Improve My Projector Image in Daylight?

To improve your projector image in daylight, try using an ambient light-rejecting screen, position your projector correctly, adjust your room with blackout curtains, and choose a brighter model with at least 3,000 lumens.

What Is the Difference Between Ambient Light Rejecting Screen and Projector Screen?

You've got to experience the magic of an Ambient Light Rejecting (ALR) screen! Unlike standard screens that wash out images, ALR screens enhance clarity and vibrancy in bright rooms, making every detail pop like never before.

Conclusion

To sum up, managing ambient light can greatly safeguard your projector's performance. By implementing innovative strategies and savvy techniques, you can successfully enhance image quality and enjoy stunning visuals. As technology continues to evolve, staying savvy about future trends will keep your setup shining brightly. So, embrace these tips, illuminate your viewing experience, and transform ordinary moments into extraordinary memories with vibrant, vivid images that captivate and charm your audience.

Advertisement
Continue Reading

Home Cinema

Projector Calibration 101: Achieving the Perfect Picture

Achieve stunning picture quality with essential projector calibration techniques—discover how to elevate your viewing experience and unlock your projector’s full potential!

Published

on

perfect picture projector calibration

Calibrating your projector is essential for achieving stunning picture quality. Start by setting up your projector properly and considering ambient light, as darker rooms enhance contrast. Use calibration tools like discs or software to adjust brightness and color settings. Regular recalibration every six months helps maintain image fidelity. Don't forget to optimize projector distance and apply keystone correction to avoid distortion. If you encounter challenges, like excessive brightness or color inaccuracies, dedicated tools can assist you. By mastering these techniques, you can elevate your viewing experience—stick around to discover even more strategies for perfecting your setup!

Key Takeaways

  • Proper calibration improves color accuracy, brightness, and contrast, enhancing overall image quality and preventing distortion.
  • Utilize calibration tools like colorimeters and calibration discs for precise adjustments and optimal viewing experiences.
  • Regular maintenance and recalibration every six months ensure sustained image fidelity and projector performance.
  • Ambient lighting conditions significantly affect calibration; dark rooms are ideal for achieving accurate color perception.
  • Implement keystone correction to maintain image alignment and avoid distortion for a clear and sharp picture.

Understanding Calibration Importance

significance of calibration awareness

When it comes to achieving the best possible viewing experience, understanding the importance of calibration is vital. Calibration is a systematic process that fine-tunes your projector's settings to match the original source's colors, brightness, and contrast. This guarantees visual fidelity across various content types, enhancing image quality and preventing color distortion and blurriness.

For instance, achieving ideal color accuracy in home cinema projectors can greatly elevate your viewing experience.

Regular calibration is important for extending your projector's lifespan. By refining settings, you can reduce wear and tear on components while improving overall performance. Adjusting brightness and contrast according to room conditions and your personal viewing preferences allows for a tailored experience that maximizes your projector's capabilities beyond factory settings.

While you can make some adjustments yourself, professional calibration is often recommended, especially for high-end setups. This expert service can greatly improve picture accuracy, contrast, and texture compared to standard factory settings.

Ultimately, understanding calibration importance empowers you to create an ideal viewing environment, transforming your projector into a powerful tool for entertainment. So, don't overlook the calibration process; it's essential for enjoying the best image quality and getting the most out of your projector.

Advertisement

Tools for Effective Calibration

calibration tool optimization techniques

To achieve an accurate calibration, you'll need the right tools at your disposal. Start with calibration tools like software applications that guide you through adjusting your projector settings, including built-in test patterns for fine-tuning. A colorimeter is essential for measuring color accuracy, ensuring your projector output aligns with visual standards.

Additionally, consider how proper air filtration, similar to HEPA filtration effectiveness, can improve your viewing environment by reducing dust and allergens that may interfere with your projector's performance.

Don't forget about calibration discs or videos, such as the Spears & Munsil High Definition Benchmark, which help you manually adjust brightness settings, contrast, and color temperature for the best picture quality.

Using computer calibration software can provide real-time feedback, allowing you to make immediate adjustments based on measured data.

Calibration Process Steps

calibration procedure detailed steps

The calibration process starts with ensuring your projector is set up correctly. Position it at the right distance from the screen and make sure it's level to avoid distortion, which greatly impacts image quality.

Additionally, consider the environment where you're calibrating; ambient light can affect how colors are perceived, so it might be helpful to select the right cold medication for your needs during this process.

Once that's sorted, follow these steps for effective calibration:

Advertisement
  • Use a calibration disc: This helps you access built-in test patterns for adjusting brightness and contrast, ensuring both bright and dark areas look their best.
  • Fine-tune focus and sharpness: Check clarity with high-contrast images to avoid any blurriness, ensuring a crisp picture.
  • Adjust color settings: Access the color calibration options to fine-tune color temperature and saturation, focusing on achieving natural hues, especially for skin tones.
  • Check aspect ratio: Make sure the aspect ratio matches your content for ideal performance and no image distortion.
  • Regular maintenance: Recalibrate every six months or after any notable changes to your projector setup to maintain image fidelity over time.

Optimizing Picture Quality

enhancing image clarity techniques

Achieving ideal picture quality involves more than just calibration; it requires attention to detail in your projector setup and environment. To attain the best image quality, start by positioning the projector at the correct distance from the screen, based on its throw ratio. This prevents image distortion and maintains clarity.

Next, consider the ambient lighting in your space. A dark room enhances contrast and overall image quality, providing the best viewing experience. Regularly adjust the brightness settings to avoid washed-out images, aiming for a balance that allows for deep blacks and vivid colors.

Utilizing high-quality projection screens or smooth white walls can greatly improve the reflection and clarity of the projected image. Keeping your screen clean is equally important to maintain sharpness.

Lastly, implement keystone correction to fix any image distortion caused by the projector's placement. This guarantees a perfectly squared image, allowing you to enjoy a stunning display that utilizes the full color space your projector offers.

Common Calibration Challenges

calibration difficulties and solutions

Many users face common calibration challenges when setting up their projectors. One of the biggest hurdles is adjusting the brightness setting. Factory defaults often prioritize showroom appeal, leading to excessive brightness that washes out details in darker scenes.

Color calibration can also be tricky without the right tools, as achieving accurate skin tones requires careful adjustments.

Additionally, ambient lighting conditions play an important role in calibration outcomes. It's best to calibrate in a dark room to avoid interference from external light sources.

Advertisement

Keystone correction is another challenge; it can introduce image distortion, making proper projector placement essential before making any adjustments.

To help you tackle these calibration challenges, consider the following:

  • Adjust brightness settings to avoid washed-out images.
  • Use appropriate tools for accurate color calibration.
  • Calibrate in dark environments for better results.
  • Verify proper projector placement to minimize distortion.
  • Regularly clean the lens to maintain picture quality.

Keystone Correction Techniques

image distortion adjustment methods

When you're setting up your projector, keystone correction is key to ensuring that the image looks sharp and aligned.

You can choose between manual adjustment methods, which keep the resolution intact, or digital correction, which offers convenience but might slightly reduce image quality.

Understanding these techniques will help you achieve the best viewing experience possible.

Manual Adjustment Methods

Manual keystone correction techniques are vital for enhancing your projector's image quality. By physically adjusting the projector's position, you can effectively align the image and eliminate distortion caused by angled placement.

Advertisement

Here are some key steps to follow for manual correction:

  • Set the projector at the correct height: Confirm the lens is level with the center of the screen for minimal distortion.
  • Adjust the distance from the screen: Position it to maintain the correct aspect ratio and ideal image size.
  • Tilt or angle the projector: Make small adjustments to correct trapezoidal distortions.
  • Incremental changes are important: Avoid making excessive adjustments, as they can degrade the overall quality of the image.
  • Be aware of limitations: Understand that extensive manual keystone correction can compromise resolution and sharpness.

Digital Correction Advantages

While manual adjustments can considerably enhance your projector's image quality, digital keystone correction offers a modern alternative that simplifies the process. This technique uses software algorithms to quickly adjust distortion, allowing you to align the image without physically moving the projector.

It's especially helpful when your projector is positioned at an angle to the screen, as it compensates for trapezoidal distortions that can occur.

However, keep in mind that while digital keystone correction is user-friendly, it may slightly reduce image resolution and quality. The scaling and processing needed to fit the corrected image into the display area can lead to a loss of sharpness. To achieve the ideal image, it's essential to minimize reliance on these adjustments through proper initial setup.

Many advanced projectors now feature auto-correction capabilities, which automatically detect distortion and apply digital keystone corrections. This enhances your experience by streamlining setup processes and saving you time.

Nevertheless, be cautious about overusing these features, as excessive adjustments can compromise the overall image quality. Balancing digital correction with precise setup is key to enjoying a stunning viewing experience.

Advertisement

Advanced Calibration Insights

precision measurement techniques explained

Advanced calibration techniques are essential for achieving the highest quality image from your projector. By using advanced tools like colorimeters and calibration software, you can make precise adjustments to brightness, contrast, and accurate color reproduction.

A well-calibrated projector guarantees an advanced image that looks stunning in any setting.

To get started, focus on these key calibration steps:

  • Adjust gamma and white point for ideal brightness.
  • Fine-tune RGB grayscale linearity, especially for HDR content.
  • Use calibration discs and built-in test patterns to check and correct black level and sharpness.
  • Regularly recalibrate every six months, particularly after environmental changes.
  • Be aware of the projector's tone-mapping algorithms, and turn off tone mapping during HDR calibration for best results.

Frequently Asked Questions

How Do I Get the Best Picture on My Projector?

To get the best picture on your projector, position it correctly, control ambient lighting, and use high-quality screens. Regularly calibrate settings like brightness and contrast to guarantee peak image quality and viewing experience.

How Do I Calibrate My Projector?

Calibrating your projector is like tuning a fine instrument. Start by positioning it correctly, adjusting brightness and contrast with test patterns, and keeping lenses clean. Regular maintenance guarantees you're always ready for a dazzling display!

How Much Does It Cost to Calibrate a Projector?

Calibrating a projector can cost between $200 and $500, depending on the technician's expertise. If you're considering DIY options, calibration tools range from $30 to $150, offering a budget-friendly alternative for adjustments.

Do Projectors Need to Be Calibrated?

While many believe projectors don't need calibration, they actually do. If you want accurate colors and ideal performance, it's essential to calibrate regularly, especially after moving the projector or changing its lamp.

Advertisement

Conclusion

In the world of projector calibration, you're the artist, and your screen is the canvas. By mastering the tools and techniques outlined, you can paint a vibrant picture that dances with life and detail. As you tackle challenges and refine your settings, remember that each adjustment brings you closer to cinematic perfection. So grab your remote, embrace the journey, and let your projector transform your space into a breathtaking visual masterpiece. Your audience will thank you!

Continue Reading

Home Cinema

How to Reduce Projector Fan Noise: Tips for a Quieter Viewing Experience

See how simple adjustments and smart choices can transform your projector experience, leaving you wondering what other secrets await for ultimate silence.

Published

on

minimize projector fan noise

To reduce projector fan noise and enhance your viewing experience, start by activating Eco Mode, which can lower noise levels to around 26 dB. Proper placement is key; elevate the projector at least 3-4 feet above the audience and guarantee adequate airflow around it. Regular maintenance, like cleaning air filters and updating firmware, also helps keep noise down. Consider sound-dampening materials in your projector's enclosure to absorb noise. Finally, if you're in the market for a new projector, choose models known for their quiet operation. Discovering more strategies could lead to an even quieter setup!

Key Takeaways

  • Activate Eco Mode to lower fan noise to 26-28 dB while extending projector lifespan and improving energy efficiency.
  • Ensure proper placement by elevating the projector and maintaining clearance for effective airflow, reducing perceived noise levels.
  • Regularly clean air filters and schedule annual maintenance checks to enhance cooling efficiency and minimize noise.
  • Use acoustic treatments like sound-dampening materials and vibration-dampening mounts to absorb noise and vibrations from the projector.
  • Select a quiet projector model, ideally operating below 30 dB, and consider LED or laser options for quieter performance.

Understanding Projector Noise

analyzing projector sound levels

When it comes to projectors, noise is often an overlooked factor that can disrupt your viewing experience. Most projector noise comes from the cooling fans, which operate to prevent overheating. These fans usually run at decibel levels between 30 to 40 dB, and in high-performance models, the fan noise can be even louder due to increased active cooling requirements. This can considerably impact your enjoyment in a home cinema setting.

Fortunately, modern projectors have made strides in reducing fan noise. Many 4K projectors now operate below 32 dB, providing a quieter viewing experience that minimizes distractions.

If you're looking to reduce fan noise further, consider using features like Eco Mode. This setting slows down the fan speeds and dims the lamp brightness, potentially lowering noise levels to around 26 dB, which is ideal for creating a serene environment.

Understanding projector noise is essential for enhancing your home cinema experience. By choosing a quieter model and utilizing features that reduce fan noise, you can guarantee that your movie nights are as immersive as possible, letting you focus on the film rather than the noise.

Eco Mode Benefits

sustainable energy consumption advantages

Eco Mode offers notable advantages for those seeking a quieter and more efficient projector experience. By activating Eco Mode, you can greatly reduce projector fan noise. Many modern projectors operate at sound levels between 26dB and 28dB, which is quieter than a whisper, making for a more enjoyable viewing experience. This quieter operation is achieved by decreasing the fan speed and lowering lamp brightness, which in turn minimizes heat production.

Here's a quick comparison of Eco Mode benefits:

Advertisement
Benefit Description Impact on Viewing Experience
Reduced Noise Sound levels drop to 26dB-28dB Less distraction from audio
Lower Heat Production Decreased lamp brightness leads to less heat Extends projector lifespan
Energy Efficiency Consumes less power while maintaining quality Lower operational costs
Reduced Thermal Stress Minimizes wear on components Enhances durability

Utilizing Eco Mode not only promotes a quieter operation but also helps in extending the lifespan of your projector and its lamp, ultimately contributing to energy efficiency and reduced operational costs.

Placement Strategies

effective job placement techniques

Proper placement of your projector can greatly minimize fan noise and enhance your overall viewing experience. By following these placement strategies, you'll effectively reduce sound disruption and create an immersive environment.

  1. Elevate the Projector: Positioning the projector at least 3-4 feet above the audience helps sound travel upward, reducing perceived noise levels.
  2. Guarantee Minimum Clearance: Maintain at least 50cm of space around the projector. This guarantees proper airflow, preventing overheating and excessive projector fan noise.
  3. Utilize Vibration-Dampening Features: If you're using a mount, choose one with vibration-dampening features. This helps isolate the projector from surfaces that might amplify noise.
  4. Avoid Enclosed Spaces: Don't place your projector in enclosed areas without adequate ventilation. Lack of airflow can lead to heat pooling, causing the fan to work harder and creating louder operational noise.

Maintenance Tips

essential care guidelines

Maintaining your projector is essential for reducing fan noise and ensuring peak performance. By following these maintenance tips, you can enjoy a quieter viewing experience and prolong your projector's life.

Maintenance Task Frequency Benefits
Regularly clean air filters Monthly Increases airflow, reduces noise levels
Schedule professional maintenance checks Annually Identifies issues early for ideal performance
Replace worn-out fans As needed Minimizes operational noise
Keep firmware updated Quarterly Improves performance and reduces noise levels
Monitor lamp life Monthly Prevents overheating, decreases fan speed

To start, regularly clean air filters, as clogged filters can lead to increased fan noise and reduced cooling efficiency. Don't forget to schedule periodic professional maintenance checks to catch any noise issues early. If you notice louder sounds, consider replacing worn-out fans with quieter models. Keeping your projector's firmware updated is also vital, as manufacturers release updates that can enhance performance and reduce noise levels. Finally, monitor lamp life closely—older lamps generate more heat, causing fans to work harder, which increases noise output.

Noise Reduction Techniques

effective sound diminishing methods

To effectively reduce projector fan noise, you'll want to explore a few key techniques.

First, activating Eco Mode can greatly lower noise levels while adjusting your projector's placement can enhance stability and minimize vibrations.

Additionally, incorporating acoustic treatments in the room can further absorb sound and improve your overall viewing experience.

Eco Mode Benefits

Eco Mode Benefits (Noise Reduction Techniques)

Advertisement

Switching on Eco Mode can markedly enhance your viewing experience by cutting down projector fan noise to a whisper-quiet range of 26dB to 28dB. This setting creates a quieter environment, allowing you to fully immerse yourself in your favorite content without distractions.

Additionally, utilizing energy-efficient options can help lower overall energy consumption, similar to the efficiency seen with geothermal heat pumps.

Here are some key benefits of using Eco Mode:

  1. Lowering Lamp Brightness: This feature reduces heat output, which lessens the need for aggressive fan cooling.
  2. Extended Lifespan: By operating at lower temperatures, Eco Mode can help extend the lifespan of your projector's lamp.
  3. Reduced Maintenance Frequency: With less heat and strain on components, you'll find that maintenance is needed less often.
  4. Performance Balance: Many modern projectors, like the BenQ HT3550, strike an effective balance between performance and noise reduction in Eco Mode.

Utilizing Eco Mode not only minimizes fan noise but also enhances the overall viewing experience, promoting immersive engagement with your favorite shows or movies.

Enjoy a quieter environment while ensuring your projector runs efficiently for years to come!

Placement Strategies

While Eco Mode effectively reduces fan noise, projector placement also plays an essential role in creating a quieter viewing experience. By employing smart placement strategies, you can greatly enhance your setup. Here are some key tips to take into account:

Advertisement
Placement Strategy Description
Position Height Place the projector 3-4 feet above the audience for reduced noise perception.
Required Clearance Ascertain at least 50cm of clearance around the projector for ideal airflow.
Ceiling Mounts Use ceiling mounts to distance the projector from viewers, minimizing sound disruption.
Ventilation Avoid enclosed spaces; verify proper ventilation to prevent heat buildup and increased fan noise.
Distance from Walls Maintain distance from walls and reflective surfaces to reduce sound reflections.

Acoustic Treatment Solutions

When it comes to minimizing projector fan noise, incorporating acoustic treatment solutions can make a significant difference in your viewing experience. By focusing on how to absorb sound and reduce vibrations, you can achieve a quieter environment.

Regular maintenance, such as ensuring your projector's filters are clean, can also help reduce overall noise levels and improve performance. Here are four effective techniques:

  1. Acoustic Panels: Install acoustic panels in your projection room to absorb sound, which helps reduce ambient noise levels and enhances your overall viewing experience.
  2. Foam Panels Under the Projector: Attaching 2×2 acoustic foam panels to the bottom of your projector can effectively block higher-frequency fan noise while still allowing for proper airflow and cooling.
  3. Sound Barriers: Constructing a sound barrier with solid wood and foam can absorb sound reflections and prevent direct noise transmission to your audience.
  4. Vibration Dampening Materials: Utilize rubber materials around the projector for vibration dampening to minimize noise from vibrations caused by the fan and other internal components.

Combining these acoustic treatment solutions not only reduces fan noise but also improves thermal management and enhances your overall viewing experience.

For ideal projector performance, consider projector bulb maintenance as part of your setup.

Selecting a Quiet Projector

choosing a silent projector

To enjoy an immersive home theater experience, you'll want to select a projector that operates quietly. Look for models with fan noise levels below 30 dB, as this range is ideal for enjoying films without distractions. Models featuring Eco Mode can lower noise further, operating around 26 dB-28 dB.

Check out the table below for a comparison of some popular quiet projectors:

Projector Model Fan Noise Level (dB) Light Source
BenQ HT5550 26-32 LED
BenQ W5700 26-32 Laser
Epson 5050UB 30 Lamp
Sony VPL-HW45ES 28 Lamp
Optoma UHD50X 27 Laser

When choosing a quiet projector, consider brands with strong reputations for acoustic engineering, like BenQ, which incorporates smart cooling technology. Also, projectors that use LED or laser light sources tend to operate more quietly than traditional lamp-based models. Before making your purchase, read user reviews specifically mentioning noise levels to verify you get the quiet projector that meets your home theater needs.

Advertisement

Acoustic Engineering Insights

sound design and analysis

When you're setting up your projector, understanding noise minimization techniques can make a big difference in your viewing experience.

Smart cooling technology, like that found in some high-end models, helps maintain low sound levels by adjusting fan speeds based on heat.

Noise Minimization Techniques

Reducing projector fan noise involves a blend of smart design and material choices that effectively tackle unwanted sound.

By focusing on acoustic engineering principles, you can create a more enjoyable viewing experience. Here are some noise minimization techniques you can implement:

1. Use Sound Dampening Materials: Lining projector enclosures with materials like Alubutyl can absorb vibrations and minimize sound produced, enhancing overall acoustics.

Keeping your projector clean and well-maintained, including regular cleaning, can also help reduce excess noise from dust accumulation.

Advertisement

2. Incorporate Vibration-Dampening Mounts: Utilize mounts designed to isolate fan vibrations, considerably reducing noise during operation.

3. Prioritize Regular Maintenance: Confirm ideal airflow by cleaning air filters and checking for dust buildup on internal components.

This helps maintain efficient cooling and reduces noise from projector fans.

4. Implement Smart Cooling Solutions: Select models that adjust fan speed based on thermal monitoring, allowing them to operate quietly, especially under 32dB.

Smart Cooling Technology

Smart cooling technology transforms the way projectors manage heat, enhancing both performance and user experience. By utilizing thermal monitoring, this technology dynamically adjusts fan speeds, ensuring peak cooling efficiency while greatly reducing fan noise.

Advertisement

For instance, high-performance projectors like BenQ's 4K HDR models maintain sound levels below 32dB, thanks to advanced acoustic engineering. This level of quiet operation makes them perfect for immersive viewing experiences.

In Eco Mode, projectors can further reduce fan noise to between 26dB and 28dB by slowing down fan speeds during less intensive tasks, enhancing viewer comfort. Additionally, BenQ projectors are designed with specially selected parts that minimize air turbulence and annoying sounds, contributing to a quieter operation.

The integration of smart cooling technology can dramatically lower perceived noise levels, ensuring that projector sound levels don't detract from the overall viewing experience.

By embracing these innovations, you can enjoy your favorite movies or presentations without the distraction of background noise, making each session more enjoyable and immersive.

Enclosure Design Considerations

optimal enclosure design factors

To create an effective projector enclosure, you must prioritize airflow and thermal management. If you restrict air circulation, you risk overheating your projector and increasing fan noise.

Here are some key considerations for your enclosure design:

Advertisement
  1. Airflow: Guarantee that the enclosure has adequate ventilation and allows for dynamic fan speeds to adapt to the projector's heat output.
  2. Projector Placement: Position your projector so that internal fans are unobstructed, maximizing their efficiency and minimizing noise levels.
  3. Flame-Resistant Materials: Construct the enclosure using flame-resistant materials to guarantee safety, as projectors generate significant heat during operation.
  4. Sound-Dampening Materials: Incorporate barriers and sound-dampening materials like rubber or Alubutyl within the enclosure to reduce sound transmission from the projector to your viewing area.

Vibration Mitigation Strategies

effective vibration control techniques

Even with a well-designed enclosure, vibrations from the projector can still contribute to unwanted fan noise. To effectively implement vibration mitigation strategies, consider using rubber dampening materials or sheets on your projector. These materials can greatly absorb vibrations, helping to reduce fan noise during operation.

Additionally, using Alubutyl adhesive to mount your projector will prevent sound transmission to surrounding surfaces, further enhancing your setup.

Cover reflective surfaces like plasterboard with sound-absorbing materials to decrease noise levels by minimizing sound reflections in the room. Choosing higher airflow fans with lower noise ratings can also help reduce internal noise while ensuring efficient cooling.

Before finalizing your setup, conduct initial noise-level tests using duct tape. This can help you assess changes in sound and guide your adjustments to fan configurations and projector placement.

Frequently Asked Questions

How Do I Reduce the Noise on My Projector?

To reduce noise on your projector, use Eco Mode, keep it away from walls and viewers, clean air filters regularly, and consider sound-absorbing materials in your room. Look for quieter models if needed.

How Do You Silence a Noisy Fan?

When a fan's roar drowns out your peace, you can silence it. Try cleaning the blades, adjusting its position, or using sound-dampening materials. Sometimes, simply replacing it with a quieter model works wonders.

Advertisement

Do All Projectors Have Loud Fans?

Not all projectors have loud fans; some are designed for quieter operation. You'll find models that run as low as 26 dB, while others may exceed 40 dB, especially budget options. Choose wisely!

How Do You Reduce the Noise in a Ventilation Fan?

You might be surprised to find that reducing noise in a ventilation fan isn't just about silence. Start by cleaning it, adding sound-absorbing materials, and installing isolation mounts to achieve a noticeably quieter environment.

Conclusion

In summary, tackling projector fan noise doesn't have to be an intimidating task. By understanding your projector's mechanics and implementing the tips we've discussed, you can create a quieter viewing experience. It's like having a conversation at a lively café—you can still enjoy the ambiance without shouting. So, whether you're binge-watching your favorite show or presenting in a meeting, you'll appreciate the difference a little effort can make in reducing that distracting hum.

Continue Reading
Advertisement

Affiliate disclaimer

As an affiliate, we may earn a commission from qualifying purchases. We get commissions for purchases made through links on this website from Amazon and other third parties.

Advertisement

Vetted

top electrostatic headphones 2024 top electrostatic headphones 2024
Vetted2 months ago

The 10 Best Electrostatic Headphones of 2024 – Ultimate Sound Experience Unveiled

Unlock the ultimate sound experience with the top electrostatic headphones of 2024—discover which models will elevate your audio journey to...

concert earplugs for hearing protection concert earplugs for hearing protection
Vetted2 months ago

15 Best Earplugs for Concerts: Protect Your Hearing Without Missing the Music

Check out the 15 best earplugs for concerts that protect your hearing while enhancing your music experience—discover which ones are...

comfortable earbuds for small ears comfortable earbuds for small ears
Vetted2 months ago

14 Best Earbuds for Small Ears That Offer Comfort and Sound Quality

Mysterious and comfortable, discover the 14 best earbuds for small ears that elevate your sound experience like never before!

best earbuds for calls best earbuds for calls
Vetted2 months ago

14 Best Earbuds for Phone Calls in 2024 – Crystal Clear Sound and Comfort

Discover the crystal-clear sound and comfort of the 14 best earbuds for phone calls in 2024, and find out which...

kid friendly safe earbuds kid friendly safe earbuds
Vetted2 months ago

15 Best Earbuds for Kids: Safe, Durable, and Perfect for Little Ears

Attention parents: Discover the 15 best earbuds for kids that prioritize safety and fun, but which one will be the...

top dynamic mics 2024 top dynamic mics 2024
Vetted2 months ago

15 Best Dynamic Microphones for Every Sound Engineer in 2024

Achieve the perfect sound with our top 15 dynamic microphones of 2024, tailored for every sound engineer's needs—discover your ideal...

top drum mics 2024 top drum mics 2024
Vetted2 months ago

15 Best Drum Mics of 2024 – Elevate Your Sound With These Top Picks

The ultimate guide to the 15 best drum mics of 2024 reveals top picks that will transform your sound—find out...

ultimate sound quality headphones ultimate sound quality headphones
Vetted2 months ago

15 Best Drum Headphones for Ultimate Sound Quality and Comfort

Browse our top 15 drum headphones for superior sound quality and comfort—discover which pair will elevate your drumming experience to...

ski helmet audio accessories ski helmet audio accessories
Vetted2 months ago

15 Best Ski Helmet Headphones to Enhance Your Slopes Experience

Immerse yourself in the slopes with the 15 best ski helmet headphones that promise unmatched sound quality and comfort—discover which...

top dj headphones 2024 top dj headphones 2024
Vetted2 months ago

15 Best DJ Headphones of 2024 – Ultimate Sound Quality and Comfort

Discover the top 15 DJ headphones of 2024 that promise unmatched sound quality and comfort—find out which models made the...

Advertisement

Trending