Home Cinema
The Pros and Cons of Front Vs. Rear Projection in Home Cinema
Uncover the essential advantages and drawbacks of front versus rear projection in home cinema to find the perfect setup for your viewing pleasure.
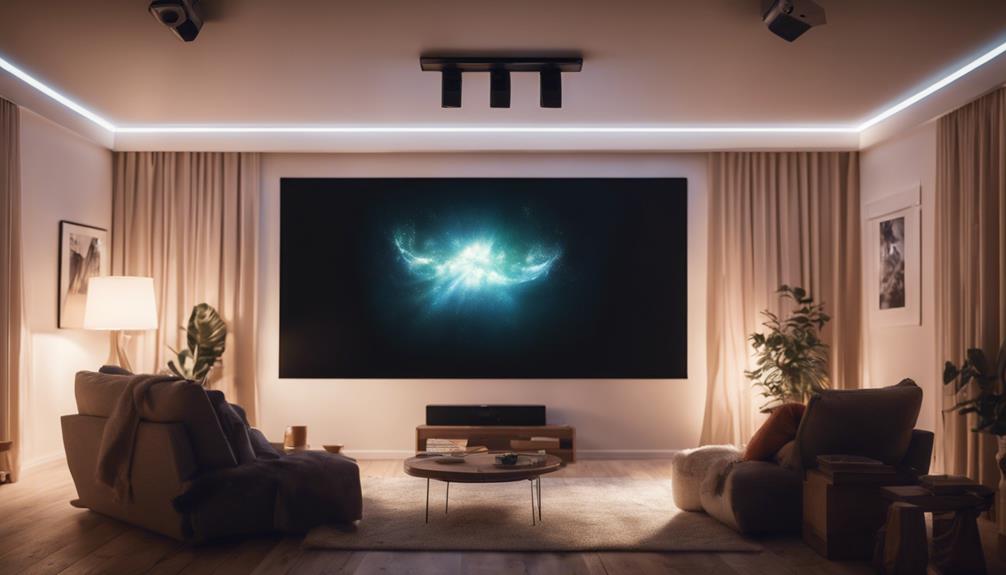
When you're deciding between front and rear projection for your home cinema, weigh your options carefully. Front projection is budget-friendly and typically offers better image quality in dark environments. However, it struggles with ambient light and can create shadows from viewers. Rear projection shines in brighter spaces, maintaining vibrant images and offering a sleek, clutter-free aesthetic. But it requires space behind the screen and can be more complex to install. By understanding these pros and cons, you can make a choice that enhances your viewing experience—there's more to discover about optimizing your setup.
Key Takeaways
- Front projection is budget-friendly and offers vibrant images in controlled lighting, but struggles in bright environments and requires dark rooms for optimal performance.
- Rear projection performs well in ambient light, eliminating shadows and enhancing aesthetics, but requires dedicated space behind the screen and often incurs higher installation costs.
- Front projection allows flexible installation and easy upgrades, while rear projection provides a cleaner appearance by concealing the projector behind the screen.
- Room size and layout greatly influence the choice of projection type; larger spaces favor front projection, while smaller rooms benefit from rear projection setups.
Overview of Projection Types
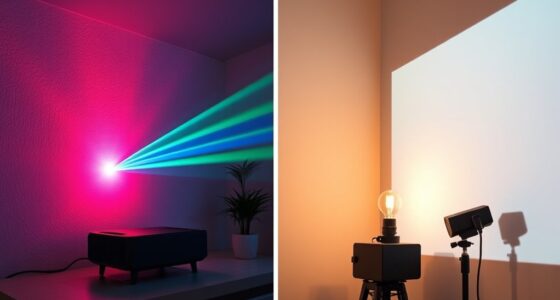
When it comes to home cinema, understanding the differences between front and rear projection types is vital for choosing the right setup for your viewing experience.
Front projection systems typically face the audience, making them easy to install and allowing for flexible placement options. They shine in controlled environments, delivering superior image quality, which is perfect for home theaters. However, they require careful management of ambient light to optimize visibility.
On the other hand, rear projection systems position the projector behind the screen, enhancing aesthetics by hiding equipment. These systems are often preferred in commercial settings, as they produce bright, clear images even in high ambient light conditions. While rear projection excels in larger venues where visibility is critical, it can struggle with brightness and sharpness if not properly diffused.
Both types cater to different display needs, and each has its unique advantages and disadvantages. When deciding between front and rear projection, consider factors like room layout, ambient light conditions, and the intended use of the space. Your choice will greatly influence your overall viewing experience, so weigh these aspects carefully.
Advantages of Front Projection
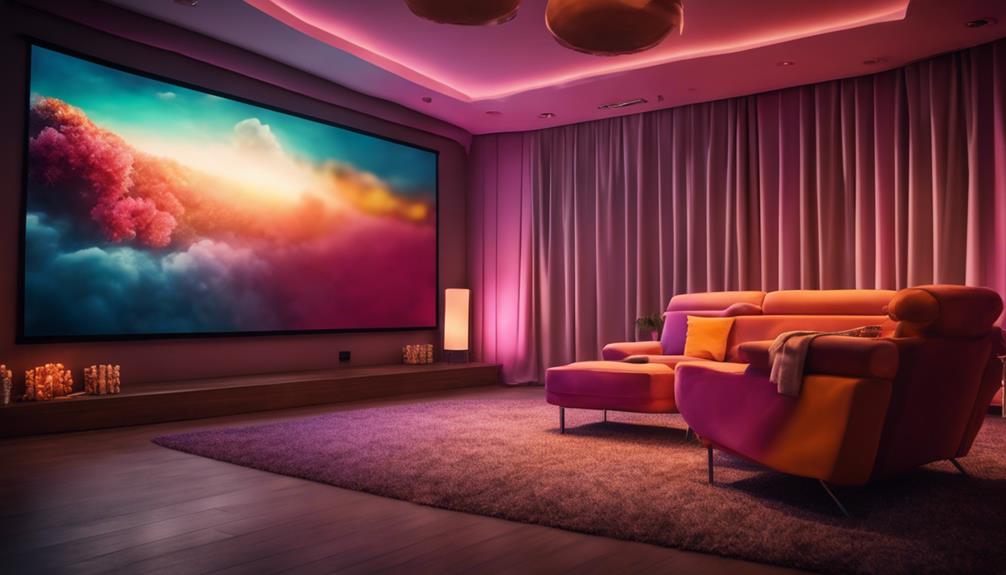
Front projection offers several advantages that make it a favored choice for many home cinema enthusiasts. One of the biggest perks is the affordability of front projection systems compared to rear projection options. This makes it easier for you to set up an impressive home theater without breaking the bank.
When it comes to image quality, front projection excels in controlled lighting environments, delivering sharper details and vibrant colors. High-quality projectors, like the JVC RS46, enhance your viewing experience considerably. Plus, the projector setup is relatively simple, allowing for flexible placement options. Whether you choose a tripod, ceiling mount, or table, you can position your projector for ideal image quality.
Another advantage of front projection is that it accommodates larger audiences. With its flexible projector distance, you can create a setup that's perfect for bigger home theaters or gatherings. This flexibility also makes upgrades and modifications straightforward, as front projection doesn't require the dedicated space behind the screen that rear projection does.
Disadvantages of Front Projection
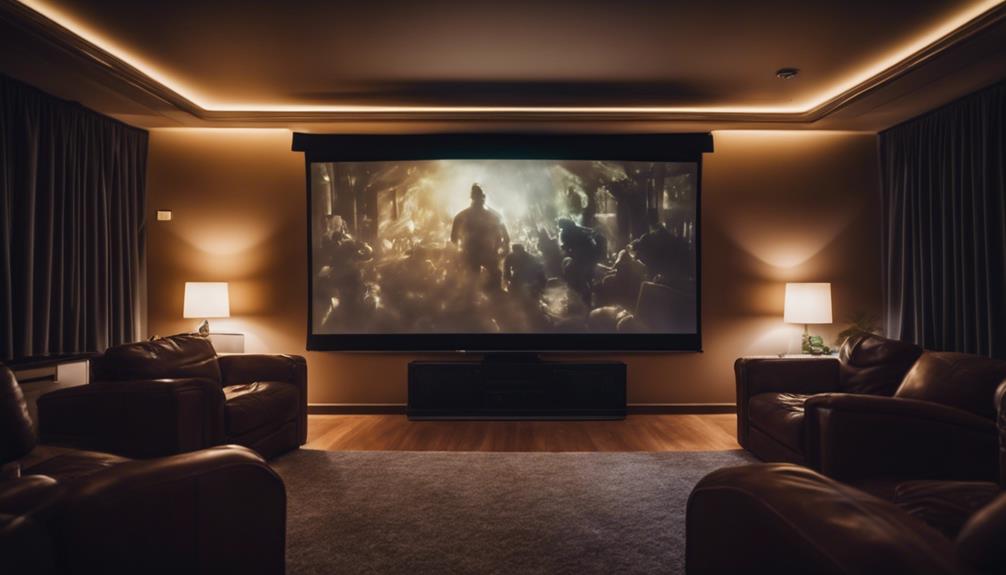
When you consider front projection, you need to think about how sensitive it's to ambient light.
Bright rooms can wash out the image, and any shadows from people or objects can really disrupt your viewing experience.
This can make it tricky to set up and enjoy your home cinema in various environments.
Ambient Light Sensitivity
Dealing with ambient light can markedly hinder the viewing experience in front projection systems, often leading to washed-out images and diminished contrast. If you're using a front projection setup, you'll quickly notice that bright environments can notably impact the performance of your projector. Without proper control over ambient light, the image quality suffers. You might find yourself squinting or straining to see details, as colors lose their vibrancy.
In contrast to rear projection screens, which can handle some ambient light better, front projection demands near-complete darkness to deliver its best performance. Shadows from people or objects in front of the projector can further complicate matters, obstructing your view and making it hard to enjoy your favorite movies or games.
The need for blackout curtains or other measures to control light can limit your room's versatility and usage.
Shadow Obstruction Issues
Shadow obstruction can become a significant problem in front projection setups, as any objects or people between the projector and the screen can block the image and disrupt your viewing experience. This issue is particularly pronounced in larger spaces where movement is common, leading to visibility issues that can ruin your film night or presentation.
To mitigate shadow obstruction, consider these four key factors:
- Projector Placement: Position your projector high and at an angle to minimize the chance of someone walking in front of it.
- Seating Arrangements: Arrange seating so that viewers aren't likely to obstruct the projector's line of sight.
- Ambient Light Control: Reduce ambient light in the room, as this can exacerbate shadow issues by washing out the image.
- Screen Size: Choose an appropriate screen size for your space, as larger screens might require more distance, increasing the potential for obstructions.
Advantages of Rear Projection
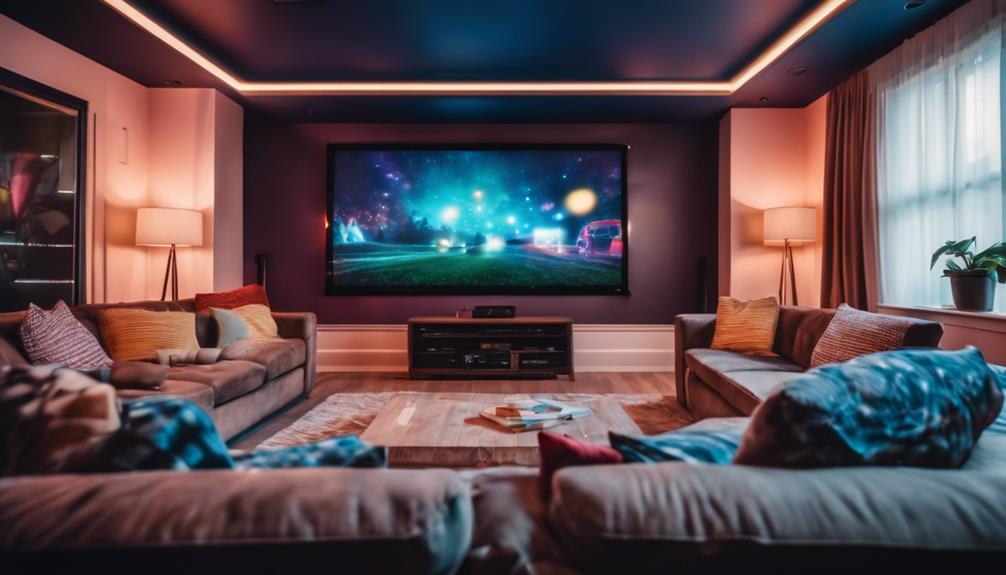
Rear projection systems shine in bright environments, delivering vibrant images that maintain contrast and saturation without needing total darkness. This makes them perfect for settings with high ambient light, where you want a better image without sacrificing quality. By placing the projector behind the screen, you eliminate shadowing effects, ensuring an unobstructed viewing experience, even in larger venues.
One of the key advantages of rear projection is its ability to use robust materials that enhance durability and reduce glare. This leads to superior clarity compared to traditional front projection methods. If you're focused on aesthetics, a rear projection setup can help conceal technology, contributing to a cleaner, more professional appearance in multi-purpose rooms.
While initial installation may be a bit complex and pricier, the long-term value is undeniable. With screen innovations continuously improving, you can enjoy a versatile viewing environment that adapts to various settings.
Disadvantages of Rear Projection
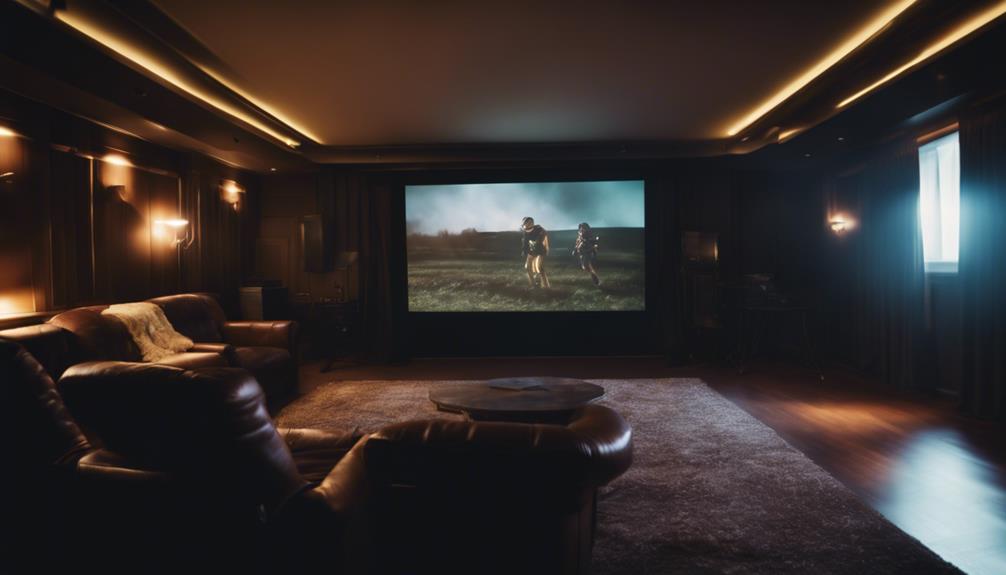
While rear projection offers notable advantages, it also comes with several disadvantages that can impact your home cinema experience. Here are some key drawbacks to take into account:
- Space Requirements: You'll need adequate space behind the screen for the projector, which can limit how you utilize your room.
- Installation Complexity: The installation process can be more involved, often requiring professional help to get the projector in the right place and properly calibrated.
- Initial Investment Costs: Typically, rear projection systems come with higher initial investment costs, especially due to the specialized rear projection screen material.
- Image Quality Concerns: You might encounter image quality issues. The diffusion process can lead to reduced brightness and sharpness, making it difficult to achieve the clarity offered by front projection.
Additionally, maintenance can be a hassle. Dust accumulation on both the projector and the screen can degrade image quality over time, necessitating regular cleaning and monitoring.
These factors combined might make rear projection less appealing for your home cinema setup.
Space Considerations
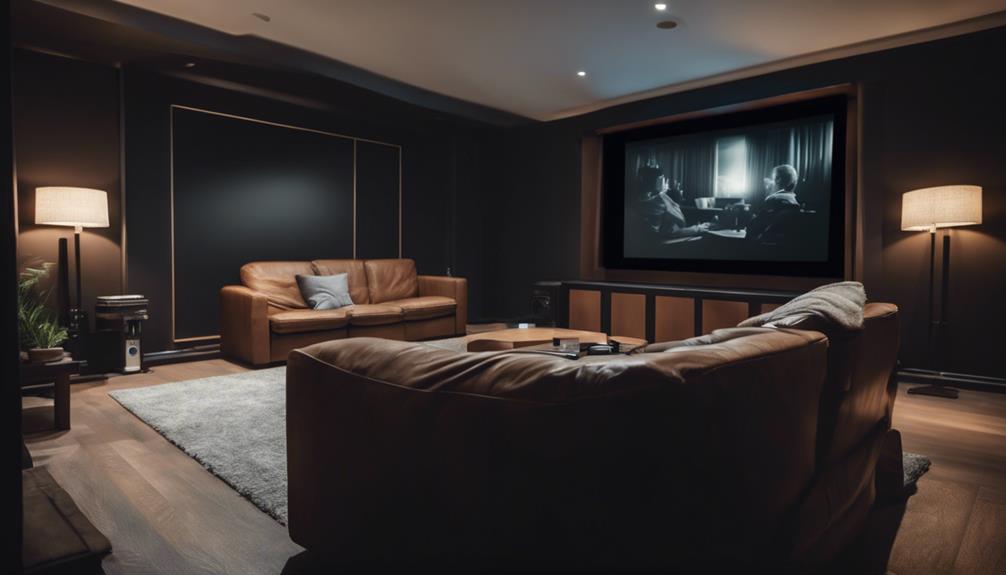
When considering space for your home cinema, installation flexibility is key.
With front projection, you can place the projector almost anywhere, making it easier to optimize your room's layout.
On the other hand, rear projection needs dedicated space behind the screen, which can limit your options, especially in smaller rooms.
Installation Flexibility
Installation flexibility in home cinema systems largely hinges on the type of projection used, with front projection often limiting space options due to potential shadowing from viewers.
If you're considering installation flexibility, here are some key points to think about:
- Front Projection Systems: These need careful positioning, typically placing the projector in front of the screen. This can restrict your layout, especially in smaller spaces.
- Rear Projection Setups: With the projector behind the screen, you free up floor space and reduce equipment visibility, making it perfect for multi-purpose rooms.
- Ambient Light Control: Front projection might require additional lighting control to guarantee image quality, which can further complicate your space requirements.
- Installation Complexity: While front projectors can be mounted variously, rear projection may need careful planning for throw distances and sometimes even mirrors, affecting overall installation flexibility.
Ultimately, your choice between front and rear projection will notably impact how you utilize your space and how easily you can adapt your setup to suit your needs.
Room Size Impact
The size of your room plays an essential role in determining whether front or rear projection is the better fit for your home cinema setup. If you're working with a larger space, front projection systems are often ideal. They allow for flexible placement options like tripods or ceiling mounts, letting you adjust the distance from the screen as needed.
However, if your room is on the smaller side, rear projection might be a better choice, as it requires dedicated space behind the screen, which could limit your room's functionality.
When considering ambient light, rear projection typically performs better in well-lit spaces, as it can enhance image quality by rejecting light from the audience side. In contrast, front projection generally requires a controlled lighting environment to maintain clarity.
Remember that the space requirements for rear projection vary based on screen size and projector type, so careful planning is vital.
Ultimately, think about your room dimensions and how you want to utilize the space. This will help you decide which projection method best suits your home cinema needs.
Ambient Light Impact
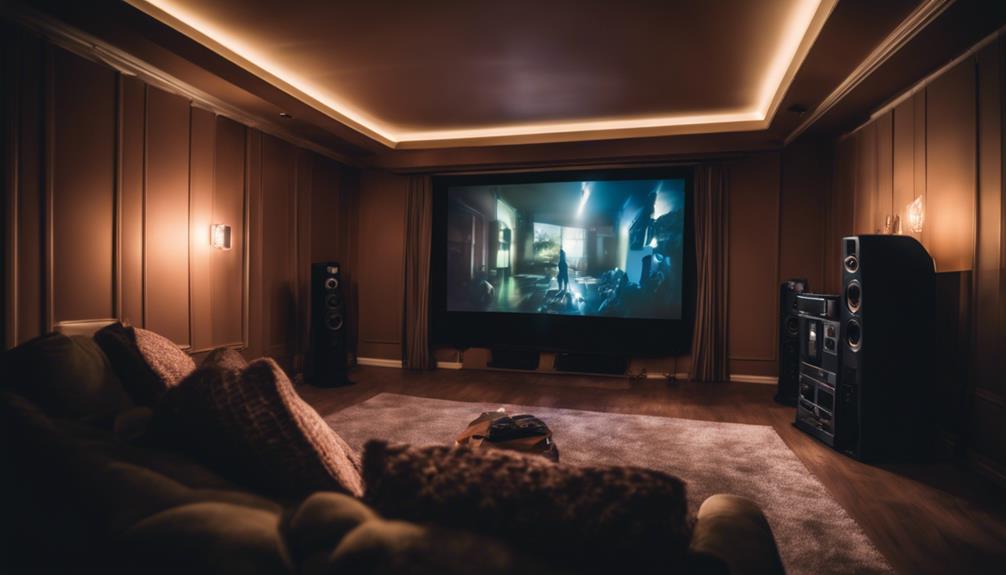
Ambient light plays an essential role in determining the performance of front and rear projection systems in home cinema setups. When you're deciding between these two types, consider how ambient light impacts your viewing experience:
- Front Projection: This system struggles in bright environments. You'll need to darken the room to enhance brightness and maintain image clarity, as high ambient light can diminish contrast.
- Rear Projection: This setup excels in managing ambient light. It can reject ambient light from the audience side, allowing for vibrant images even in well-lit conditions.
- Brightness and Contrast: In a bright room, front projection can weaken, while rear projection maintains better contrast and saturation, making it ideal for larger venues.
- Light Treatment: Both setups benefit from light treatment, but rear projection tolerates less-than-ideal lighting conditions more effectively, making it a versatile choice.
Ultimately, if you have to deal with ambient light, rear projection will likely provide a superior viewing experience. So, think about your room's lighting before making a decision—it could save you from future frustrations!
Aesthetic Considerations
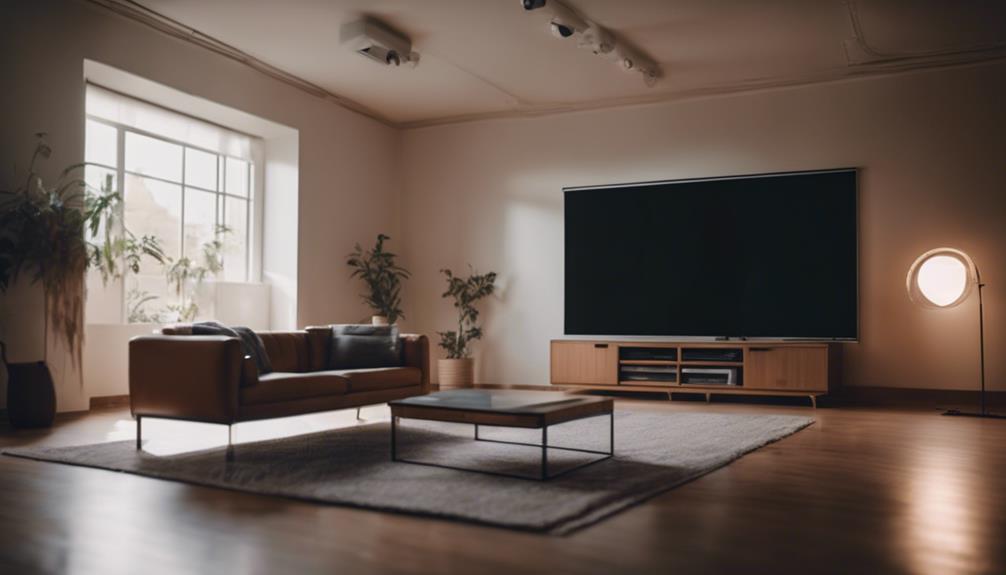
Choosing between front and rear projection can notably impact the overall aesthetics of your home cinema, influencing how the space feels and functions.
Front projection setups often feature visible equipment, which can create a cluttered appearance. This visibility can detract from the visual appeal of your space and may affect the overall event professionalism, especially during high-stakes presentations.
On the other hand, rear projection offers a clean and sophisticated look. By concealing the projector behind the screen, it enhances the visual appeal of the environment and creates a more polished atmosphere. This setup can greatly improve the ambiance of your events, making them feel more professional and refined.
When considering aesthetic considerations, it's crucial to balance them with technical requirements. While front projection may seem like an easier option, the clutter it creates can impact your viewing experience.
Rear projection, while potentially more complex to set up, can provide a seamless look that enhances your home cinema's charm. Ultimately, your choice should reflect both the aesthetic preferences and the functionality you desire in your space.
Image Quality Comparison
When it comes to image quality, front projection often outshines rear projection, especially in environments designed for ideal viewing. If you're aiming for the best possible image, consider these factors:
- Brightness: Front projection setups typically deliver brighter images, thanks to advanced projectors that perform well, even in dark rooms.
- Contrast: Dedicated home theaters with front projection benefit from treated walls, enhancing contrast and detail, which is essential for a cinematic experience.
- Sharpness: Rear projection can soften images due to diffusion through screen material, making it harder to achieve the clarity you want.
- Ambient Light Handling: While rear projection manages ambient light better, it often requires precise diffusion to maintain even image quality, which can be tricky.
Frequently Asked Questions
What Are the Pros and Cons of Rear Projection Vs Front Projection?
When considering rear versus front projection, you'll find rear projection excels in ambient light and minimizes shadows. However, front projection offers better image quality in dark settings and is generally more affordable and easier to install.
Is It Better to Have a Projector in Front or Behind the Screen?
It depends on your space and preferences. If you value image quality in bright rooms, rear projection's a great choice. For casual viewing and easier setup, front projection might suit you better. Consider your needs!
What Are the Disadvantages of Rear Projection?
You'll face several disadvantages with rear projection, like higher installation costs, complex setup, and limited layout flexibility. Additionally, maintaining image quality can be tricky due to dust accumulation and potential issues with brightness and sharpness.
What Are the Benefits of Rear Projection?
Imagine a sleek, modern art gallery where your images shine brilliantly. Rear projection gives you vibrant visuals even in bright spaces, eliminates shadows, and keeps your setup tidy. Plus, it looks fantastic in any room.
Conclusion
In the end, choosing between front and rear projection for your home cinema is like picking the perfect frame for a masterpiece.
Each option has its own charm—front projection brings vibrant colors and a cinematic feel, while rear projection offers sleek elegance and space efficiency.
Picture yourself settling into your favorite chair, the screen flickering to life, transforming your living room into a private theater.
Whichever you choose, you'll create an enchanting experience that pulls you into the story.
Tom is the Editor-in-Chief of 1home Theatre Projector, a website that provides news and reviews on the best home cinema experiences. With over 10 years of experience in the industry, Tom knows what makes a great home theatre projector and wants to make it easy for everyone to build the perfect setup for their needs. When he’s not busy writing or testing projectors, Tom enjoys watching classic films and spending time with his family.
Home Cinema
DIY Projector Remote Control: Customizing Your Device’s Interface
Keep your DIY projector remote control intuitive and efficient by customizing its interface—discover essential tips to enhance your user experience and streamline operations.
Customizing your DIY projector remote control interface makes using it easier and more enjoyable. Start by accessing 'switches.yaml' to assign friendly names and create toggle buttons for power and volume control. Use 'scripts.yaml' to develop organized commands for seamless operation, simplifying complex actions into single clicks. Designing an intuitive layout with vertical and horizontal stacks enhances navigation. Don't forget to integrate popular apps for quick access to streaming services. By focusing on user experience and testing your setup, you can achieve an efficient interface. Keep going, and you'll discover more tips to elevate your remote control project.
Key Takeaways
- Access 'switches.yaml' to define user-friendly toggle switches for power and volume control, enhancing ease of use.
- Develop scripts in 'scripts.yaml' to combine multiple commands into single clicks, streamlining remote functionality with ADB commands.
- Design an intuitive remote UI using vertical and horizontal stacks, incorporating Material Design Icons for improved navigation and visual appeal.
- Integrate popular streaming apps like Netflix and Plex by defining buttons in 'switches.yaml' for quick access to content.
- Test and troubleshoot configurations thoroughly, ensuring commands execute correctly and adjusting as needed for optimal performance.
Understanding Remote Control Basics
When you think about remote controls, it's easy to appreciate how they simplify our lives by allowing us to operate devices from a distance. Most remote controls utilize infrared or wireless signals, so you can easily control your projector without getting up. This convenience is a game changer, especially when you're settled in for a movie night.
The design of a remote is essential. For basic functions, toggle buttons work just fine for power switches, but when it comes to more intricate tasks like volume adjustments, they mightn't be the best choice. Instead, a well-organized layout lets you quickly find the buttons you need. Imagine pressing the left button to lower the volume and the right button to increase it—simple and effective!
To enhance your experience, consider how configuration files like 'switches.yaml' can tailor your remote's functionality. By customizing these settings, you can guarantee your remote control meets your specific needs.
Plus, using scripts in 'scripts.yaml' can combine several commands into a single click, streamlining your remote control experience even further. You'll love how easy it gets!
Configuring Your Switches
Configuring your switches is a straightforward process that enhances your DIY projector remote's functionality. Start by accessing the 'switches.yaml' file, where you can define toggle switches for essential functions like power and volume control.
It's important to use friendly names in your switch definitions, making it easier to recall and reference them later. Incorporate underscores for better readability.
For volume control, implement single toggle commands to streamline user experience. This allows for simple up and down adjustments with just one click, making it user-friendly.
When labeling directional buttons, verify they're clearly marked (e.g., left, up) in your configuration. This clarity boosts usability and helps users navigate the interface intuitively.
Once you've set up your switches, don't forget to test their functionality within the overall remote interface. This step is vital to confirm seamless integration and operation.
Developing Effective Scripts
Creating effective scripts for your projector remote control starts with understanding the command structure in the 'scripts.yaml' file.
By incorporating ADB commands, you can enhance functionality and streamline your setup, making it more user-friendly.
Remember to specify service and entity IDs correctly to guarantee your scripts run smoothly and efficiently.
Script Command Structure
To guarantee your DIY projector remote control functions smoothly, you need to focus on the script command structure. Start by developing scripts in 'scripts.yaml' using a clear sequence format that specifies both service and entity IDs. This guarantees accurate command execution every time.
When creating your scripts, replace button names with ADB commands to enhance functionality and achieve smoother operations. It's also vital to utilize underscores in friendly names for consistency, which helps avoid errors during execution. For example, when scripting power and volume control, you can streamline user interactions by combining complex commands into a single click.
Organizing commands logically within your scripts not only enhances readability but also simplifies modifications or troubleshooting in the future. It's easier to manage your project if you can quickly identify and edit specific commands without sifting through disorganized code.
Enhancing Functionality With ADB
When it comes to enhancing the functionality of your DIY projector remote control, ADB commands can make a significant difference. By utilizing ADB, you can streamline remote control functions, replacing traditional button names with efficient scripts for single-click execution. This not only saves time but also simplifies your user experience.
Here are three key steps to effectively develop your ADB scripts:
- Define Your Scripts: Organize commands in 'scripts.yaml'. This allows you to group multiple commands into a single function, making tasks like power management and volume control a breeze.
- Use the Correct Format: Specify both the service and entity IDs in your scripts. This guarantees that your commands are correctly recognized and executed by the system.
- Keep It Friendly: Remember to use underscores in friendly names within your scripts. This practice helps with proper identification and prevents errors during execution.
Incorporating ADB commands into your remote setup not only enhances functionality but also allows for greater customization. You'll find it much easier to control various device features from a unified interface, making your DIY projector experience even better.
Designing Your Remote UI
Designing an intuitive remote UI can greatly enhance your DIY projector experience. Start by creating a new panel using vertical and horizontal stacks to organize buttons in a way that feels natural. This structure helps users navigate easily, so they can find what they need without frustration.
Incorporate Material Design Icons for visual appeal. Each button should be easily recognizable, making it user-friendly. Place a power button in the first row, linked to a dedicated power script, for quick access. This small detail can considerably enhance your experience.
When it comes to naming your buttons, use friendly names with underscores in the 'switches.yaml' configuration file. Clear commands guarantee that even new users can understand and remember how to operate your remote.
Don't forget to customize icon size and layout to fit your aesthetic preferences. This not only improves functionality but also guarantees your UI looks great across different devices.
Integrating Popular Apps
Incorporating popular apps like Netflix and Plex into your DIY projector remote control elevates your viewing experience by providing instant access to your favorite streaming content.
This is especially beneficial for home cinema enthusiasts who want seamless integration with their setup, enhancing overall enjoyment. By setting up built-in buttons for these apps in the 'switches.yaml' file, you can navigate effortlessly to your preferred services, much like how the role of color accuracy enhances cinematic experiences.
Here are three key steps to integrate these apps:
- Create Buttons: Define buttons for Netflix and Plex in your 'switches.yaml' file, making them easily accessible from your remote.
- Add Icons: Use Material Design Icons for these buttons to enhance the visual appeal and guarantee that your interface looks sleek and modern.
- Custom Scripts: Assign custom scripts in 'scripts.yaml' to these buttons. This allows you to launch your favorite apps with just a single click, eliminating the need for extra navigation.
Enhancing User Experience
To enhance your remote control experience, focus on creating an intuitive button layout that makes navigation effortless.
Consider the impact of visual design elements on user engagement, as seen in the cozy workspace improvements that promote well-being.
Streamlining command execution with clear labels helps you quickly access the functions you need.
Additionally, incorporating visual design elements can make the interface not only more appealing but also easier to use.
Intuitive Button Layout
Creating an intuitive button layout is essential for enhancing the user experience of a DIY projector remote control. When you design your remote, think about how you can make it user-friendly and efficient. Reflect that just like a good home security system requires thoughtful design and functionality, your remote should too.
Here are three key strategies to reflect upon:
- Organize Controls Effectively: Stack frequently used functions in vertical and horizontal arrangements. This way, you can access them quickly without fumbling around.
- Use Clear Labels: Opt for friendly and straightforward names for each button. This will help you recall commands easily when you're scripting and using the remote.
- Incorporate Directional Buttons: Include clearly labeled directional buttons (like left, right, up, and down) for easy navigation. This simplifies controlling your projector functions during use.
Additionally, reflect on using Material Design Icons for visual appeal. They enhance usability by allowing you to identify button functions at a glance.
Don't forget to customize icon sizes and layouts to fit your preferences, ensuring comfort and ease of use while operating your remote. By following these tips, you'll create a remote that's not just functional but truly enjoyable to use.
Streamlined Command Execution
An intuitive button layout sets the stage for a more streamlined command execution in your DIY projector remote control. By utilizing scripts in 'scripts.yaml', you can perform multiple actions with a single click, eliminating the hassle of toggling through various buttons. This functionality is further enhanced by implementing ADB commands, allowing for a more intuitive experience without complex sequences.
To boost readability and recall, use friendly names in your scripts with underscores. This simple change makes it easy to identify and execute commands quickly. The sequence format in scripts, specifying service and entity IDs, simplifies your command structure and improves responsiveness.
Directional buttons can also enrich user experience. Clarity in labeling, such as 'left' and 'up', makes navigation straightforward and accessible.
Here's a quick overview:
Feature | Benefit |
---|---|
Scripts in 'scripts.yaml' | Perform multiple actions easily |
ADB commands | Simplifies command execution |
Friendly names | Enhances readability |
With these strategies, your DIY projector remote control becomes a breeze to use, making your viewing experience more enjoyable.
Visual Design Elements
Incorporating effective visual design elements can greatly enhance your DIY projector remote control's user experience. By focusing on aesthetics and functionality, you can create a more engaging interface that encourages ease of use.
Here are three key design elements to contemplate:
- Material Design Icons: Use these for a visually appealing interface that boosts user engagement and intuitiveness. Well-designed icons can simplify navigation and make your remote control feel more modern.
- Logical Button Organization: Arrange buttons in a logical flow, both vertically and horizontally. This organization helps users navigate quickly to essential functions, reducing frustration during use.
- Clear and Intuitive Names: Confirm button labels are friendly and easy to understand. Using underscores can enhance readability and recall, making it simpler for users to remember their functions.
Additionally, customize icon sizes and layouts to accommodate user preferences, enhancing accessibility.
Incorporating built-in buttons for popular apps offers immediate access to frequently used features, improving overall functionality.
Customizing Button Functions
Customizing button functions on your projector remote can greatly enhance your viewing experience. To get started, access the 'switches.yaml' file where you can define toggle switches for actions like power and volume control.
By utilizing single toggle commands, you can effectively manage your volume, allowing you to adjust it up and down with just one button press.
For more advanced functionality, implement scripts in the 'scripts.yaml' file. This allows you to create command sequences and replace button names with ADB commands.
Make sure to use friendly names for buttons that incorporate underscores; this not only improves recall in scripts but also enhances organization and usability.
To create a visually appealing layout, organize your buttons using vertical and horizontal stacks. This arrangement makes navigation intuitive and efficient.
You can also enhance the interface by incorporating Material Design Icons, which will help you easily identify each function.
With these customizations, you'll have a projector remote that not only looks great but also operates according to your unique preferences, making your viewing sessions more enjoyable and convenient.
Testing and Troubleshooting
After you've set up your customized button functions, it's important to test and troubleshoot to verify everything works smoothly. Here are three steps to guarantee your remote's functionality:
- Check Your Scripts: Make sure all commands in your 'scripts.yaml' file are correctly formatted. Errors in the sequence of service and entity IDs can prevent your remote from functioning as intended.
- Test Each Button: After configuration, test each button individually. Confirm that they execute the expected actions, like power on/off and volume adjustments. This step is vital for identifying any issues early on.
- Utilize Logging Features: Use the logging feature in your system to troubleshoot any problems. Check for error messages that may indicate misconfigured commands or scripts.
If a script doesn't work, verify that the friendly names in your 'switches.yaml' match those referenced in your scripts. Discrepancies can cause execution failures.
If you continue to face issues, consider resetting your remote interface and re-uploading your configurations. This can help resolve conflicts stemming from outdated settings or corrupted files.
Sharing Your Custom Setup
Sharing your custom remote control setup can be a rewarding experience, allowing you to help others while showcasing your creativity.
To get started, export your 'switches.yaml' and 'scripts.yaml' files. These files contain your configurations and scripts, making it easy for others to integrate your setup into their own devices.
Don't forget to capture screenshots of your UI design. Visuals are powerful, so show how your remote interface is organized, highlighting button arrangements and icon choices. This clarity helps others understand your design better.
Consider creating a step-by-step tutorial video or guide. Break down how you set up each button and script, which can greatly ease the replication process for others.
Engage with online communities or forums, where you can showcase your setup and gather feedback. This interaction can inspire further improvements and customizations.
Frequently Asked Questions
How to Make Remote Universal?
To make your remote universal, start by accessing configuration files to set up device controls. Incorporate command sequences and ADB commands for seamless functionality, then design a user-friendly interface that simplifies your experience.
How to Program Remote to Projector?
To program your remote to the projector, access the 'switches.yaml' file for essential functions and use 'scripts.yaml' for advanced commands. Incorporate ADB commands for improved functionality and organize buttons for user-friendly navigation.
What Does IR Remote Mean?
An IR remote means it uses infrared light to send commands wirelessly. You point it at your device, typically within 30 feet, and it needs a clear line of sight to work effectively.
How Does Universal Remote Work?
Think of a universal remote as a key that opens multiple doors. It sends infrared or radio signals to control various devices, allowing you to streamline your entertainment experience with just a single click.
Conclusion
Now that you've transformed your projector remote into a personalized powerhouse, imagine effortlessly gliding through your favorite movies with just a touch. Picture the ease of switching from a thrilling action scene to a cozy rom-com, all at your fingertips. Your custom interface not only enhances your viewing experience but also brings a spark of joy to every movie night. So go ahead, embrace your creativity, and let your customized remote light up your cinematic adventures!
Hi, I’m Dominique. I love movies and want everyone to have the best home cinema experience possible. That’s why I started 1home Theatre Projector. We help people build their home cinema system using the latest technology and news on laser tv and all-around home entertainment.
We’re a small team of movie buffs (and experts) who are passionate about giving our readers the best advice and information possible. So whether you’re just starting out or you’re looking to upgrade your home cinema system, we’ve got you covered!
Home Cinema
Projector Lens Shift vs. Keystone Correction: Which to Use When
How do you choose between projector lens shift and keystone correction for optimal image quality? Discover the answer to elevate your projection experience.
When deciding between projector lens shift and keystone correction, you'll want to prioritize lens shift for the best image quality. Lens shift allows adjustments without sacrificing clarity, ensuring a crisp image. It maintains the integrity of your projection, while keystone correction often leads to resolution loss and visual artifacts. Use keystone correction only when absolutely necessary, as it's best for correcting distortions caused by misaligned projectors. Remember, proper initial placement can greatly reduce your need for adjustments. Stick around, and you'll discover more tips for achieving the perfect projector setup.
Key Takeaways
- Use lens shift when aiming for optimal image quality and clarity, as it maintains resolution without introducing artifacts.
- Employ keystone correction as a last resort for fixing trapezoidal distortions caused by projector misalignment.
- Prioritize proper initial projector placement to minimize the need for both lens shift and keystone correction adjustments.
- Opt for lens shift when installation constraints allow, as it provides greater flexibility without degrading image quality.
- Regular maintenance and recalibration of projector positioning can help preserve image clarity and reduce reliance on keystone adjustments.
Understanding Lens Shift
When setting up your projector, understanding lens shift is vital for achieving the best image quality. Lens shift allows you to adjust the projector's lens assembly both vertically and horizontally, enabling precise image positioning without sacrificing resolution.
For vertical lens shift, you can typically move the image up to 15% of the image height above or below the lens centerline. This feature gives you more flexibility in projector placement, especially if you can't mount the projector directly in line with the screen.
Horizontal lens shift, measured as a percentage of the screen width, allows you to make adjustments without the need to physically relocate the projector. This flexibility is essential in tight spaces where moving the projector isn't possible.
Unlike keystone correction, which digitally alters the image and can degrade quality, lens shift maintains the integrity of your image by adjusting the lens position. By understanding and utilizing lens shift, you can avoid the need for keystone correction altogether, ensuring a clearer, sharper image.
Exploring Keystone Correction
Keystone correction is an essential feature for projector users, especially when you can't position the projector perfectly perpendicular to the screen. This digital adjustment method modifies the image shape, correcting trapezoidal distortions that arise from misaligned projector positioning.
You have two main types of keystone correction at your disposal: vertical keystone, which adjusts the top and bottom of the image, and horizontal keystone, which fixes distortions on the left and right sides.
While keystone correction can provide a quick fix to achieve a rectangular projection, it's important to use it sparingly. Frequent reliance on keystone adjustment may lead to visual issues like a "squished" or "stretched" image, loss of sharpness, and color distortion.
These artifacts can degrade your viewing experience as the effective resolution diminishes. To minimize the need for keystone correction, focus on careful projector positioning and utilize lens shift whenever possible.
Impact on Image Quality
Achieving ideal image quality is essential for any projector setup, and the method you choose to correct image distortions plays a significant role.
When it comes to maintaining a clear and sharp projected image, lens shifting is often the better option. Unlike keystone correction, which can reduce the available pixels and resolution, lens shift allows you to reposition the image without sacrificing quality.
Here are some key points to evaluate:
- Keystone correction may introduce artifacts, leading to a less sharp image.
- Relying on keystone can result in distorted lines, both horizontal and vertical.
- Lens shifting maintains the original resolution, ensuring a crisp image.
- Users generally prefer lens shift due to its minimal impact on image quality.
- Consistent use of keystone might compromise your overall viewing experience.
Flexibility in Projector Placement
When setting up your projector, ideal positioning can make a big difference in your viewing experience.
You might face installation constraints that limit where you can place the projector, but understanding lens shift and keystone correction will help you make the best choice.
Adjustability is key, so let's explore how these features impact installation ease and flexibility.
Optimal Projector Positioning
Finding the ideal projector position is essential for achieving the best image quality, and lens shift technology plays an important role in this process.
With lens shift, you can adjust the lens vertically or horizontally, allowing for optimal projector placement without having to move the entire unit. This flexibility minimizes the need for keystone correction, which can degrade image quality.
To guarantee you get the best results, consider these tips:
- Align the projector with the screen to avoid trapezoidal distortion.
- Use lens shift to maintain resolution and reduce image artifacts.
- Plan your projector positioning carefully, taking lens offset into account.
- Make sure to respect the proper throw distance for your specific model.
- Avoid relying solely on keystone correction, as it can negatively impact visuals.
Installation Constraints Overview
Understanding installation constraints is essential for successful projector placement. When you're setting up your projector, the positioning can greatly impact image quality.
Using lens shift gives you greater flexibility, allowing you to make vertical and horizontal adjustments without sacrificing clarity. This is particularly useful in challenging environments where space is limited or where you can't achieve proper alignment with the screen.
On the other hand, while keystone correction can help fix trapezoidal distortions, it often degrades image quality. It reduces resolution and introduces artifacts, so it should be your last option when positioning the projector.
Ideally, you want to minimize the need for keystone adjustments by strategically placing the projector to guarantee proper alignment with the screen. Some projectors may only offer keystone adjustments, limiting your installation options and possibly forcing you into setups that compromise image quality.
By understanding and planning around lens shift capabilities, you can avoid these installation constraints, leading to a better overall viewing experience.
Adjustability and Installation Ease
Achieving ideal image quality often hinges on the adjustability of your projector.
When considering installation ease, lens shift offers significant advantages over keystone correction. With lens shift, you can move the lens both vertically and horizontally without having to physically relocate the projector, ensuring you maintain peak image quality. This flexibility in projector positioning makes it easier to adapt to various room setups.
On the other hand, keystone correction may be necessary in tricky installations where the projector isn't directly aligned with the screen. However, relying solely on keystone adjustments can degrade image quality and introduce unwanted artifacts.
Here's why you should prioritize lens shift for your projector setup:
- Greater flexibility in positioning.
- Maintains sharp image quality.
- Reduces the need for digital corrections.
- Less distortion in the final image.
- Simplified installation options.
Best Practices for Adjustments
Aligning your projector correctly from the start can considerably reduce the need for keystone correction, which often compromises image quality.
Begin by ensuring your projector placement is ideal, with the top corners of the screen aligned first. This foundational step helps achieve the best alignment and minimizes reliance on keystone adjustments.
Whenever possible, utilize lens shift functionality. It allows for precise adjustments without degrading image resolution, unlike keystone correction, which alters the image digitally and can introduce artifacts.
By leveraging lens shift, you maintain the integrity of the original image while adjusting to fit your screen size.
Regularly check and recalibrate your projector placement, as even slight misalignments can necessitate corrections that impact clarity and detail.
Investing in high-quality mounting hardware and adjustable brackets can also enhance your setup, allowing for accurate positioning and reducing complications associated with keystone correction.
Choosing the Right Technique
Selecting the right technique for adjusting your projector can greatly impact your viewing experience. When it comes to image positioning, you typically want to prioritize lens shift over keystone correction. Lens shift helps maintain image quality by adjusting the lens itself, avoiding any degradation that can occur with keystone adjustments.
Here are some key points to take into account:
- Proper projector placement minimizes the need for adjustments.
- Align your projector perpendicularly to the screen for best results.
- Check the projector's offset percentage to determine ideal placement.
- Utilize lens shift for flexibility in installation without losing clarity.
- Remember that keystone correction may reduce resolution and introduce artifacts.
Frequently Asked Questions
Is Lens Shift Better Than Keystone?
Yes, lens shift's generally better. It keeps your image sharp and clear, allowing for flexible projector placement. Keystone correction can distort the image and reduce quality, so you'll likely prefer lens shift for ideal viewing.
What Does Lens Shift Do in a Projector?
Lens shift lets you adjust the projector's lens position, aligning images precisely without moving the projector. This keeps your image quality high, avoiding the distortions often caused by digital corrections like keystone adjustments.
What Is Keystone Correction on a Projector?
Imagine trying to fit a square peg in a round hole. Keystone correction adjusts distorted images to appear rectangular. While handy, overusing it can blur details, so always aim for proper projector alignment first.
Does Keystone Correction Reduce Resolution?
Yes, keystone correction reduces resolution. It utilizes fewer pixels, leading to potential image degradation and artifacts. To maintain sharpness and quality, you should minimize its use by properly positioning your projector instead.
Conclusion
In the battle of projector adjustments, lens shift reigns supreme for preserving image quality, while keystone correction is a handy backup when you're in a pinch. Remember, lens shift lets you achieve that perfect projection without warping the image, making it feel like you're bringing the cinema to your living room! Choose wisely based on your setup, and you'll transform any space into a stunning viewing experience, ensuring every movie night is nothing short of magical.
Hi, I’m Dominique. I love movies and want everyone to have the best home cinema experience possible. That’s why I started 1home Theatre Projector. We help people build their home cinema system using the latest technology and news on laser tv and all-around home entertainment.
We’re a small team of movie buffs (and experts) who are passionate about giving our readers the best advice and information possible. So whether you’re just starting out or you’re looking to upgrade your home cinema system, we’ve got you covered!
Home Cinema
How to Use a Projector for Product Photography and Videography
Master the art of using a projector for stunning product photography and videography, but discover the key techniques that will elevate your visuals beyond expectations.
To use a projector for product photography and videography, start by selecting a high-brightness projector, ideally 3000 lumens or more, for clear images. Position the projector at eye level or just above your product and maintain a distance of 8-10 feet for best results. Control ambient lighting to enhance your projector's brightness and minimize shadows. Don't forget to match the color temperature to avoid unwanted casts and use high-resolution images for vibrant backgrounds. Experiment with various setups to achieve your desired look, and there's much more to explore about optimizing your projector's use effectively.
Key Takeaways
- Choose a high-brightness projector (at least 3000 lumens) with 4K UHD resolution for clear, vibrant product images in various lighting conditions.
- Position the projector at eye level or slightly above the product to minimize shadows and ensure flattering angles.
- Control ambient lighting to enhance projection visibility and prevent washed-out images, using modifiers to direct light effectively.
- Experiment with color temperature settings and white balance adjustments to achieve accurate color representation in your photographs.
- Utilize themed backgrounds and dynamic visuals for storytelling, enhancing product appeal and engagement with your audience.
Projector Selection and Types
When selecting a projector for product photography, it's crucial to prioritize models that offer high brightness levels, ideally at least 3000 lumens. This guarantees your images remain clear and vibrant, even in well-lit environments. A projector with high brightness levels helps you avoid washed-out visuals, allowing your products to shine.
Next, consider the resolution. For high-end product shots, opt for projectors with 4K UHD resolution. This delivers superior detail and clarity, making fine details pop. A high dynamic range (HDR) capability is also important; it enhances color accuracy and contrast, guaranteeing your product images look vibrant and appealing.
Versatility is key in projector selection, so choose digital projectors that can easily connect to various devices. This feature allows for quick adjustments during shoots, making your workflow smoother.
Importance of Brightness
Brightness plays an important role in product photography, directly influencing the clarity and vibrancy of your images. To achieve stunning results, consider these key points about brightness and lumens:
- Optimal Exposure: A projector with at least 3000 lumens allows you to use faster shutter speeds and lower ISO settings, which improves image quality.
- Detail Highlighting: Adequate brightness minimizes pixel visibility on products, making sure the projected images appear smooth and professional on camera.
- Avoiding Washout: Insufficient brightness can lead to washed-out images and poor color reproduction, so it's vital to select a projector with appropriate lumens for your environment.
For effective product shots, the average exposure settings of 1/60 sec, f4, and ISO 200 require sufficient projector brightness. This guarantees that your images maintain their intended depth and detail.
Managing Color Temperature
Getting the color temperature right is essential for accurate product photography, as mismatched temperatures can cause unwanted color casts in your images.
When using a projector, you'll need to set a custom white balance to match the projector's color temperature, which often differs from other light sources in your setup. This adjustment guarantees that the colors in your images remain true to life.
To help align the color temperatures, consider using gels like CTO (Color Temperature Orange) on your additional light sources. These gels can help warm up the light, making it more compatible with the warmer tones projected by your device.
It's also wise to experiment with shooting in RAW format, as this gives you greater flexibility in post-processing. You can adjust the white balance without compromising your image quality, allowing for quick corrections if needed.
For initial testing, shoot bright images with large white sections. This technique will help you gauge the effective color balance between the projector and your other lighting elements, guaranteeing your products look their best.
Setup Techniques for Projectors
Effective setup techniques are vital for maximizing the potential of your projector during product photography. By carefully considering your projector's position and the surrounding environment, you can achieve stunning results. Here are three key setup techniques to keep in mind:
- Positioning: Place the projector at eye level or just above the subject. This minimizes unflattering shadows and guarantees even illumination of the projected image.
- Distance: Maintain a distance of 8-10 feet from the model for 3/4 length shots. This helps the projected image cover the desired area without distortion.
- Rear Projection: Use rear projection techniques with translucent screens. This enhances image clarity while reducing reflections and background spill.
Additionally, controlling ambient lighting is essential. Make sure the room's light doesn't wash out the projector light; aim for a balance that highlights your product without distractions.
Experiment with different lighting placements and modifiers, like reflector dishes, to direct light effectively and elevate your product shots. With these setup techniques, you'll set the stage for engaging visuals that truly showcase your products.
Lighting Adjustments for Clarity
To achieve clarity in your product photography, it's crucial to focus on ideal light placement and balance ambient illumination.
Position your key light strategically to manage shadows effectively, ensuring your product stands out without losing detail.
With the right adjustments, you'll enhance both the visibility of your product and the quality of the projected images.
Optimal Light Placement
Proper light placement plays an essential role in achieving clarity and depth in product photography. To get the best results, consider these key points:
- Position your key light at a 45-degree angle to the product. This creates depth and dimension while avoiding harsh shadows.
- Control ambient light to maintain the integrity of the projected image. Excessive brightness from other sources can wash out your visuals.
- Utilize rim lights behind the product to enhance separation from the background, providing a more polished look.
Experimenting with different light angles and intensities is crucial. A distance of 8-10 feet from the product is recommended for ideal projection coverage and clarity.
You can also use modifiers like reflector dishes with grids to focus light direction and minimize background spill, ensuring that your projected image remains clear and vibrant.
Balancing Ambient Illumination
Achieving clarity in product photography often hinges on how well you balance ambient illumination with your projector's brightness. To get ideal results, aim for a projector that has at least 3000 lumens. Position additional lights carefully to avoid background spill, ensuring they enhance the projected image instead of washing out details.
Here's a quick reference table to help you with your lighting setups:
Lighting Setup | Ambient Illumination | Projector Brightness |
---|---|---|
Key Light Only | Low | High |
Rim Light Only | Medium | Medium |
Combined Setup | Balanced | High |
Adjusted Backdrop | Soft | Medium |
Experiment with different configurations, like using a key light and rim light, to create depth while keeping your product and background clear. Don't forget to adjust the white balance settings to match your projector and ambient lights. Light modifiers, such as reflector dishes with grids, can also help direct light precisely, minimizing unwanted shadows and enhancing your product's visibility against the projected backdrop.
Managing Shadows Effectively
Managing shadows effectively is essential for enhancing clarity in your product photography. By controlling shadows, you can guarantee the projected images from your projector shine through without distractions. Here are three key strategies to take into account:
- Positioning: Place the projector above the model's eye level, ideally 8-10 feet away. This minimizes unflattering shadows and provides better image coverage on your subject, which is especially important for achieving the best results in top projectors for gaming enthusiasts.
- Lighting Control: Use direct overhead lighting to manage shadows on the model. This helps maintain a balance between ambient light and the projector's output, preventing the background from being washed out.
- White Balance Adjustment: Confirm your camera's white balance matches the color temperature of both the projector and surrounding lights. This prevents unwanted color casts that can create distracting shadows.
Regularly assess your lighting setup as you shoot. Make real-time adjustments to guarantee shadows don't obscure any projected elements.
Think about experimenting with lighting modifiers like reflector dishes with grids to enhance directionality and reduce background spill.
With these tips, you'll achieve clearer, more impactful product photography that showcases your projected images beautifully.
Creative Background Applications
Using a projector opens up a world of themed background ideas that can elevate your product photography.
By incorporating elements of innovative design, you can create dynamic visual storytelling by projecting images or animations that enhance your product's narrative.
Experimenting with different themes not only adds interest but also helps convey the essence of what you're showcasing.
Themed Background Ideas
Creating an enchanting atmosphere with themed backgrounds can greatly elevate your product photography. By using a projector, you can customize visuals to fit specific concepts that resonate with your target audience. Additionally, incorporating elements from nature can enhance your imagery, similar to how camping locations create unique backdrops for outdoor experiences.
Here are three themed background ideas to contemplate:
- Seasonal Themes: Use vibrant images of autumn leaves or summer beach scenes to connect your product with the time of year.
- Cultural Motifs: Incorporate backgrounds that reflect cultural events, like festivals or traditional art, to make your product more relatable.
- Event-Based Themes: Create a festive atmosphere with holiday-themed images, enhancing the emotional appeal of your product.
Experiment with different projector placements to find the right angle that complements your product without overshadowing it. High-contrast and vibrant images will help capture attention and create a striking backdrop.
Additionally, contemplate using software to animate your projected backgrounds, allowing for dynamic changes that keep the visuals fresh and engaging throughout the shoot. By thoughtfully selecting themed backgrounds, you can create immersive environments that not only showcase your product but also tell a compelling visual story.
Dynamic Visual Storytelling
Engaging visuals can transform your product photography into a storytelling experience that resonates with your audience. By using a projector, you can create dynamic and customizable backgrounds that immerse viewers in a specific theme or atmosphere, enhancing both storytelling and product presentation. This approach provides a unique visual context that complements your product's features and branding.
To achieve the finest results, experiment with different projector resolutions and brightness settings. Higher lumens guarantee vibrant and clear imagery, making your backgrounds pop.
Remember, careful attention to lighting placement is essential. You want to avoid shadows on the product while making sure the projected background is visible and impactful. A distance of 8-10 feet is recommended for ideal coverage.
Additionally, consider techniques like rear projection to enhance the clarity of your product shots. This method helps eliminate common issues associated with direct projection, such as glare or distortion, resulting in a professional finish.
Overcoming Pixel Visibility Issues
Pixel visibility can be a frustrating hurdle in product photography when using a projector, but several strategies can help you overcome this issue. Here are three effective methods to minimize pixel visibility:
- Choose High-Resolution Projectors: Opt for projectors with a resolution of 1080p or higher. This guarantees finer details in the projected images, helping reduce the appearance of pixels on your subject.
- Use Softer Lighting: Avoid harsh lighting conditions. Softer lighting can diffuse pixel visibility, creating a more flattering look for your products. Experiment with different light sources and distances to find what works best.
- Enhance Image Quality: Always utilize high-quality images rich in colors and textures. Engaging visuals can distract from pixel visibility, making your product look more appealing.
Additionally, adjust the projector's distance from the subject for maximum image sharpness. Increasing the distance can help spread the image more evenly, further reducing pixel visibility.
Regularly test and calibrate the projector's brightness and contrast settings to find the perfect balance that maintains image quality while minimizing pixel visibility.
Implementing these strategies will lead to more polished product photography.
Experimentation and Adaptation
Finding the right balance in your product photography often involves trying out different techniques and settings. Embrace experimentation with your projector's brightness and color temperature. These adjustments can dramatically alter the final look of your images, allowing you to express your creativity based on the product's unique characteristics.
Using a high-lumen projector (like a 3000-lumen model) enhances brightness, enabling faster shutter speeds and lower ISO settings. This leads to clearer images with minimal noise. Pairing the projector with various lighting techniques, such as key and accent lights, helps balance ambient light, reduces shadows, and refines your final product's appearance.
To inspire your process, consider the following table showcasing ways to adapt your approach:
Technique | Effect |
---|---|
Brightness Adjustment | Enhances clarity and detail |
Color Temperature Change | Alters mood and tone |
Key and Accent Lighting | Balances shadows and highlights |
Regular Image Rotation | Sparks creativity and fresh ideas |
Community Feedback | Refines techniques and inspires growth |
Community Resources and Learning
The world of product photography is enriched by a vast array of community resources that can elevate your skills in using projectors.
By tapping into these resources, you'll find plenty of opportunities for growth and improvement. Here are three key options you should consider:
1. Community Forums: Join online platforms where you can access a wealth of tutorials and guides centered around projectors in product photography.
Learning from experienced professionals can fast-track your expertise.
2. Workshops: Attend workshops and webinars led by industry experts.
These sessions offer hands-on experiences that dive deep into best practices for using projectors, allowing you to practice and ask questions in real-time.
3. Continuous Learning: Engage with local photography clubs or online groups to share techniques and experiences.
This creates a collaborative environment where you can receive feedback and adapt new projector techniques.
Frequently Asked Questions
Can You Use a Projector for Photography?
Yes, you can definitely use a projector for photography. It allows you to create dynamic backdrops and enhance storytelling. Just make sure to take into account brightness, setup, and lighting for the best results.
How to Use a Projector as a Background?
Using a projector as a background can transform your visuals into an artist's masterpiece. Position it above eye level, adjust brightness, and experiment with distance to create a stunning, cohesive effect that captivates your audience.
What Background Is Best for a Projector?
For the best projector background, choose white or light-colored surfaces. They enhance clarity and vibrancy. You can also consider translucent screens to minimize reflections, ensuring the projected images stand out beautifully against your subject.
Can You Connect Camera Directly to Projector?
Imagine you're at a retro movie night; you can't connect your camera directly to a projector. Most projectors need video inputs. Check for adapters or consider using a computer for better control and quality.
Conclusion
Incorporating a projector into your product photography and videography can elevate your visuals to breathtaking new heights. By carefully selecting the right projector, adjusting lighting, and experimenting with backgrounds, you can create stunning images that captivate your audience. Don't shy away from adapting your setup; the possibilities are virtually endless. Remember, the more you explore and refine your techniques, the more you'll reveal the true potential of your creativity. Happy shooting!
Hi, I’m Dominique. I love movies and want everyone to have the best home cinema experience possible. That’s why I started 1home Theatre Projector. We help people build their home cinema system using the latest technology and news on laser tv and all-around home entertainment.
We’re a small team of movie buffs (and experts) who are passionate about giving our readers the best advice and information possible. So whether you’re just starting out or you’re looking to upgrade your home cinema system, we’ve got you covered!
-
Beginners Guides3 months ago
How to Use Surround Sound With Firestick
-
Beginners Guides3 months ago
How to Connect Speaker Wire & Spot the Connectors
-
Home Cinema3 months ago
What to Know when Buying a Home Theatre Projector
-
Beginners Guides3 months ago
Why Do Projector Bulbs Explode?
-
Beginners Guides3 months ago
How to Use Home Theater Speakers Without a DVD Player
-
Home Cinema3 months ago
Factors to Consider When Buying a Home Cinema and Music System
-
Beginners Guides3 months ago
How to Stop Echo Home Theater
-
Beginners Guides3 months ago
How to Connect Home Theatre to PlayStation 5