Connect with us

Home Cinema

The Benefits of Anamorphic Lenses in Home Cinema Projectors

Harness the power of anamorphic lenses to enhance your home cinema experience—discover how they can transform your movie nights into cinematic adventures!

Published

on

enhanced cinematic viewing experience

Anamorphic lenses can elevate your home cinema by providing a wider, more immersive viewing experience. They expand images horizontally, ensuring you enjoy a full 2.35:1 aspect ratio without those distracting black bars. The enhanced clarity and brightness they offer make every movie night feel cinematic. Plus, these lenses maintain high compatibility with your projector, allowing seamless switching between different content formats. You'll also appreciate the vibrant HDR performance. Proper installation is key for ideal results, but once set up, you'll truly transform your home theater. Stick around to discover even more advantages and tips for maximizing your setup.

Key Takeaways

  • Anamorphic lenses provide a wider aspect ratio (2.35:1) for an immersive cinematic experience without black bars.
  • They enhance image quality by utilizing the full pixel panel, improving brightness and detail in 4K HDR content.
  • Seamless switching between 16:9 and 2.35:1 content allows for versatile viewing without compromising image integrity.
  • Proper installation and alignment maximize performance, ensuring minimal distortion and optimal image quality over time.

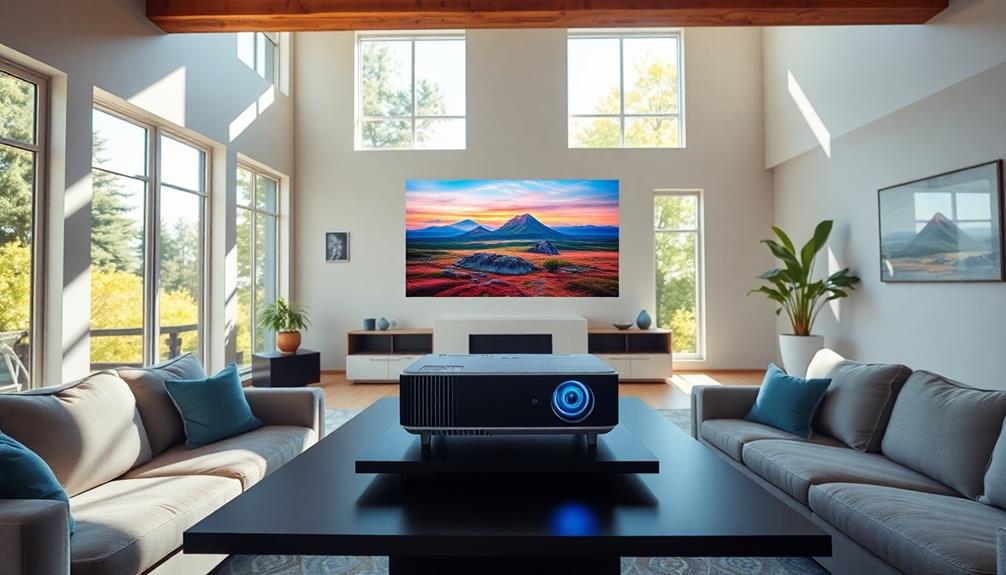
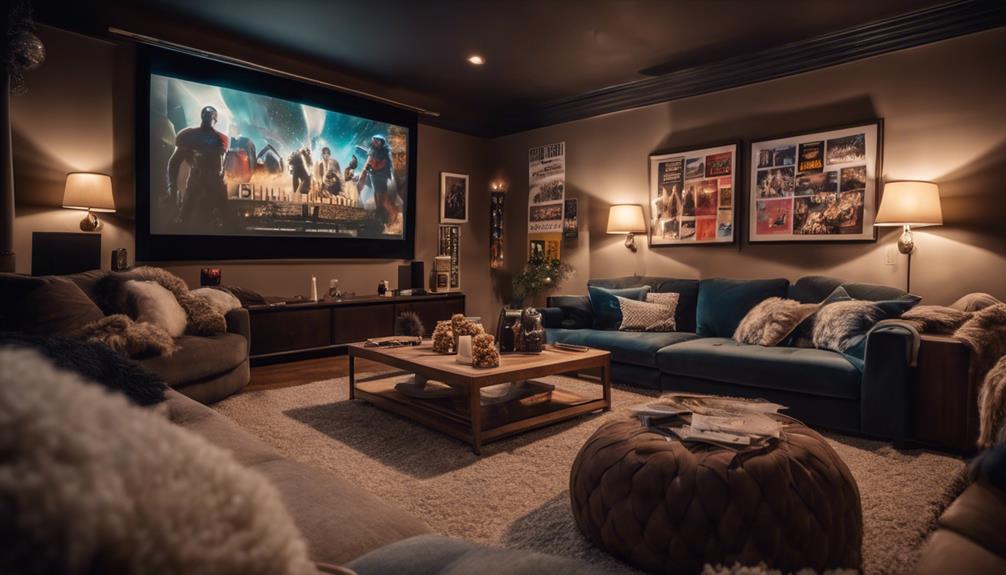
Anamorphic Lens Basics

Anamorphic lenses stretch images horizontally to fit wider screens, creating a more immersive cinematic experience in your home theater. These lenses are designed to optimize the 2.35:1 aspect ratio commonly used in films, allowing you to enjoy a wider field of view without the distraction of black bars.

By utilizing Horizontal Expansion and Vertical Compression techniques, anamorphic lenses enhance image quality considerably. When you incorporate high-quality options like those from Panamorph, you can support impressive resolutions, even up to 8K, ensuring your setup remains future-proof.

To maximize the benefits, it's essential to match the lens with compatible projector models and screen sizes. Proper setup is key—test various configurations to achieve the best image quality tailored to your specific environment.

With anamorphic lenses, you'll notice increased brightness, improved pixel density, and reduced distortion, making film-watching a truly engaging experience. Plus, as you eliminate black bars from widescreen films, you'll appreciate how these lenses transform your home theater into a professional-quality viewing space.

Advantages of Anamorphic Lenses

enhanced cinematic visual storytelling

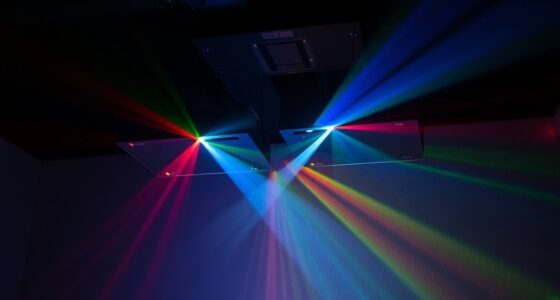
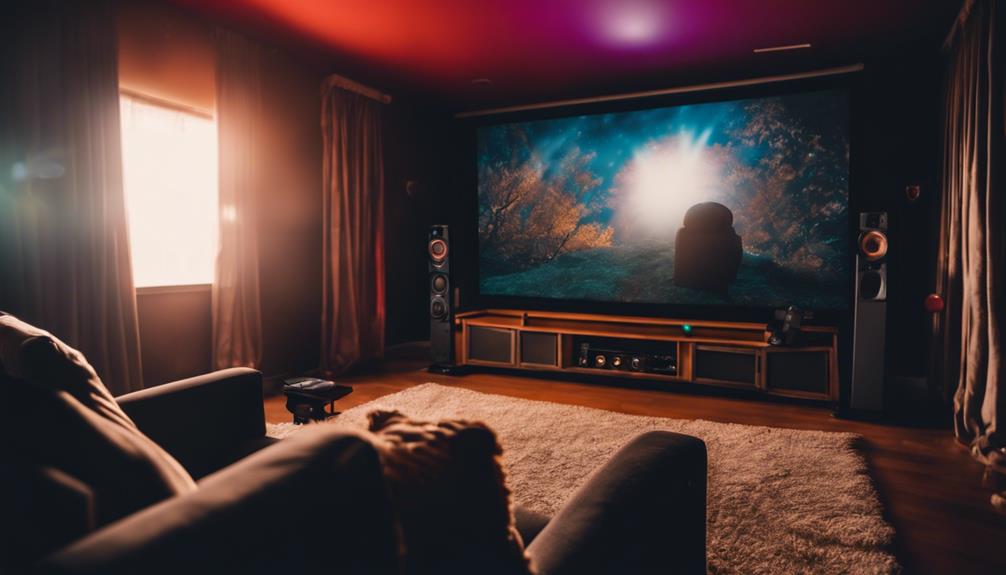
Enhancing your home cinema experience, anamorphic lenses allow projectors to display a wider 2.35:1 aspect ratio, effectively eliminating black bars and immersing you in the film. This wider aspect ratio considerably improves image quality, utilizing the full pixel panel of your home theater projectors. You'll notice increased brightness and pixel density, which is particularly beneficial for HDR content, bringing vibrant colors to life.

One of the standout advantages of anamorphic lenses is their ability to switch seamlessly between different aspect ratios, letting you enjoy both 16:9 and 2.35:1 content without any loss of quality or image distortion. By compressing images horizontally, they enhance the field of view and sharpness while reducing distortion in wide formats, elevating your viewing experience.

Advertisement

Additionally, high-quality anamorphic lenses are designed for continuous use, ensuring minimal image degradation over time. This helps maintain contrast and reduces excess light spill in your viewing area, providing a more cinematic feel.

With these benefits, anamorphic lenses truly transform your home theater setup, making every movie night an immersive adventure.

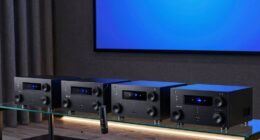
Installation Considerations

installation planning and guidelines

When you're ready to install anamorphic lenses, there are several important factors to take into account to guarantee peak performance and image quality.

Start by ensuring you have a suitable mounting plate, as many installations require a new one. This process may involve dismounting your projector for proper alignment. Misalignment can lead to lens distortion, like barrel roll, which you definitely want to avoid.

Next, check your projector settings to accommodate various aspect ratios. Anamorphic lenses can complicate this, so you'll need to configure settings correctly, like using Anamorphic Mode C for 2.35:1 content and Mode D for 16:9.

Be aware of compatibility issues with existing mounting brackets; temporary solutions may seem convenient but can lead to instability and affect image quality.

Advertisement

Performance Enhancements

boosting athletic abilities safely

Utilizing anamorphic lenses in your home cinema projector markedly boosts brightness and overall image quality, making your viewing experience more impactful. These lenses enhance light efficiency by using the full pixel panel of the projector, allowing for a truly immersive experience.

Performance Feature Benefits
Brightness Significant increase in light efficiency
Image Quality Enhanced detail and clarity for 4K HDR content
Constant Image Height Eliminates black bars for a seamless viewing experience

With high-quality anamorphic lenses, like the Panamorph Paladin, you can enjoy modern content without sacrificing detail. They also improve dynamic iris performance and adaptive tone mapping, enhancing HDR highlights for a more vivid picture. You'll find that switching between 16:9 content and 2.35:1 movies is seamless, offering versatility as you explore an increasing variety of streaming options.

Incorporating anamorphic lenses into your home cinema setup not only elevates your viewing experience but also transforms how you perceive films, making them more engaging and visually stunning.

Future Trends in Home Cinema

home cinema trends 2023

Embracing advancements in projector technology, home cinema enthusiasts are increasingly turning to integrated anamorphic processing for a more streamlined setup. With the rise of high-resolution projectors, you're able to enjoy native ultra-wide formats without the need for traditional anamorphic lenses. This evolution simplifies your home theater experience while maintaining cinematic quality.

As streaming services continue to deliver diverse content in various aspect ratios, the focus on flexible masking solutions has become essential. These solutions help eliminate distracting black bars, enhancing your viewing experience. You're likely to find that more DIY solutions are emerging, allowing you to achieve that cinematic feel without breaking the bank.

Moreover, community engagement in home theater forums is thriving. These platforms foster discussions that help you optimize your setup and explore the latest trends in projector technology. As fellow enthusiasts share their experiences, you can learn about innovative approaches to maximizing your home cinema's potential.

Frequently Asked Questions

Why Use an Anamorphic Lens on a Projector?

You'd use an anamorphic lens on a projector to achieve a wider aspect ratio, enhance image quality, and eliminate letterboxing. It stretches images, allowing for a more immersive viewing experience without sacrificing resolution.

Advertisement

What Are the Advantages of Anamorphic Lenses?

Imagine diving into a vast ocean of cinematic wonder. Anamorphic lenses expand your viewing experience, enhancing image quality and flexibility while eliminating letterboxing. You'll enjoy vibrant colors and stunning detail, making every movie night unforgettable.

Why Do Filmmakers Use Anamorphic Lenses?

Filmmakers use anamorphic lenses to create a wider aspect ratio, enhancing visual storytelling. You'll notice stunning landscapes and dramatic flares, all while maximizing image quality and immersing audiences in a mesmerizing cinematic experience.

What Are the Disadvantages of Anamorphic Lenses?

Anamorphic lenses can complicate your setup due to high costs and installation challenges. You might face image distortion, limited aspect ratio options, and potential resolution loss, especially with standard 16:9 content. Choose wisely!

Conclusion

Incorporating anamorphic lenses into your home cinema setup can truly elevate your viewing experience.

Did you know that using an anamorphic lens can increase your horizontal field of view by up to 33%? This means you'll enjoy a more immersive picture, just like in the theaters.

Advertisement

By embracing this technology, you're not just enhancing image quality; you're transforming your home into a cinematic haven.

So, consider adding an anamorphic lens for that ultimate movie night magic!

Tom is the Editor-in-Chief of 1home Theatre Projector, a website that provides news and reviews on the best home cinema experiences. With over 10 years of experience in the industry, Tom knows what makes a great home theatre projector and wants to make it easy for everyone to build the perfect setup for their needs. When he's not busy writing or testing projectors, Tom enjoys watching classic films and spending time with his family.

Continue Reading
Advertisement

Home Cinema

Using Your Projector for Digital Art and Photography Displays

Harness the power of your projector to transform digital art displays, but are you ready to unlock its full potential?

Published

on

By

projector for art displays

Using your projector for digital art and photography displays can elevate your work dramatically. Start by ensuring your projector offers at least 2,000 lumens for vibrant images. Position it 8-10 feet up for ideal lighting. You can project onto white walls or screens to maximize clarity. Experiment with colors by using gels or layering multiple images to create new visuals. Don't forget to choose high-resolution images and leverage different surfaces for unique effects. This setup not only amplifies your presentation but also invites innovative collaboration. If you're curious about techniques to enhance your displays further, there's much more to explore.

Key Takeaways

  • Choose a digital art projector with at least 2,000 lumens for vibrant displays in well-lit environments.
  • Ensure proper connectivity options like HDMI or USB for seamless integration with devices.
  • Experiment with various projection surfaces, such as textured walls or fabric, for unique visual effects.
  • Utilize color management techniques, including white balance adjustments and shooting in RAW, for accurate color representation.
  • Engage in collaborative art sessions by projecting images onto large surfaces for real-time modifications and creativity.

Projector Types Overview

When you're diving into digital art, understanding the different types of projectors can really enhance your creativity. Digital art projectors are designed to project digital images and videos directly from devices like computers and smartphones, making them perfect for bright environments.

With brightness levels exceeding 2,000 lumens, you'll find clarity in your projected image even in ambient light. Additionally, utilizing a home theater setup can greatly enhance your projection experience by ensuring ideal image quality and immersive sound.

Opaque projectors, on the other hand, require a dark room. They project images from physical prints and cater to artists who enjoy traditional media. If you want to work with slides, slide projectors can still be a valuable tool. They display photographs from physical slides, allowing you to enlarge reference images accurately for your artistic projects.

Overhead projectors are commonly used in classrooms, projecting transparencies effectively. They can also help you enlarge reference photos, though you might find more affordable secondhand models.

For beginners, the Artograph EZ Tracer Art Projector offers a simple entry point for projecting images onto a large canvas, perfect for straightforward sketches. Each type of projector has its unique strengths, so choosing the right one can elevate your digital art experience.

Advertisement

Importance of Brightness

significance of illumination levels

Brightness plays a crucial role in your projector's performance, directly impacting how well you can see your artwork in various lighting conditions. When selecting a projector, consider the brightness measured in lumens. For clear projections in well-lit environments, aim for a projector with over 2,000 lumens.

For example, a projector with 3,000 lumens can greatly enhance your photography, allowing you to capture dynamic scenes without distortion. Additionally, using air purifiers to improve indoor air quality can create a more suitable environment for your displays, making certain that dust and allergens don't obstruct your view.

The brightness of the projected image also affects your exposure settings. An average brightness image might require settings like 1/60 second, f4, and 200 ISO for maximum image clarity. Brighter projectors not only improve clarity but also enable faster shutter speeds and lower ISO settings, which are crucial for capturing moving subjects effectively.

However, remember that while high brightness can enhance visibility, it's important to maintain a balanced color palette. Excessive brightness can overwhelm colors, detracting from the overall quality of your artwork.

Color Management Techniques

effective color control methods

Achieving the right visual impact in your digital art goes beyond just having a bright projector; color management is key to ensuring your images look their best. Proper color management allows you to adjust the color temperature of your projector, enhancing the overall appearance of your projected images.

Incorporating techniques from yoga for back pain management can help create a comfortable environment for your creative process. Here are some techniques to keep in mind:

  • Shoot in RAW format for flexible post-processing.
  • Start with bright images that have large white sections to gauge projector accuracy.
  • Maintain a controlled color scheme to avoid overwhelming visuals.
  • Adjust white balance to correct any color casts.
  • Use CTO gels on flashes to match warmer projector bulbs with surrounding lighting.

Setting Up Your Projector

projector installation guidelines provided

To set up your projector effectively, position it at a height that mimics natural light sources. Ideally, elevate it about 8-10 feet from the ground to create flattering lighting on your subjects, guaranteeing ideal coverage in 3/4 length shots.

It's also important to reflect on the emotional connection of your audience, similar to how cats show signs of affection upon their owner's return.

Advertisement

Next, check the brightness of your projector; you'll want a minimum of 2,000 lumens for clear projections, especially in well-lit environments. Adjust the exposure settings based on the type of source image you're projecting, whether it's dark or bright.

For the best image quality, project onto a white wall or screen. Experiment with different angles to enhance visibility and clarity of the projected artwork.

Additionally, verify your projector has the right connectivity options, like HDMI or USB, to seamlessly integrate with your devices during setup.

Lastly, maintain a clutter-free background and control any additional light sources to prevent them from spilling onto the projection area. This preserves the integrity and focus of your projected image, allowing your digital art to shine beautifully.

With these steps, you'll create an impressive display that captivates your audience.

Advertisement

Creative Experimentation Ideas

innovative project inspiration suggestions

Now that you've set up your projector, it's time to get creative with unique projection techniques.

Consider incorporating elements from your cozy aesthetics and natural elements to enhance your displays.

Try collaborating with other artists to layer your work, or experiment with projecting on different surfaces for unexpected effects.

These approaches can spark fresh ideas and create engaging experiences for your audience.

Unique Projection Techniques

Exploring unique projection techniques can transform your digital art into enchanting experiences. By experimenting with various methods, you can elevate your displays and captivate your audience. Here are some ideas to get you started:

  • Project images onto textured surfaces like fabric or wood for unique backgrounds.
  • Use color gels or filters on your projector for dynamic mood shifts, much like how AI-generated music influences ownership debates in the music industry.
  • Layer multiple projected images at different opacities for a composite effect.
  • Adjust focus and zoom settings to create distortion effects that reveal new perspectives.
  • Incorporate movement with video projections or animated graphics to enhance the multimedia experience.

With these techniques, you can turn your digital art into immersive displays that invite interaction and engagement.

As you experiment, consider how each method affects the overall feel of your artwork. Each unique technique offers a chance to tell a story and evoke emotions in your viewers.

Advertisement

Collaborative Art Sessions

Collaborative art sessions offer an exciting opportunity to harness the power of digital projectors for collective creativity. By using a digital art projector, you can project images onto large surfaces, allowing multiple artists to trace, paint, or modify visuals in real-time. This not only enhances creativity but also fosters effective teamwork.

Here's how to maximize your collaborative art sessions:

Action Benefit
Use projectors still Maintain focus and clarity
Adjust brightness settings Optimize visibility for all
Project images onto large surfaces Experiment with scale and perspective
Share photos onto canvas Facilitate dynamic presentations
Explore new techniques Foster an interactive environment

These projectors with adjustable brightness settings work well in varying lighting conditions, ensuring everyone can see the artwork clearly. You'll find that integrating projectors into group activities encourages experimentation and enhances communication, as participants can visualize and discuss their ideas more effectively. So, gather your fellow artists and let the projector spark your creativity!

Engaging With the Community

community engagement initiatives active

Engaging with the community opens up a wealth of opportunities to enhance your skills in projector techniques. By connecting with others, you can discover new insights and inspiration that elevate your artistic projects.

For instance, you might find inspiration from immersive experiences at local art events or even draw parallels with attractions at water parks in Washington DC that blend excitement and creativity.

Here are some ways to get involved:

Advertisement
  • Attend workshops to learn about projection lighting and techniques.
  • Join online forums and social media groups for discussions and tips.
  • Participate in local art events featuring projected artwork.
  • Collaborate with fellow artists on innovative projection-based projects.
  • Organize or attend exhibitions to showcase your immersive creations.

These activities not only provide valuable feedback but also foster collaboration that can lead to unique artistic expressions.

Engaging with others in your community will help you gain hands-on experience and inspire fresh ideas for your digital art and photography displays.

You'll discover that sharing techniques and visuals with fellow artists can cultivate a supportive environment where creativity thrives.

Plus, showcasing your work in exhibitions allows for interaction and feedback from viewers, further enhancing your artistic journey.

Enhancing Your Art Experience

elevating artistic engagement strategies

Transform your art experience by harnessing the power of digital projectors. These devices can project high-resolution images, up to 1080p or even 4K, allowing your art and photography to shine with clarity and vividness. When you display your work, details become more visible, engaging your audience during presentations or exhibitions.

Incorporating breathtaking destinations into your art themes can enhance the overall narrative and emotional connection of your displays.

Using a projector with brightness levels exceeding 2,000 lumens guarantees your images remain vibrant, even in well-lit environments. This feature is essential for larger audiences, as it facilitates better visibility and engagement.

Advertisement

Imagine projecting images up to 100 inches wide—this transforms walls into canvases, creating immersive experiences that draw viewers in.

Modern digital projectors offer advanced connectivity options like Wi-Fi and HDMI support, making it simple to showcase your digital art directly from a laptop, tablet, or smartphone. You can easily switch between devices, making sure that your art is always front and center.

Experiment with different projection angles and distances to optimize the visual impact of your artwork. Elevated projector positions can enhance lighting and presentation quality, creating a stunning display that elevates your art experience.

Embrace these tools to revolutionize how you share your creative vision!

Conclusion

Using a projector for digital art and photography can transform your creative experience, but remember: it's not just about the technology. The real magic happens when you engage with your audience and explore new ideas together. Experimenting with different settings and techniques can reveal unexpected beauty in your work. So, don't just project—connect and inspire. The truth is, art thrives in community, and your projector can be a bridge to deeper conversations and collaborations.

Advertisement
Continue Reading

Home Cinema

Portable Projectors: How to Set Up a Movie Theater Anywhere

Perfect your outdoor movie experience with portable projectors and discover essential tips for setting up an unforgettable theater anywhere. What will you need to know?

Published

on

portable projector movie setup

Setting up a movie theater anywhere with a portable projector is easier than you think! Start by choosing a bright projector with at least 3,000 lumens and connect it to your favorite device via HDMI. Find a location with minimal light and clear viewing angles. Position the projector per the manufacturer's guidelines and guarantee the screen is reflective and stable. For great sound, pair external speakers with the projector. Keep an eye on the weather, and have a backup plan ready. If you want tips for memorable movie nights, you'll find plenty more helpful ideas ahead.

Key Takeaways

  • Choose a portable projector with at least 3,000 lumens for optimal brightness, ensuring clear images in various lighting conditions.
  • Select a suitable location with minimal ambient light and enough space for seating to enhance the viewing experience.
  • Position the projector at the recommended throw distance and ensure it is centered and leveled for a distortion-free image.
  • Use high-quality HDMI cables for connecting devices, and consider wireless options for convenience and ease of setup.
  • Test audio and video connections beforehand to troubleshoot any sync issues, ensuring a seamless movie experience.

Essential Equipment for Projector Setup

projector setup essential equipment

When setting up a portable projector, you'll often find that having the right equipment is vital for an enjoyable viewing experience.

First, consider the brightness of the projector. For ideal outdoor viewing, select a model with at least 3,000 lumens, and aim for 5,000 lumens or more if you're in bright ambient light conditions.

Next, focus on image quality; Full HD (1080p) is standard, but a 4K projector can elevate your cinematic experience considerably.

Screen size and type also play an important role in your projector setup. A high-quality reflective screen improves image quality, especially in bright environments, guaranteeing clear visibility. Confirm your screen is compatible with your projector for the best results.

Don't forget about connectivity; having HDMI ports is vital for connecting various devices, so check the projectors available to make sure you have what you need.

Advertisement

Finally, if portability is a priority, lightweight models like the Capsule Air or Cosmos 4K SE offer extended battery life, making them convenient for movie nights anywhere.

This combination of equipment will set you up for an incredible viewing experience!

Choosing the Perfect Location

selecting ideal venue site

Finding the right location for your portable projector setup can make all the difference in your viewing experience. Start by choosing a spot with ample space for seating arrangements, guaranteeing a clear viewing angle. Stay away from trees or tall structures that might obstruct the screen. To enhance your viewing experience, consider selecting a location that allows for ideal high refresh rates and minimal distractions.

Next, consider ambient light. Select a site with minimal illumination, positioning your setup far from street lamps or house lights. This will greatly enhance picture quality. If you can, avoid direct light exposure, especially from the setting sun, to improve visibility during your screening.

It's also essential to verify you have stable ground. A level surface prevents your equipment from shifting, which can disrupt your movie. Using portable projector stands can provide extra stability.

Installing Your Projector

projector installation guide provided

Installing your projector correctly is critical for achieving the best viewing experience. Start by positioning your projector at the ideal throw distance as specified by the manufacturer. This guarantees you get the desired image size and clarity.

Center and level the projector with your screen to prevent any image distortion from misalignment. Additionally, consider the environment in which you're setting up the projector, as factors like air quality can affect the overall experience; using an air purifier can help maintain a comfortable atmosphere by reducing allergens and pollutants effective air quality.

Advertisement

Next, choose a stable and secure surface for your projector installation. This could be a sturdy table or a dedicated mount that can handle the projector's weight. A secure surface helps prevent accidental movement or tipping during operation, which is essential for maintaining image quality.

Once you've positioned your projector, connect it to your media source using high-quality HDMI cables. This step is crucial for optimal video and audio output without any signal loss, guaranteeing a seamless viewing experience.

If you're setting up outdoors, consider using weather-resistant equipment and make sure that all components are secured to withstand wind or adverse conditions.

Proper projector setup will make all the difference in enjoying a cinematic experience wherever you are!

Setting Up the Screen

preparing the display setup

Setting up the screen is just as important as positioning your projector, as it directly impacts your viewing experience. Choose a screen that's properly reflective; high-quality screens greatly enhance image visibility, especially in bright conditions.

Position the screen at an ideal height, making sure it's visible to all viewers and away from light sources to minimize glare.

Advertisement

If you're using a portable screen, follow the manufacturer's setup instructions for easy assembly and stability. Make sure the screen is anchored securely to prevent movement in windy conditions, which can disrupt the viewing experience.

Consider the size of the screen in relation to your projector's throw distance. This helps you achieve the desired image size without distortion, allowing for a more immersive viewing experience.

Connecting Audio and Video Sources

integrating audio visual equipment

When connecting your portable projector, you'll want to contemplate both cable and wireless options for your audio and video sources.

Make sure you have the right cables ready and know how to troubleshoot any sync issues that might arise. This will help you enjoy a smooth viewing experience without the hassle of technical difficulties.

Cable Connection Basics

Connecting your portable projector to audio and video sources is vital for an enjoyable viewing experience. Start by using HDMI cables to connect your projector to modern devices like laptops, streaming sticks, or gaming consoles. This guarantees ideal video and audio quality.

Make sure both your projector and audio source, like external speakers, are powered on and properly connected to avoid any signal issues.

Advertisement

If you're using older devices without HDMI ports, you'll need a VGA connection, which requires a separate audio cable to transmit sound. Always test your connections before the movie starts. This way, you can confirm that both video and audio are functioning correctly, allowing for any troubleshooting if something goes wrong.

While cable connections are reliable, consider the options available on some projectors for Wi-Fi and Bluetooth connections. These can help eliminate cable clutter and streamline your projector setup, making it easier to enjoy your favorite films.

Whether you go wired or wireless, getting the cable connection right is a vital step in creating your portable movie theater experience.

Wireless Connection Options

Wireless connectivity options for portable projectors open up a world of convenience, letting you link your devices without the hassle of cables. Many projectors support Wi-Fi and Bluetooth, so you can easily connect smartphones, tablets, or streaming sticks. This way, you can enjoy your favorite content without being tied down by wires.

Additionally, using a portable projector in a clean environment can enhance your overall viewing experience, similar to how air purifiers improve indoor air quality. If you prefer a more traditional approach, most portable projectors also come with HDMI and USB ports. These ports allow for versatile connections to laptops, gaming consoles, and other video sources. Some projectors even have built-in smart capabilities, giving you direct access to streaming apps without needing extra devices.

Advertisement

To elevate your audio experience, consider pairing your projector with external speaker systems via Bluetooth. This setup can greatly boost sound quality, making your viewing experience even more enjoyable.

To guarantee everything runs smoothly, keep your devices within a reasonable range for a stable connection. This minimizes potential interruptions during playback and allows you to focus on enjoying your movie night or presentation.

With these wireless connection options, you can create an impressive home theater setup anywhere!

Troubleshooting Sync Issues

In the world of portable projectors, sync issues between audio and video can be frustrating, especially during an important presentation or movie night. To minimize these problems, start by ensuring all audio and video sources are securely connected using the right cables, like HDMI for video and auxiliary for audio.

If you're using external speakers, double-check that they're properly connected and powered, as poor connections may lead to audio lag or distortion.

Advertisement

Next, explore your projector's settings to investigate audio delay options. This feature can help adjust the timing of the sound to better match the video output.

Testing different audio sources is also essential; some devices have inherent latency, so a direct connection to the projector often yields better results.

Lastly, keep your projector and connected devices updated with the latest firmware. Regular updates can enhance performance and fix compatibility issues that might affect audio-visual sync.

Managing Ambient Light

controlling surrounding light levels

Managing ambient light is essential for achieving the best possible image quality during outdoor movie screenings. By carefully controlling the lighting conditions, you can enhance visibility and contrast, making your movie experience enjoyable.

Here are some tips to help you manage ambient light effectively:

  1. Schedule Screenings at Dusk: Aim to start your show when ambient light is minimal. This timing boosts image clarity.
  2. Use Dark-Colored Screens: Opt for dark-colored screens or sheets that absorb excess light. Lighter surfaces reflect ambient light, diminishing image quality.
  3. Position Away from Light Sources: Place your projector and screen away from direct light sources, such as street lamps, to minimize glare and improve viewing comfort.
  4. Create a Controlled Environment: If unavoidable light sources exist, consider using portable blackout curtains or screens to maintain a controlled viewing environment.

Lastly, remind your guests to limit phone screen usage. The light emitted can distract, detracting from the overall experience.

Optimizing Sound Quality

enhancing audio performance techniques

While controlling ambient light is vital for visual quality, sound plays an equally important role in creating an immersive outdoor movie experience. Investing in external speaker systems can greatly enhance sound quality, as built-in projector speakers often lack depth and clarity.

To optimize sound distribution, position your speakers at ear level and angle them toward the audience. This guarantees that everyone enjoys balanced audio throughout the viewing area.

Advertisement

Look for projectors with built-in support for surround sound formats like Dolby Digital Plus. This feature can elevate your audio experience by providing richer sound details, making those action scenes even more thrilling.

Additionally, check for audio sync features on your projector or external sound system. Synchronization is essential; delays between video and audio can disrupt immersion and detract from your enjoyment.

Preparing for Weather Conditions

adapting to weather changes

When planning your outdoor movie night, always have a backup plan for unexpected rain.

Use weather-resistant projectors and speakers to keep your setup safe, and practice quick pack-up procedures to protect your gear from sudden storms.

Contingency Plans for Rain

Planning for a successful outdoor movie night means having solid contingency plans for rain. You don't want unexpected weather to ruin your fun, so consider these steps to guarantee your event goes smoothly:

  1. Backup Plan: Always have an indoor location ready in case rain interrupts your outdoor setup. A tent can also provide shelter if you prefer to stay outside.
  2. Weather Monitoring: Keep an eye on weather reports leading up to the event. This way, you can make timely adjustments, moving to your backup location if needed.
  3. Durable Equipment: Use outdoor-rated projectors and speakers that are weather-resistant (IPX3 rated or higher). This guarantees your equipment can withstand unexpected rain.
  4. Rapid Disassembly: Prepare for quick disassembly of your setup if weather conditions change suddenly. Secure your equipment to prevent movement in windy conditions, and keep tarps or waterproof covers handy to protect your projector and screen.

Weather-Resistant Equipment Use

Using weather-resistant equipment is essential for any outdoor movie night, especially if you're looking to avoid disruptions from unexpected rain or humidity.

Invest in weather-resistant projectors rated IPX3 or higher, as they're designed for outdoor use and can handle light rain and humidity. Regular checks for weatherproofing guarantee that your equipment durability remains intact, so always inspect your projector and speakers for any signs of wear before your event.

Advertisement

When setting up, utilize outdoor-rated power stations or extension cords to connect your equipment safely. This minimizes the risk of electrical hazards, especially in wet conditions.

It's also a smart move to secure your equipment by anchoring screens and projectors. This helps prevent movement and damage during windy weather, guaranteeing a stable viewing experience.

Lastly, don't forget to have a backup plan. Consider having a tent ready or an alternative indoor option if the weather turns foul. Being prepared will help you maintain a smooth and enjoyable movie night, regardless of what nature throws your way.

Quick Pack-Up Procedures

As the weather can be unpredictable, it's important to have quick pack-up procedures in place for your outdoor movie night. To make certain you're ready for sudden changes, follow these steps:

  1. Monitor weather reports leading up to your event to anticipate any inclement weather.
  2. Securely anchor your projector stand and screen setup to prevent movement in windy conditions, making sure everything stays stable during use.
  3. Check your equipment's weatherproofing regularly, particularly for outdoor-rated projectors and speakers. Look for gear rated IPX3 or higher for peak durability.
  4. Have a contingency plan ready, like a tent or a nearby indoor space, to quickly adapt if the weather turns unfavorable.

Preparing for rapid disassembly is vital. Organize your equipment and keep a checklist handy to streamline your quick pack-up procedures.

This way, you can efficiently dismantle your setup without stress, making sure your movie night concludes smoothly, regardless of the weather.

Advertisement

Recommended Portable Projectors

top portable projector picks

When you're in the market for a portable projector, several standout options can elevate your viewing experience. Whether you're setting up an outdoor movie theater or just want a cozy movie night indoors, here are some recommended portable projectors that balance picture quality, battery life, and easy setup.

Projector Key Features
XGIMI Halo+ 1080p, 700 ISO lumens, 2-hour battery, Harman Kardon speakers
MoGo Pro+ 1080p, 300 ANSI lumens, 2-hour battery, auto keystone correction
XGIMI Halo 1080p, 600 ISO lumens, 2-4 hour battery, auto-focus feature
Capsule Air 1080p, compact, Google TV built-in, $399.99 price point

If you're after the best portable projector, the Cosmos 4K SE is hard to beat, boasting 4K resolution and Dolby Vision support for just $1,299.99. Each of these projectors delivers excellent performance, ensuring that your movie nights will be memorable, whether under the stars or in your living room. Choose the one that fits your needs, and get ready to enjoy your films in style!

Tips for Memorable Movie Nights

engaging film night ideas

Now that you've picked out a portable projector, it's time to set the stage for a memorable movie night. Follow these tips to create an enjoyable experience for you and your guests:

1. Schedule Wisely: Plan your movie night at dusk to minimize ambient light.

Projectors perform best with a brightness of at least 3,000 lumens, so timing is key.

2. Comfortable Seating: Provide a variety of seating options like chairs, blankets, and bean bags.

Comfortable seating makes all the difference in guaranteeing everyone can relax and fully enjoy the film.

Advertisement

3. Enhance the Sound: Invest in a quality external sound system.

Built-in projector speakers often lack the power for an immersive experience, so good audio is essential.

4. Perfect the Picture: Level and center your projector with the screen, adjusting for any distortion using the keystone correction feature.

This guarantees a crystal-clear image that enhances the viewing experience.

Frequently Asked Questions

How to Watch Movies on Projector Without Wifi?

To watch movies on your projector without Wi-Fi, connect your device via HDMI, use a USB drive with stored movies, or employ a DVD player. You can also try screen mirroring directly from your device.

Advertisement

How Do I Watch Netflix on My Portable Projector?

To watch Netflix on your portable projector, connect a streaming device via HDMI or use screen mirroring from your smartphone. Make sure your internet's stable and your Netflix app's updated for the best experience.

How to Watch a Movie Outside With a Projector?

To watch a movie outside with a projector, set it up at dusk for ideal visibility, use a reflective screen, guarantee proper connections, and consider adding external speakers for an enhanced audio experience.

How Far Away Does a Home Theater Projector Need to Be?

To get the best image quality, position your home theater projector 8 to 12 feet away for a standard 100-inch screen. Always check your projector's manual for specific distance recommendations based on its design.

Conclusion

With the right setup, you can transform any space into a cozy movie theater, making memories that last a lifetime. So, why settle for the ordinary when you can create an extraordinary experience under the stars? Gather your friends, pick a flick, and let the magic of portable projectors whisk you away to cinematic bliss. After all, every movie night is an opportunity to escape reality, if only for a couple of hours. Enjoy the show!

Advertisement
Continue Reading

Home Cinema

Understanding Projector Specifications: Lumens, Contrast Ratio, and Resolution Explained

Keen to elevate your projector experience? Discover how lumens, contrast ratio, and resolution can transform your viewing like never before.

Published

on

projector specs lumens contrast resolution

To enhance your projector experience, it's essential to understand lumens, contrast ratio, and resolution. Lumens indicate brightness, with more needed in well-lit spaces; generally, over 2,500 lumens is suitable for such environments. Contrast ratio determines image depth, with a ratio above 10,000:1 being great for home theaters. Finally, resolution affects clarity, with 4K offering superior detail compared to lower resolutions like 1080p. By combining these specifications wisely, you can achieve an excellent viewing experience tailored to your needs. There's plenty more to explore regarding these projector essentials that can elevate your viewing game.

Key Takeaways

  • Brightness is measured in lumens; higher lumens are required for brighter environments to ensure clear visibility.
  • Contrast ratio influences image quality, with a ratio over 10,000:1 ideal for home theaters.
  • Higher resolutions like 4K provide sharper images, enhancing detail for movies and gaming experiences.
  • Ambient lighting affects projector performance; brighter spaces require projectors with at least 2,500 lumens for optimal visibility.
  • Selecting the right projector involves balancing brightness, contrast, and resolution based on specific viewing needs and environments.

Projector Brightness Measurement

brightness measurement for projectors

When choosing a projector, understanding brightness measurement is key to getting the best image quality. Projector brightness is measured in lumens (lm), and this number considerably impacts how well you'll see your content in different lighting conditions.

For ideal sound quality in conjunction with your visuals, consider using best dynamic microphones for sound engineers to enhance the overall experience. If you're using your projector in a dimmed room, a model with 500-1000 lumens will generally suffice. However, if you're in a bright space or planning to project outdoors, you'll want something that exceeds 1500 lumens to combat the ambient light.

For small rooms with controlled lighting, around 500 lumens should work fine; but remember, larger images in bright settings might require projectors boasting up to 20,000 lumens. Higher brightness equates to increased visibility, but it often comes with a higher price tag.

Therefore, it's crucial to evaluate the specific lighting conditions of your intended viewing environment.

Understanding Contrast Ratio

evaluating visual accessibility standards

When you're choosing a projector, understanding contrast ratio is key for enhancing your viewing experience.

Higher contrast ratios yield deeper blacks and brighter whites, which are essential for detailed image rendering in dark scenes. You'll find different types of contrast ratios, like native and dynamic, each affecting how you perceive images.

Advertisement

Knowing how these ratios are measured can help you make an informed decision for your specific needs, whether it's for home theater or professional use.

For instance, a projector with a high static contrast ratio can greatly impact the perceived sharpness and clarity of images, making it an important factor to take into account for enhancing visual experiences.

Types of Contrast Ratios

Understanding contrast ratios is essential for evaluating projector performance, as they directly impact image quality. There are several types of contrast ratios to take into account when choosing projectors. One common type is dynamic contrast, which often presents inflated numbers that don't accurately reflect real-world viewing conditions. This can mislead you if you're looking for true image quality.

High-quality content can help in understanding these specifications more deeply, as it enhances credibility and trustworthiness when making a purchase decision topical authority in content.

On the other hand, native contrast provides a more honest measurement of a projector's performance. For instance, the JVC NZ7 boasts an impressive native contrast ratio of 40,000:1, showcasing its capability for deep blacks and bright whites.

Advertisement

Then there's full on/off contrast, which measures brightness between solid white and black screens. While this can result in higher numbers, it can also mislead you about the actual viewing experience.

Measuring Contrast Ratios

Measuring contrast ratios is essential for determining a projector's true performance in real-world scenarios. The contrast ratio reflects the difference in brightness between the darkest black and the brightest white a projector can produce, expressed as a ratio (e.g., 10,000:1).

There are two main methods for measuring contrast ratios: Full On/Off Contrast, which often gives inflated numbers, and ANSI Contrast, which offers a more realistic measurement through alternating black and white patterns.

When evaluating projector features, pay attention to native contrast ratios, as they accurately represent a projector's capabilities. Dynamic contrast ratios can be misleading; they often rely on peak measurements and don't reflect typical viewing conditions.

Be cautious, too—manufacturer-reported contrast ratios can sometimes exaggerate performance. For a clearer picture, consult independent reviews and measurements.

Advertisement

A high contrast ratio is particularly important in darker environments, as it helps achieve deeper blacks and more vibrant colors. This not only enhances image quality but also plays a significant role in your overall viewing experience.

Importance in Viewing Experience

A projector's contrast ratio plays an important role in your viewing experience, directly impacting how vivid and lifelike the images appear. The contrast ratio measures the difference in brightness between the darkest and lightest parts of an image. A higher ratio indicates better image quality and richer colors.

For home theaters, a contrast ratio over 10,000:1 is ideal, ensuring you see every detail, especially in darker scenes. In contrast, business projectors often have much lower ratios, ranging from 200 to 1,000:1, which may not suffice for cinematic experiences.

Ambient lighting greatly affects perceived contrast. In darker rooms, the contrast becomes more visible, enhancing your overall viewing experience. However, if you're in a bright environment, you'll need a projector with higher lumen output to maintain image clarity and vibrancy.

Contrast sensitivity, or your ability to distinguish objects from backgrounds, is closely linked to the contrast ratio, making it vital to reflect upon when evaluating projector performance across different conditions.

Advertisement

The Role of Resolution

importance of clear resolutions

When choosing a projector, resolution plays an essential role in your viewing experience.

Higher resolutions like 1080p and 4K deliver sharper, more detailed images that enhance everything from gaming to movie nights.

Understanding the common resolution types can help you select the best option for your specific needs.

Importance of High Resolution

High resolution is vital for delivering stunning visual experiences that captivate audiences. When you choose a projector, the resolution greatly impacts the quality of the image you see. Higher resolutions, like 4K (3840×2160), offer a high-quality image that's sharper and more detailed than lower resolutions, such as 720p or 1080p. This clarity is especially important for creating an immersive experience in movies and gaming.

For movie lovers, a 4K projector enhances the realism of scenes, making them appear lifelike, particularly on larger screens. Gamers also benefit from higher resolutions, as they allow for clearer visuals, helping you recognize details and improving your performance in fast-paced environments.

Different resolutions cater to various needs; for instance, WXGA (1280×800) is suitable for general presentations, while WUXGA (1920×1200) is better for detailed content.

Advertisement

Choosing the right resolution is essential—while a 1080p projector works for casual viewing, a 4K projector elevates high-definition gaming and cinematic experiences. Ultimately, the right resolution guarantees you enjoy the best possible visuals for your specific needs.

Common Resolution Types

Understanding projector resolutions is essential for selecting the right model for your needs. Resolutions are defined by pixel count, with common types including 720p (1280×720), 1080p (1920×1080), and 4K UHD (3840×2160). Each of these resolutions offers progressively sharper and more detailed images, greatly impacting your viewing experience.

If you're into high-definition films or streaming, a 4K projector can create stunningly lifelike visuals, enhancing clarity even in large displays. Conversely, for casual viewing or presentations, 1080p might be sufficient.

When it comes to gaming, while 1080p works for most scenarios, 4K is the go-to for high-end gaming to boost visual fidelity and detail recognition.

Additionally, consider how resolution affects your projector's suitability for different environments. Higher resolutions are better for close viewing distances, as they minimize pixelation.

Advertisement

Impact of Lighting Conditions

lighting conditions affect outcomes

Lighting conditions play an essential role in projector performance, directly impacting the clarity and vibrancy of the images displayed. In bright environments, you'll need a projector with higher brightness ratings—typically at least 2,500 lumens—to guarantee visibility. Conversely, in a dark room, you can achieve good results with as few as 500 lumens. This significant difference highlights how ambient light influences your choice of projector.

When you're in a well-lit area, the contrast ratio becomes critical. Ambient light can wash out colors and diminish image depth, making it important to select a projector with a higher contrast ratio. This enhancement helps preserve the vibrancy of the displayed images despite the surrounding light.

If you're using a projector in a classroom or business setting, you'll likely need one with 4,000 lumens or more to counteract overhead lighting and make certain your presentations are clear.

Choosing the Right Projector

selecting ideal projector options

When it comes to choosing the right projector for your needs, evaluating both the environment and intended usage is vital. First, assess your room's ambient light conditions. If you have a bright space, you'll need a projector with at least 2,500 lumens to guarantee ideal visibility.

Next, consider what you'll be using the projector for. For home theaters, a high contrast ratio of 10,000:1 or higher is perfect, as it delivers vibrant colors and deep blacks. On the other hand, business presentations might prioritize brightness over contrast.

Resolution is another significant factor. If you're planning to watch high-definition movies or play games, a 4K projector is your best bet for stunning visuals. However, for general presentations and casual viewing, a 1080p projector will often suffice.

Keep in mind that projectors with higher lumens typically come at a higher price. So, balancing brightness, contrast ratio, and resolution within your budget is essential.

Advertisement

Lastly, don't forget to research independent reviews and performance tests, as manufacturer-reported specifications can often be inflated. Making an informed choice will guarantee you get the best projector for your needs.

Balancing Specifications for Viewing

optimizing viewing experience specifications

Selecting the right projector involves more than just picking a model with impressive specifications; it's about finding a balance that suits your viewing environment and needs.

You need to take into account brightness, contrast ratio, and resolution to create an ideal experience. Here's what to keep in mind:

  • Bright images for well-lit spaces
  • Deep blacks for rich, vibrant colors
  • Clear details for immersive experiences
  • Comfortable viewing to reduce eye strain
  • Versatile setups for various activities

In a bright room, a projector with at least 2,500 lumens is crucial, while a darker setting may only require 1,000 lumens.

The contrast ratio plays an important role too; aim for over 10,000:1 for a home theater to guarantee those deep blacks and eye-catching colors.

Frequently Asked Questions

What Is a Good Contrast Ratio for Projectors?

A good contrast ratio for projectors varies by use. For home theaters, aim for over 10,000:1; for business, 4,000:1. Gaming projectors should have at least 2,000:1 for better dark scene visibility.

What Is a Better Contrast Ratio, 1000:1 or 3000:1?

A 3000:1 contrast ratio's definitely better than 1000:1. You'll notice more vibrant images with deeper blacks and brighter whites, enhancing your viewing experience, especially in darker settings where details matter the most.

Advertisement

How to Understand Projector Specs?

When you're choosing a projector, think of it like picking a movie. You want bright images, deep contrasts, and sharp details. So, check the lumens, contrast ratio, and resolution to match your viewing needs.

Is 20000:1 Contrast Good?

Yes, a 20,000:1 contrast ratio's excellent! It enhances your viewing experience by delivering deep blacks and vibrant colors, especially in low-light settings. You'll notice finer details and richer images during movies or gaming sessions.

Conclusion

As you navigate the world of projectors, imagine casting vibrant images against a canvas of possibilities. With the right balance of lumens lighting up your space, contrast ratios painting rich details, and resolution sharpening every pixel, your viewing experience transforms into a masterpiece. Whether it's a movie night or a business presentation, understanding these specs empowers you to choose wisely. So, embrace the brilliance and let your screen come alive, turning every moment into a visual feast.

Continue Reading
Advertisement

Affiliate disclaimer

As an affiliate, we may earn a commission from qualifying purchases. We get commissions for purchases made through links on this website from Amazon and other third parties.

Advertisement

Vetted

top electrostatic headphones 2024 top electrostatic headphones 2024
Vetted2 months ago

The 10 Best Electrostatic Headphones of 2024 – Ultimate Sound Experience Unveiled

Unlock the ultimate sound experience with the top electrostatic headphones of 2024—discover which models will elevate your audio journey to...

concert earplugs for hearing protection concert earplugs for hearing protection
Vetted2 months ago

15 Best Earplugs for Concerts: Protect Your Hearing Without Missing the Music

Check out the 15 best earplugs for concerts that protect your hearing while enhancing your music experience—discover which ones are...

comfortable earbuds for small ears comfortable earbuds for small ears
Vetted2 months ago

14 Best Earbuds for Small Ears That Offer Comfort and Sound Quality

Mysterious and comfortable, discover the 14 best earbuds for small ears that elevate your sound experience like never before!

best earbuds for calls best earbuds for calls
Vetted2 months ago

14 Best Earbuds for Phone Calls in 2024 – Crystal Clear Sound and Comfort

Discover the crystal-clear sound and comfort of the 14 best earbuds for phone calls in 2024, and find out which...

kid friendly safe earbuds kid friendly safe earbuds
Vetted2 months ago

15 Best Earbuds for Kids: Safe, Durable, and Perfect for Little Ears

Attention parents: Discover the 15 best earbuds for kids that prioritize safety and fun, but which one will be the...

top dynamic mics 2024 top dynamic mics 2024
Vetted2 months ago

15 Best Dynamic Microphones for Every Sound Engineer in 2024

Achieve the perfect sound with our top 15 dynamic microphones of 2024, tailored for every sound engineer's needs—discover your ideal...

top drum mics 2024 top drum mics 2024
Vetted2 months ago

15 Best Drum Mics of 2024 – Elevate Your Sound With These Top Picks

The ultimate guide to the 15 best drum mics of 2024 reveals top picks that will transform your sound—find out...

ultimate sound quality headphones ultimate sound quality headphones
Vetted2 months ago

15 Best Drum Headphones for Ultimate Sound Quality and Comfort

Browse our top 15 drum headphones for superior sound quality and comfort—discover which pair will elevate your drumming experience to...

ski helmet audio accessories ski helmet audio accessories
Vetted2 months ago

15 Best Ski Helmet Headphones to Enhance Your Slopes Experience

Immerse yourself in the slopes with the 15 best ski helmet headphones that promise unmatched sound quality and comfort—discover which...

top dj headphones 2024 top dj headphones 2024
Vetted2 months ago

15 Best DJ Headphones of 2024 – Ultimate Sound Quality and Comfort

Discover the top 15 DJ headphones of 2024 that promise unmatched sound quality and comfort—find out which models made the...

Advertisement

Trending