Using a projector in your home recording studio can transform your visuals and enhance client engagement. Start by choosing a projector with at least 2000 lumens and 4K resolution for clarity. Position it correctly, 1.5 to 2.5 times the image width away, and adjust brightness and contrast to suit your lighting. Prevent noise by selecting a quiet model and soundproofing your space. Utilize specialized screens for better image quality and consider integrating audio for a complete experience. With these tips, you're well on your way to creating stunning visuals—it's just the beginning, as there's so much more to explore!
Key Takeaways
- Use a 4K projector with at least 2000 lumens brightness for clear visuals during recording sessions.
- Manage ambient light with blackout curtains to enhance projected image clarity.
- Position the projector 1.5 to 2.5 times the image width for optimal throw distance.
- Adjust brightness and contrast settings based on studio lighting for improved visibility.
- Implement soundproofing techniques to minimize noise and enhance the recording environment.

HAPPRUN Native 1080P Projector, Bluetooth Home Theater Movie Projector with Built-in Speaker, Compatible with Smartphone, HDMI, Fire Stick, PS5, Indoor & Outdoor Use -With Google TV System
[ Built-in Official Licensed Google TV ] - Without additional equipment, the smart projector can directly access Netflix,...
As an affiliate, we earn on qualifying purchases.
Benefits of Using Projectors

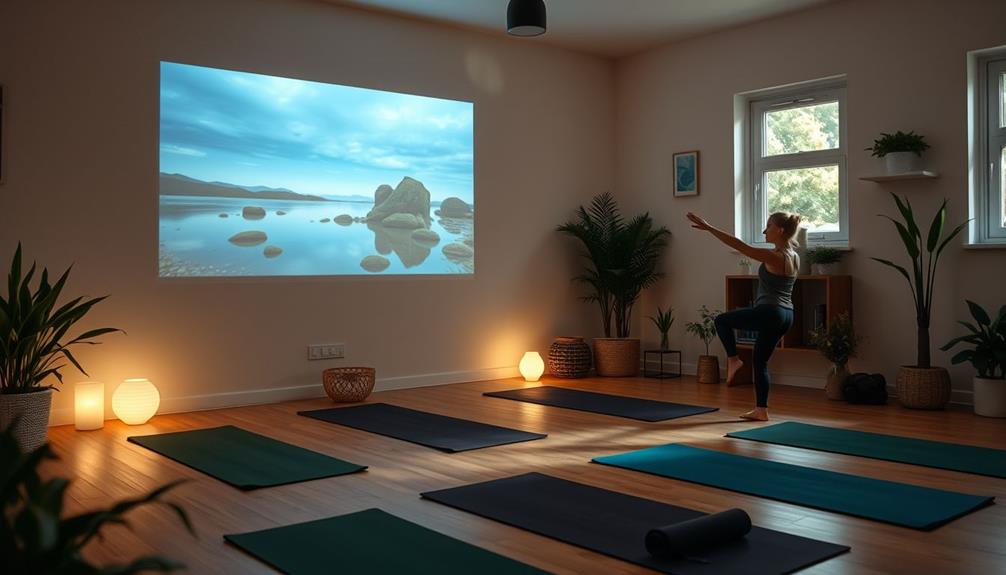
When you're setting up a home recording studio, using a projector can greatly enhance your workspace. Unlike flat-screens, a projector would provide a larger display size, creating an immersive environment that's perfect for studio work and film scoring.
Imagine watching your edits or animations on a big screen; it's a game changer.
A 4K projector boosts image size and resolution, markedly improving studio aesthetics. You'll enjoy high-quality visuals projected onto walls, making your space feel more professional.
Plus, projectors save desk space by replacing traditional monitors, allowing you to keep your workspace clutter-free and organized.
With a higher pixel density, projectors improve visual clarity for non-critical tasks, making them suitable for a range of studio applications.
When you're presenting to clients, the cinematic experience a projector provides can enhance their engagement, allowing for louder music without any mismatch in visuals.

2000 ANSI 4K Decoding Projector with WiFi and Bluetooth, HAPPRUN Movie Home Theater with Auto Focus, 300'' Display for Indoor/Outdoor, Smart Proyector Compatible with Phone/TV Stick/PC/PS5
[EASIER OPERATION: AI Smart Screen Adjustment] HAPPRUN projector comes with auto focus and 6D auto-keystone technology, enjoy a...
As an affiliate, we earn on qualifying purchases.
Choosing the Right Projector

Selecting the right projector for your home recording studio is essential for maximizing your creative potential. To guarantee you make a well-informed choice, focus on three key factors: brightness, resolution, and noise level.
| Feature | Recommendation |
|---|---|
| Brightness | Minimum of 2000 lumens |
| Resolution | Preferably 4K |
| Noise Level | Low decibel ratings |
Brightness is important, especially in well-lit environments. A projector with at least 2000 lumens assures visibility during your sessions. Next, consider the resolution; 4K projectors offer superior clarity that's perfect for video work, making sure your visuals look sharp and professional.
Additionally, don't overlook the noise level. A quieter projector helps maintain focus during recording sessions, so opt for models with low decibel ratings. Finally, keep in mind the long-term costs of maintenance and bulb replacements, as these can add up considerably. By prioritizing these features, you'll set yourself up for success, enhancing both your creative output and your studio atmosphere.

【2200ANSI & Officially-Licensed APP】Smart 4K Projector with WiFi and Bluetooth, VISSPL 3D Dolby Audio and Auto Focus Portable Outdoor Projector, Movie Home Theater Proyector with 360° Adjustable Stand
[ Compatible with Netflix - No Extra Devices Needed ] - VISSPL Smart Projector: Hollywood in the palm...
As an affiliate, we earn on qualifying purchases.
Setting Up Your Projector

When setting up your projector, start by choosing the ideal placement to guarantee the best image quality.
You'll need to adjust the brightness and contrast settings to match your studio's lighting for clear visuals.
Don't forget to manage ambient light effects, as they can greatly impact the clarity of your projected images.
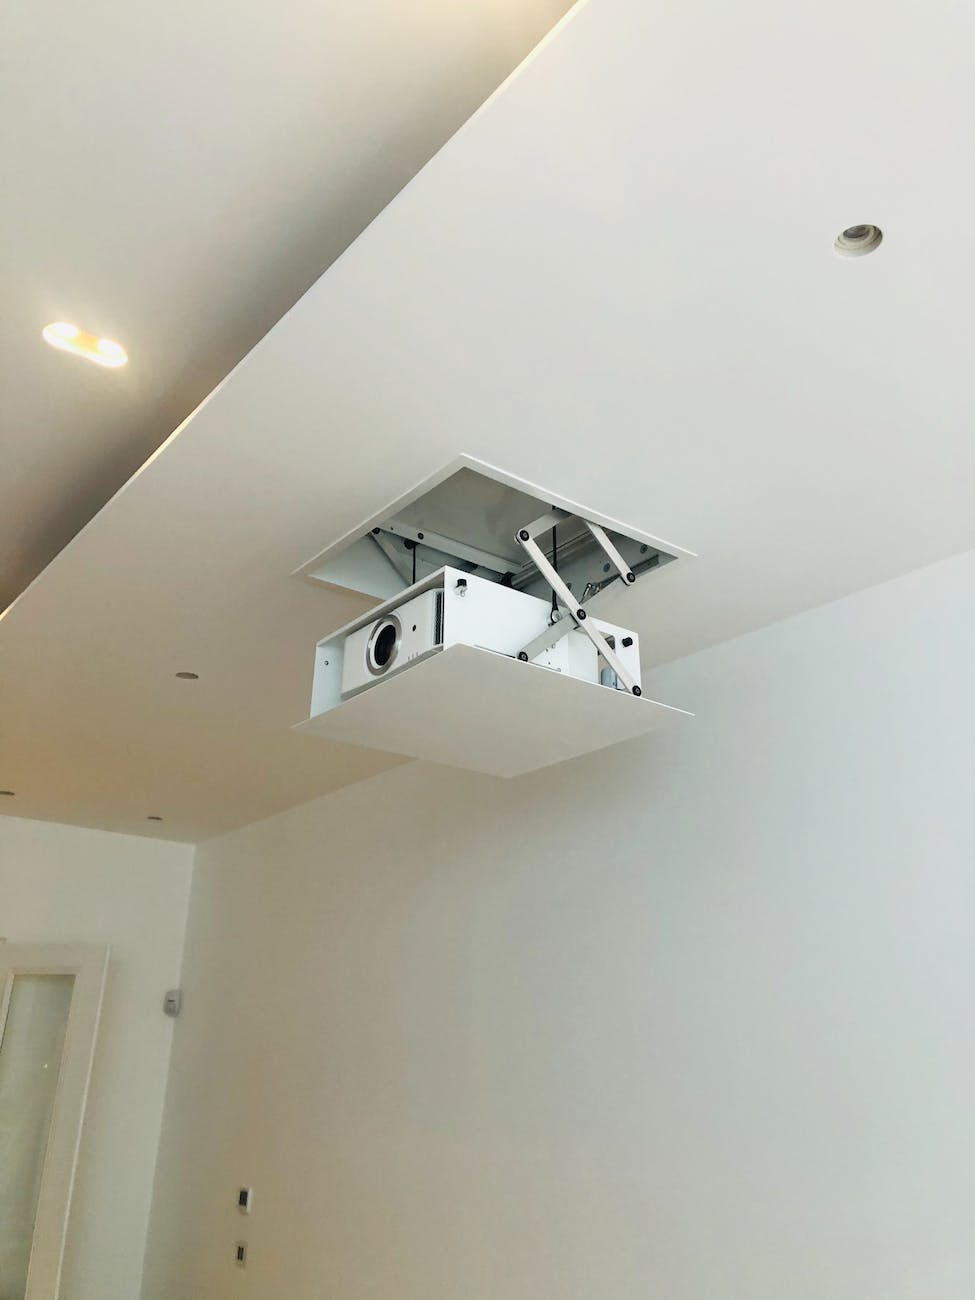
Optimal Placement Strategies
For ideal projector placement in your home recording studio, you'll want to verify it's positioned at the right throw distance—generally 1.5 to 2.5 times the width of the image you aim to project. This guarantees peak clarity and prevents image distortion.
A projector with high resolution and accurate color reproduction will further enhance your visuals, making it essential to reflect on the role of color accuracy in home cinema projectors.
Here are some strategies to keep in mind:
- Eye Level: Position the projector at or slightly above eye level for a comfortable viewing angle.
- Secure Mounting: Use a ceiling mount or dedicated stand to minimize vibrations, ensuring stable visuals during recording sessions.
- Ambient Light Consideration: Assess the ambient light in your studio; darker environments enhance the projector's contrast and brightness.
- Experiment with Alignment: Play around with projector alignment and keystone correction settings to perfect the image shape and clarity on your intended surface.
- Distance Check: Always recheck the distance to maintain the proper throw ratio for your specific projector and desired image size.
Adjusting Brightness and Contrast
After confirming ideal projector placement, the next step is adjusting brightness and contrast to achieve the best visuals for your home recording studio.
Start by setting your projector in a darkened room. This greatly enhances contrast and image quality, guaranteeing that your visuals have maximum visibility. If there's any ambient light, adjust the brightness settings on your projector accordingly. A higher brightness level, measured in lumens, is essential for clear visibility when light is present.
Additionally, consider using a high-quality screen that can further improve the image clarity and color accuracy, similar to how HEPA filtration secures a clean environment by effectively capturing allergens.
Next, focus on the contrast setting. This will improve the differentiation between light and dark areas of the projected image, making text and graphics easier to read.
Don't hesitate to experiment with the projector's positioning and throw distance. These factors can dramatically impact visibility and minimize distortion, so find the best setup for your space.
Lastly, maintain your projector by regularly cleaning the lens and checking for any obstructions that could affect brightness and clarity. A clean lens is essential for preserving image quality, so make it a part of your routine.
Managing Ambient Light Effects
Minimizing ambient light is essential for creating stunning visuals in your home recording studio.
To achieve the best image quality, follow these key tips:
- Use blackout curtains to block out outside light and keep your space dark.
- Adjust your room's lighting setup, turning off unnecessary lights during recording sessions.
- Position your projector at a suitable throw distance to enhance clarity and avoid light washout.
- Utilize specialized projector screens instead of plain walls, as they greatly improve brightness and contrast levels, even with some ambient light.
- Experiment with projector settings, tweaking brightness and contrast to find the perfect balance against ambient light interference.
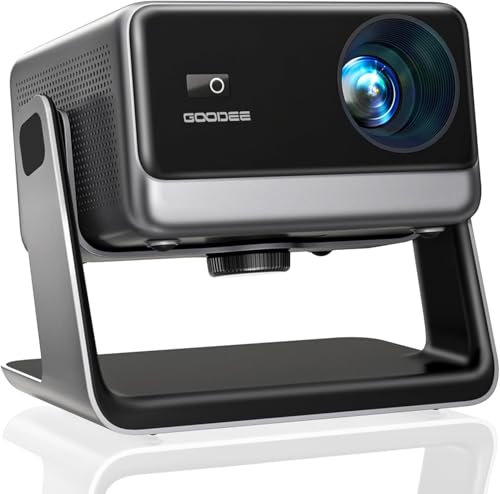
GooDee Video Projector With Wifi And Bluetooth, Smart Portable Projector Movie System Compatible With Netflix/Dolby Audio/Auto Focus & Keystone, 4k Video Decode & 1080p Native For Home Theater/Outdoor
「Smart TV Projector」The Goodee AC321 4K projector is officially licensed by mainstream streaming platforms such as Netflix/YouTube/Prime Video,...
As an affiliate, we earn on qualifying purchases.
Managing Noise Levels

When you're setting up your home recording studio, managing noise levels is essential for achieving clear audio.
You'll want to explore quiet projector options to minimize fan noise and consider soundproofing techniques to further enhance your environment.
Additionally, incorporating acoustic treatment solutions can help absorb any unwanted sounds, ensuring your recordings stay pristine.
Quiet Projector Options
Finding the right projector for your home recording studio can make a significant difference in your workflow, especially when it comes to managing noise levels.
You'll want to choose projectors that prioritize quiet operation, ensuring they won't distract you during recordings. Look for models with low fan noise ratings and evaluate those utilizing laser technology, which typically produce less heat and noise compared to traditional bulb projectors.
Here are some key features to assess when selecting a quiet projector:
- Noise Levels: Aim for projectors with noise levels below 30 dB.
- Cooling Systems: Advanced cooling features help minimize fan noise.
- Brand Recommendations: Evaluate reputable brands like Epson and BenQ.
- Laser/LED Technology: These options are generally quieter and more efficient.
- Sound Test: Always conduct a sound test in your studio before finalizing your choice.
Soundproofing Techniques
Creating an effective soundproofing strategy is vital for maintaining a quiet recording environment, especially when using a projector in your home studio. Start by investing in quieter projector models designed for low-noise operation. Many users have found that this can considerably enhance their recording experience.
Next, consider implementing acoustic panels strategically around the projector. These panels absorb sound and reduce echo, which is essential for clear audio capture. Place them on walls closest to the projector to maximize their effectiveness.
Additionally, utilizing soundproof curtains can further help dampen external noise. These curtains not only block outside sounds but also aid in creating a controlled environment for your recordings.
Don't forget about proper ventilation techniques. Confirm you create airflow pathways or use cooling fans to mitigate heat produced by the projector. Overheating can lead to increased noise levels, disrupting your recordings.
Acoustic Treatment Solutions
After establishing a solid soundproofing foundation, you'll want to focus on acoustic treatment to further enhance your recording environment.
Proper acoustic treatment can greatly reduce noise levels and improve sound quality by managing sound reflections and echoes. Here are some effective solutions to keep in mind:
- Install acoustic panels on walls to absorb sound waves and minimize unwanted reflections.
- Target first reflection points—the areas on adjacent walls that directly reflect sound back to the recording space.
- Use bass traps in corners to handle low-frequency sounds, ensuring a balanced audio experience, especially in smaller studios.
- Incorporate soft furnishings like rugs and curtains to further dampen sound reflections without breaking the bank.
- Regularly assess your setup and adjust acoustic treatment based on your recording needs for ideal sound quality.
Heat Management Strategies

Heat management is vital in a home recording studio, especially when using a projector that can generate significant warmth during operation.
To keep your workspace comfortable and your equipment safe, guarantee proper ventilation. Install vents or fans to help dissipate the heat created by the projector. Position your projector in a well-ventilated area, away from direct sunlight and other heat sources, to minimize heat buildup and extend its lifespan.
Consider investing in projectors with advanced thermal management features, such as temperature sensors and automatic fan control. These features help prevent overheating during extended use in your studio.
Regular maintenance is essential as well. Clean dust filters regularly and confirm that airflow around the projector isn't obstructed. This maintenance not only optimizes heat management but also enhances the projector's overall performance.
Optimizing Image Quality

Maintaining a comfortable environment in your home recording studio is just the beginning; optimizing image quality is equally important for enhancing your visuals.
To achieve the best results, follow these tips:
- Use a specialized screen: Projecting onto a specialized screen boosts brightness and contrast, delivering clearer visuals than a plain wall.
- Adjust brightness and contrast: Tailor your projector's settings to the ambient light levels. A darkened room helps improve perceived contrast and visibility.
- Choose the right resolution: Match your projector's resolution to your content needs. HD projectors are fine for non-critical tasks, but for high-quality video work, opt for 4K.
- Position correctly: Place the projector at the right throw distance to avoid distortion, ensuring the projected content is sharp and legible across the entire image.
- Maintain your projector: Regularly clean the projector lens and follow maintenance practices to prevent dust and debris from impacting image clarity.
Integrating Audio With Visuals

Integrating audio with visuals is essential for creating a polished presentation in your home recording studio. To achieve this, start by using a clip microphone to capture high-quality audio from the speaker, ensuring clarity and reducing background noise. This step is vital for maintaining viewer engagement during lectures or presentations.
Additionally, employing techniques similar to those found in voiceover ads can enhance your storytelling and overall presentation quality.
If you're recording audio separately, like on a phone, focus on achieving good audio sync during post-production. Syncing your audio with the visuals can elevate the cohesiveness of your presentation and enhance the overall viewer experience. Investing time in post-production editing will allow you to integrate presentation slides seamlessly with the speaker footage.
Consider using wired headphones as a makeshift microphone if you don't have access to professional equipment. This can improve audio quality and help maintain clarity, making it easier for your audience to follow along.
Filming Techniques for Presentations

Effective presentation filming techniques can greatly enhance your video quality and viewer engagement. To guarantee your audience connects with your message, focus on the visibility of the speaker. Their expressions and body language are essential for effective communication.
Here are some tips to maximize your filming:
- Use separate lighting for the speaker to prevent screen spill, guaranteeing both the speaker and projected content are clearly visible.
- Choose a single camera shot focused on the speaker, but balance the visibility of the projection content in the frame.
- Experiment with camera angles and distances to find the best position for clear visibility of both the speaker and the visuals.
- Capture close-ups of the speaker during key moments to showcase their engagement and emotional delivery.
- Test your setup before recording to guarantee that both the speaker and the projection are well-lit and clear.
Post-Production Tips and Tricks

Post-production is where your recorded content truly comes to life, transforming raw footage into a polished presentation. To guarantee your visuals are engaging and clear, use video editing software that enables seamless syncing of audio and presentation slides. This step is essential for maintaining high-quality viewer engagement.
Invest time in color grading and contrast adjustments during post-production to enhance visibility and overall image quality. You can also use keyframes to animate shifts between speaker footage and slides, adding dynamism to your presentation. Don't forget to clean up audio; incorporating noise reduction tools can greatly enhance clarity, making sure your voice stands out.
Here's a quick checklist to guide your post-production:
| Task | Purpose |
|---|---|
| Sync audio & slides | Maintain viewer engagement |
| Color grading | Enhance visibility and image quality |
| Use keyframes | Create dynamic shifts |
| Audio cleanup | Guarantee clarity of the speaker's voice |
Frequently Asked Questions
How Do You Use a Projector With a Sound System?
To use a projector with a sound system, connect both devices via HDMI or audio cables. Position your speakers strategically, test audio levels, and consider wireless transmitters for a cleaner, more immersive setup.
How to Use a Projector as a Background?
You might think projecting images is as simple as turning it on, but it's not. Position the projector correctly, adjust the brightness, and choose a good surface for stunning visuals that enhance your setup.
How to Make Multimedia Projector at Home?
To make a multimedia projector at home, you'll need a bright LED or laser light source, a quality lens, sturdy housing, and a microcomputer like Raspberry Pi for multimedia playback and connectivity.
How Do You Stream Through a Projector?
Imagine a vibrant canvas lighting up your space. To stream through a projector, connect your device via HDMI or wirelessly, adjust settings for maximum brightness, and guarantee sound flows seamlessly through your studio speakers.
Conclusion
Incorporating a projector into your home recording studio not only enhances your visuals but also elevates your entire creative process. By choosing the right setup and managing noise and heat, you can craft an immersive environment that captivates your audience. Remember, every image tells a story; with the right techniques, you can turn your presentations into unforgettable experiences. So, why settle for ordinary when you can transform your space into a canvas of innovation?