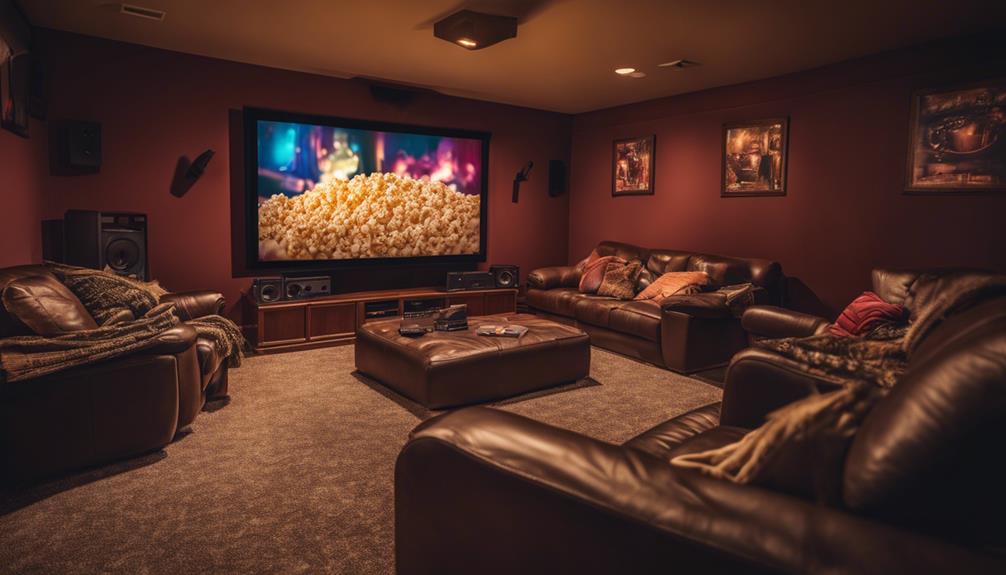
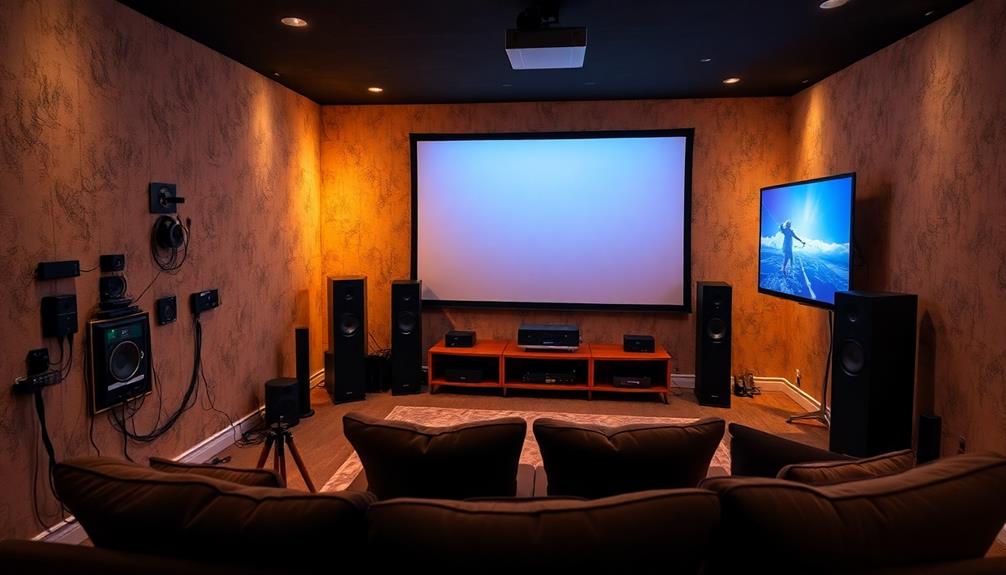
To create a home theatre, start by selecting the perfect space—preferably a basement or dedicated room around 20 ft long and 12 ft wide. Design the layout with tiered seating and a 110-120 inch screen for ideal viewing. Before installation, verify proper soundproofing with acoustic panels and thick curtains. Pre-wire for audio and video equipment, connecting everything to a quality A/V receiver. Choose comfortable seating and improve aesthetics with a cohesive theme. With thoughtful planning, you can transform your space into a cinematic haven. Keep going to discover more tips for a flawless setup!
Key Takeaways
- Choose a dedicated, rectangular space with minimum dimensions of 20 ft long and 12 ft wide for optimal viewing and sound quality.
- Use tiered seating to ensure clear sightlines and enhance the audio experience for all viewers.
- Incorporate soundproofing materials like acoustic panels and wall-to-wall carpeting to improve sound quality and reduce outside noise.
- Pre-wire for audio and video systems to ensure seamless connectivity and optimal performance of your home theatre equipment.
- Install adjustable lighting solutions and blackout curtains to create the perfect ambiance for movie screenings.
Selecting the Perfect Location
When selecting the perfect location for your home theater, it's vital to find a space that minimizes noise disruption and enhances your viewing experience. An isolated area, like a basement or a dedicated room, is ideal.
Consider that modern heat pumps operate at noise levels comparable to a refrigerator, which can further enhance your theater environment for an immersive experience, especially if you invest in noise reduction technology.
Aim for a room size of at least 20 feet long and 12 feet wide to comfortably accommodate your home theater seating and best screen size. If you can't find a larger space, a spare bedroom measuring at least 12 by 12 feet can work, but be mindful of sight lines and seating arrangements.
Ceiling height is also significant; make certain your chosen room has a minimum height of 7 feet. This allows for proper projector placement and effective sound management.
If you opt for a second-story space, check that it provides sufficient throw distance for your projector, ideally around 14 feet for larger screens (150 inches).
Selecting the right location not only sets the stage for an immersive viewing experience but also guarantees that you enjoy it without interruptions from the rest of the house.
Take your time with this decision—it's the foundation of your home theater journey!
Designing the Home Theatre Layout

When designing your home theatre layout, focus on creating a rectangular space that's at least 20 feet long and 12 feet wide for the best sound and viewing experience.
Consider incorporating a high-quality projector that supports top 5 projectors for gaming enthusiasts to elevate your viewing experience.
Plan your seating arrangement with tiered options to guarantee everyone has a clear view of the screen, while also considering the ideal screen size of 110-120 inches.
Don't forget to incorporate acoustic panels and soundproofing materials to enhance the audio quality and keep outside noise at bay.
Ideal Room Dimensions
Creating the perfect home theater starts with choosing the right room dimensions. Aim for a space that's at least 20 feet long and 13 feet wide. This size accommodates comfortable seating and allows for ideal viewing experiences with your home theater equipment. A minimum of 15 feet in width and 20 feet in length is recommended to support larger screen sizes and guarantee appropriate speaker placements.
When it comes to ceiling height, aim for at least 7 feet. This dimension not only enhances acoustics but also allows for unobstructed projector installations. Avoid cubic room shapes, as they can negatively impact sound quality. A width that's at least 1.6 times the ceiling height greatly improves acoustics.
Here's a quick reference for ideal room dimensions:
| Room Size | Ceiling Height | Acoustics Impact |
|---|---|---|
| 15' x 20' | 7' | Basic sound quality |
| 13' x 20' | 8' | Improved sound clarity |
| 20' x 20' | 9' | Excellent sound distribution |
| 20' x 25' | 10' | Superior acoustics |
These dimensions will help you achieve a fantastic home theater experience!
Screen and Seating Arrangement
After establishing the ideal room dimensions, it's time to focus on the screen and seating arrangement to maximize your home theater experience. For a fascinating viewing experience in a 20×13 ft space, aim for a screen size of 110-120 inches.
When planning your layout, consider integrating an energy-efficient heat pump for efficient climate control, which can improve overall comfort during long viewing sessions energy-efficient technology. Arrange your seating with clear sightlines in mind, using tiered seating to elevate the back row by at least 10 inches for unobstructed views.
Make sure the distance between your seating and the screen allows for proper viewing—typically, this means sitting 1.5 to 2.5 times the screen size away. Position your center speaker directly above or below the screen to enhance the surround sound system, while side surround speakers should be mounted at ear height on the side walls behind your main seating.
Avoid blocking views from any seat by ensuring all seating is forward-facing and carefully considering the placement of walls and columns. Additionally, using acoustic panels can help improve sound quality, but remember, this will be covered in the next section.
With these arrangements, your home theater will deliver an immersive and enjoyable viewing experience.
Acoustic and Sound Considerations
To guarantee an exceptional audio experience in your home theater, you must prioritize acoustic and sound considerations. Proper speaker placement is essential; position the center speaker directly above or below the screen, while side surround speakers should be located on the sidewalls behind your seating. This setup creates immersive audio that pulls you into the action.
Soundproofing is also vital. Use acoustic panels, solid doors, and thick curtains to minimize outside noise interference and reduce sound leakage.
Incorporating tiered seating can greatly improve sightlines and enhance the acoustic experience, allowing sound to reach every audience member without obstruction.
Consider installing wall-to-wall carpeting to absorb sound and further reduce audio distortion. Soft materials on walls help limit sound bounce, maintaining clarity.
Don't forget that acoustic panels can serve dual purposes; they not only manage sound but can also add aesthetic appeal to your theater. Customize them with family photos or artwork to enhance the overall atmosphere.
Insulation and Soundproofing Essentials

When you're setting up your home theater, effective insulation and soundproofing are crucial for preserving audio quality. To achieve ideal audio integrity, aim for insulation ratings of R30 for floors, ceilings, and exterior walls, and R11 for interior walls. This will help minimize sound leakage from movie noise and create a quieter environment.
Implement soundproofing techniques like adding drywall layers and using sound-reducing materials to enhance your space. Don't forget to seal any cracks with caulk to prevent sound leaks.
Consider wall-to-wall carpeting, thick curtains, and cushioned seating; these elements not only add comfort but also absorb sound and reduce audio bounce, providing a better viewing experience.
For even greater improvement, strategically place acoustic panels around the room. These panels absorb excess noise and reduce echo, greatly enhancing sound quality.
By focusing on insulation and soundproofing, you'll guarantee that your home theater delivers an immersive experience, allowing you to enjoy your favorite films and music without distractions.
Prioritizing these essentials will make all the difference in creating a space that feels professional and enjoyable.
Pre-Wiring for Audio Systems
Pre-wiring for audio systems is a vital step in creating an immersive home theater experience. To achieve ideal audio performance, you need to take into account proper speaker placement for your 7.1 surround sound system. Here's a quick reference table to guide you:
| Component | Recommended Cable Gauge | Placement |
|---|---|---|
| Front Speakers | 12 or 14-gauge | At ear height |
| Center Speaker | 12 or 14-gauge | Above or below the screen |
| Side Surround | 16-4 gauge | Mounted on side walls |
| Rear Surround | 16-4 gauge | Mounted on back wall |
Ensure you run HDMI cables from your equipment hub to the projector area for seamless video transmission. Pre-wiring for recessed lighting will enhance the atmosphere, allowing for dimmed lighting when the movie starts. Incorporating RF dimmer connections lets you control the lighting with ease, making your home theater experience even more enjoyable. By carefully planning your pre-wiring, you'll set the stage for a fantastic audio experience that immerses you in your favorite films.
Pre-Wiring for Video Projectors

Setting up your audio system lays a strong foundation for your home theater, but video projectors play a key role in creating an immersive viewing experience. To guarantee your video projector performs at its best, start with pre-wiring.
You'll need to run an HDMI cable from the projector location to your equipment hub for high-quality video transmission. Don't forget to include a CAT5 cable for RF remote control access, allowing you to conveniently control the projector from a distance.
Position the projector at the rear of the room, which typically requires a throw distance of about 14 feet for a 150-inch screen to achieve ideal image size.
Also, make sure the hub is pre-wired for cable or satellite feeds and high-speed Internet, assuring seamless streaming services and connectivity for your projector.
Proper planning for electrical wiring is essential, too. Place outlets near the projector location and confirm there's an adequate power supply for all connected devices.
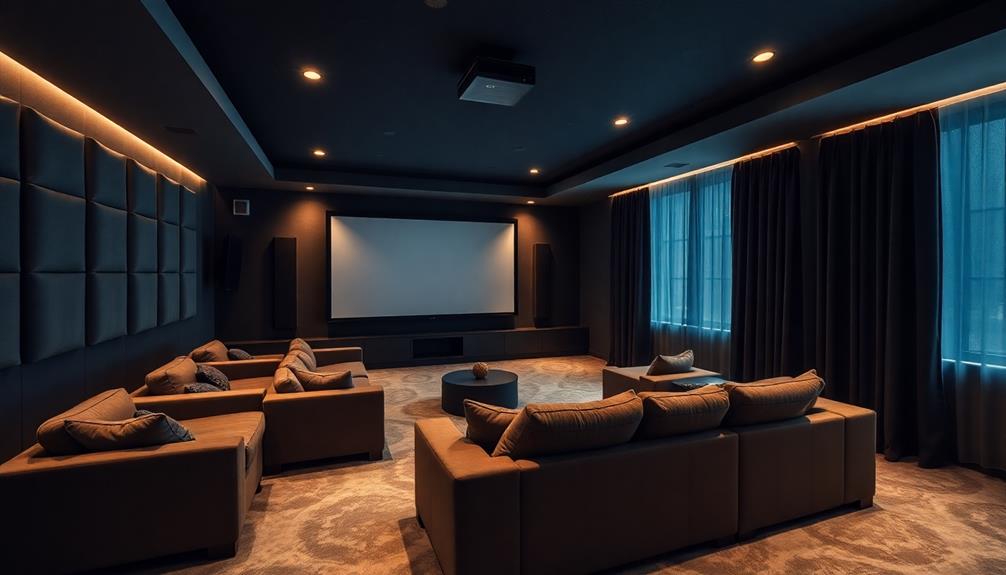
Installing Lighting Solutions
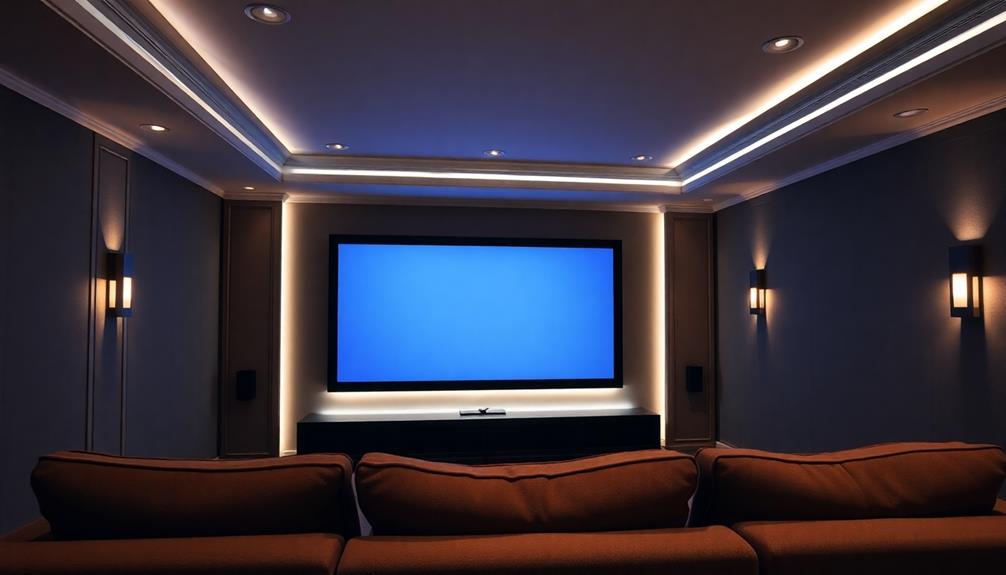
Creating the perfect ambiance in your home theater is vital for an immersive viewing experience. To achieve this, consider incorporating dimmable wall sconces and recessed ceiling lights. These fixtures allow you to adjust the lighting to your preference, enhancing the cinematic feel. Plan for lighting installation during the framing stage to guarantee ideal placement and seamless integration.
Utilizing blackout curtains is important for blocking ambient light and improving image quality during screenings. Additionally, choose dark, matte finishes for your walls and ceilings to minimize light reflections, which can detract from your viewing experience.
Consider the following options for your lighting setup:
| Lighting Solutions | Benefits |
|---|---|
| Dimmable Wall Sconces | Adjustable ambiance |
| Recessed Ceiling Lights | Sleek design, effective lighting |
| Smart LED Lighting | Color changes, remote control |
Setting Up Audio and Video Equipment
When you're ready to plunge into the audio and video setup for your home theater, focus on achieving a balanced and immersive experience. A well-configured system enhances your movie nights and gaming sessions. Follow these steps:
- Set Up Surround Sound Configuration: Opt for a Dolby Atmos 7.2.2 setup with three front speakers, two subwoofers, and strategically placed side and ceiling speakers for ideal Home Theater Audio.
- Install HDMI Cables: Pre-wire your room with HDMI cables from the projector and screen to your A/V receiver, ensuring high-definition video delivery.
- Connect Your Blu-ray Player: Link your Blu-ray player and other devices to your A/V rack, which should have proper ventilation to avoid overheating.
- Position Speakers Correctly: Use 12 or 14-gauge cables for the front speakers, and place them at ear height. Make sure the center speaker is positioned below or above the screen for the best sound distribution.
Choosing Comfortable Seating

When choosing seating for your home theater, you want to prioritize comfort and support.
Consider options that provide ergonomic design and proper back support, ensuring everyone enjoys the show without discomfort.
Arranging your seating thoughtfully can also enhance the viewing experience, so let's explore the best types and layouts for your space.
Seating Types Overview
Comfort is key in selecting the right seating for your home theater, as it can make or break your movie-watching experience. When you're investing in this space, consider the following seating options:
- Reclining Chairs: These provide excellent comfort and support, allowing you to kick back and relax during long movie marathons.
- Sectionals: Plush, spacious sectionals can accommodate multiple viewers while offering ample cushioning for everyone.
- Leather Seating: Genuine leather options are durable, often come with built-in cup holders, and add a touch of luxury to your home theater.
- Mid-Range Options: While high-end theater seats may be tempting, comfortable mid-range options can deliver an enjoyable experience without straining your budget.
Ensure your seating arrangement accommodates two rows of four seats in a standard 20×13 ft theater, with the back row elevated on a riser for unobstructed views.
Remember to position all seating forward-facing to enhance sight lines and prevent any view blockage from others.
Prioritizing comfort and functionality will create a welcoming atmosphere for your movie nights.
Ergonomics and Support
How can you assure your home theater seating is both comfortable and supportive? Prioritizing ergonomic designs is key. Look for chairs that support your back and neck, as they'll enhance your overall comfort during long viewing sessions. Genuine leather seats are a great option, offering both durability and ease of maintenance. Plus, features like cup holders add convenience.
To help you choose the right seating, consider the following factors:
| Feature | Importance |
|---|---|
| Ergonomic Design | Provides necessary support for your body |
| Soft Cushions | Minimize sound reflection for better acoustics |
| Adequate Legroom | Assures comfort during extended viewing |
| Tiered Seating Layout | Enhances visibility and immersion |
Aim for a seating arrangement that accommodates two rows of four seats in a 20×13 ft theater, with the back row elevated on a riser. Forward-facing seating is essential, but be sure to leave enough space between rows to prevent discomfort. By focusing on comfort and support, you'll create an immersive viewing experience that you and your guests will love.
Arrangement for Comfort
Creating a cozy atmosphere in your home theater hinges on selecting the right seating arrangement. Comfort is key, so make certain your seating enhances both visibility and audio experience. Here are some tips to help you choose wisely:
- Opt for Forward-Facing Seating: Ascertain all seats have clear sight lines to the screen. If you're using a tiered arrangement, elevate the back row by about 10 inches for better visibility.
- Choose Comfortable Styles: Look for genuine leather recliners or sectionals that come with built-in cup holders. They provide added comfort for those long movie marathons.
- Prioritize Cushioned Seating: Cushioned seats minimize sound reflection, enhancing your overall audio experience. Hard furniture can disrupt the immersive feel you're aiming for.
- Maximize Space: In a 20×13 ft room, consider two rows of four seats for a comfortable setup. Ensure there's enough room for easy movement and access to walkways without compromising comfort.
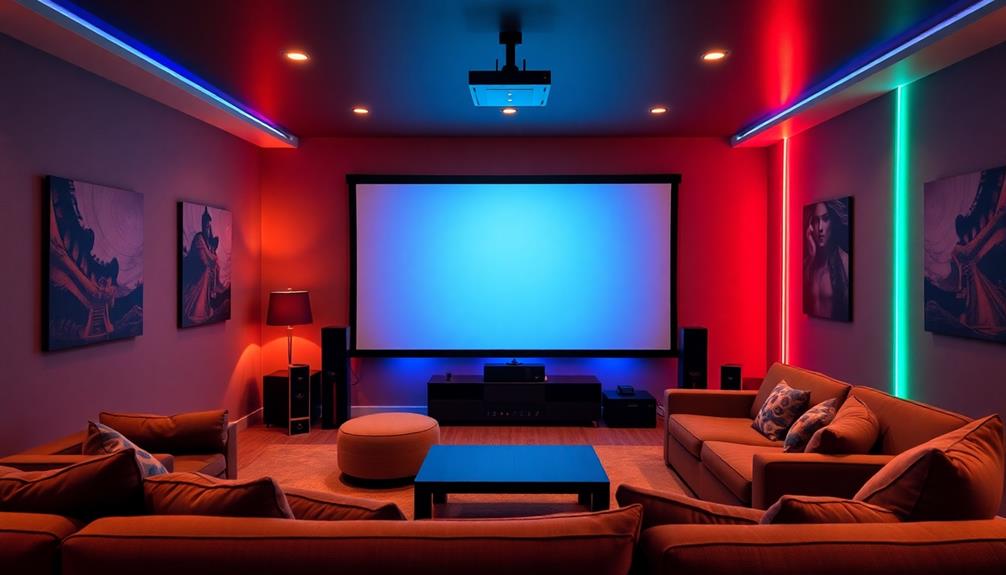
Enhancing Aesthetic and Theme

To truly elevate the aesthetic and theme of your home theatre, you should frequently consider the impact of color and decor. Opt for a dark and inviting color scheme, like Sherwin Williams' Iron Ore, to create an immersive environment that minimizes light reflection and enhances your cinematic experience.
Incorporate themed decor and acoustic panels that double as artwork, featuring family photos or iconic movie posters. This personal touch not only enhances the space but also maintains sound quality.
Install dimmable wall sconces and recessed ceiling lights to give you adjustable ambiance, allowing you to set the perfect lighting for every movie night.
Don't forget about blackout curtains; they'll block out any ambient light from windows and doors, ensuring peak image quality during screenings.
For a space-saving solution, consider a drop-down movie screen that fits your projector specifications, maximizing your viewing area without distractions.
Maintenance and Upkeep Tips

To keep your home theatre in top shape, you need to stay on top of regular equipment checks.
Make certain to clean your surrounding environment and update your software and firmware regularly.
These simple steps will guarantee peak performance and longevity of your setup.
Regular Equipment Checks
Maintaining your home theater system is essential for enjoying the best audio and video experience. Regular equipment checks can help you avoid issues and enhance your overall setup. Here are some key maintenance tips to keep in mind:
- Inspect Cables: Regularly check for worn or damaged HDMI and speaker wires. Replacing these guarantees peak performance for your audio/video equipment.
- Firmware Updates: Schedule periodic checks on all audio/video equipment, including your projector and receivers. This way, you'll keep everything compatible with the latest streaming services and devices.
- Clean Components: Dust your A/V rack and components regularly. This prevents overheating and guarantees proper ventilation. A vacuum with a brush attachment works wonders for delicate areas.
- Test Sound Levels: Annually test your sound levels and speaker placement. Adjustments may be needed due to changes in room acoustics or furniture arrangements, which can greatly impact sound quality.
Additionally, replace or maintain soundproofing materials like acoustic panels and insulation as needed. This will help minimize noise leakage and enhance your overall home theater experience.
Clean Surrounding Environment
While enjoying your home theater, it's easy to overlook the importance of a clean surrounding environment. A tidy space not only enhances the ambiance but also guarantees peak sound quality. Regular cleaning is essential; dust and vacuum your theater space, including carpets and furniture, to prevent dust buildup that can interfere with acoustics.
Here's a simple maintenance checklist to help you stay organized:
| Task | Frequency |
|---|---|
| Dust and vacuum | Weekly |
| Clean acoustic panels | Every 2 months |
| Organize cables and wiring | Monthly |
| Check projector and screen | Every 3 months |
Keep soundproofing materials, like curtains and insulation, in good condition. Monitor their state and replace or repair them as needed to maintain effective sound isolation. Remember, cluttered wiring can lead to overheating, so make sure everything is organized and free from debris. By following these maintenance tips, you'll not only improve the functionality of your home theater but also create a more enjoyable viewing experience.
Update Software Firmware
A clean environment sets the stage for an enjoyable home theater experience, but keeping your equipment up to date is equally important.
Regular firmware updates for your A/V receiver, projector, and streaming devices can optimize performance and enhance your viewing experience. Here are some steps to follow:
- Check for Updates: Regularly check for firmware updates for your projector and A/V receiver to guarantee you're accessing the latest features.
- Schedule Updates: Set a time to update your streaming devices and Blu-ray players to improve compatibility with new services and fix bugs affecting playback quality.
- Use the Menu System: Access your device's menu system to initiate firmware updates easily. Consider enabling automatic updates if available to simplify the process.
- Log Versions: Keep a log of firmware versions and update dates. This helps track significant changes that could impact your home theater experience.
After completing the updates, test all connected devices to confirm they're functioning correctly.
This proactive maintenance guarantees that you're always ready for movie night without unexpected issues!
Frequently Asked Questions
How to Make a Theater at Home?
To make a theater at home, choose a spacious, quiet area, soundproof it, and set up a projector with a large screen. Add comfortable seating and a quality sound system for an immersive experience.
What Do I Need to Set up a Home Theater System?
"Home is where the heart is." To set up a home theater system, you'll need a quality screen, surround sound, proper wiring, ambiance lighting, and comfortable seating. Each element enhances your viewing experience.
How Much Does It Cost to Set up a Home Theatre?
Setting up a home theater can cost you anywhere from $2,000 to over $50,000. It really depends on the equipment quality and customization level you desire, plus potential additional costs for modifications and maintenance.
How to Make Home Theater Speakers at Home?
Making home theater speakers is like crafting a fine dish. Start by choosing the right driver size, build a sturdy enclosure, and use proper crossover components. Kits can simplify the process, ensuring great sound for your space.
Conclusion
To summarize, creating a home theatre can transform your entertainment experience. Did you know that 75% of American households enjoy watching movies at home? By investing time and effort into crafting your ideal space, you're not just building a room; you're enhancing your lifestyle. With the right setup and design, you'll find yourself enjoying your favorite films and shows in a whole new way. So, get started on your home theatre journey today!