To effectively calibrate your audio system with room correction tools, start by positioning the microphone at your typical listening spot at ear level. Run the software to emit test sounds, capturing how your room affects sound quality. Use this data to create tailored equalization adjustments that minimize peaks and dips in frequency response. Remember to fine-tune settings and consider room treatments for the best results—continuing with these tips helps reveal richer, more natural sound.
Key Takeaways
- Position the microphone at ear level in your listening spot to ensure accurate room analysis.
- Run the room correction software to emit test tones and capture how sound interacts with your space.
- Review the generated equalization adjustments and manually fine-tune for a natural, balanced sound.
- Perform calibration regularly, especially after room changes or speaker repositioning, to maintain optimal sound quality.
- Combine software corrections with proper speaker placement and room treatments for the best listening experience.

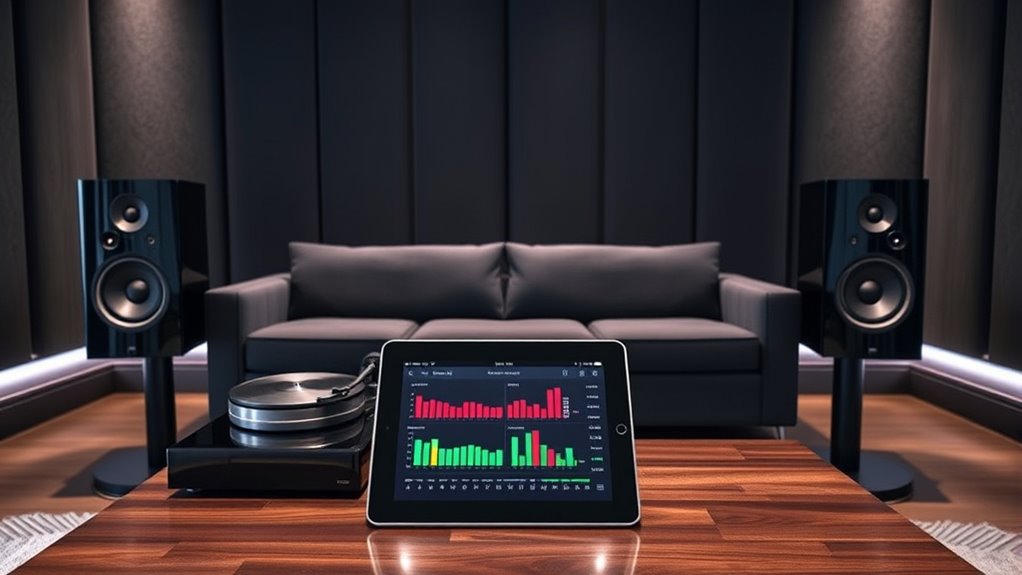
Calibrating your audio system guarantees you get the best sound quality and a balanced listening experience. When you take the time to set up your equipment properly, you ensure that every note, beat, and nuance comes through clearly, no matter where you’re sitting in the room. Room correction tools are invaluable in this process, helping you compensate for the acoustics and speaker placement issues that often distort sound. These tools analyze how sound behaves in your space and adjust the audio output to deliver a more accurate and immersive experience. To start, position your microphone in your typical listening spot, making sure it’s at ear level and oriented correctly. When you run the room correction software, you’ll notice it emits test tones from your speakers, capturing how sound interacts with your room’s surfaces. This is vital because walls, furniture, and even curtains can reflect or absorb sound, creating peaks and dips in frequency response. The software then processes this data, generating a set of equalization adjustments tailored to your space.
Proper calibration ensures your sound is clear, balanced, and immersive for the best listening experience.
Once the initial calibration completes, don’t just accept the default settings blindly. Take a moment to listen critically. You might find that some frequencies sound off or unnatural, which isn’t uncommon. Many room correction tools allow you to fine-tune these adjustments manually. Trust your ears—if the bass feels boomy or the treble seems harsh, tweak the equalization curves accordingly. Remember, the goal is to craft a sound that feels natural and balanced to you. It’s also helpful to perform multiple calibration runs if your room has changed—like moving furniture or adding new decor—as these adjustments ensure ongoing accuracy.
Keep in mind that calibration isn’t a one-and-done step; it’s an ongoing process. As your room evolves or your listening preferences change, revisit the calibration to maintain peak sound. In addition, don’t rely solely on software; consider how your speakers are positioned and whether room treatments could further improve sound quality. Proper calibration complements good speaker placement, helping you avoid common issues like muddiness or uneven frequency response.
Ultimately, effective use of room correction tools transforms your listening environment. It’s about making the most of your setup by understanding and adjusting for your unique space. When calibrated correctly, your audio system delivers clear, balanced sound that fills the room with richness and detail, making every listening session more enjoyable.

Klipsch R-12SW Powerful Deep Bass Front Firing 12" Copper-Spun Driver 400W Digital Power Subwoofer 14" X 18.5" X 16"
Powerful 12" copper-spun front-firing woofer
As an affiliate, we earn on qualifying purchases.
Frequently Asked Questions
Can Room Correction Tools Improve Sound Quality in Any Room?
Room correction tools can considerably improve sound quality in most rooms. They analyze your space’s acoustics and adjust your audio system’s settings for better clarity, bass, and balance. While they can’t fix every acoustic flaw, they’re effective at reducing echo, standing waves, and uneven sound distribution. You’ll notice a more immersive listening experience, especially in challenging spaces. Just make sure you calibrate properly for best results.
How Often Should I Recalibrate My Audio System?
Think of your audio system as a garden that needs regular tending. You should recalibrate whenever you notice sound quality slipping or after significant room changes—like moving furniture or new decor. Regular checks, say every 3-6 months, help keep your sound crisp and balanced. Like tuning a musical instrument, routine recalibration guarantees your system performs at its best, delivering the rich, immersive experience you crave.
Do I Need Professional Training to Use Room Correction Tools?
You don’t need professional training to use room correction tools effectively. Many user-friendly apps and devices guide you through the process step-by-step, making calibration accessible. With some patience and attention to detail, you can learn to optimize your audio system on your own. Just follow the instructions carefully, and don’t hesitate to consult online tutorials or user manuals if you need extra help.
Are There Specific Brands or Models Recommended for Calibration?
When choosing calibration tools, you should look for reputable brands like Dirac, Audyssey, or Anthem Room Correction. These companies offer user-friendly interfaces and reliable results, making calibration easier even if you’re a beginner. You don’t need professional training to use them effectively—just follow the instructions carefully. Investing in well-reviewed tools guarantees you get the best sound quality from your system without needing expert help.
Can Calibration Fix All Audio Issues Caused by Room Acoustics?
Calibration can markedly improve your sound quality, but it can’t fix all issues caused by room acoustics. While room correction tools help reduce echoes, standing waves, and uneven frequency response, they can’t eliminate fundamental problems like poor room layout or excessive reflections. To get the best sound, you should combine calibration with strategic room treatments and speaker placement, creating a balanced listening environment that complements your calibration efforts.

Klipsch R-120SW Subwoofer, Black
12" high excursion spun-copper Imp woofer
As an affiliate, we earn on qualifying purchases.
Conclusion
Think of your room as a canvas and your audio system as the paint. When you calibrate with room correction tools, you’re blending colors to create a masterpiece of sound. Proper calibration transforms chaos into harmony, turning your space into a sanctuary where every note resonates perfectly. Remember, the true beauty of your system lies in your hands—like an artist, you hold the brush to craft an auditory experience that’s uniquely yours.

Epson Home Cinema 980 3-Chip 3LCD 1080p Projector 4,000 Lumens Color and White Brightness, Streaming/Gaming/ Media Room, Built-In Speaker, Auto Picture Skew, 16000:1 Contrast, 2 HDMI Ports
Exceptional Picture Quality — Provides stunning, detailed 1080p images and fast data processing that’s optimized for fast-action sports,...
As an affiliate, we earn on qualifying purchases.

ViewSonic LS740W 5500 Lumens WXGA Laser Projector with 1.3X Optical Zoom, H/V Keystrone, 360 Degrees Projection for Auditorium, Conference Room, and Education
High Brightness Laser Projector: WXGA (1280x800p) resolution with a 1.2-1.5 throw ratio and 5,500 ANSI lumens for clear,...
As an affiliate, we earn on qualifying purchases.