The Dolby Atmos shortcut that usually fails is relying on quick fixes like enabling auto-calibration or selecting simplified sound modes without proper setup. These shortcuts often ignore necessary hardware support, speaker placement, and calibration steps, resulting in underwhelming sound. Without verifying content compatibility or optimizing your room acoustics, you’ll miss out on true Atmos immersion. To get the best experience, you’ll want to follow proper setup and calibration steps—there’s more to uncover that can transform your sound.
Key Takeaways
Quick Atmos shortcuts often skip proper hardware support, calibration, or content verification, leading to subpar immersive sound.
Relying solely on software tricks or automatic calibration can cause phase issues, misplacement, and poor sound quality.
Inadequate speaker placement and room acoustics are common overlooked factors that quick fixes fail to address.
False promises of “easy” Atmos setup often ignore critical calibration steps necessary for true immersion.
Proper Atmos experience requires thorough setup, calibration, and compatible hardware—shortcuts usually compromise these essentials.
Outdoor-Projector-4K with WiFi and Bluetooth:[3500 Bright/60W Dolby Audio/Official Licensed Apps],Smart-Projector with AI Auto Focus,ONOAYO ONO5Pro 2.0 Movie Projector for Indoor/Outdoor 2026New
[Hear the Difference–Hollywood-Grade Dual 60W Dolby Audio] Why spend more on a TV + soundbar or settle for...
As an affiliate, we earn on qualifying purchases.
Why Relying on Quick Fixes for Dolby Atmos Usually Fails
Quick fixes for Dolby Atmos often seem like an easy solution, but they rarely deliver the immersive experience you’re expecting. These quick fixes often come with false promises, leading you to believe you can enhance sound quality with minimal effort. Unfortunately, they usually involve simple tweaks or software tricks that don’t address the core technology needed for true Atmos effects. Relying on these false promises can give a false sense of improvement, but the audio remains limited and underwhelming. Dolby Atmos requires precise calibration and compatible hardware to truly work. Skipping these essential steps in favor of quick fixes only delays your ability to enjoy the full spatial sound experience. In the end, genuine Atmos performance depends on proper setup, not shortcuts. Understanding the technology is crucial to achieving the best possible sound quality. Without a solid grasp of spatial audio principles, many users continue to chase illusions of improvement. Recognizing the importance of hardware compatibility can help set realistic expectations and guide effective upgrades, especially since miscommunication between family members can sometimes lead to misunderstandings about what setup is necessary.
【Now with Netflix & 3000ANSI】Smart 4K Projector with WiFi and Bluetooth, VISSPL 3D Dolby Audio and Auto Focus Portable Outdoor Projector, Movie Home Theater Projectors for Bedroom/Ceiling
[ Netflix Ready - No Extra Devices Needed ] – VISSPL Smart Projector: No TV stick, no casting,...
As an affiliate, we earn on qualifying purchases.
What Hardware and Settings You Need for Dolby Atmos
To enjoy Dolby Atmos, you need compatible hardware like a capable sound system or headphones and a device that supports Atmos playback. Make sure your audio settings are optimized for immersive sound, with the right configurations enabled. Finally, select content that’s mastered in Dolby Atmos to experience the full effect. Additionally, using dedicated smart home gear can enhance your setup by providing seamless control over your audio environment. Ensuring your device’s audio output settings are correctly configured is essential for achieving optimal Atmos experience. Proper audio calibration can also significantly improve your listening experience by balancing sound levels and clarity. Paying attention to speaker placement and acoustic treatment can further elevate your immersive audio experience. Incorporating room acoustics adjustments can help optimize sound quality and immersion.
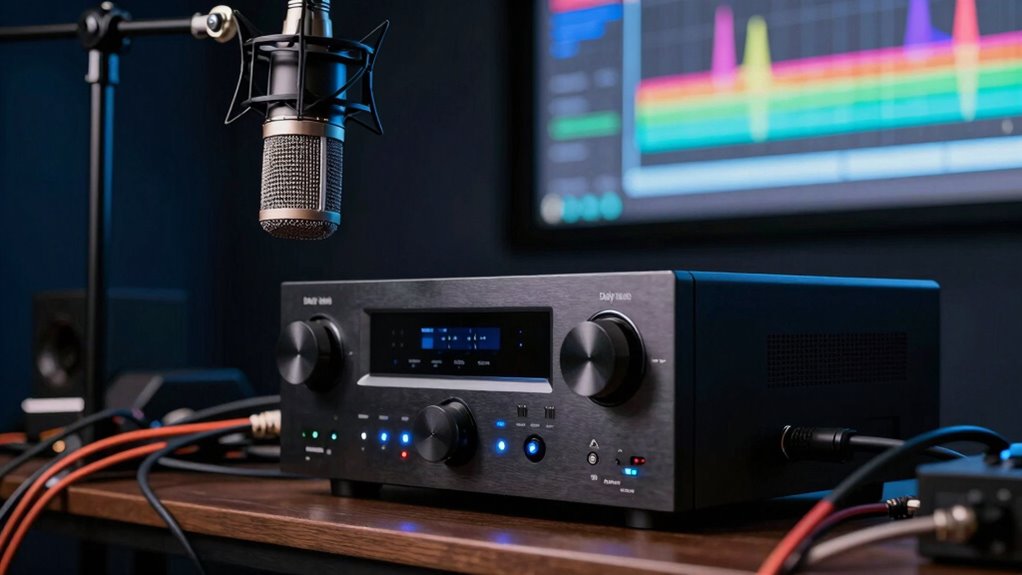
Compatible Hardware Requirements
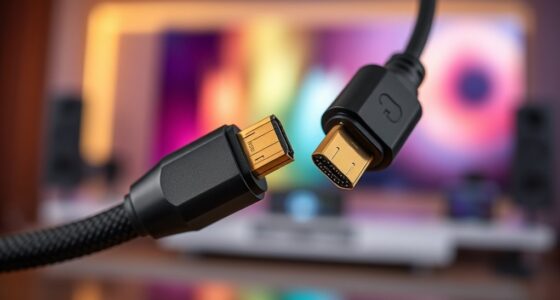
Having the right hardware is vital to enjoy Dolby Atmos at its full potential. Your system must support Dolby Atmos content, which means your hardware needs to be compatible. This includes a capable AV receiver or soundbar that explicitly lists Atmos support, along with compatible speakers or upward-firing modules. Proper speaker calibration is essential to ensure the sound is accurately placed and immersive. Check that your setup matches the content’s requirements—whether it’s a 5.1.2 or 7.1.4 configuration—so Atmos can deliver its full effect. Not all devices support Atmos, so verify compatibility before investing. Making sure your hardware meets these requirements guarantees you get the best listening experience and avoids playback issues caused by incompatible equipment. Additionally, speaker calibration is crucial for optimal Atmos performance, ensuring sound is accurately positioned in your space. Confirming hardware compatibility helps prevent common issues and ensures seamless Dolby Atmos playback. To maximize your experience, consider upgrading your equipment with the latest Atmos-enabled devices for enhanced sound quality. Ensuring hardware standards are met can also help you avoid frustration and get the most out of your investment. Regularly checking for firmware updates can also enhance device performance and compatibility.
Optimal Audio Settings
Once you’ve confirmed your hardware supports Dolby Atmos, the next step is to optimize your audio settings for the best experience. Proper speaker calibration ensures sound is accurately placed, so run calibration tools to balance levels and speaker distances. Adjust audio compression settings to prevent dynamic range issues, allowing clearer sound at lower volumes. Here’s a quick guide:
Setting
Recommended Adjustment
Purpose
Speaker Calibration
Use calibration mic, set levels evenly
Accurate sound placement
Audio Compression
Minimize compression for clarity
Reduces muddiness
Volume Level
Set consistent listening volume
Prevents distortion
Surround Sound Mode
Enable Dolby Atmos or immersive mode
Enhances spatial audio
Equalizer Settings
Flat or slight boost on treble/bass
Clearer, balanced sound
Ensuring your audio hardware and settings are compatible and properly configured is essential for an immersive Dolby Atmos experience. Additionally, checking audio configuration tools can help ensure your system is optimized. Proper room acoustics also play a vital role in sound quality. Understanding how sound placement impacts the overall experience can help you make more informed adjustments. Optimizing these settings enhances your Dolby Atmos experience.
Proper Content Selection
Are you ready to enjoy Dolby Atmos in its full glory? Proper content selection is vital. First, verify your audio file is Atmos-enabled; not all files are compatible. Look for high-quality streams labeled as Dolby Atmos on streaming services like Netflix, Disney+, or Apple TV+. These services offer specific Atmos tracks designed for immersive sound. Check that your device’s hardware supports Atmos playback—this includes your TV, soundbar, or AV receiver. Also, confirm your streaming app’s settings to enable Dolby Atmos output. Using the right combination of compatible audio files, streaming services, and hardware guarantees you experience true spatial audio. Without proper content, even the best setup can fall flat, so prioritize Atmos-encoded files and trusted streaming options for maximum results. Additionally, understanding audio format compatibility ensures your system is configured correctly for optimal Atmos performance. To maximize your experience, it’s equally important to stay updated on hardware compatibility and firmware updates that can improve Atmos support. Ensuring your device firmware is current can significantly enhance compatibility and overall Atmos playback quality. Moreover, being aware of content source quality can prevent issues related to low-bitrate streams that undermine Atmos effects. Regularly checking content availability helps ensure you’re accessing the best possible Atmos content for your setup.
[Built-in Apps/4K Support] Smart Outdoor Projector with WiFi and Bluetooth, Movie Projector, DoIby Audio with Dual Speaker, Auto Focus w/ YouTube&PrimeVideo Proyector, Upgrad P62 Pro
[Upgraded Classic – P62 Pro Movie Projector] Building on the reliability and low return rate of the classic...
As an affiliate, we earn on qualifying purchases.
Common Mistakes That Sabotage Your Atmos Setup
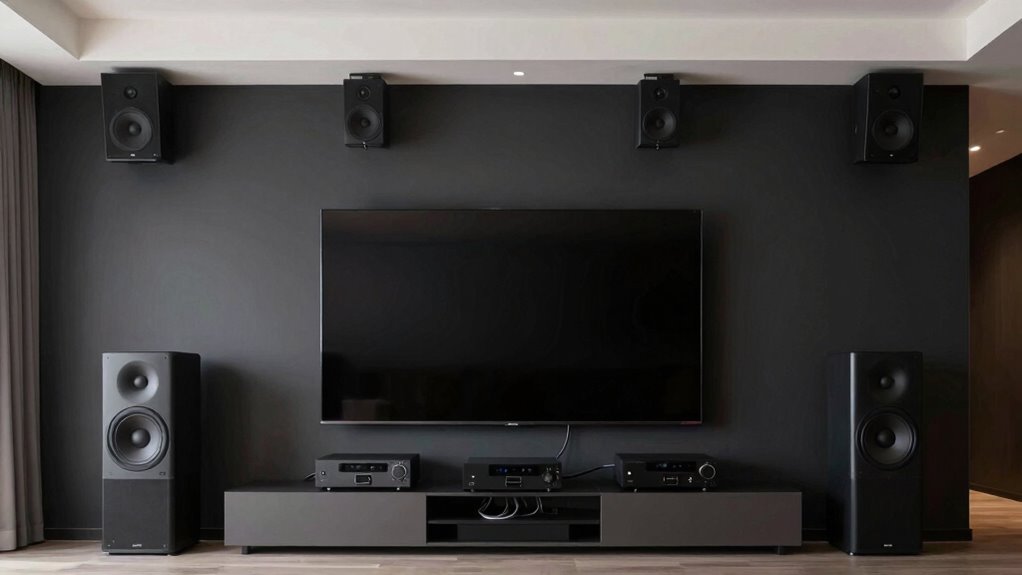
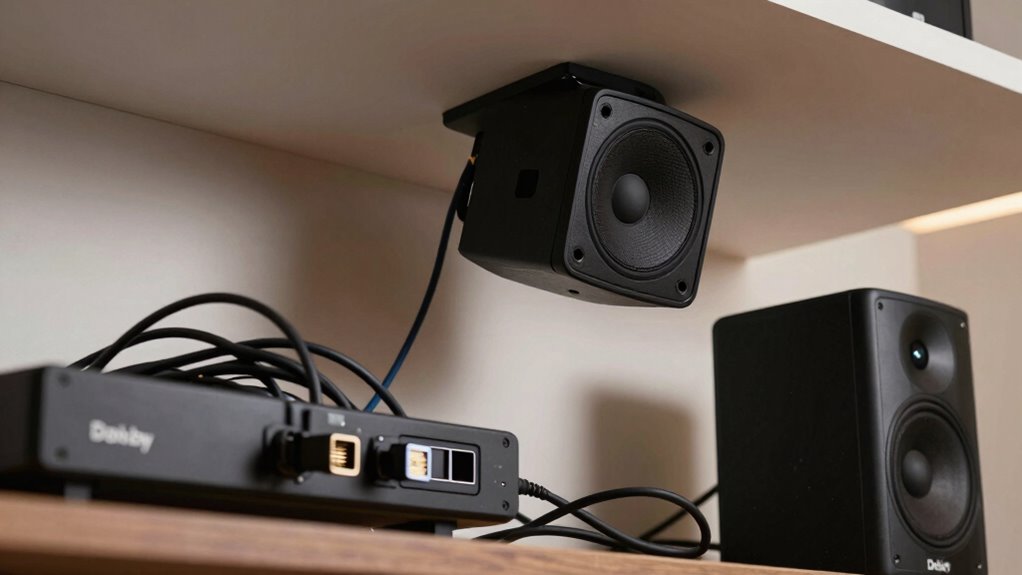
One of the biggest mistakes you can make is improper speaker placement, which can ruin the immersive experience Dolby Atmos offers. Neglecting room acoustics also leads to sound issues that diminish clarity and depth. Addressing these common pitfalls ensures your setup performs at its best.
Improper Speaker Placement
Improper speaker placement is one of the most common mistakes that sabotage your Dolby Atmos setup. If your speakers aren’t correctly aligned, the sound won’t reach your ears as intended, ruining the immersive experience. Make certain your overhead and surround speakers are positioned according to recommended guidelines, with precise speaker alignment. Using calibration tools can help you fine-tune placement and guarantee consistent sound levels across all speakers. Avoid placing speakers too close to walls or in corners, which can cause unwanted reflections and distortions. Proper placement not only improves clarity but also enhances the overall Atmos effect. Take the time to adjust your speakers carefully, because even small misplacements can considerably diminish your immersive sound experience.
Overlooking Room Acoustics
Ignoring room acoustics can substantially undermine your Dolby Atmos setup, even if your speakers are perfectly placed. Without proper room treatment, reflections and standing waves distort sound clarity and imaging. You might have your speaker positioning optimized, but if the room’s surfaces cause echo or muddiness, your immersive experience suffers. Adding acoustic panels, rugs, or diffusers can drastically improve sound quality by controlling reflections. Don’t forget that speaker placement isn’t just about location; how your room interacts with sound is equally important. Neglecting room acoustics means you’re letting sound waves bounce and interfere unpredictably, sabotaging the Atmos effects you’re trying to achieve. Addressing room treatment and refining speaker positioning are essential steps to unseal the full potential of your Dolby Atmos system.
Smart 4K Projector [Google TV Stick Built-in & 360° Stand] with WiFi 6, Bluetooth 5.3, HDR10, 30W Hi-Fi, AI Auto Focus, Outdoor Portable Short Throw Movie Projector for Home Theater Bedroom Ceiling
[Google TV Built-in | 10,000+ Apps | Voice Control] The smart projector with wifi and bluetooth features Google...
As an affiliate, we earn on qualifying purchases.
Risks of Using Automatic or DIY Atmos Calibration
While automatic or DIY Atmos calibration can seem like a convenient solution, it often comes with significant risks. Relying solely on auto calibration or making diy adjustments may lead to misaligned sound stages, uneven volume levels, or incorrect speaker placement. These issues can diminish the immersive experience Dolby Atmos promises. Without professional tuning, calibration errors might go unnoticed, causing audio distortions or imbalance. To better understand potential pitfalls, consider this table:
Risk
Description
Impact
Inaccurate speaker levels
Auto calibration may misjudge speaker distances
Poor sound balance
Phase issues
DIY adjustments might cause phase cancellation
Reduced clarity
Uneven bass response
Incorrect calibration affects low frequencies
Muddy or boomy sound
Delay mismatches
Timing errors disrupt immersive effects
Loss of Atmos effect
Overcompensation
Overcorrected settings cause unnatural sound
Fatigue and irritation
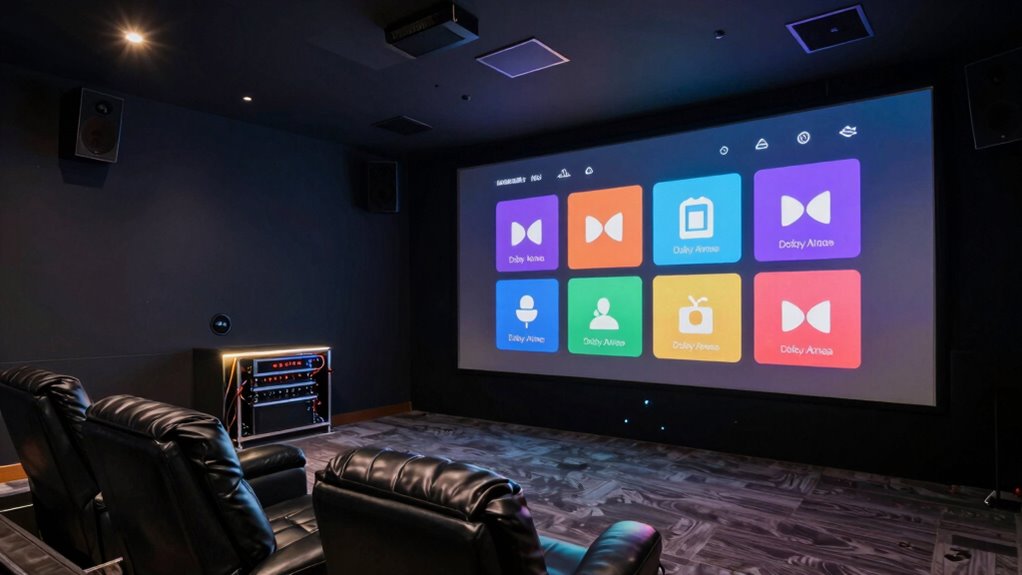
How to Properly Set Up Dolby Atmos at Home
Setting up Dolby Atmos correctly guarantees you experience its full immersive potential. Begin with speaker calibration to ensure each speaker is positioned and leveled properly. Use a calibration microphone and receiver’s auto-calibration feature, but double-check the results manually for accuracy. Proper room treatment is also essential; add acoustic panels, bass traps, and diffusers to minimize reflections and echoes that can distort sound. Clear, balanced audio depends on reducing unwanted sound interactions. Keep speakers at the recommended heights and angles, aligning them with your seating area. Avoid clutter and reflective surfaces that interfere with sound quality. Taking these steps guarantees your Atmos setup delivers a seamless, immersive experience, maximizing the impact of overhead sound effects and creating a true home theater environment.
Troubleshooting Atmos Setup Problems
Even with careful setup, you might encounter issues where Dolby Atmos isn’t delivering the immersive experience you expect. Troubleshooting often starts with speaker calibration—ensure your speakers are balanced, levels are correct, and positioning is accurate. Poor calibration can cause sound imbalances or missing height effects. Additionally, soundproofing techniques can reduce external noise and prevent sound leakage, improving Atmos clarity. Use the table below to identify common problems and solutions:
Issue
Solution
No height effects
Recheck speaker placement and calibration
Sound bleeding or echo
Add soundproofing materials around setup
Imbalanced sound levels
Fine-tune speaker levels in settings
Audio dropouts
Ensure firmware and cables are up-to-date
Address these areas to fix most Atmos setup problems efficiently.
Tips for Long-Term Dolby Atmos Performance and Sound Quality
To maintain ideal Dolby Atmos performance over time, regular system maintenance and careful care are essential. Proper speaker calibration ensures your sound stays balanced, avoiding muddiness or tinny audio. Adjust your crossover settings periodically to optimize how low-frequency sounds are distributed across speakers, preventing overlaps or gaps.
Here are three tips for long-term sound quality:
Recalibrate your speakers regularly to account for room changes or speaker aging.
Fine-tune crossover settings to maintain accurate sound separation and clarity.
Keep your equipment clean and check connections to prevent signal loss or interference.
Frequently Asked Questions
Can Software Updates Fix Dolby Atmos Setup Issues Permanently?
Yes, software updates can fix Dolby Atmos setup issues permanently by improving software stability and fixing bugs. Regular update frequency guarantees your system stays compatible with your hardware and resolves known problems. You should keep your device and Dolby Atmos app up-to-date, as developers release patches that enhance performance and fix errors. However, if issues persist, you might need to reset your setup or seek technical support for more complex problems.
Is Professional Calibration Necessary for Optimal Dolby Atmos Sound?
Professional calibration isn’t always necessary for ideal Dolby Atmos sound; DIY calibration can often suffice, especially if you’re using budget equipment. You can fine-tune your setup by adjusting speaker placement, calibrating levels, and running room correction tools. While professional calibration offers precision, taking the time to learn and tweak your system can considerably improve your Atmos experience, making it more immersive without breaking the bank or requiring expertise.
What Are the Signs of a Faulty Dolby Atmos Speaker?
You’ll notice a faulty Dolby Atmos speaker if you experience speaker distortion or audio dropouts during playback. Distortion makes sounds harsh or fuzzy, while dropouts cause sudden silence or missing audio cues, disrupting your immersive experience. Check for loose connections or damaged components. If these issues persist, it’s likely the speaker needs repair or replacement to restore ideal Atmos sound quality.
How Often Should I Recalibrate My Dolby Atmos System?
Think of your Dolby Atmos system like a garden; it needs tending to stay lush. You should recalibrate your system every 6 to 12 months to keep the sound balanced and guarantee system longevity. Regular calibration prevents issues from creeping in, much like weeds taking over a garden. Staying on top of this task helps your setup deliver ideal sound quality, so enjoy immersive audio for years to come.
Do All Content Providers Support Dolby Atmos Properly?
Not all content providers support Dolby Atmos properly, so provider compatibility varies. You can check content support by reviewing the streaming service’s specifications or app details. Some platforms like Netflix, Disney+, and Apple TV+ offer extensive Dolby Atmos support, but others might only provide it for select titles. To confirm a great experience, verify the compatibility of your provider before investing in Atmos-compatible hardware, ensuring you get the most out of your system.
Conclusion
Don’t let quick fixes sabotage your Dolby Atmos experience—getting it right transforms your home into a cinematic universe. By investing time in proper setup and avoiding shortcuts, you’ll gain access to sound that’s truly breathtaking, making every movie feel like a front-row ticket. Patience and attention to detail are your best allies—because settling for less isn’t just a mistake, it’s a tragedy that robs you of the immersive soundscape you deserve.
Before You Start: Speaker Placement 101 Codes & Compliance Checklist
Here’s a meta description: “Having the right speaker placement is crucial; explore our comprehensive codes and compliance checklist to ensure safety, legality, and optimal sound quality.
Unlock the potential of your home theater by integrating AV receivers with smart systems—discover how to create a seamless entertainment experience today.

![Outdoor-Projector-4K with WiFi and Bluetooth:[3500 Bright/60W Dolby Audio/Official Licensed Apps],Smart-Projector with AI Auto Focus,ONOAYO ONO5Pro 2.0 Movie Projector for Indoor/Outdoor 2026New](https://m.media-amazon.com/images/I/41fylkjOTIL._SL500_.jpg)


![[Built-in Apps/4K Support] Smart Outdoor Projector with WiFi and Bluetooth, Movie Projector, DoIby Audio with Dual Speaker, Auto Focus w/ YouTube&PrimeVideo Proyector, Upgrad P62 Pro](https://m.media-amazon.com/images/I/51yAGv8VI7L._SL500_.jpg)
![Smart 4K Projector [Google TV Stick Built-in & 360° Stand] with WiFi 6, Bluetooth 5.3, HDR10, 30W Hi-Fi, AI Auto Focus, Outdoor Portable Short Throw Movie Projector for Home Theater Bedroom Ceiling](https://m.media-amazon.com/images/I/41zno6cZMFL._SL500_.jpg)