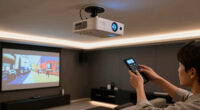
This guide walks you through selecting the right projector and installing it in a media room. It is designed for homeowners or tech enthusiasts with some DIY experience who want a high-quality viewing setup. The process includes choosing equipment, positioning, mounting, and calibration to ensure clear, bright images for movies, gaming, or presentations.

HAPPRUN Native 1080P Projector with Bluetooth and Built-in Speakers
- ✔ Resolution: 1920×1080
- ✔ Screen Size: up to 200 inches
- ✔ Connectivity: Bluetooth 5.1, HDMI, Smartphone compatibility

Aurzen Roku TV Smart Projector with WiFi and Bluetooth, 1080P FHD, Roku TV Built-in, Auto Focus & Keystone, DoIby Audio, Portable…
- ✔ Native Resolution: 1920 x 1080
- ✔ Display Type: LCD
- ✔ Maximum Throw Distance: 18.58 Feet

Optoma HD146X 1080P Full HD Home Theater Projector
- ✔ Resolution: 1920×1080
- ✔ Color Performance: Vibrant and accurate
- ✔ Setup: Easy and straightforward
Difficulty: Intermediate | Time: 2-4 hours
What You’ll Need
Tools & Materials:
- Power drill
- Screwdriver
- Measuring tape
- Level
- Ladder
- Wire stripper
- Projector mount (if mounting)
- HDMI or VGA cables
Knowledge:
- Basic understanding of electrical wiring
- Familiarity with mounting hardware
- Ability to read product specifications
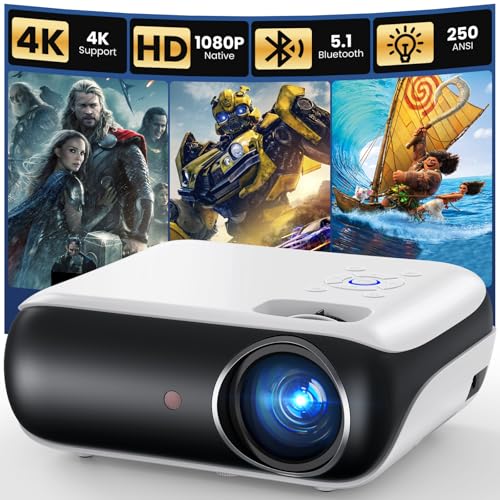
HAPPRUN Native 1080P Projector, Bluetooth Home Theater Movie Projector with Built-in Speaker, Compatible with Smartphone, HDMI, Fire Stick, PS5, Indoor & Outdoor Use - Without Google TV System
[ Native 1080P Full HD Resolution ] - Enjoy crystal-clear visuals with HAPPRUN H1's native 1920x1080 resolution, delivering...
As an affiliate, we earn on qualifying purchases.
HAPPRUN Native 1080P Projector with Bluetooth and Built-in Speakers
The HAPPRUN H1 projector stands out for delivering a sharp 1080p image, making it ideal for media rooms that prioritize image quality and portability. Its compact design allows easy setup in multiple locations, whether indoors or outdoors. With Bluetooth 5.1, it simplifies pairing with wireless speakers or soundbars, and the built-in Hi-Fi stereo speakers enhance the viewing experience without extra equipment. Compared to the other options, this projector is better suited for users who want a flexible, mobile solution that can double as outdoor entertainment. However, it’s limited in maximum screen size (200 inches) and requires additional adapters for smartphone connectivity, which can be a hassle for some. This model makes the most sense for those valuing portability and high-quality picture over larger screen sizes or smart features.
Pros:
- Sharp 1080p resolution for vibrant images
- Portable and lightweight for versatile use
- Bluetooth 5.1 for wireless audio pairing
- Built-in Hi-Fi stereo speakers for immersive sound
Cons:
- Requires HDMI adapters for smartphones (not included)
- Limited to 200-inch maximum screen size
- Additional accessories needed for some devices
Best for: Buyers seeking a portable, high-definition projector for both indoor and outdoor media enjoyment.
Not ideal for: Those who want a large, fixed installation or integrated smart TV features without extra accessories.
Bottom line: A portable, high-res option perfect for users who want flexibility and decent image quality without sacrificing mobility.
“A portable, high-res option perfect for users who want flexibility and decent image quality without sacrificing mobility.”

Aurzen Roku TV Smart Projector with Wifi and Bluetooth, Roku TV Built-in, 1080P FHD, DoIby Audio, Auto Focus & Keystone, Zoom, Movie Portable Outdoor Mini Projector for Soccer Football Game, White
A Roku account and internet connection are required for activation (Creating an account is free). Note: Power Supply:...
As an affiliate, we earn on qualifying purchases.
Aurzen Roku TV Smart Projector with WiFi and Bluetooth, 1080P FHD, Roku TV Built-in, Auto Focus & Keystone, DoIby Audio, Portable…
The Aurzen Roku TV Smart Projector offers a compelling mix of smart features and portability, making it ideal for media rooms that value integrated streaming. Its built-in Roku TV provides instant access to streaming apps, and the auto-focus and keystone correction simplify setup—especially useful in outdoor or variable indoor environments. Its dual 5W speakers deliver decent audio, and WiFi plus Bluetooth ensure flexible connectivity. Compared with the HAPPRUN, this projector’s standout feature is its smart streaming platform, eliminating the need for separate streaming devices, but it depends on a reliable internet connection and a Roku account for full functionality. The maximum screen size of 200 inches makes it suitable for large media rooms or outdoor movie nights, though small spaces might find it too large or unnecessary. This pick is best for those looking for a plug-and-play, all-in-one media solution with outdoor versatility.
Pros:
- Built-in Roku TV with access to streaming apps
- Auto-focus and keystone for easy setup
- WiFi and Bluetooth connectivity
- Portable design suitable for outdoor use
Cons:
- Requires internet connection and Roku account
- Power supply limited to 60W, needs stable power
- Maximum screen size may be too large for small rooms
Best for: Media room owners wanting integrated streaming and outdoor use with ease of setup.
Not ideal for: Users with limited internet access or who prefer traditional cable or wired setups over smart features.
Bottom line: A versatile, smart streaming projector ideal for outdoor media rooms or those who prioritize ease of use and connectivity.
“A versatile, smart streaming projector ideal for outdoor media rooms or those who prioritize ease of use and connectivity.”

Optoma HD146X 1080P Full HD Vibrant Home Theater Projector
Home Cinema Experience
As an affiliate, we earn on qualifying purchases.
Optoma HD146X 1080P Full HD Home Theater Projector
The Optoma HD146X is tailored for dedicated media rooms seeking a true home theater experience. Its full 1080p resolution ensures crisp, detailed images, while its vibrant colors make movies and gaming come alive. Although specifics like brightness and throw distance aren’t detailed, the model is known for straightforward installation and a dedicated game display mode that enhances fast-paced content. Compared to the other two options, the HD146X prioritizes image quality and color performance over smart features or portability. It’s better suited for fixed setups where the focus is on high-quality visuals rather than smart streaming or outdoor use. Its main tradeoff is the lack of detailed specs and smart integrations, meaning it’s less adaptable to varied environments or multimedia sources without additional equipment.
Pros:
- 1080p resolution for clear images
- Vibrant color display enhances viewing experience
- Easy to install and set up
Cons:
- Limited detailed specifications available
- No information on brightness or throw distance
- No smart features or built-in streaming
Best for: Home theater enthusiasts wanting vibrant, crisp images with straightforward setup.
Not ideal for: Those seeking portability, smart features, or outdoor versatility in their media projector.
Bottom line: A solid choice for dedicated media rooms focused on high-quality, vibrant visuals with simple installation.
“A solid choice for dedicated media rooms focused on high-quality, vibrant visuals with simple installation.”
As an Amazon Associate we earn from qualifying purchases.
Before You Start
Verify the room has sufficient space for the projector throw distance based on the projector’s specifications. Clear the area of obstacles where the projector will be installed. Confirm that power outlets and input sources (Blu-ray, streaming device, PC) are accessible nearby.Step-by-Step Instructions
Step 1: Determine the optimal projector placement
Measure the distance from where the projector will be placed to the screen or wall where the image will be projected. Refer to the projector’s throw ratio to calculate the ideal distance for the desired image size.
Tip: Use a tape measure for accuracy. Check the projector’s specifications for minimum and maximum throw distances.
Check: The projected image size matches your room’s dimensions and the projector is within the recommended throw distance range.
Step 2: Select a suitable projector
Choose a projector that supports your desired resolution (e.g., 1080p or 4K), brightness (lumens), and contrast ratio. Confirm it has compatible input options (HDMI, VGA).
Tip: Opt for at least 2,000 lumens for room lighting conditions; higher lumens are better for brighter rooms.
Check: You have a projector with specifications matching room lighting and image quality needs.
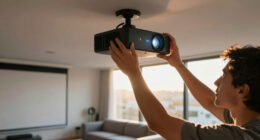
Step 3: Prepare the mounting location
If mounting on the ceiling, locate a sturdy ceiling joist or beam. Mark the mounting points for the projector mount using a pencil and level.
Tip: Use a stud finder to locate joists. Ensure the mount will position the projector at the calculated throw distance and angle.
Check: Mounting points are marked level and aligned with the projector’s optimal position.
Step 4: Install the projector mount
Attach the mount to the ceiling using appropriate anchors or screws into the joist. Securely tighten all fasteners.
Tip: Double-check stability by gently tugging on the mount after installation.
Check: The mount is firmly attached and level, ready to hold the projector securely.
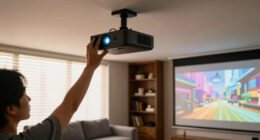
Step 5: Mount the projector
Attach the projector to the mount following the manufacturer’s instructions. Adjust the tilt and position to align the projected image with the screen or wall.
Tip: Use a level to ensure the projector is perfectly horizontal and aligned vertically.
Check: The projector is securely mounted and the projected image is centered and straight on the screen.
Step 6: Connect input devices
Plug HDMI or VGA cables from your media sources (Blu-ray, streaming devices, PC) into the projector. Connect the projector to power.
Tip: Use high-quality cables to prevent signal degradation. Keep cables organized to prevent tripping or disconnections.
Check: The projector powers on and displays the input device interface or image.
Step 7: Adjust the projector settings
Turn on the projector and access the menu to set resolution, aspect ratio, keystone correction, and focus. Fine-tune the image to fit the screen area.
Tip: Use test patterns or grid images for precise adjustment. Keep the projector at the recommended distance for best clarity.
Check: The image is sharp, correctly proportioned, and fills the screen without distortion.
Step 8: Calibrate the image quality
Adjust brightness, contrast, color, and sharpness for optimal picture quality. Use calibration tools or test images if available.
Tip: Ensure the room lighting conditions are considered during calibration for best brightness and contrast.
Check: The image is vibrant, clear, and free of distortions or color issues.
Common Mistakes to Avoid
- Mounting the projector too close or too far from the screen — Calculate the throw distance using the projector’s specifications before installation to avoid poor image size or focus issues.
- Incorrect alignment causing keystone distortion — Use the mount’s tilt adjustment and keystone correction features to align the projector so the image is rectangular and centered.
- Using low-brightness projectors in bright rooms — Choose a projector with sufficient lumens for your ambient lighting; consider blackout curtains or dimming lights if needed.
- Poor cable management leading to disconnections or tripping hazards — Organize cables with clips or conduits and keep extra cable length secured and out of walking paths.
Troubleshooting
Problem: Image is blurry or out of focus
Solution: Adjust the focus ring on the projector until the image appears sharp across the entire screen.
Problem: Projected image is distorted or keystone effect is visible
Solution: Use keystone correction or physically reposition the projector to align it perpendicular to the screen.
Problem: No image or input source not recognized
Solution: Check all cable connections, switch input sources, and ensure the projector is set to the correct input mode.
Problem: Image too dim even at maximum brightness
Solution: Increase room lighting control, select a higher lumen projector, or verify the projector’s brightness setting.
What Success Looks Like
The projector displays a clear, bright, and correctly proportioned image that fills the screen without distortion. The setup is stable, and input sources are recognized and functional. The image is aligned and calibrated for optimal viewing comfort.
Next Steps
Secure all cables and check for any loose connections. Test the system with different media sources. Schedule regular cleaning of the projector lens and filters. Consider installing remote control or smart automation for easier operation. Re-calibrate periodically to maintain image quality.
Frequently Asked Questions
How high should I mount the projector?
Mount the projector at a height that aligns the lens with the center of your projected image, typically 6-12 inches above or below the screen, depending on the projector’s throw ratio and mount flexibility.
Can I use a standard TV mount for a projector?
No, standard TV mounts are not suitable. Use a dedicated projector mount that supports ceiling installation and the weight of your projector.
What if the projected image is distorted?
Adjust keystone correction settings or physically reposition the projector to achieve a rectangular, aligned image.
How often should I clean the projector?
Clean the lens and filters every 3-6 months, or more frequently if used heavily, to maintain image quality and prevent overheating.