To stop mounting screens crooked, start by gathering all your tools—measuring tape, level or laser, and a pencil. Mark your wall carefully, using a level or laser to guarantee straight lines before drilling. Double-check your marks and use sturdy hardware to secure the mount. Regularly verify alignment during installation. If you follow these steps, you’ll achieve a professional, straight look. Keep going to discover more expert tips for perfect mounting every time.
Key Takeaways
- Always mark mounting points carefully using a measuring tape and a pencil, ensuring proper height and alignment.
- Use a level or laser level to verify horizontal and vertical lines before drilling.
- Confirm marks are straight and aligned by double-checking with the level after marking.
- Secure brackets and hardware tightly, adjusting as needed to correct any crookedness before final tightening.
- Recheck the mounted screen’s levelness after installation and make adjustments for a professional, straight appearance.

Pyle 10 Outlet Power Sequencer Conditioner - 13 Amp 2000W Rack Mount Pro Audio Digital Power Supply Controller Regulator w/Voltage Readout, Surge Protector, for Home Theater Stage/Studio Use - PCO875
2000W POWER: Pyle's Professional Power Sequence Controller is designed to improve the quality of power supplied to your...
As an affiliate, we earn on qualifying purchases.
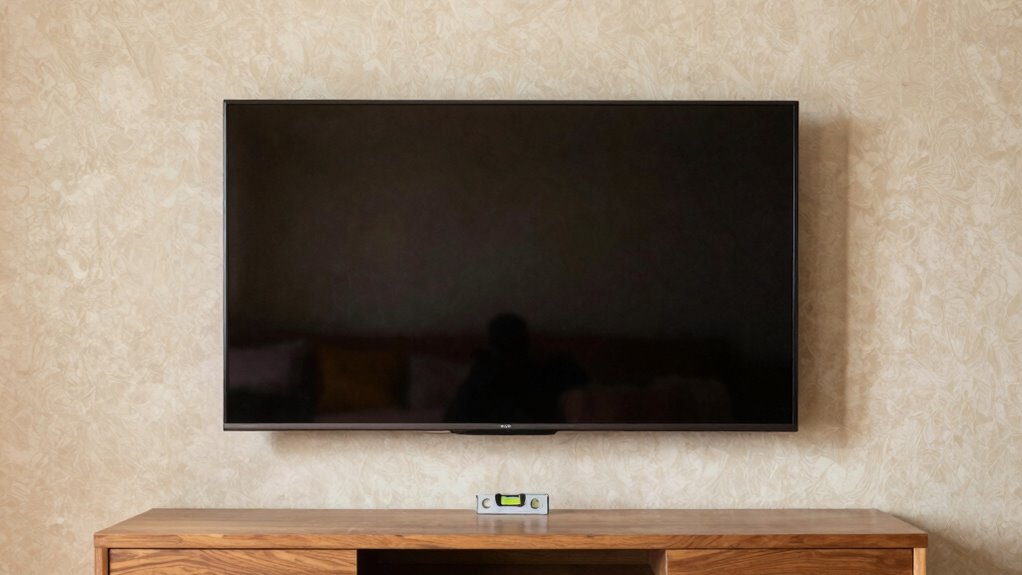
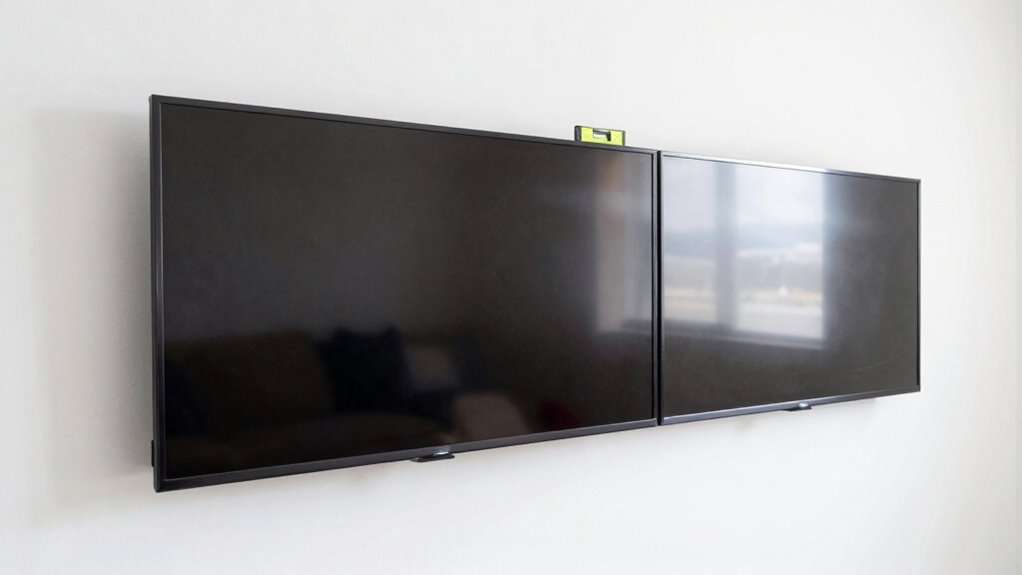
Why Crooked Mountings Ruin Your Space and How to Prevent Them

Crookedly mounted frames or shelves can instantly make a space look messy and unprofessional. This misalignment disrupts wall aesthetics, making your carefully designed interior look cluttered and poorly executed. When your screens or decor aren’t straight, it detracts from the overall harmony and balance of your interior design. Visitors notice crooked mounts immediately, which can diminish the room’s appeal and give off an impression of carelessness. To prevent this, always double-check your measurements and use a level during installation. Properly aligned screens enhance your space’s visual flow, creating a sleek, cohesive look. Straight mounts not only improve your interior design but also reflect your attention to detail, making your space feel more polished, inviting, and thoughtfully curated. Additionally, understanding the importance of proper cabling solutions can help maintain a clean and professional appearance in your installation. Incorporating mounting tools can further ensure precision and consistency in your setup, reducing the risk of crooked placements. Using the right measurement techniques is essential to achieve perfect alignment every time, especially considering how piercings require precise measurements and proper jewelry fit for comfort and safety. A careful approach to installation methods can significantly improve the overall outcome.

AAJK Outdoor Projector Screen 150 inch, Washable Projector Screen 16:9 Foldable Anti-Crease Portable Projector Movies Screen for Home Theater Outdoor Indoor Support Double Sided Projection
Movie Screen Fabric: Made from white, soft-touch material, our thickened, smooth projector screen is crease-free and nontransparent, delivering...
As an affiliate, we earn on qualifying purchases.
Tools Needed for Accurate Screen Mounting
To mount your screen accurately, you’ll need the right tools that guarantee precision. Essential supplies like a level, measuring tape, and a pencil help you mark and align properly. Having these tools on hand makes the process easier and guarantees a perfect, straight mount every time. Additionally, understanding the contrast ratio of your projector can help you optimize the viewing setup for the best image quality. For optimal results, also consider the mounting surface to ensure it can support the weight and maintain stability over time. Being aware of your personality traits can also help you stay patient and focused during the mounting process. Moreover, knowing about regional flavor profiles can inspire you to create a space that complements your personal style. Paying attention to the support breakfast options available nearby can enhance your overall experience after the setup is complete.
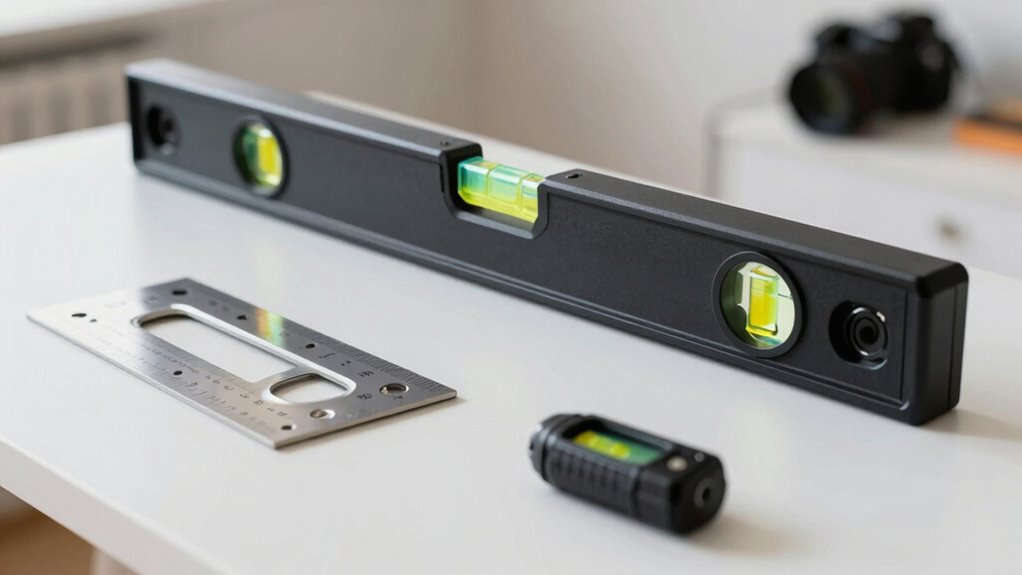
Tools That Ensure Precision
Using the right tools is vital to guarantee your screen is mounted accurately. Start with quality mounting accessories, such as brackets and levelers, to ensure stability and proper alignment. Wall anchors are indispensable if you’re mounting on drywall—they provide extra support and prevent the mount from slipping. A laser level or spirit level helps you achieve a perfectly straight installation, avoiding crooked screens. A measuring tape ensures accurate placement, while a pencil marks precise points. Using these tools together minimizes errors and makes the process smoother. Investing in reliable mounting accessories and wall anchors makes a significant difference in achieving a professional, level mount. With the right tools, you’ll confidently hang your screen straight and secure. Incorporating proper wall mounting techniques can further enhance your results and ensure longevity.
Essential Mounting Supplies
Having the right mounting supplies makes all the difference in guaranteeing your screen hangs perfectly level. You’ll need sturdy mounting brackets designed to support your screen’s weight securely. Choose brackets that are compatible with your wall type and size. Wall anchors are essential if you’re mounting into drywall or plaster; they provide extra support to prevent slipping or damage. Use appropriate anchors that match your wall material and bracket screws for a secure fit. Before starting, gather a level, a drill, and a measuring tape for accurate placement. These supplies help you avoid crooked mounting and ensure stability. Proper wall support structures are crucial for maintaining your screen’s position over time. Additionally, selecting the right mounting hardware can prevent future issues such as loosening or falling. Using quality secure storage options for your tools and supplies can further streamline your mounting process. Investing in quality mounting brackets and reliable wall anchors is essential to ensure your screen remains straight and secure over time, providing peace of mind during and after installation. It’s also helpful to consider installation techniques that promote long-lasting, secure mounting.

AAJK ALR Projector Screen, 4K Movie Projector Screen 16:9 HD Foldable Anti-Crease Portable Projector, Movies Screen for Home Theater Outdoor Indoor Support (120in Pro)
【Watch What You Want, When You Want!】 Remember when you could only really use your projector at night?...
As an affiliate, we earn on qualifying purchases.
How to Mark Your Wall Precisely for Mounting

Start by gathering all the necessary tools, like a tape measure, pencil, and level. Carefully measure and mark the spots where you’ll hang your screen, ensuring everything lines up perfectly. Use a level to double-check your marks so your screen will hang straight and look professional. Incorporating proper mounting protocols can help prevent crooked installations and ensure safety. Additionally, taking the time to accurately measure and mark your mounting points can save you from redoing the setup later. Remember, precise measurement techniques are essential for a seamless and professional-looking installation, especially when considering existential themes that emphasize the importance of precision and authenticity in our actions. Paying attention to wall integrity can also prevent unexpected issues during installation.
Gather Necessary Tools
Before you begin marking your wall, gather all the necessary tools to guarantee accuracy. Having the right tools guarantees your measurements stay precise and your installation straight. First, grab a tape measure and a pencil for marking exact points. Second, pick up wall anchors and a drill with the appropriate bits to secure your brackets firmly. Lastly, use a level to double-check your markings and keep everything perfectly straight. A power drill makes installing wall anchors easier and faster, especially if you’re working with tougher surfaces. Make sure to have all these tools ready before you start; this minimizes mistakes and keeps your mounting process smooth. Additionally, consulting a measuring guide can help ensure your markings are perfectly aligned. Knowing how to read measurements accurately can significantly improve your project outcome. Proper wall preparation can also prevent misalignments and ensure a secure mount. With everything in place, you’re ready for careful measurement and marking.
Measure and Mark Carefully
With your tools gathered, it’s time to measure and mark your wall accurately. Begin by considering your decorative accents and wall textures to determine the best placement. Use a tape measure to find the correct height and width, making sure your marks align with your desired position. Lightly mark the spots with a pencil—this way, you can adjust if needed before making permanent holes. Pay attention to wall textures, as rough surfaces might require a different marking approach to ensure your markings stay visible. Double-check your measurements before proceeding. Precise marking helps prevent crooked mounting and keeps your screen level with other decor. Taking this step carefully ensures your installation looks professional and polished.
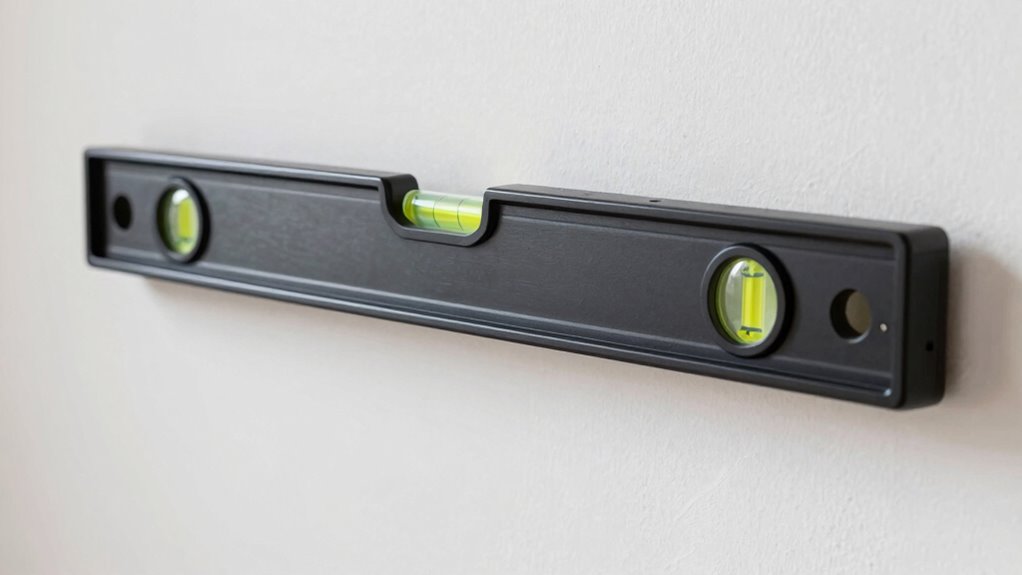
Use Level for Accuracy
Using a level is essential to guarantee your marks are perfectly straight and your mount stays even. It ensures your wall anchors are placed accurately, preventing crooked screens. To get the best results:
- Place the level along your marked line, adjusting until bubble is centered, ensuring your marks are perfectly horizontal or vertical.
- Double-check your marks before drilling, especially if you’re working with drywall that might need drywall repair later. Properly leveled marks reduce the risk of needing repairs or re-drilling.
- When mounting, use the level again to confirm your screen hangs straight, avoiding crooked displays. This method saves time and ensures a clean, professional look without unnecessary drywall repair.

Projector Screen 100 inch, Taotique 4K Movie Projector Screen 16:9 HD Foldable and Portable Anti-Crease Indoor Outdoor Projection Double Sided Video Projector Screen for Home, Party, Office, Classroom
100% Wrinkle Free Material - The 100 inch projector screen used soft touch and stretchy thick polyester fiber...
As an affiliate, we earn on qualifying purchases.
How to Use a Level or Laser for Perfect Alignment
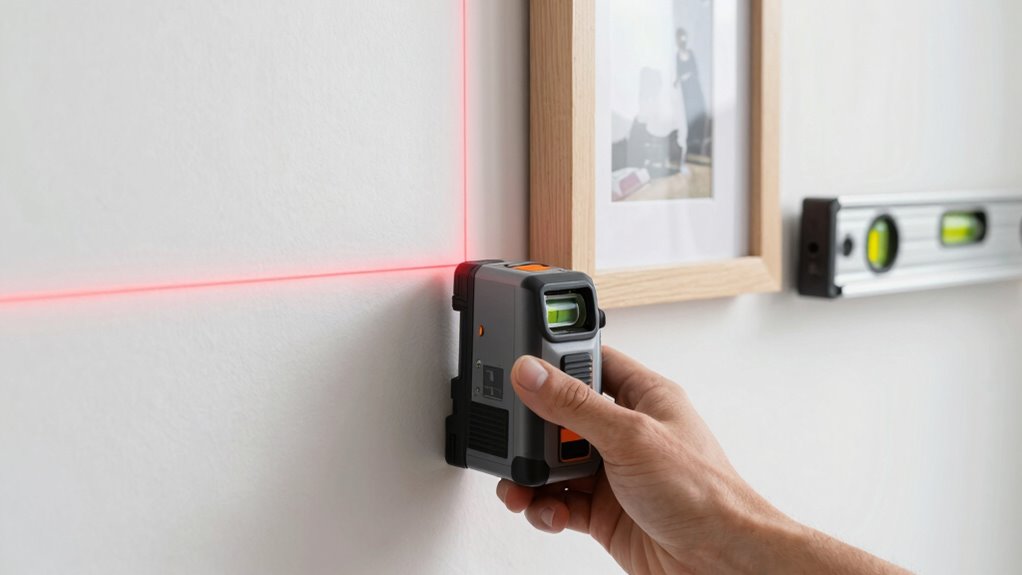
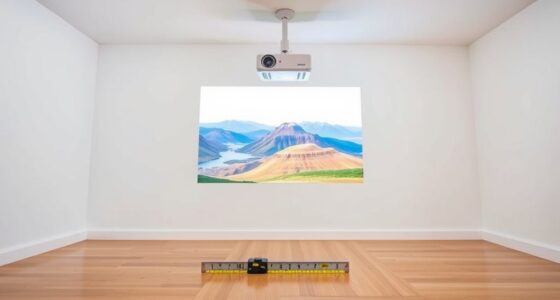
Achieving perfect alignment starts with selecting the right tool—either a traditional level or a laser. If you’re hanging wall decor or managing cables behind your TV, accuracy matters. For a level, place it along the top edge of your mount, ensuring the bubble is centered. Adjust until it’s perfectly horizontal. Laser levels are faster; they project a straight line across your wall. Turn on the laser and align your mount with the laser line for precise positioning. Keep your eye level with the laser line for accuracy. This method helps you avoid crooked mounts, especially when dealing with multiple elements like wall decor or cable management. Using a level or laser ensures your screen is perfectly aligned, creating a clean, professional look every time.
Step-by-Step Guide to Mounting Screens Straight Every Time
Once you’ve confirmed your wall is properly leveled with a laser or a traditional level, it’s time to mark the mounting points. Accurate markings make certain your screen hangs straight, complementing your decorative accents and wall color choices.
- Use a pencil to make small marks at the designated mounting spots, aligning with your level or laser line.
- Double-check each mark by measuring from the ceiling or floor to maintain symmetry.
- Consider the placement of decorative accents nearby—height and positioning can enhance your wall’s overall aesthetic.
Fixing Common Crooked Mounting Problems
Even with careful measurements, crooked mounting can still happen due to uneven walls, misaligned brackets, or slight miscalculations. To fix this, start by checking the mounting height and adjusting the brackets if needed. If your wall has a rough or textured surface, it can cause the mounting hardware to shift or sit unevenly. Use a level to identify the crookedness, then gently loosen the brackets or screws. For uneven walls, consider using shims or wall anchors to create a flat, stable surface. When re-mounting, double-check the alignment before tightening fully. Taking these steps helps correct common issues caused by wall texture or height miscalculations, ensuring your screen hangs straight and looks professional.
Tips to Keep Your Screens Straight and Look Professional
Keeping your screens straight and looking professional requires attention to detail during installation and regular checks afterward. To maintain wall decor and aesthetic balance, consider these tips:
- Use a level or laser tool to ensure perfect alignment before mounting.
- Mark the wall with painter’s tape or a pencil to create guidelines, preventing crooked placement.
- Regularly check the screens’ position and adjust if they shift over time, keeping your display polished and balanced.
These simple steps help you avoid uneven screens that undermine your decor’s harmony. Proper installation and maintenance make certain your screens enhance your space’s aesthetic, making it look intentional and professional. Staying attentive to these details keeps your wall decor looking sharp and visually appealing.
Frequently Asked Questions
Can I Mount Screens Without Professional Tools?
Yes, you can do DIY mounting without professional tools. Start by checking your wall compatibility and choosing the right mounting kit. Use a level or a smartphone app to verify your screen stays straight. Gather basic tools like a drill, screws, and a screwdriver. Carefully measure and mark where you’ll place the brackets, then mount your screen securely. This simple process helps you avoid crooked screens without needing special equipment.
What Should I Do if My Screen Still Tilts After Mounting?
If your screen still tilts after mounting, try some simple adjustment techniques. First, check the mounting brackets and make sure they’re level; use a bubble level if needed. Slightly loosen the screws, then gently shift the screen until it’s straight. Tighten the screws securely, and recheck. Remember, following proper mounting tips helps prevent this issue from happening in the first place. Patience and careful adjustments are key!
How Often Should I Check the Alignment of Mounted Screens?
You should check the alignment of mounted screens at least once every three to six months to guarantee measurement accuracy. Regular mounting frequency helps catch any shifts or tilts early, preventing long-term issues. Keep an eye on the screen’s position and use a level or measuring tools for precise checks. Consistent inspections maintain ideal display quality and ensure your setup stays straight and professional over time.
Are There Specific Wall Types Better Suited for Mounting Screens?
Think of your wall as a stage where your screen takes center spotlight. Drywall with good durability works best, especially when you use sturdy wall anchors. Avoid weak or textured drywall, which can be like trying to hang a picture on a cloud. For heavier screens, opt for wall anchors designed for drywall to guarantee your setup stays perfect. This way, your screen stays mounted straight and secure, like a star performer.
How Can I Hide Any Remaining Uneven Gaps or Misalignments?
To hide uneven gaps or misalignments, you can use a visual filler like a paintable caulk or decorative trim. Apply the filler along the edges to conceal gaps, then smooth it out for a seamless look. Decorative trim adds a polished touch, covering any imperfections while improving your wall’s appearance. This quick fix ensures your mounted screen looks professional and clean, even if there are minor alignment issues.
Conclusion
When you master these mounting techniques, your screens will hang like a finely tuned orchestra—harmonious and precise. No more crooked displays to distract or frustrate you. Think of your wall as a canvas, and your tools as brushes; with patience and the right strokes, you’ll create a masterpiece of perfect alignment. Keep practicing, and your space will reflect the professionalism and attention to detail that truly makes a house a home.
")