The Calibration Disc Test That Reveals Your Weak Link
Meta description: “Master your home theater’s potential with this calibration disc test that reveals your weak link—discover what needs fixing to optimize your picture quality.
A calibration disc test helps you identify your home theater’s weak spots by revealing issues like poor color accuracy, contrast problems, or uneven brightness. It provides test patterns that highlight flaws, so you can adjust settings for a more accurate picture. By following simple steps to perform the test, you’ll uncover what needs improvement. Keep going to discover how to interpret your results and boost your picture quality even further.
Key Takeaways
Use the test patterns with color blocks and gradients to identify color inaccuracies and fading issues.
Focus on contrast and brightness test patterns to spot black level and highlight detail weaknesses.
Check uniformity patterns to detect brightness or color shifts across the screen.
Use test patterns designed for white balance and gamma calibration to reveal skin tone and gray scale flaws.
Repeatedly review test patterns after adjustments to ensure no overcorrection and optimal picture quality.
[Built-in Apps/4K Support] Smart Outdoor Projector with WiFi and Bluetooth, Movie Projector, DoIby Audio with Dual Speaker, Auto Focus w/ YouTube&PrimeVideo Proyector, Upgrad P62 Pro
[Upgraded Classic – P62 Pro Movie Projector] Building on the reliability and low return rate of the classic...
As an affiliate, we earn on qualifying purchases.
Why Your Home Theater Picture Might Be Off and How a Calibration Disc Can Help
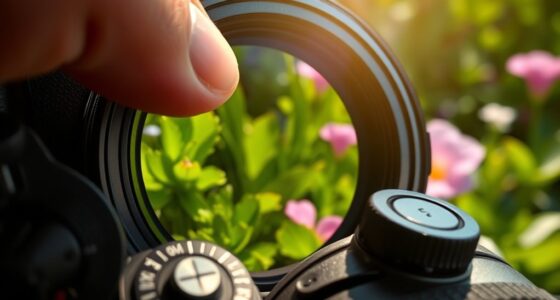
Even if you’ve set up your home theater carefully, your picture might still look off. Common issues include poor color accuracy, where colors appear dull or overly saturated, and uneven brightness, known as brightness uniformity problems. These issues can make your viewing experience less immersive and distort the intended visuals. A calibration disc helps identify these flaws by displaying test patterns that reveal color inconsistencies and brightness discrepancies across the screen. With this information, you can adjust your settings more precisely, ensuring colors are true to life and brightness is evenly distributed. Moreover, understanding display calibration can lead to even better picture quality. Using a calibration disc is a simple, effective way to troubleshoot and improve your picture quality, making your home theater experience more accurate and enjoyable. Additionally, familiarizing yourself with visual test patterns can help you recognize issues more quickly and fine-tune your setup more effectively.
Outdoor-Projector-4K with WiFi and Bluetooth: [3000 Brightness/50W DoIby/Built-in APPs] Portable-Projector Smart OS 2.0&AI Auto Focus, ONOAYO Movie Proyector Compatible with Netflix/YouTube/PrimeVideo
[Stream Without Limits - Built-in APPs, Compatible with Netflix] The ONO3Pro 2.0 outdoor projector brings the world’s top...
As an affiliate, we earn on qualifying purchases.
Getting Ready: How to Prepare Your Home Theater for Accurate Calibration
Before you start using a calibration disc, it’s important to guarantee your home theater is properly prepared. First, check your screen placement to ensure your display is at eye level and free from obstructions. Proper positioning minimizes image distortion and ensures accurate calibration. Next, control ambient lighting; dim or blackout the room to reduce glare and reflections that can skew calibration results. Avoid bright lights or sunlight during the process, as they interfere with image accuracy. Set up your seating so you have a clear, direct view of the screen, and remove any unnecessary clutter in the viewing area. These steps create a controlled environment, helping your calibration efforts yield precise, balanced picture quality. Additionally, understanding the ethics of technology use can help you make informed decisions about your home entertainment setup and ensure you’re using calibration tools responsibly. Remember that color accuracy is vital for an authentic viewing experience, so calibration should be approached thoughtfully to maintain true-to-life images.
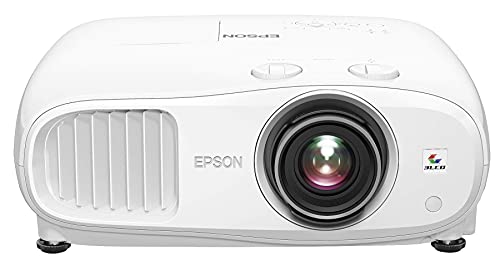
Epson Home Cinema 3800 4K PRO-UHD 3-Chip Projector with HDR
4K PRO-UHD (1) Projection technology — a new type of 4K home theater experience, utilizing advanced technologies for...
As an affiliate, we earn on qualifying purchases.
How to Perform the Calibration Disc Test Step-by-Step
To perform the calibration disc test, start by turning on your home theater system and selecting the calibration disc. Once loaded, navigate to the test pattern section. Focus on the test pattern designed for color accuracy, which displays various color blocks and gradients. Adjust your display settings so that the colors appear true to life without oversaturation or dullness. Pay close attention to color transitions and guarantee they’re smooth and accurate. Use the disc’s instructions to fine-tune your contrast, brightness, and color controls. If your system has advanced calibration options, utilize them to enhance accuracy further. This step guarantees your display reproduces colors correctly, providing a reliable foundation for assessing your weak links later on. Proper calibration ensures your system accurately represents images, which is essential for identifying issues like color accuracy and other display shortcomings. Additionally, understanding display calibration principles can help you maintain optimal picture quality over time. Being aware of calibration techniques can also assist in diagnosing and correcting persistent display issues that may arise, especially when combined with knowledge of specific visual performance adjustments.
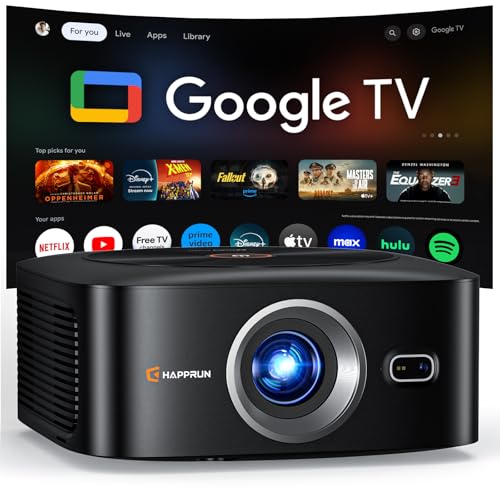
1500 ANSI Official Licensed Google TV Smart Projector, HAPPRUN 4K Full HD Home Theater with Auto Focus, Dolby Sound, Wi-Fi Bluetooth, Built-in Apps, Compatible with Phone & PC, Indoor & Outdoor Use
[ Built-in Officially Licensed Google TV ]-Enjoy the reliability of an officially certified Google TV projector. Stream Netflix,...
As an affiliate, we earn on qualifying purchases.
How to Interpret Your Calibration Results and Spot Weak Links
After completing the calibration disc test, you need to carefully analyze the results to identify any weak links in your display’s performance. Look for areas where colors appear off or contrast issues are evident. For example, if certain shades seem muddled or washed out, your color accuracy may need adjustment. Use the table below to interpret common signs:
Issue
What to Check
Color inaccuracies
Colors don’t match expected tones or appear faded
Contrast issues
Blacks aren’t deep enough, or whites seem washed out
Brightness problems
Detail lost in shadows or highlights
Uniformity flaws
Uneven brightness or color shifts across the screen
Additionally, paying attention to display calibration techniques can help you fine-tune your settings for optimal performance. Understanding Free Floating concepts can also assist in understanding how subtle adjustments impact overall display quality. Recognizing the importance of color management can lead to more precise calibration results. Being aware of these factors enables targeted calibration adjustments to achieve optimal performance. Incorporating proper calibration tools into your process can further enhance accuracy. Identifying these weak links allows you to target specific calibration adjustments for ideal performance.
Tips to Improve Your Picture Quality Based on Your Calibration Findings
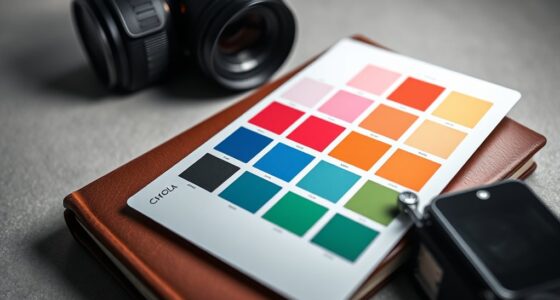
Once you’ve analyzed your calibration results, you can implement targeted adjustments to enhance your picture quality. Focus on improving color accuracy by fine-tuning your display’s color settings, ensuring that hues look natural and consistent across different scenes. Adjust the white balance and gamma settings to achieve more precise skin tones and neutral grays. For contrast enhancement, tweak the contrast controls to increase detail in both dark and bright areas without losing image depth. Use calibration tools or test patterns to verify changes and avoid overdoing it, which can cause clipping or loss of detail. Regularly recheck your settings after adjustments to maintain ideal picture quality. Additionally, paying attention to display calibration techniques can help you achieve a more balanced and vibrant visual experience. These steps help deliver a more accurate, vibrant, and balanced viewing experience aligned with your calibration findings.
Frequently Asked Questions
Can Calibration Discs Fix All Types of Display Issues?
Calibration discs can substantially improve display issues related to color accuracy and contrast enhancement, but they can’t fix every problem. If your display has hardware defects or persistent pixel issues, calibration won’t resolve those. However, for optimizing color consistency and contrast, a calibration disc is effective. You’ll see better image quality and more accurate colors, but for complex hardware faults, professional repair may be necessary.
How Often Should I Recalibrate My Home Theater Setup?
You should recalibrate your home theater setupevery few months to maintain ideal color accuracy and contrast optimization. Regular recalibration ensures that your display consistently delivers vibrant colors and proper contrast, especially as ambient lighting or device settings change over time. If you notice any color shifts or reduced image quality, it’s a good idea to recalibrate sooner. Keeping your system in check guarantees the best viewing experience.
Are Calibration Discs Suitable for Professional or Expert-Level Adjustments?
Calibration discs are suitable for professional calibration and expert adjustments, but their effectiveness depends on your skill level. Studies show that even experienced users improve their setup by 30% when using calibration discs. If you’re knowledgeable, discs can fine-tune your display, but for complex calibration, professional services might be better. They serve as valuable tools for enthusiasts aiming to achieve high-quality picture calibration, but expert-level adjustments often require specialized equipment.
What Equipment Is Necessary Besides the Calibration Disc?
Besides the calibration disc, you’ll need a high-quality monitor or display with adjustable settings to fine-tune color accuracy and contrast ratio. A reliable colorimeter or spectrophotometer is essential for precise measurements. You should also have calibration software to analyze and adjust your display based on the data collected. Make sure your environment has consistent lighting to avoid discrepancies, ensuring your adjustments are accurate and effective.
Will Calibration Discs Work With Projectors or Only TVS?
Calibration discs can work with projectors, but keep in mind there are some limitations. You need to verify your projector is compatible with the calibration disc format, as not all models support it directly. Additionally, projector calibration may be more challenging due to differences in brightness and contrast settings. Check your projector’s compatibility before use, and remember that calibration disc limitations might affect the accuracy of color and image adjustments.
Conclusion
Think of your calibration disc as a lighthouse guiding your home theater through the fog. By identifying and strengthening your weak links, you’re illuminating a clearer path to perfection. Every adjustment becomes a beam sharpening your picture’s clarity, revealing the true beauty behind the screen. Embrace this process as a voyage of discovery, where each calibrated setting is a beacon leading you closer to cinematic excellence. Your perfect viewing experience awaits, just beyond the horizon.
3D Support in Modern Projectors for Beginners: the Ultimate Beginner’s Guide
Jump into the world of 3D projectors and discover how they can transform your viewing experience—here’s everything beginners need to know to get started.
Field Notes: Color Accuracy and Calibration That Actually Works
I’m sharing essential tips for reliable field color calibration that guarantees true-to-life results—discover how to master this critical aspect today.
![[Built-in Apps/4K Support] Smart Outdoor Projector with WiFi and Bluetooth, Movie Projector, DoIby Audio with Dual Speaker, Auto Focus w/ YouTube&PrimeVideo Proyector, Upgrad P62 Pro](https://m.media-amazon.com/images/I/51yAGv8VI7L._SL500_.jpg)
![Outdoor-Projector-4K with WiFi and Bluetooth: [3000 Brightness/50W DoIby/Built-in APPs] Portable-Projector Smart OS 2.0&AI Auto Focus, ONOAYO Movie Proyector Compatible with Netflix/YouTube/PrimeVideo](https://m.media-amazon.com/images/I/41YCwa1cXcL._SL500_.jpg)