Using a projector with a mirror expands your projection options and enhances image quality. Start by selecting a first-surface mirror for minimal distortion and ghosting. Position your projector at the right distance, ensuring it's well-aligned with the mirror. Keep in mind the importance of high-quality mirrors, as they greatly impact clarity. You can even create larger displays in compact spaces, perfect for home theaters or educational settings. Don't forget to regularly maintain your mirror for best performance. If you're keen to explore innovative setups and techniques, there's plenty more to discover that can elevate your projection experience.
Key Takeaways
- Use first-surface mirrors to minimize ghosting and distortion, enhancing image quality during projection.
- Position the projector appropriately to achieve desired image size and ensure alignment with the mirror.
- Regularly clean mirrors to prevent dust accumulation, which can negatively affect image clarity.
- Consider ambient-light rejecting techniques to improve projection quality in various lighting conditions.
- Experiment with DIY setups using affordable materials to create effective projection solutions at home.
![[Built-in Apps/4K Support] Smart Outdoor Projector with WiFi and Bluetooth, Movie Projector, DoIby Audio with Dual Speaker, Auto Focus w/ YouTube&PrimeVideo Proyector, Upgrad P62 Pro](https://m.media-amazon.com/images/I/51yAGv8VI7L._SL500_.jpg)
[Built-in Apps/4K Support] Smart Outdoor Projector with WiFi and Bluetooth, Movie Projector, DoIby Audio with Dual Speaker, Auto Focus w/ YouTube&PrimeVideo Proyector, Upgrad P62 Pro
[Upgraded Classic – P62 Pro Movie Projector] Building on the reliability and low return rate of the classic...
As an affiliate, we earn on qualifying purchases.
Understanding Projection Basics
When you're diving into projection basics, it's essential to grasp how projectors work and the different types available. Common types like DLP, LCD, LED, and LCoS each offer varying resolutions such as 720p, 1080p, and 4K, impacting the image quality you can achieve.
Brightness, measured in lumens, plays a key role in visibility; higher lumens are necessary for well-lit environments. Additionally, understanding the impact of air quality on the viewing environment is significant, as improved air quality can enhance the overall experience better air quality.
Understanding throw distance is critical too. This ratio determines how far your projector needs to be from the surface to project a specific image size. Using mirrors can help you maximize projection space by creating larger images in tighter spots.
Keystone correction is another significant feature, compensating for distortion when projecting at angles. This guarantees you get a perfectly rectangular image, regardless of mirror placement.

4K Projector with Built-in Apps, 1500ANSI Auto Focus&6D Keystone Dolby Audio Kogata Smart Projector with WiFi 6 Bluetooth Outdoor Movie Proyector for Home Theater HDR10+ UPGRADE
【UPGRADE Version】Unlimited Streaming –Compatible with Netflix & Dolby Audio& DTS Audio: The Kogata GC357 home projector comes with...
As an affiliate, we earn on qualifying purchases.
Mirror Types and Selection

When selecting mirrors for your projector setup, first-surface mirrors are your best bet for clear images without distortions.
Additionally, contemplate using a mirror treatment that can enhance the visual experience, much like how cute acne patches to brighten skin can boost confidence during treatment.
You'll also want to reflect on the size and placement of the mirror, as these factors can greatly impact the projection quality.
Balancing performance and cost is key, so think carefully about your options.
First Surface Mirrors
First surface mirrors, also known as front surface mirrors, are vital for any serious projection setup. Unlike standard mirrors, they reflect light directly from the surface without interference from a backing layer. This design greatly minimizes distortion and eliminates ghosting effects, providing you with a clearer and sharper image, which is particularly important for color accuracy in home cinema projectors.
When investing in first surface mirrors, opt for high-quality glass that guarantees a smooth, flat surface. This choice is fundamental for maintaining image quality, as imperfections in standard mirrors can introduce unwanted artifacts. By selecting optical-grade mirrors, you'll enhance clarity and reduce issues like banding, making your projection experience much more enjoyable.
While the typical cost for first surface mirrors starts around $300, this investment is worthwhile for projection enthusiasts seeking peak performance. Remember to take into account the thickness and flatness of the glass, as these factors directly affect the accuracy of your image projection.
Size and Placement
Choosing the right size and placement for your mirror is essential to maximizing your projection setup. A large mirror not only enhances image visibility but also accommodates larger projection sizes, ideally around 20 inches by 35 inches. When selecting a mirror, verify it's a first-surface mirror, as it minimizes distortion and ghosting, delivering a clearer image than second-surface mirrors.
Here's a quick reference table to help you choose:
| Mirror Type | Key Features |
|---|---|
| First-Surface Mirror | Minimizes distortion, enhances clarity |
| Optical-Grade Mirror | High-quality reflections, expensive |
| Large Mirror | Better visibility, larger images |
| Smooth Surfaces | Yield better reflections |
| Precise Alignment | Avoids projector shadows |
Mirror placement is equally important. Confirm you maintain precise alignment and adjust the height to avoid projector silhouette shadows. Additionally, selecting mirrors with smooth surfaces and neutral colors helps reduce distortion and color shifts during projection. Balancing the size of the mirror with your budget is key, especially when considering optical-grade mirrors. Your setup will greatly benefit from these careful considerations.
HAPPRUN Native 1080P Projector, Bluetooth Home Theater Movie Projector with Built-in Speaker, Compatible with Smartphone, HDMI, Fire Stick, PS5, Indoor & Outdoor Use - Without Google TV System
[ Native 1080P Full HD Resolution ] - Enjoy crystal-clear visuals with HAPPRUN H1's native 1920x1080 resolution, delivering...
As an affiliate, we earn on qualifying purchases.
Setting Up Your Projector

To set up your projector effectively, start by positioning it at an appropriate distance from the mirror. This distance is vital to achieve the desired image size, as the mirror should reflect half of the screen size for ideal results.
Use first-surface mirrors to minimize distortion and ghosting, guaranteeing clearer reflections that enhance image clarity.
Next, verify your projector is precisely aligned with the mirror, typically at a 45-degree angle if you're using rear wall mounts, or slightly upward for ceiling mounts. This alignment helps maintain proper image orientation and avoids keystone distortion.
If you notice any angled projections, adjust the keystone correction settings on your projector to achieve a rectangular image.
Don't forget about regular maintenance; cleaning the mirror surface is essential to prevent dust accumulation that can impact brightness and clarity. This is especially important in setups where the projector is housed in a closet or enclosed space.
![[Officially-Licensed App & Auto Focus]White Smart Mini Projector with WiFi and Bluetooth, XuanPad 4K Support Movie Projector, Portable Native 1080P Outdoor Projector with 360° Stand](https://m.media-amazon.com/images/I/51I8uy-U8bL._SL500_.jpg)
[Officially-Licensed App & Auto Focus]White Smart Mini Projector with WiFi and Bluetooth, XuanPad 4K Support Movie Projector, Portable Native 1080P Outdoor Projector with 360° Stand
Exciting Moments Begin - The XuanPad mini projector compatible with Netflix for the ultimate viewing experience.No extra devices...
As an affiliate, we earn on qualifying purchases.
Image Quality Considerations

When using a projector with a mirror, the quality of the mirror plays an essential role in the clarity of your images.
If the mirror isn't aligned properly, you'll notice distortion that can ruin your viewing experience.
Additionally, keep an eye on keystone correction, as too much can compromise image sharpness.
Mirror Quality Impact
The quality of the mirror you choose plays an essential role in the overall image clarity when using a projector. Selecting the right mirror can make a significant difference in your viewing experience. Here are some key points to take into account:
- First-surface mirrors help reduce distortion and ghosting.
- Optical-grade mirrors eliminate banding for clearer images.
- High-quality flat mirrors guarantee sharp projection.
- Budget considerations are important for peak performance.
Using first-surface mirrors is critical since they prevent light from reflecting off the backing glass, which can introduce unwanted artifacts.
The thickness and quality of the mirror glass directly impact image clarity; hence, investing in quality mirrors is fundamental.
While standard bathroom mirrors may seem like a budget-friendly option, they can introduce banding, especially in bright areas, harming your projection performance.
Alignment and Keystone Correction
Achieving ideal image quality with your projector requires precise alignment with the mirror. Misalignment can lead to distortion and a loss of clarity, negatively impacting your viewing experience. Keystone correction becomes essential when projecting at an angle. This adjustment helps maintain the proper proportions of the image, although it may slightly reduce overall resolution.
To guarantee high-quality projections, consider the following:
| Factor | Impact on Image Quality |
|---|---|
| Alignment | Essential for clarity and accuracy |
| Keystone Correction | Adjusts image shape but may reduce resolution |
| Mirror Quality | High-quality mirrors minimize distortion and ghosting |
Practical Applications of Mirror Projection
How can mirror projection transform various environments? By utilizing a projector and mirror setup, you can create large displays even in confined spaces. This technology opens up a variety of practical applications that enhance visibility and engagement in numerous settings:
- Educational environments: Facilitate better learning with larger, clearer projected images for all students.
- Eye examinations: Provide a compact solution for eye doctors to display patient information without cluttering the examination room.
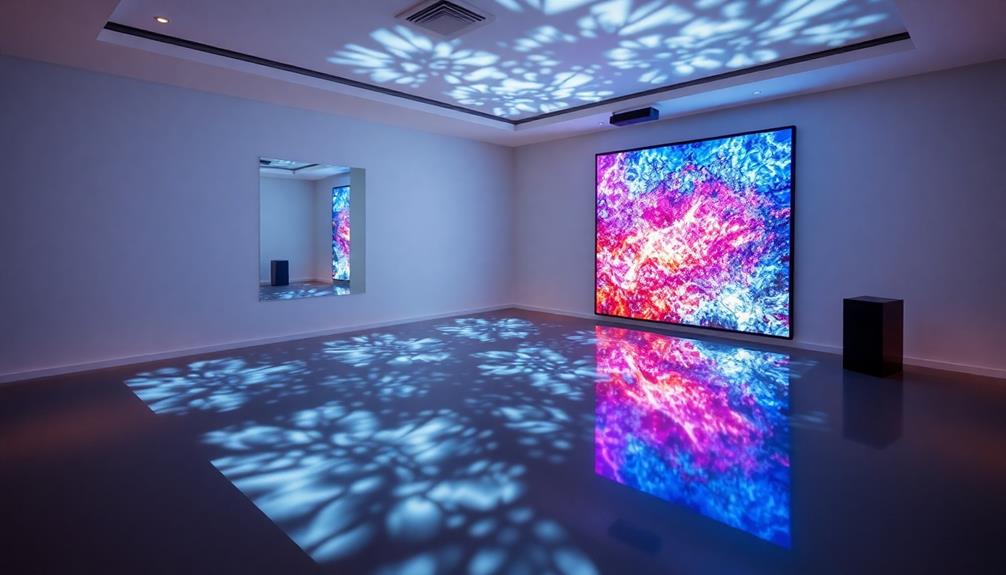
- Art installations: Enable artists to creatively manipulate light and shadow, maximizing space while delivering stunning visuals.
- Fitness instruction: Allow fitness instructors to project workout routines effectively in small studios, enhancing client engagement.
Mirror projection is particularly beneficial when using short throw projectors, as it allows you to maintain proximity to the screen while enlarging the projected image.
This versatility makes it easier to adapt to different spaces, whether you're in a classroom, collaborating on an art project, or leading a fitness class.
Embracing these innovations can greatly improve your presentation capabilities and overall experience in various environments.
Troubleshooting Common Issues
Mirror projection setups can sometimes present challenges, but addressing these common issues guarantees peak performance. Start with alignment; even slight misalignments can lead to distortion and greatly impact image quality. Make certain you're using high-quality first-surface mirrors, as second-surface mirrors can introduce ghosting and other imperfections.
Keep your mirrors clean to avoid dust accumulation, which can degrade image clarity and brightness. If you notice any distortion, check your setup. While keystone correction can help, remember it may reduce resolution, so try to adjust the projector and mirror for best results without relying on this feature.
Lastly, monitor the projector's heat output and make sure proper ventilation is in place. Overheating can lead to performance issues and degrade your image. Below is a quick reference table to assist with troubleshooting:
| Issue | Solution |
|---|---|
| Misalignment | Adjust projector and mirror setup |
| Image degradation | Clean mirrors regularly |
| Overheating | Improve ventilation |
Innovative Uses for Projector Mirrors
You can transform your home theater experience by using projector mirrors to create larger images in smaller spaces.
In educational settings, these mirrors enhance presentations, making it easier for students to see from anywhere in the classroom.
Additionally, artists can use projector mirrors to craft stunning visual displays, adding a unique touch to their installations.
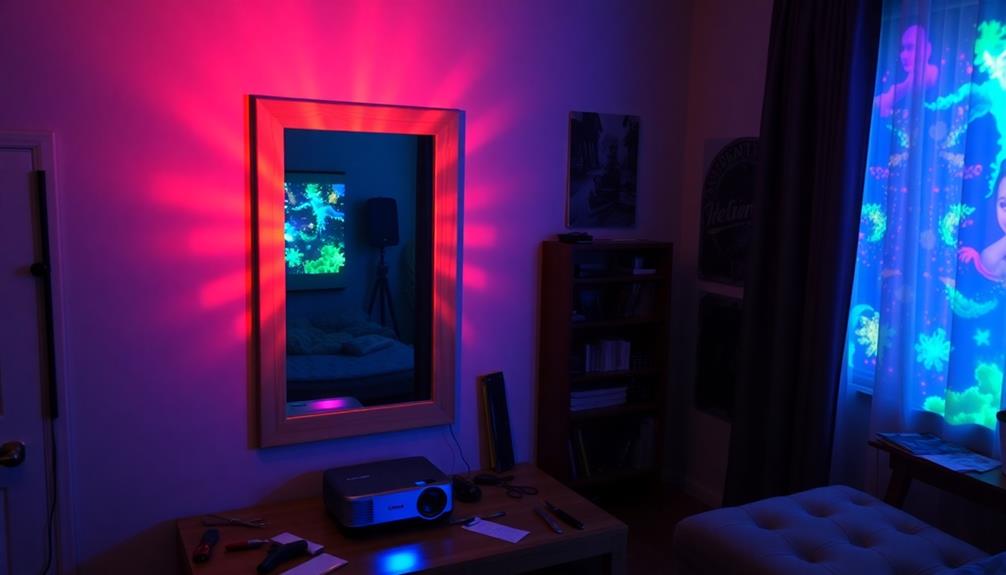
Home Theater Enhancements
Enhancing your home theater experience can be as simple as incorporating innovative uses for projector mirrors. These mirrors can transform your setup, offering improved image quality and flexibility in small spaces. Here are some ideas to get you started:
- Utilize first-surface mirrors for minimized distortion and clearer images.
- Experiment with rear projection techniques to save floor space.
- Adjust mirror angles to create a unique viewing experience.
- Guarantee proper keystone correction for sharp, distortion-free images.
By mounting your projector on the ceiling and using a 45-degree angled mirror, you can achieve larger visuals without compromising your room's layout. This setup allows for ideal projector placement, letting you maximize your screen size while maintaining clarity.
First-surface mirrors, specifically designed for projection, reduce ghosting effects, so your images remain crisp and vibrant.
Don't forget about the importance of alignment and keystone correction. Proper adjustments will keep your projected image sharp and free from the distortions that can arise from the reflection process.
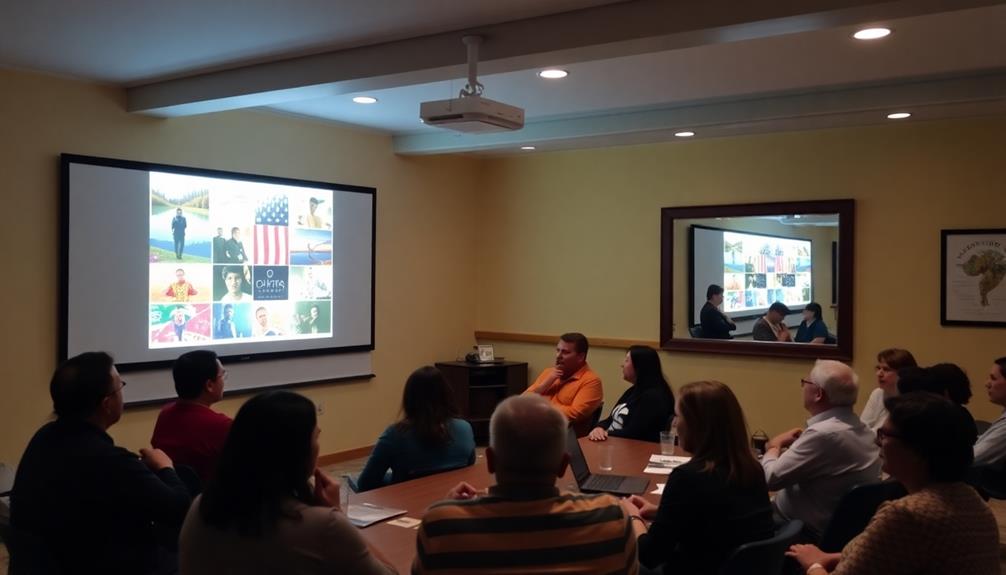
Educational Presentation Benefits
Incorporating projector mirrors into educational settings opens up a world of benefits for both educators and students. By utilizing a projector with a mirror, you can create larger image projections in confined educational spaces, making it perfect for classrooms or small lecture halls. This setup enhances visibility for students by minimizing glare from ambient light, leading to improved engagement and focus during presentations.
Using high-quality first-surface mirrors allows you to achieve clearer and more vibrant images, which is essential for showcasing detailed graphics and text in your educational materials. Additionally, mirrors facilitate creative teaching methods, enabling you to project instructional videos or interactive content onto surfaces that aren't directly behind the projector. This fosters dynamic learning environments where students can actively participate.
The versatility of mirrors in projector setups also accommodates various room layouts, enhancing flexible presentation angles. This means you can guarantee that all students have access to visual aids, regardless of where they're seated.
Creative Art Installations
When exploring creative art installations, the use of projector mirrors can transform ordinary spaces into immersive environments that enthrall viewers. This innovative approach enhances artistic expression by manipulating light paths and creating stunning visual experiences.
- Achieve ultra-wide viewing angles with concave mirrors.
- Minimize distortion using first-surface mirrors for clarity.
- Employ the Peppers Ghost technique for enchanting optical illusions.
- Facilitate unique projections on unconventional surfaces.
By incorporating projector mirrors, you can fill larger spaces with vibrant projected images that engage audiences like never before. Concave mirrors allow for expansive displays, making every corner of the installation part of the experience.
Meanwhile, first-surface mirrors keep your visuals clear and dynamic, essential for conveying your artistic vision.
Moreover, the Peppers Ghost technique adds an element of surprise, drawing viewers in with unexpected visual effects.
With these tools, you can push the boundaries of traditional gallery spaces, creating art that not only decorates but also interacts with its environment.
Embrace these innovative uses for projector mirrors to elevate your installations and leave a lasting impression on your audience.
Advanced Techniques and Technologies
Using advanced techniques and technologies can truly elevate your projector setup. By incorporating first-surface mirrors, you can minimize distortion and ghosting, ensuring exceptional image quality. If you're projecting at angles, advanced keystone correction is essential to prevent resolution loss and moiré artifacts.
A motorized mirror setup offers flexibility in adjusting projection angles and distances, though it may require careful calibration to operate effectively. Experimenting with concave mirrors can also enhance your experience; they allow for wider viewing angles, which greatly impacts the size and clarity of the projected image.
Lastly, utilizing projection mapping software can greatly improve image alignment and correct distortions caused by angled reflections. This can take your setup to the next level.
Here's a quick reference table:
| Technique/Technology | Benefits |
|---|---|
| First-Surface Mirrors | Minimized distortion, better quality |
| Keystone Correction | Prevents resolution loss |
| Motorized Mirror Setup | Flexible angle adjustments |
| Concave Mirrors | Wider viewing angles |
| Projection Mapping Software | Enhanced image alignment |
With these strategies, you'll enjoy a more refined and versatile projector experience!
DIY Solutions for Projection Needs
Creating your own projection solutions can be both fun and cost-effective, especially with the right materials and techniques. Here are some affordable DIY options to contemplate:
- Use ambient-light rejecting paint for better image quality.
- Construct simple mirror setups with common household items.
- Explore local hardware stores for suitable materials.
- Experiment with mirror angles for improved clarity.
By applying ambient-light rejecting (ALR) paint, you can create effective projection surfaces for around $25-$50. This paint works wonders in enhancing your viewing experience.
For those looking to build their own setups, using common household items makes it easy to create creative projection solutions that adapt to various environments.
When setting up your DIY projector installations, don't underestimate the importance of experimenting with mirror angles and positioning. Slight adjustments can greatly enhance image alignment and clarity.
If you run into challenges, community forums and online platforms are great resources for troubleshooting techniques and shared experiences. They can guide you through the process, making your DIY journey smoother and more enjoyable.
With these tips, you'll be well on your way to enjoying high-quality projections!
Community Insights and Feedback
Many enthusiasts have found that sharing their experiences in community forums can greatly enhance their understanding of projector and mirror setups. Platforms like AVForums and ControlBooth have become hotbeds for lively discussions, amassing thousands of views and encouraging users to explore various projection techniques.
As you investigate these discussions, you'll find valuable community feedback on the trade-offs between mirror quality and projector performance. Many users emphasize the importance of using first-surface mirrors to achieve the best image clarity. This specific type of mirror minimizes distortion and enhances projection quality.
However, it's not all smooth sailing; feedback also highlights challenges like banding artifacts when using lower-quality mirrors. This has sparked conversations around the necessity of investing in higher-grade optical mirrors.
Moreover, community members actively share troubleshooting tips and solutions, creating a collaborative space for those experimenting with projector-mirror setups. Whether you're facing issues or simply looking to refine your projection options, engaging with these forums can provide insights that greatly enhance your overall experience.
Don't hesitate to contribute your own experiences, as collective knowledge is key in maneuvering the complexities of projector and mirror setups.
Frequently Asked Questions
How to Use Screen Mirroring on a Projector?
To use screen mirroring on your projector, connect your device and projector to the same Wi-Fi network. Access the projector's menu to activate screen mirroring, then select your device for seamless content sharing.
Can a Projector Work on a Mirror?
Yes, a projector can work on a mirror if you position it correctly. Use a first-surface mirror to minimize distortion and adjust the angles for ideal image clarity. Experiment to find the best setup for you.
How to Make a Projector Using a Mirror?
To make a projector using a mirror, you'll need to position the projector correctly and use a quality mirror. Adjust angles and settings to guarantee clarity, and don't forget to experiment for the best results.
How Do You Use an Extended Screen on a Projector?
To use an extended screen on your projector, connect it through HDMI or VGA. Adjust your computer's display settings to extend rather than duplicate, ensuring the resolution matches for the best image quality.
Conclusion
Incorporating a mirror into your projection setup can feel like discovering a secret door to a hidden room, expanding your creative space. Just like a painter uses a palette to mix colors for a masterpiece, you can enhance your projections to fit any environment. Whether you're showcasing a presentation or crafting an immersive experience, using mirrors opens up a world of possibilities. So, grab your projector and mirror—it's time to elevate your visual storytelling!