Connect with us

Home Cinema

How to Choose the Perfect Projector for Your Space: A Room-by-Room Guide

Find the ideal projector for your space with our room-by-room guide, and unlock the secrets to achieving the perfect viewing experience.

Published

on

room by room projector selection guide

To choose the perfect projector for your space, start by evaluating your room size and the number of viewers. For small rooms, look for devices around 3,000-3,500 lumens, while larger spaces need at least 5,000 lumens to combat ambient light. Consider the room's brightness; darker settings can lower your lumen requirements. Next, identify your usage: home theater demands high resolution for vibrant visuals, whereas business presentations may need something simpler. Don't forget essential features like connectivity options and lens adjustments. By following these steps, you'll pinpoint the ideal projector for your specific needs and settings. There's so much more to explore!

Key Takeaways

  • Assess room size: small rooms need 3,000-3,500 lumens, while larger venues require over 5,000 lumens for clear images.
  • Consider ambient light: brighter environments necessitate higher brightness projectors to maintain image clarity and contrast.
  • Identify usage needs: choose projectors based on purpose, like home theater needing full HD or business requiring WXGA resolution.
  • Evaluate projector types: select based on portability, throw distance, and specific use cases, such as ultra-short-throw for limited space.
  • Explore essential features: prioritize brightness, resolution, connectivity options, and lens adjustments for optimal projector performance in your space.

Assessing Your Room Size

evaluating room dimensions accurately

When you're choosing a projector, evaluating your room size is vital for an effective presentation. The right projector can transform your experience, but it must fit your environment.

For small conference rooms accommodating 10-20 people, look for projectors with brightness levels between 3,000 to 3,500 lumens. This guarantees ideal visibility without overwhelming the space. Regular cleaning of filters can also extend the lifespan of your projector bulb, enhancing performance in smaller spaces.

In medium-sized rooms that hold up to 50 attendees, you'll need a minimum brightness of 5,000 lumens. This helps maintain clarity and detail, especially when projecting from a distance.

When considering large venues with around 100 participants, ultra-bright projectors exceeding 5,000 lumens are essential to combat ambient light and provide a clear image. To enhance your viewing experience, confirm that your projector is compatible with your devices and the resolution matches for optimal performance projector compatibility with gaming consoles.

Keep in mind that projection distance impacts luminosity. Standard throw projectors typically work best at distances of 5 to 13 feet, depending on your desired screen size. The greater the distance, the higher the brightness required to maintain image quality.

Advertisement

Considering Ambient Light

ambient light consideration techniques

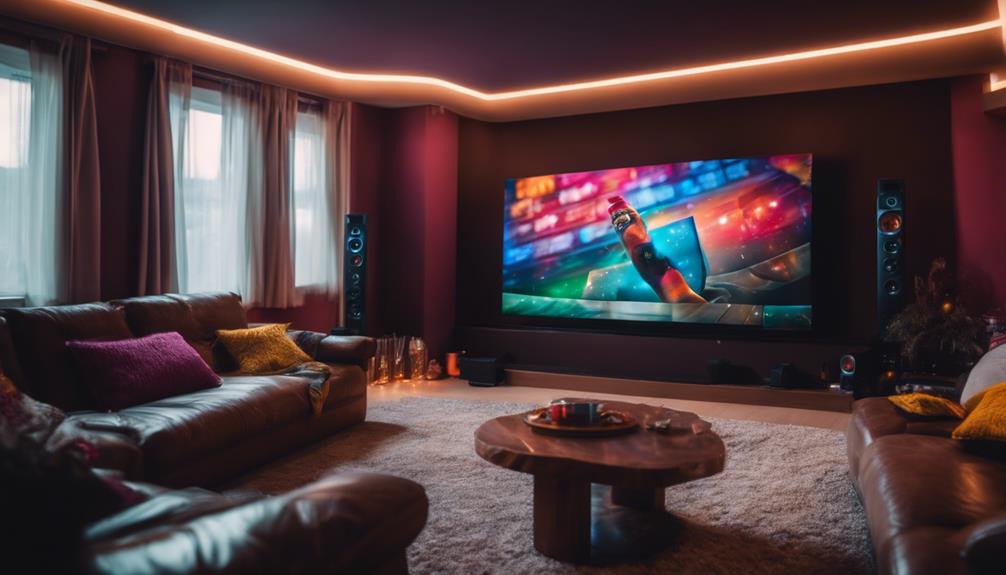
Understanding the impact of ambient light is essential for selecting the right projector. The brightness you need directly correlates with your room's light levels. For home cinema settings, aim for projectors with at least 1,500 lumens, especially if you prioritize features like high refresh rates for an enhanced viewing experience.

In business environments, though, you'll want at least 3,000 lumens to guarantee superior image clarity. If your space is particularly bright, consider projectors with higher luminosity—5,000 lumens or more—to achieve strong contrast and clear images.

The contrast ratio plays a critical role, too. A standard ratio of 3,000:1 is common, but projectors with a 5,000:1 ratio or higher enhance detail and depth, perfect for a high-quality projection in varying conditions.

High-contrast projectors, like the VPL-EX455 with a 20,000:1 ratio, maintain image quality even in well-lit environments, making them ideal for presentations.

Additionally, features like Bright View can greatly improve visibility in spaces flooded with ambient lighting. By considering these factors, you'll enhance your viewing experience and guarantee that your projector delivers the performance you expect, no matter the room's lighting conditions.

Identifying Usage Needs

assessing user requirements efficiently

After considering ambient light, it's time to pinpoint your specific usage needs for the projector.

Start by evaluating the primary purpose of your projector—whether it's for home theater, business presentations, or gaming—as this will dictate your brightness and resolution requirements. For a home theater, aim for at least full HD (1920×1080) resolution to guarantee stunning image quality. If you're using it for business, WXGA (1280×800) might suffice. Additionally, confirm your setup complies with local fire safety regulations to prevent hazards, especially if using a wood stove in conjunction with your projector.

Advertisement

Next, consider room size and the number of viewers. In smaller rooms accommodating 10-20 people, projectors with 3,000-3,500 lumens usually work well. However, if you're presenting to around 100 people in a larger space, look for ultra-bright projectors that exceed 5,000 lumens.

If gaming's your priority, prioritize projectors with low input lag—ideally 16 ms or less—and refresh rates of at least 120 Hz to minimize motion blur.

Evaluating Projector Types

comparing different projector models

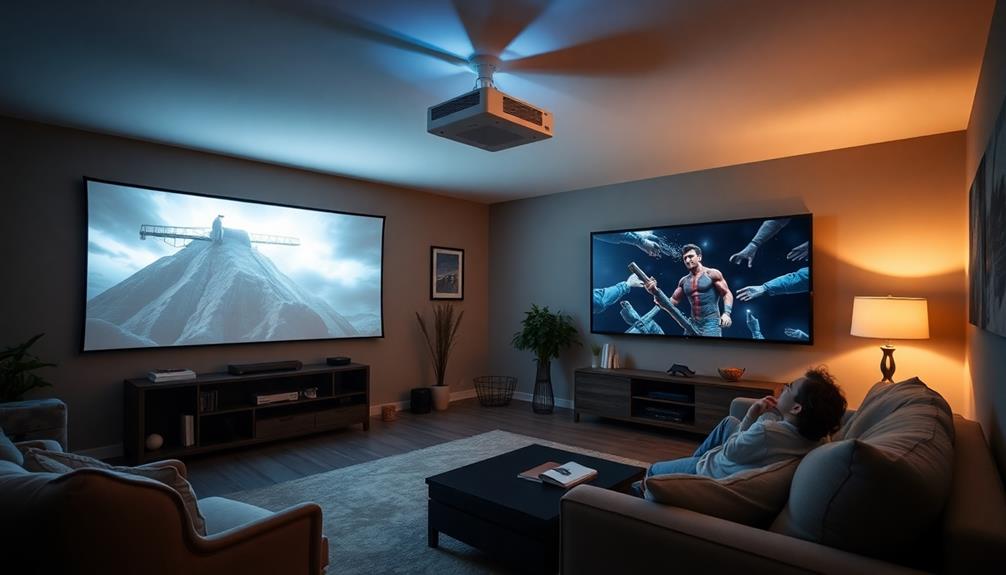
As you explore different projector types, it's essential to match each style to your specific needs and environment.

Home theater projectors are your best bet for dedicated viewing spaces, prioritizing high image quality, contrast ratios, and color accuracy.

If you're presenting in well-lit rooms, consider business projectors, which have a light output of 3,000 lumens or more to guarantee visibility.

For those who need mobility, portable projectors are compact and lightweight, often weighing under 6 lbs, making them ideal for off-site presentations or casual movie nights.

Advertisement

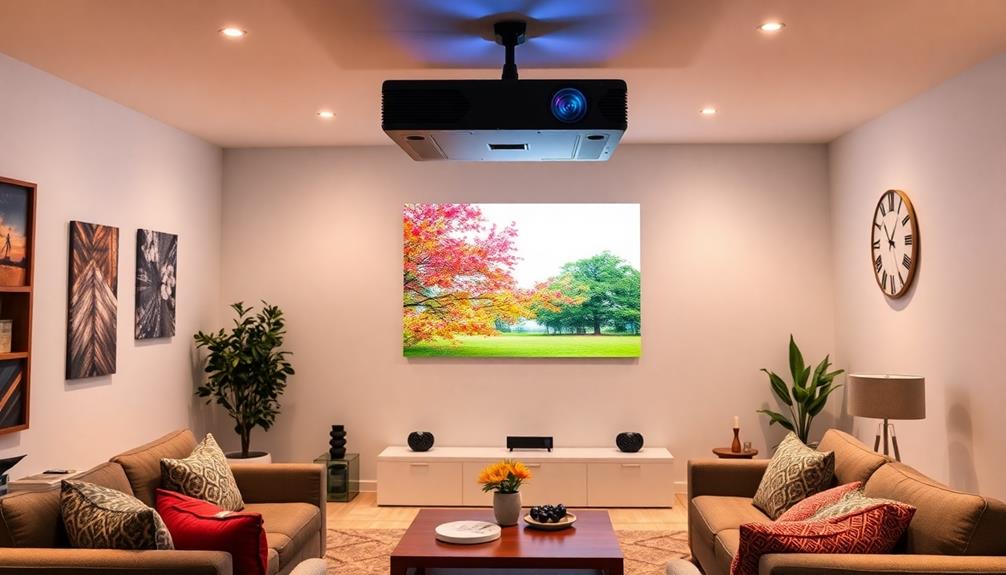
If space is limited, an Ultra-Short-Throw Projector can be placed just inches from the screen, creating large images without requiring a long throw distance.

Exploring Essential Features

key functionalities uncovered

Choosing the right features can greatly enhance your projector experience, guaranteeing it meets your specific needs.

Start by considering brightness levels; for small conference rooms, aim for 3,000-3,500 lumens, while larger venues may need ultra-bright projectors with 5,000+ lumens to combat ambient light and guarantee clear visibility.

Next, evaluate resolution options. WXGA (1280 x 800) works well for standard presentations, but if you're focusing on professional content, opt for WUXGA (1920 x 1200) for greater detail.

Connectivity features are also essential. Look for multiple HDMI ports, USB, and wireless capabilities to connect various devices effortlessly.

Additionally, lens adjustments like lens shift and zoom allow for flexible projector placement and precise image alignment, even in tricky spots.

Advertisement

Frequently Asked Questions

How Do I Find the Right Projector for My Room?

To find the right projector for your room, assess your space's size, light conditions, and content type. Measure throw distance, consider lumens, and make certain seating doesn't block the projector's light path for ideal viewing.

How Big Does My Room Need to Be for a Projector?

Your room size directly impacts projector choice. For small spaces, aim for 5-8 feet projection distance; medium rooms need 8-13 feet. Guarantee adequate lumens based on how many people will be viewing.

How Do You Determine the Size of a Projector Screen for a Room?

Choosing a projector screen size is like picking the right pair of shoes; it needs to fit. Measure your room, consider your viewing distance, and guarantee the screen height's comfortable for seated viewers.

How Do I Choose the Best Projector?

To choose the best projector, assess your room size, seating arrangement, and ambient light. Consider the content type you'll display, desired resolution, and features like lens shift or edge blending for an ideal viewing experience.

Conclusion

In choosing the perfect projector for your space, remember that "the devil's in the details." By evaluating your room size, considering ambient light, and identifying your usage needs, you can find a projector that truly enhances your experience. Don't overlook essential features that can make a big difference. With the right projector, you'll transform your viewing experience, whether it's for movie nights, presentations, or gaming. Now, go ahead and make your choice with confidence!

Advertisement

Hi, I'm Dominique. I love movies and want everyone to have the best home cinema experience possible. That's why I started 1home Theatre Projector. We help people build their home cinema system using the latest technology and news on laser tv and all-around home entertainment. We're a small team of movie buffs (and experts) who are passionate about giving our readers the best advice and information possible. So whether you're just starting out or you're looking to upgrade your home cinema system, we've got you covered!

Continue Reading
Advertisement

Home Cinema

How to Reduce Projector Fan Noise: Tips for a Quieter Viewing Experience

See how simple adjustments and smart choices can transform your projector experience, leaving you wondering what other secrets await for ultimate silence.

Published

on

minimize projector fan noise

To reduce projector fan noise and enhance your viewing experience, start by activating Eco Mode, which can lower noise levels to around 26 dB. Proper placement is key; elevate the projector at least 3-4 feet above the audience and guarantee adequate airflow around it. Regular maintenance, like cleaning air filters and updating firmware, also helps keep noise down. Consider sound-dampening materials in your projector's enclosure to absorb noise. Finally, if you're in the market for a new projector, choose models known for their quiet operation. Discovering more strategies could lead to an even quieter setup!

Key Takeaways

  • Activate Eco Mode to lower fan noise to 26-28 dB while extending projector lifespan and improving energy efficiency.
  • Ensure proper placement by elevating the projector and maintaining clearance for effective airflow, reducing perceived noise levels.
  • Regularly clean air filters and schedule annual maintenance checks to enhance cooling efficiency and minimize noise.
  • Use acoustic treatments like sound-dampening materials and vibration-dampening mounts to absorb noise and vibrations from the projector.
  • Select a quiet projector model, ideally operating below 30 dB, and consider LED or laser options for quieter performance.

Understanding Projector Noise

analyzing projector sound levels

When it comes to projectors, noise is often an overlooked factor that can disrupt your viewing experience. Most projector noise comes from the cooling fans, which operate to prevent overheating. These fans usually run at decibel levels between 30 to 40 dB, and in high-performance models, the fan noise can be even louder due to increased active cooling requirements. This can considerably impact your enjoyment in a home cinema setting.

Fortunately, modern projectors have made strides in reducing fan noise. Many 4K projectors now operate below 32 dB, providing a quieter viewing experience that minimizes distractions.

If you're looking to reduce fan noise further, consider using features like Eco Mode. This setting slows down the fan speeds and dims the lamp brightness, potentially lowering noise levels to around 26 dB, which is ideal for creating a serene environment.

Understanding projector noise is essential for enhancing your home cinema experience. By choosing a quieter model and utilizing features that reduce fan noise, you can guarantee that your movie nights are as immersive as possible, letting you focus on the film rather than the noise.

Eco Mode Benefits

sustainable energy consumption advantages

Eco Mode offers notable advantages for those seeking a quieter and more efficient projector experience. By activating Eco Mode, you can greatly reduce projector fan noise. Many modern projectors operate at sound levels between 26dB and 28dB, which is quieter than a whisper, making for a more enjoyable viewing experience. This quieter operation is achieved by decreasing the fan speed and lowering lamp brightness, which in turn minimizes heat production.

Here's a quick comparison of Eco Mode benefits:

Advertisement
Benefit Description Impact on Viewing Experience
Reduced Noise Sound levels drop to 26dB-28dB Less distraction from audio
Lower Heat Production Decreased lamp brightness leads to less heat Extends projector lifespan
Energy Efficiency Consumes less power while maintaining quality Lower operational costs
Reduced Thermal Stress Minimizes wear on components Enhances durability

Utilizing Eco Mode not only promotes a quieter operation but also helps in extending the lifespan of your projector and its lamp, ultimately contributing to energy efficiency and reduced operational costs.

Placement Strategies

effective job placement techniques

Proper placement of your projector can greatly minimize fan noise and enhance your overall viewing experience. By following these placement strategies, you'll effectively reduce sound disruption and create an immersive environment.

  1. Elevate the Projector: Positioning the projector at least 3-4 feet above the audience helps sound travel upward, reducing perceived noise levels.
  2. Guarantee Minimum Clearance: Maintain at least 50cm of space around the projector. This guarantees proper airflow, preventing overheating and excessive projector fan noise.
  3. Utilize Vibration-Dampening Features: If you're using a mount, choose one with vibration-dampening features. This helps isolate the projector from surfaces that might amplify noise.
  4. Avoid Enclosed Spaces: Don't place your projector in enclosed areas without adequate ventilation. Lack of airflow can lead to heat pooling, causing the fan to work harder and creating louder operational noise.

Maintenance Tips

essential care guidelines

Maintaining your projector is essential for reducing fan noise and ensuring peak performance. By following these maintenance tips, you can enjoy a quieter viewing experience and prolong your projector's life.

Maintenance Task Frequency Benefits
Regularly clean air filters Monthly Increases airflow, reduces noise levels
Schedule professional maintenance checks Annually Identifies issues early for ideal performance
Replace worn-out fans As needed Minimizes operational noise
Keep firmware updated Quarterly Improves performance and reduces noise levels
Monitor lamp life Monthly Prevents overheating, decreases fan speed

To start, regularly clean air filters, as clogged filters can lead to increased fan noise and reduced cooling efficiency. Don't forget to schedule periodic professional maintenance checks to catch any noise issues early. If you notice louder sounds, consider replacing worn-out fans with quieter models. Keeping your projector's firmware updated is also vital, as manufacturers release updates that can enhance performance and reduce noise levels. Finally, monitor lamp life closely—older lamps generate more heat, causing fans to work harder, which increases noise output.

Noise Reduction Techniques

effective sound diminishing methods

To effectively reduce projector fan noise, you'll want to explore a few key techniques.

First, activating Eco Mode can greatly lower noise levels while adjusting your projector's placement can enhance stability and minimize vibrations.

Additionally, incorporating acoustic treatments in the room can further absorb sound and improve your overall viewing experience.

Eco Mode Benefits

Eco Mode Benefits (Noise Reduction Techniques)

Advertisement

Switching on Eco Mode can markedly enhance your viewing experience by cutting down projector fan noise to a whisper-quiet range of 26dB to 28dB. This setting creates a quieter environment, allowing you to fully immerse yourself in your favorite content without distractions.

Additionally, utilizing energy-efficient options can help lower overall energy consumption, similar to the efficiency seen with geothermal heat pumps.

Here are some key benefits of using Eco Mode:

  1. Lowering Lamp Brightness: This feature reduces heat output, which lessens the need for aggressive fan cooling.
  2. Extended Lifespan: By operating at lower temperatures, Eco Mode can help extend the lifespan of your projector's lamp.
  3. Reduced Maintenance Frequency: With less heat and strain on components, you'll find that maintenance is needed less often.
  4. Performance Balance: Many modern projectors, like the BenQ HT3550, strike an effective balance between performance and noise reduction in Eco Mode.

Utilizing Eco Mode not only minimizes fan noise but also enhances the overall viewing experience, promoting immersive engagement with your favorite shows or movies.

Enjoy a quieter environment while ensuring your projector runs efficiently for years to come!

Placement Strategies

While Eco Mode effectively reduces fan noise, projector placement also plays an essential role in creating a quieter viewing experience. By employing smart placement strategies, you can greatly enhance your setup. Here are some key tips to take into account:

Advertisement
Placement Strategy Description
Position Height Place the projector 3-4 feet above the audience for reduced noise perception.
Required Clearance Ascertain at least 50cm of clearance around the projector for ideal airflow.
Ceiling Mounts Use ceiling mounts to distance the projector from viewers, minimizing sound disruption.
Ventilation Avoid enclosed spaces; verify proper ventilation to prevent heat buildup and increased fan noise.
Distance from Walls Maintain distance from walls and reflective surfaces to reduce sound reflections.

Acoustic Treatment Solutions

When it comes to minimizing projector fan noise, incorporating acoustic treatment solutions can make a significant difference in your viewing experience. By focusing on how to absorb sound and reduce vibrations, you can achieve a quieter environment.

Regular maintenance, such as ensuring your projector's filters are clean, can also help reduce overall noise levels and improve performance. Here are four effective techniques:

  1. Acoustic Panels: Install acoustic panels in your projection room to absorb sound, which helps reduce ambient noise levels and enhances your overall viewing experience.
  2. Foam Panels Under the Projector: Attaching 2×2 acoustic foam panels to the bottom of your projector can effectively block higher-frequency fan noise while still allowing for proper airflow and cooling.
  3. Sound Barriers: Constructing a sound barrier with solid wood and foam can absorb sound reflections and prevent direct noise transmission to your audience.
  4. Vibration Dampening Materials: Utilize rubber materials around the projector for vibration dampening to minimize noise from vibrations caused by the fan and other internal components.

Combining these acoustic treatment solutions not only reduces fan noise but also improves thermal management and enhances your overall viewing experience.

For ideal projector performance, consider projector bulb maintenance as part of your setup.

Selecting a Quiet Projector

choosing a silent projector

To enjoy an immersive home theater experience, you'll want to select a projector that operates quietly. Look for models with fan noise levels below 30 dB, as this range is ideal for enjoying films without distractions. Models featuring Eco Mode can lower noise further, operating around 26 dB-28 dB.

Check out the table below for a comparison of some popular quiet projectors:

Projector Model Fan Noise Level (dB) Light Source
BenQ HT5550 26-32 LED
BenQ W5700 26-32 Laser
Epson 5050UB 30 Lamp
Sony VPL-HW45ES 28 Lamp
Optoma UHD50X 27 Laser

When choosing a quiet projector, consider brands with strong reputations for acoustic engineering, like BenQ, which incorporates smart cooling technology. Also, projectors that use LED or laser light sources tend to operate more quietly than traditional lamp-based models. Before making your purchase, read user reviews specifically mentioning noise levels to verify you get the quiet projector that meets your home theater needs.

Advertisement

Acoustic Engineering Insights

sound design and analysis

When you're setting up your projector, understanding noise minimization techniques can make a big difference in your viewing experience.

Smart cooling technology, like that found in some high-end models, helps maintain low sound levels by adjusting fan speeds based on heat.

Noise Minimization Techniques

Reducing projector fan noise involves a blend of smart design and material choices that effectively tackle unwanted sound.

By focusing on acoustic engineering principles, you can create a more enjoyable viewing experience. Here are some noise minimization techniques you can implement:

1. Use Sound Dampening Materials: Lining projector enclosures with materials like Alubutyl can absorb vibrations and minimize sound produced, enhancing overall acoustics.

Keeping your projector clean and well-maintained, including regular cleaning, can also help reduce excess noise from dust accumulation.

Advertisement

2. Incorporate Vibration-Dampening Mounts: Utilize mounts designed to isolate fan vibrations, considerably reducing noise during operation.

3. Prioritize Regular Maintenance: Confirm ideal airflow by cleaning air filters and checking for dust buildup on internal components.

This helps maintain efficient cooling and reduces noise from projector fans.

4. Implement Smart Cooling Solutions: Select models that adjust fan speed based on thermal monitoring, allowing them to operate quietly, especially under 32dB.

Smart Cooling Technology

Smart cooling technology transforms the way projectors manage heat, enhancing both performance and user experience. By utilizing thermal monitoring, this technology dynamically adjusts fan speeds, ensuring peak cooling efficiency while greatly reducing fan noise.

Advertisement

For instance, high-performance projectors like BenQ's 4K HDR models maintain sound levels below 32dB, thanks to advanced acoustic engineering. This level of quiet operation makes them perfect for immersive viewing experiences.

In Eco Mode, projectors can further reduce fan noise to between 26dB and 28dB by slowing down fan speeds during less intensive tasks, enhancing viewer comfort. Additionally, BenQ projectors are designed with specially selected parts that minimize air turbulence and annoying sounds, contributing to a quieter operation.

The integration of smart cooling technology can dramatically lower perceived noise levels, ensuring that projector sound levels don't detract from the overall viewing experience.

By embracing these innovations, you can enjoy your favorite movies or presentations without the distraction of background noise, making each session more enjoyable and immersive.

Enclosure Design Considerations

optimal enclosure design factors

To create an effective projector enclosure, you must prioritize airflow and thermal management. If you restrict air circulation, you risk overheating your projector and increasing fan noise.

Here are some key considerations for your enclosure design:

Advertisement
  1. Airflow: Guarantee that the enclosure has adequate ventilation and allows for dynamic fan speeds to adapt to the projector's heat output.
  2. Projector Placement: Position your projector so that internal fans are unobstructed, maximizing their efficiency and minimizing noise levels.
  3. Flame-Resistant Materials: Construct the enclosure using flame-resistant materials to guarantee safety, as projectors generate significant heat during operation.
  4. Sound-Dampening Materials: Incorporate barriers and sound-dampening materials like rubber or Alubutyl within the enclosure to reduce sound transmission from the projector to your viewing area.

Vibration Mitigation Strategies

effective vibration control techniques

Even with a well-designed enclosure, vibrations from the projector can still contribute to unwanted fan noise. To effectively implement vibration mitigation strategies, consider using rubber dampening materials or sheets on your projector. These materials can greatly absorb vibrations, helping to reduce fan noise during operation.

Additionally, using Alubutyl adhesive to mount your projector will prevent sound transmission to surrounding surfaces, further enhancing your setup.

Cover reflective surfaces like plasterboard with sound-absorbing materials to decrease noise levels by minimizing sound reflections in the room. Choosing higher airflow fans with lower noise ratings can also help reduce internal noise while ensuring efficient cooling.

Before finalizing your setup, conduct initial noise-level tests using duct tape. This can help you assess changes in sound and guide your adjustments to fan configurations and projector placement.

Frequently Asked Questions

How Do I Reduce the Noise on My Projector?

To reduce noise on your projector, use Eco Mode, keep it away from walls and viewers, clean air filters regularly, and consider sound-absorbing materials in your room. Look for quieter models if needed.

How Do You Silence a Noisy Fan?

When a fan's roar drowns out your peace, you can silence it. Try cleaning the blades, adjusting its position, or using sound-dampening materials. Sometimes, simply replacing it with a quieter model works wonders.

Advertisement

Do All Projectors Have Loud Fans?

Not all projectors have loud fans; some are designed for quieter operation. You'll find models that run as low as 26 dB, while others may exceed 40 dB, especially budget options. Choose wisely!

How Do You Reduce the Noise in a Ventilation Fan?

You might be surprised to find that reducing noise in a ventilation fan isn't just about silence. Start by cleaning it, adding sound-absorbing materials, and installing isolation mounts to achieve a noticeably quieter environment.

Conclusion

In summary, tackling projector fan noise doesn't have to be an intimidating task. By understanding your projector's mechanics and implementing the tips we've discussed, you can create a quieter viewing experience. It's like having a conversation at a lively café—you can still enjoy the ambiance without shouting. So, whether you're binge-watching your favorite show or presenting in a meeting, you'll appreciate the difference a little effort can make in reducing that distracting hum.

Continue Reading

Home Cinema

DIY Projector Screen: Step-by-Step Tutorial

Navigate the exciting world of DIY projector screens with our step-by-step tutorial, and discover the secrets to creating the perfect movie night experience.

Published

on

create your own projector screen

Creating a DIY projector screen is a fun project that can enhance your movie nights. First, gather materials like blackout cloth or specialized fabrics, and decide on a frame – PVC for portability or wood for sturdiness. Measure, cut, and assemble your frame before cutting the screen material to size. Stretch it tight over the frame using a staple gun to minimize wrinkles. For mounting, secure D-rings and brackets to guarantee stability. Finally, position your screen at eye level to optimize the viewing experience. Want to make certain everything's seamless? There's plenty more to explore about setup and maintenance.

Key Takeaways

  • Choose suitable screen material like blackout cloth or projector fabric for optimal image quality.
  • Construct a sturdy frame using PVC or wood, ensuring proper dimensions for your projector's aspect ratio.
  • Securely stretch and staple the screen material over the frame to eliminate wrinkles and ensure a flat surface.
  • Properly mount the screen using D-rings and wall anchors, maintaining a distance of at least 1 foot from walls.
  • Regularly calibrate your projector settings and check for any signs of wear on equipment for the best viewing experience.

Materials Needed for Your Screen

essential items for screen

When you're ready to create your DIY projector screen, gathering the right materials is vital for achieving the best results. First, you'll need to choose your screen material. Options like blackout cloth, canvas, or specialized projector screen fabric provide different levels of reflectivity and light-blocking capabilities, which are essential for peak image quality in both home cinema and gaming settings.

For the frame, you can either build a frame using PVC for lightweight portability or opt for a sturdy wooden frame for durability, making certain it can handle the demands of high refresh rates and low input lag for gaming enthusiasts top projectors for gaming.

Next, consider your mounting hardware. This includes brackets, screws, and wall anchors, tailored to the type of wall you're working with, whether it's drywall or concrete. If you decide to paint your screen instead of using fabric, be sure to get specific projector screen paint to enhance image quality and color accuracy. Multiple coats might be necessary for a properly reflective surface.

Lastly, don't forget the tools needed for assembly. A drill, saw, measuring tape, and staple gun will guarantee precise construction and secure mounting of your screen. By gathering these materials, you'll be set to create a fantastic DIY projector screen that performs well in any ambient light situation.

Step-by-Step Assembly Process

sequential assembly instructions guide

To kick off the assembly process, start by measuring the desired dimensions for your DIY projector screen and cutting the frame materials—whether wood or PVC—to the appropriate size. Guarantee the lengths correspond to your selected aspect ratio, like 16:9 or 4:3.

For a relaxing viewing experience, consider enhancing your space with essential oils, which can improve focus and create a soothing atmosphere while you enjoy your films (mood enhancement benefits).

Advertisement

Next, follow these steps to assemble the frame:

  1. Assemble the frame: Join the cut pieces at the corners using screws or corner brackets for a sturdy structure. Double-check that all corners form right angles for stability.
  2. Select your screen material: Choose between blackout cloth or specially designed projector screen fabric. Cut it to size, allowing for an overlap on the frame for securing.
  3. Stretch the screen: Tightly stretch the screen material over the frame, using a staple gun to secure it at regular intervals. Confirm there are no wrinkles or sagging areas that could distort the projected image.
  4. Attach mounting hardware: Finally, attach D-rings or brackets to the frame for secure mounting.

With your frame complete, you're ready to set it up in your home theater and enjoy an impressive projector light experience!

Mounting Your Projector Screen

installing projector screen securely

Mounting your projector screen properly is vital for achieving the best viewing experience. To guarantee ideal viewing comfort, position the screen at eye level, reducing neck strain during use. Use a laser level to make certain the screen is perfectly horizontal, which is critical for accurate projection.

Here's a quick guide to what you'll need for a secure installation:

Component Purpose
D-rings Attach to the screen frame for easy mounting
Mounting brackets Provide stable support for the screen
Wall anchors Confirm secure installation based on wall type
Distance from walls Enhance sound quality and avoid obstruction

When attaching the D-rings or mounting brackets, place them in the top corners of the screen frame. This allows for a balanced setup. Make certain to select appropriate wall anchors for your wall type, whether it's drywall or concrete. Finally, consider placing the screen at least 1 foot away from walls to enhance sound quality and confirm nothing obstructs the projection. With these steps, you'll enjoy a well-mounted projector screen for all your viewing needs!

Tips for Optimal Viewing

maximize your viewing experience

After you've securely mounted your projector screen, refining your viewing setup can greatly enhance your experience.

Regular maintenance of your equipment is also essential for guaranteeing longevity and performance, much like the importance of air purifier maintenance in enhancing air quality.

Here are some essential tips for achieving ideal viewing:

Advertisement
  1. Positioning: Verify your projector screen is at eye level, roughly 24-36 inches above the floor. This prevents neck strain and promotes comfortable viewing.
  2. Screen Size and Distance: Maintain a seating arrangement that places you 1.5 to 2.5 times the screen width away. This distance maximizes immersion and helps maintain ideal viewing angles.
  3. Control Ambient Light: Use blackout curtains or dark paint on adjacent walls to minimize reflections. This is especially important for projectors over 3,500 lumens, as it greatly enhances projection quality.
  4. Calibration: Regularly calibrate your projector settings for brightness, contrast, and color accuracy. This guarantees you get the best visual experience from your DIY projector screen.

Troubleshooting Common Issues

resolving frequent technical problems

Troubleshooting common projector screen issues can save you from frustrating viewing experiences and guarantee your setup runs smoothly.

If you notice a blurred image, first check that the projector is focused properly. Next, verify the screen material is taut and wrinkle-free to provide a flat projection surface.

For image alignment problems, adjust the projector's placement or use the keystone correction settings to achieve a rectangular image.

If color accuracy doesn't seem right, explore the projector's settings to optimize brightness and contrast levels based on your screen material.

If you find that your screen reflects too much ambient light, consider repositioning it for better results or installing blackout curtains to minimize external light interference.

In cases where the screen appears sagging or loose, reinforce the mounting hardware or tighten the screen material. This adjustment will help maintain a flat projection surface, enhancing your overall viewing experience with your DIY Projection Screen.

Advertisement

Addressing these common issues promptly will guarantee you enjoy a seamless and visually pleasing setup every time you project.

Frequently Asked Questions

How Do You Make a Homemade Projector Screen?

To make a homemade projector screen, choose a smooth, reflective fabric, cut a frame to size, secure the material tightly, and mount it at eye level for the best viewing experience. Enjoy your movie nights!

What Material Can I Use for a Projector Screen?

Imagine hosting a movie night outdoors; using blackout cloth can create a perfect screen. For your projector screen, you can also consider canvas, specialized screen fabric, or even lightweight PVC sheets for portability.

Will a White Tarp Work as a Projector Screen?

Yes, a white tarp can work well as a projector screen. Its smooth surface reflects light effectively. Just make sure to stretch it tight and use it in a dark area for the best image quality.

Can You Use a Bed Sheet for a Projector Screen?

Using a bed sheet is like painting on a blank canvas; it can work well as a projector screen. Just guarantee it's smooth, white, and properly sized for the best viewing experience. Enjoy your movie night!

Advertisement

Conclusion

Now that you've crafted your DIY projector screen, you're ready to transform your living room into a personal cinema. Just like the first time you watched the stars flicker on a clear night, this screen will bring those magical moments into your home. Remember, every movie night is a chance to create memories, so grab some popcorn and enjoy the show! Your hard work has paid off, and the adventure of cinematic storytelling awaits.

Continue Reading

Home Cinema

How to Choose the Right Projector Mount for Your Setup

Knowing the right factors for selecting a projector mount can transform your viewing experience; discover what you need to consider before making a decision.

Published

on

By

selecting ideal projector mount

Choosing the right projector mount starts with evaluating your room layout and projector specifications. Consider if you need a ceiling, wall, shelf, or stand mount based on your space and aesthetic preferences. Be certain to check weight capacity and ventilation needs to avoid overheating. Compatibility with your projector is key, so consult specs for a precise fit. Think about future upgrades, too, as this can impact your choice. By understanding these factors, you'll guarantee an ideal viewing experience. Discover more tips to refine your selection process and enhance your entire setup.

Key Takeaways

  • Assess your room layout and size to determine the ideal mounting position for optimal projection quality.
  • Consider the projector's weight and ensure the mount's weight capacity is sufficient for stability and safety.
  • Evaluate compatibility with your projector model to prevent installation issues and ensure proper function.
  • Think about ambient light conditions when selecting a mount to minimize glare and enhance image clarity.
  • Explore different mount types (ceiling, wall, shelf, stands) to find the one that best fits your aesthetic and functional needs.

Importance of Proper Mounting

Understanding the importance of proper mounting can greatly enhance your viewing experience. When you install your projector safely on a ceiling or wall, you guarantee top-notch image quality.

A well-mounted projector provides sharp, clear, and aligned projections, making your presentations or movie nights much more enjoyable. Additionally, a good mounting solution can contribute to better sound performance, especially when integrated with a home theater setup that includes quality audio systems.

Safety is another critical aspect of mounting. By securing your projector correctly, you prevent potential falls and injuries, offering peace of mind, especially in high-traffic areas. Additionally, effective mounting solutions save valuable floor space, creating a more organized and clutter-free environment.

Proper installation allows for angle adjustments, which can markedly improve image stability and reduce the risk of overheating or damage to the equipment.

Types of Projector Mounts

variety of projector mounts

When selecting a projector mount, you'll find several types available, each catering to different needs and environments.

Shelf mounts are cost-effective options that offer a sturdy flat surface attached to the wall. While they're easy to install, guarantee careful construction to avoid collapse; they mightn't blend well with all home decor.

Advertisement

For those looking to elevate their space with some creativity, consider how a projector can complement your living room transformation goals.

Ceiling mounts provide a fixed position, ideal for permanent installations, guaranteeing safety and balance for your projector. However, they complicate maintenance and angle adjustments due to their height.

Wall mounts integrate well with room decor and can support heavyweight projectors, but they limit your viewing angle flexibility.

If you prefer mobility, consider projector stands. These versatile devices are suitable for various setups, including outdoor use, allowing easy relocation and adjustments.

For a more elegant solution, projector lifts conceal the projector when it's not in use, enhancing your room's aesthetics while saving space. However, be prepared for additional installation considerations.

Advertisement

Advantages and Disadvantages

pros and cons analysis

When choosing a projector mount, you need to weigh the advantages and disadvantages of each option.

Consider factors like stability, aesthetics, and flexibility to find the best fit for your space.

Additionally, understanding how design principles can enhance your overall setup can be beneficial, especially when you think about fostering a culture of creativity and experimentation in your workspace Design Thinking Leadership.

Understanding these key points will help you make a more informed decision.

Mounting Options Overview

There are several mounting options for projectors, each with its own set of advantages and disadvantages. Shelf mounts are a cost-effective choice, providing a solid base for your projector. However, they can pose safety risks if not constructed properly and might clash with your home decor aesthetics.

Additionally, considering the investment in a Gold IRA can hedge against inflation, similar to how projector mounts protect your technology.

Advertisement

Ceiling mounts offer great stability and safety, making them ideal for permanent setups, but they can be difficult to adjust for best viewing angles and require ladders for maintenance.

Wall mounts integrate well with your decor and can support heavier projectors, yet they limit flexibility in viewing angles and may not suit all room layouts.

If mobility is essential for your setup, projector stands provide versatility, allowing for different configurations, including outdoor use. However, they may lack stability compared to fixed mounts in certain environments.

Lastly, projector lifts enhance aesthetics by concealing the projector when it's not in use, but they can be more expensive and complex to install than traditional options.

Key Considerations for Selection

Choosing the right projector mount involves several key considerations that can greatly impact your viewing experience.

Advertisement

First, evaluate your room layout and size, as ceiling height and available wall space will affect your mounting options. For instance, ceiling mounts offer safety and a clean look but can complicate maintenance, while shelf mounts are cost-effective but might clash with your decor. Additionally, conducting thorough keyword research can help identify the best options for your specific needs.

Next, consider your projection requirements, including screen size and aspect ratio. The necessary distance and viewing angle for effective projection are vital for ideal results. Make sure to assess compatibility with your specific projector models; dedicated mounts align screw holes perfectly, while universal mounts offer flexibility across various devices.

Don't forget to factor in ambient light conditions, as they can greatly influence image clarity. The right mount should help minimize glare and enhance viewing quality.

Key Factors for Selection

criteria for choosing wisely

Evaluating your needs is crucial when selecting a projector mount. Start by evaluating your room layout and size, taking into account wall space availability and ceiling height. This helps you determine the most suitable mounting position for ideal projector placement.

Next, understand your projection requirements by defining the desired image size, aspect ratio, and the distance necessary for effective image projection. Incorporating various aspects of your setup, such as the potential for future upgrades or changes, can further enhance your choice. It's also beneficial to contemplate the ideal investment strategy for your equipment, guaranteeing you're getting the best value for your needs.

Review viewing angles and distance to guarantee that your mount allows for ideal image alignment, while also accommodating ambient light conditions that could affect image clarity. It's crucial to take into account throw distance and mount shift capabilities, as these factors guarantee proper projector setup and help achieve the desired image size and quality.

Advertisement

Lastly, consult with experts or refer to manufacturer specifications for tailored recommendations on projector mounts that support various projector types and weights. By focusing on these key factors, you'll be better equipped to choose a mount that perfectly fits your setup, enhances your viewing experience, and meets your unique needs.

Specific Mounts Overview

detailed mounts analysis summary

When you're choosing a projector mount, understanding the different types available is essential. Each mount comes with its own key features and installation factors that can impact your setup.

It's important to take into account aspects such as weight capacity and compatibility with your projector model, as improper mounting can lead to performance issues.

Additionally, ensuring that your mount is placed in a suitable environment is critical for ideal projector function, much like how cat health and nutrition can influence a pet's wellbeing.

Let's compare the options to help you find the best fit for your needs.

Mount Types Comparison

A variety of projector mounts cater to different needs and preferences, influencing both functionality and aesthetics in your space.

Advertisement

When considering a mount types comparison, here are some common options:

1. Ceiling Mounts: These guarantee safety and balance, making them ideal for permanent setups. They're often recommended for larger spaces where ceiling height allows for peak projection.

However, they can be tricky to adjust and require ladders for maintenance.

2. Wall Mounts: These integrate well with your home decor and can support heavier projectors.

Consider the importance of reputation and reviews from past clients when choosing a service to install your mount.

Advertisement

But keep in mind that they offer limited viewing angle flexibility.

3. Shelf Mounts: Cost-effective and providing a solid base, shelf mounts can clash with home decor if not chosen carefully.

They may also pose safety risks if not properly constructed.

For more versatility, consider projector stands that allow for easy relocation, or projector lifts that conceal the projector when not in use, enhancing your room's aesthetics.

Each option has its pros and cons, so assess your space and usage needs carefully to guarantee you choose the best mount for your setup.

Advertisement

Key Features Evaluation

Choosing the right projector mount involves understanding the unique features that each option brings to the table. If you're looking for versatility, the XGIMI Portable Stand is a great choice, offering 360° panoramic rotation and height adjustment up to 795mm. This makes it suitable for both desktop and floor use.

Additionally, using a projector can enhance your home entertainment experience, similar to how ceiling fans enhance air circulation for overall comfort. The XGIMI X-Desktop Stand Pro combines stability with aesthetics, thanks to its aluminum alloy base and universal compatibility with a ¼-inch screw, while allowing a height adjustment of up to 9.5 cm.

For those needing a more robust option, the XGIMI X-Floor Stand supports a height range from 19 to 35 inches, featuring a triangular base design for enhanced stability in various settings.

If you're considering shelf mounts, they can be a cost-effective solution for wall attachment but may clash with your home decor, especially if not designed for heavy projectors. On the other hand, ceiling mounts provide a clean, fixed integration into your space, though they require ladder access for adjustments or maintenance.

Ultimately, evaluate each mount's stability, viewing angle, and compatibility with your projector and screen.

Advertisement

Installation Considerations

Selecting the right installation method for your projector can make all the difference in achieving the best viewing experience. Here are some key options to take into account:

  1. Ceiling Mount: Ideal for permanent setups in larger rooms, ceiling mounts provide safety and balance for your projector. They guarantee proper ventilation and can often support heavier models, similar to how garage door openers enhance home security with modern technology.
  2. Wall Mount: If you're looking for a solution that integrates seamlessly with your home decor, wall mounts are a great choice. They typically support heavier projectors and can easily fit into various aesthetic styles.
  3. Mobile Options: For maximum versatility, think about mobile projector stands. These allow for easy relocation and adjustments, perfect for both indoor and outdoor use.

When choosing a mount, confirm it's compatible with your projector model. Dedicated mounts are tailored for specific models, while universal mounts offer flexibility.

Also, pay attention to weight capacity and ventilation; mounts must support the projector's weight securely and allow unobstructed airflow to prevent overheating.

XGIMI Mount Options

xgimi projector mounting solutions

XGIMI's mount options provide the perfect blend of versatility and stability for your projector needs. Whether you're setting up for a home theater or a professional presentation, these XGIMI projector stands offer reliable mounting solutions.

Mount Type Key Features Ideal Use
XGIMI Portable Stand 360° panoramic rotation, 5kg load capacity Mobile setups
XGIMI X-Desktop Stand Pro Universal compatibility, height adjustment (up to 9.5 cm) optimal image projection
XGIMI X-Floor Stand Adjustable heights (19 to 35 inches) Indoor and outdoor environments

All XGIMI stands emphasize stability and ease of use, ensuring that you can focus on your presentation without worry. With sleek aesthetics, these mounting options blend seamlessly into any setting. Plus, they're compatible with a variety of projector models, giving you the flexibility you need for different user needs and environments. Choose XGIMI for a reliable and stylish solution that elevates your viewing experience.

Screen Compatibility

device display compatibility issues

How do you guarantee a seamless viewing experience with your projector? Screen compatibility is key. You need to take into account several factors to assure everything aligns perfectly for ideal image clarity and enjoyment.

  1. Aspect Ratio: Make sure the projector's aspect ratio matches the screen. This prevents image distortion during presentations or movie nights.
  2. Throw Distance: Different projectors require specific throw distances to project the right image size. Know your projector's needs to avoid any hiccups.
  3. Mounting Height: The screen's mounting height should align with your projector installation. An improper height can affect the viewing angle and overall experience.

Larger screens often need secure anchoring, while smaller ones may mount directly to the wall.

Additionally, using brackets for adjustment allows you to fine-tune the distance from the wall, assuring ideal visibility.

Taking these considerations into account helps you achieve a setup that not only looks great but performs well too.

Advertisement

With the right screen compatibility, you can elevate your viewing experience, making every presentation or movie night enjoyable and hassle-free.

Installation Considerations

installation guidelines and recommendations

With screen compatibility sorted, it's time to focus on installation considerations that will guarantee your projector setup performs at its best.

Start by evaluating your room layout and size to determine the ideal mounting position. Verify there's enough wall or ceiling space for installation, taking into account the projector model you're using, as different types may require specific configurations for proper alignment and stability.

Next, examine the mounting hardware. Confirm it's rated for the weight of your projector to avoid potential safety hazards or equipment damage.

Pay attention to ventilation requirements, as your mount shouldn't obstruct the projector's cooling fans or airflow; overheating can lead to performance issues.

If you're opting for ceiling mounts, plan for easy access to the projector for maintenance and adjustments. You'll want it to be accessible, especially if you need to use a ladder for retrieval.

Advertisement

Additional Accessories and Products

supplementary items and gear

When setting up your projector, considering additional accessories can greatly enhance your overall experience.

These accessories not only improve the functionality of your setup but also boost your projector's performance. Here are three must-have accessories:

  1. Projector Screens: Investing in a quality projector screen guarantees ideal viewing angles and clarity, making your presentations or movie nights far more enjoyable.
  2. TV Stick 4K: Priced at €79.99, this device considerably enhances your streaming capabilities, allowing you to access a wider range of content seamlessly.
  3. Support Multi-Angle Accessories: At €89.99, these versatile accessories provide multiple viewing angles, making sure that everyone in the room has a great view.

Additionally, don't forget about quality cables and adapters for ideal connectivity, which are essential for maintaining clear visuals and sound.

You can often find promotions or bundled purchases through community memberships that save you money on these vital accessories.

Conclusion

Choosing the right projector mount can really enhance your viewing experience. Did you know that 70% of home theater enthusiasts say a proper mount improves picture quality? By considering factors like compatibility, installation ease, and specific features, you can find a mount that suits your setup perfectly. Whether you opt for a fixed or adjustable mount, taking the time to select the right one will elevate your home entertainment to a whole new level!

Continue Reading
Advertisement

Affiliate disclaimer

As an affiliate, we may earn a commission from qualifying purchases. We get commissions for purchases made through links on this website from Amazon and other third parties.

Advertisement

Vetted

top electrostatic headphones 2024 top electrostatic headphones 2024
Vetted2 months ago

The 10 Best Electrostatic Headphones of 2024 – Ultimate Sound Experience Unveiled

Unlock the ultimate sound experience with the top electrostatic headphones of 2024—discover which models will elevate your audio journey to...

concert earplugs for hearing protection concert earplugs for hearing protection
Vetted2 months ago

15 Best Earplugs for Concerts: Protect Your Hearing Without Missing the Music

Check out the 15 best earplugs for concerts that protect your hearing while enhancing your music experience—discover which ones are...

comfortable earbuds for small ears comfortable earbuds for small ears
Vetted2 months ago

14 Best Earbuds for Small Ears That Offer Comfort and Sound Quality

Mysterious and comfortable, discover the 14 best earbuds for small ears that elevate your sound experience like never before!

best earbuds for calls best earbuds for calls
Vetted2 months ago

14 Best Earbuds for Phone Calls in 2024 – Crystal Clear Sound and Comfort

Discover the crystal-clear sound and comfort of the 14 best earbuds for phone calls in 2024, and find out which...

kid friendly safe earbuds kid friendly safe earbuds
Vetted2 months ago

15 Best Earbuds for Kids: Safe, Durable, and Perfect for Little Ears

Attention parents: Discover the 15 best earbuds for kids that prioritize safety and fun, but which one will be the...

top dynamic mics 2024 top dynamic mics 2024
Vetted2 months ago

15 Best Dynamic Microphones for Every Sound Engineer in 2024

Achieve the perfect sound with our top 15 dynamic microphones of 2024, tailored for every sound engineer's needs—discover your ideal...

top drum mics 2024 top drum mics 2024
Vetted2 months ago

15 Best Drum Mics of 2024 – Elevate Your Sound With These Top Picks

The ultimate guide to the 15 best drum mics of 2024 reveals top picks that will transform your sound—find out...

ultimate sound quality headphones ultimate sound quality headphones
Vetted2 months ago

15 Best Drum Headphones for Ultimate Sound Quality and Comfort

Browse our top 15 drum headphones for superior sound quality and comfort—discover which pair will elevate your drumming experience to...

ski helmet audio accessories ski helmet audio accessories
Vetted2 months ago

15 Best Ski Helmet Headphones to Enhance Your Slopes Experience

Immerse yourself in the slopes with the 15 best ski helmet headphones that promise unmatched sound quality and comfort—discover which...

top dj headphones 2024 top dj headphones 2024
Vetted2 months ago

15 Best DJ Headphones of 2024 – Ultimate Sound Quality and Comfort

Discover the top 15 DJ headphones of 2024 that promise unmatched sound quality and comfort—find out which models made the...

Advertisement

Trending