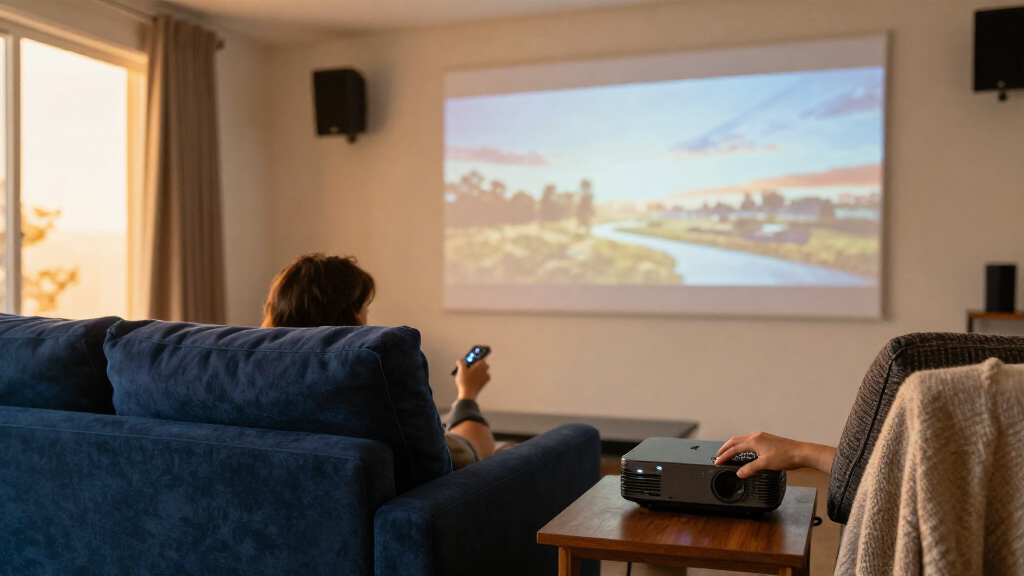
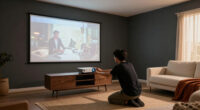
Set up a home theater projector by choosing a suitable screen location, placing or mounting the projector, connecting video and sound, and adjusting the picture. This guide is for beginners with a projector, screen or clear wall, and source device such as a streaming player or game console. Plan for about 2-4 hours, including measuring, installation, and picture checks. By the end, you should have an image that fits the screen, looks focused from your seats, and plays sound through the intended speakers.

Get business pricing on your home office setup
- Business-only prices and quantity discounts
- Tax-exempt purchasing
- Multiple users, one account, clear invoices

Epson Home Cinema 980 3-Chip 3LCD 1080p Movie Projector
- ✔ Native resolution: 1920 × 1080
- ✔ Brightness: 4,000 lumens color and white, as stated
- ✔ Display technology: Three-chip 3LCD

TOPTRO X9 Pro VIDAA Smart Projector
- ✔ Native resolution: 1920 × 1080
- ✔ 4K support: 4K decoding; native display remains 1080p
- ✔ Brightness: 920 ISO lumens, as stated

Aurzen Roku TV D1R Smart Portable Outdoor Projector
- ✔ Native resolution: 1920 × 1080
- ✔ Display technology: LCD
- ✔ Brightness: Not stated in supplied specifications
Difficulty: Beginner | Time: 2-4 hours
What You’ll Need
Tools & Materials:
- Projector and power cable
- Projector screen or smooth, light-colored wall
- Video source, such as a streaming device, receiver, computer, or game console
- HDMI cable of suitable length
- Tape measure
- Painter’s tape or removable labels
- Step ladder for ceiling installation
- Stud finder, drill, and mounting hardware for a ceiling mount
- Level and screwdriver
- Audio system or projector speakers
Knowledge:
- Basic use of a tape measure and level
- Ability to select an HDMI input and operate the projector’s menus
- For a ceiling mount, basic familiarity with locating ceiling joists and using a drill
Check the projector manual for its throw distance, lens shift, mounting pattern, and ventilation clearances before choosing a location. A helper can hold the projector or screen while you measure. For a ceiling mount, use hardware rated for the projector’s weight and fasten it to a joist or a suitable structural support. Do not rely on drywall anchors alone.
Epson Home Cinema 980 3-Chip 3LCD 1080p Movie Projector
For a home theater that also has to handle daytime sports or casual gaming, the Epson Home Cinema 980 is the most display-focused pick in this lineup. Its stated 4,000 lumens of color and white brightness put it well ahead of the listed 920 ISO lumens on the TOPTRO; the Aurzen description does not specify a brightness figure for comparison. That makes Epson the clearest option when controlling ambient light is difficult. Its three-chip 3LCD system also presents the full RGB signal in each frame, a meaningful distinction for viewers who want vivid color without the rainbowing associated with some projection designs.We would choose it for a room where a large, bright image matters more than having a streaming platform built in. It supports native 1080p, has two HDMI inputs, and includes USB power for a streaming stick. The built-in speaker helps us get started without extra gear, while the 16,000:1 listed contrast ratio adds context for image presentation. Compared with TOPTRO and Aurzen, however, Epson asks us to supply the streaming interface and handle placement more deliberately: the supplied details do not list autofocus or automatic keystone correction. Its large-image capability is appealing, but image quality at the maximum claimed size depends on room, screen, and placement.The tradeoff is that this is not a native 4K projector and it lacks the smart platform conveniences of its rivals. Its stated 6,000-hour light-source life is also shorter than TOPTRO’s listed 30,000 hours, though the product details do not specify identical measurement conditions. This is our best overall recommendation for a bright, flexible viewing room, but less compelling for buyers who want a compact, automatic all-in-one unit.
Pros:
- Stated 4,000-lumen color and white brightness suits brighter viewing spaces better than the listed portable alternatives.
- Three-chip 3LCD design presents full RGB color each frame and avoids distracting rainbowing.
- Two HDMI ports and USB power make it easy to connect a streamer, console, and other source devices.
- Built-in speaker and portable form factor simplify initial setup and repositioning.
Cons:
- Native resolution is 1080p, not 4K.
- Streaming is not built in, so a separate device and network connection may be needed.
- Supplied details do not list autofocus or automatic keystone correction.
Best for: Viewers who want a bright native 1080p image for sports, gaming, and movies in rooms where light control is imperfect.
Not ideal for: Buyers who prioritize built-in streaming, automatic focus and keystone correction, native 4K, or the smallest portable setup.
Bottom line: Choose the Epson when brightness and color take priority over smart features and automatic setup.
“Choose the Epson when brightness and color take priority over smart features and automatic setup.”
TOPTRO X9 Pro VIDAA Smart Projector
The TOPTRO X9 Pro packs the most home theater functions into one portable projector here. Its native resolution is 1080p, with 4K decoding for 4K-labeled sources; that lets it accept those files, but the projected image remains 1080p. The manufacturer lists 920 ISO lumens, HDR10, and a 30,000:1 contrast ratio. Those figures make it more naturally suited to a dim room than the Epson, whose stated brightness is substantially higher. In return, the TOPTRO offers a more integrated entertainment setup than Epson: VIDAA apps, AirPlay 2, Wi-Fi 6, and voice control are built in.For a movie room, its practical strengths go beyond streaming. Autofocus, keystone correction, obstacle avoidance, and screen fit can simplify setup when the projector moves between rooms. Zoom and multiple mounting options add flexibility, while HDMI ARC/CEC allows a cleaner connection to external audio equipment than the product details list for Aurzen. The dual 20W speakers are also the largest stated built-in audio system in this group. Compared with Epson, TOPTRO gives up substantial stated brightness; compared with Aurzen, it offers more specified audio and installation features.We would treat its wide feature set as a convenience advantage, not proof that it replaces a dedicated theater system. A 1080p panel limits the detail available at very large screen sizes, and the 920-lumen figure points toward controlled lighting for a satisfying movie image. Smart app availability can also depend on region and service support, so buyers should check that their preferred services work where they live. This is the strongest choice for someone who wants a flexible, self-contained projector for a darkened room and values built-in setup aids and sound.
Pros:
- VIDAA streaming, AirPlay 2, Wi-Fi 6, and voice control reduce the need for separate playback devices.
- Autofocus, keystone correction, obstacle avoidance, and screen fit make repositioning easier.
- HDMI ARC/CEC supports a more streamlined soundbar connection.
- Dual 20W speakers and multiple mounting options add flexibility for an all-in-one setup.
Cons:
- Native image resolution is 1080p; 4K decoding does not produce a native 4K image.
- Listed 920 ISO lumens make a darkened room a safer fit than a bright viewing space.
- Streaming app availability and features can vary by region and service.
Best for: Movie watchers who want an all-in-one smart projector with automatic setup, flexible mounting, and a built-in route to external audio.
Not ideal for: Viewers in bright rooms or buyers expecting native 4K detail from 4K-labeled content.
Bottom line: Pick the TOPTRO for the broadest smart and setup feature set when the room can be kept dim.
“Pick the TOPTRO for the broadest smart and setup feature set when the room can be kept dim.”
Aurzen Roku TV D1R Smart Portable Outdoor Projector
The Aurzen Roku TV D1R makes the most sense when we want to turn a wall or screen into a simple streaming destination without adding a stick or learning another interface. Roku is built in, with familiar apps and a straightforward home screen, and the listed autofocus and auto keystone help align the image after moving the projector. That ease gives it the clearest beginner-friendly role. Epson offers far more stated brightness for a room with ambient light, while TOPTRO supplies more detailed mounting, audio, and adjustment specifications; Aurzen’s appeal is getting to a show with minimal equipment.Its native 1080p resolution is appropriate for everyday films and television, and the stated 60-to-150-inch use range is more restrained than Epson’s maximum claim or TOPTRO’s listed 200-inch maximum. The 2.1 kg weight supports occasional movement between rooms or an outdoor movie setup. Dual-band Wi-Fi and Bluetooth 5.2 help with streaming and wireless audio, while dual 5W speakers provide a starting point when we do not want to carry a sound system. Roku activation requires an internet connection and account, so the projector is not a fully offline entertainment hub.The biggest comparison question is brightness: the supplied Aurzen specifications do not include a lumen figure, so we cannot place it confidently against Epson’s 4,000 stated lumens or TOPTRO’s 920 ISO lumens. For that reason, we would favor a darkened room and moderate screen size rather than assume it will handle ambient light. Its speakers are also far less powerful on paper than TOPTRO’s 2×20W system, and the provided details do not identify HDMI ARC. Choose it when streaming simplicity and portability outrank detailed picture-performance specifications; skip it when the room is bright or a soundbar-centered theater is the priority.
Pros:
- Built-in Roku provides a familiar streaming interface without a separate streaming stick.
- Autofocus and auto keystone correction reduce manual setup after repositioning.
- Portable 2.1 kg design and stated 60-to-150-inch range suit flexible movie nights.
- Bluetooth 5.2 and dual-band Wi-Fi support wireless audio and streaming connections.
Cons:
- The supplied specifications do not state brightness, making room suitability harder to compare.
- Dual 5W speakers are modest beside TOPTRO’s stated 40W system.
- Roku activation requires an internet connection and account.
Best for: First-time projector buyers who want built-in Roku streaming, automatic image adjustment, and a portable unit for occasional movie nights.
Not ideal for: Buyers who need a documented high-brightness option, robust built-in sound, or detailed home theater integration.
Bottom line: Choose Aurzen for approachable built-in streaming and quick setup when you can keep the room dim.
“Choose Aurzen for approachable built-in streaming and quick setup when you can keep the room dim.”
As an Amazon Associate we earn from qualifying purchases.
Before You Start
Darken the room as much as practical and decide where viewers will sit. Keep the projector away from heat sources and leave the manual’s required space around its air intake and exhaust. Measure the wall or screen and mark its edges with painter’s tape. Check that the proposed projector location falls within the throw-distance range for your desired image size. If the room has multiple HDMI devices, decide which one will handle audio switching before routing cables.
Turn off and unplug the projector before attaching a mount or changing its position. Ceiling work requires a stable ladder and a secure attachment to structural support. If you cannot confirm a safe mounting point, use a stable table or get help with the installation.
Step-by-Step Instructions
Step 1: Choose the screen position
Mark the center of the screen area at a height that gives seated viewers a comfortable sightline. Keep the screen square to the seating area and avoid placing it where doors, lamps, or furniture will block the image. If you are projecting onto a wall, pick the smoothest, lightest-colored section available; texture and color can make the picture uneven.
Measure the width and height of the screen area. Use the projector manual’s aspect ratio guidance to confirm that the image shape will fit. Most home theater content uses a widescreen shape, but the manual and screen determine the exact dimensions.
Tip: A screen that is too high can make long viewing sessions uncomfortable. Check the view from the seats you use most.
Check: The marked screen area is clear, centered for the seating, and large enough for the image shape you plan to use.
Step 2: Measure the projector position
Find the projector’s throw-distance chart in its manual or manufacturer specifications. Measure from the lens to the screen, following the method specified by the manufacturer. Use the chart to choose a distance that produces an image within your marked screen boundaries. If the projector has zoom, the chart may show a range; choose a position that leaves some adjustment room.
Check whether the lens can align with the screen center from the intended location. Lens shift can move the image without tilting the projector. Keystone correction can reshape a skewed image, but heavy correction may reduce image detail, so plan for a square, direct placement where possible. Mark the lens position and cable route.
Tip: Do not rely on a generic online distance estimate when your model’s specifications are available. Throw ratios vary by projector.
Check: The lens position is within the manufacturer’s distance range, and the projected image is expected to fit the screen.
Step 3: Place or mount the projector
Place the projector on a firm, level surface at the marked position for a table setup. Point the lens toward the screen and leave clear space around the vents. Secure loose cables so no one can trip over them or pull the projector off the table.
For a ceiling setup, locate a joist or other approved support with a stud finder, then confirm the position against the projector’s mounting pattern and screen alignment. Attach the mount with the specified hardware, following both manuals. Ask a helper to support the projector while you fasten it to the mount, then check that every connection is tight before letting go. Route power and signal cables without pinching them or placing them near hot surfaces.
Tip: If the ceiling position does not line up with the screen, check lens shift and mount adjustment before using keystone correction to compensate.
Check: The projector is stable, the lens faces the screen, the ventilation openings are clear, and the cables are routed safely.
Step 4: Connect the video source and audio
Turn off the projector and source device. Connect an HDMI cable from the source to the projector, or to an audio-video receiver if that device will switch video and sound. Connect the receiver’s HDMI output to the projector. For a soundbar or separate audio system, use the connection supported by your equipment, such as HDMI ARC or eARC, optical audio, or an audio connection from the source. Follow the manuals for the correct ports.
Plug in the devices and turn them on. Select the projector input that matches the cable. On the source device, choose a supported display resolution and refresh rate. If you use a receiver, select its matching input and confirm that it sends video to the projector.
Tip: Some long HDMI runs may not carry a stable signal with a standard cable. Check the cable and equipment specifications before installing a cable through a wall or ceiling.
Check: The projector shows the source device’s image, and sound comes from the audio system you selected.
Step 5: Set the image size and alignment
Display a test pattern or a menu with straight edges. Adjust the projector’s position and optical zoom, if available, until the image fits within the screen edges. Use lens shift to move the image into place without tilting the projector. Adjust the mount or projector position if the image is visibly trapezoidal or one side is taller than the other.
Use the projector’s keystone control only for small corrections after physical alignment. Large digital corrections can soften detail. If the image is larger than the screen, move the projector closer or reduce optical zoom. If it is too small, move it farther away or increase optical zoom within the model’s range.
Tip: Avoid digital zoom if it crops or resizes the source image. Physical position and optical zoom usually preserve more picture detail.
Check: The image fills the screen area without spilling over the edges, and its borders look square.
Step 6: Focus the picture and set basic image options
Display a sharp menu, text screen, or focus pattern. Adjust the focus ring or focus control until fine text and line details look crisp from your normal seat. If the center is sharp but the edges are blurry, check that the projector is level and square to the screen; focus cannot correct a tilted projection surface.
Select a picture mode suited to your room, such as a cinema mode for a dark room. Set brightness, contrast, color, and sharpness conservatively, then play familiar content to judge the result. Turn off motion processing or extra image effects if they create distracting artifacts. Use the projector’s manual for model-specific picture controls.
Tip: Make picture adjustments after the projector has warmed up, since brightness and focus can change slightly as it reaches operating temperature.
Check: Text is readable across the image, familiar content looks natural, and no major part of the picture is out of focus.
Step 7: Check sound, seating, and cable stability
Play a film or program with dialogue and music. Confirm that dialogue is clear from the seats, that left and right channels match the screen if you use stereo speakers, and that the audio does not lag noticeably behind the image. Use the receiver or sound system’s lip-sync setting if needed. Set a comfortable volume before the viewing session.
Sit in each regular viewing seat and check for blocked sightlines, distracting glare, and a picture size that feels comfortable. Inspect the mount and cable connections once more. Save or note any input and picture settings that you changed.
Tip: If the picture appears only after a delay, give the projector time to start and check the source device’s display settings before changing cables.
Check: The image remains visible from the planned seats, the sound is clear and synchronized, and cables and mount are secure.
Common Mistakes to Avoid
- Choosing a projector position before checking its throw-distance range. — Use the exact model’s specifications and measure from the lens to the screen before mounting or routing cables.
- Mounting the projector off-center and applying heavy keystone correction. — Align the lens and screen physically, use lens shift where available, and reserve keystone for small corrections.
- Blocking ventilation openings or placing the projector in an enclosed shelf. — Follow the manual’s clearance requirements and keep intake and exhaust vents unobstructed.
- Connecting the audio system to the wrong device or port. — Plan the signal path first and check each device manual for supported HDMI, ARC, optical, or audio connections.
Troubleshooting
Problem: The projector displays “no signal.”
Solution: Confirm that the source is on, select the matching projector input, and reseat both ends of the HDMI cable. If a receiver is in the path, check its input and output settings. Test with a shorter known-working cable to isolate a cable or long-run issue.
Problem: The image does not fit the screen.
Solution: Recheck the lens-to-screen distance against the throw chart. Adjust projector position or optical zoom, then check the source’s aspect ratio and display scaling.
Problem: The image looks blurry or unevenly focused.
Solution: Focus using text or a test pattern from your normal seating position. Confirm that the projector is level and square to the screen. Clean the lens only as the manual directs, using a suitable lens cloth.
Problem: There is no sound or the sound is out of sync.
Solution: Check the selected audio output, receiver input, and cable connection. Confirm that the source and receiver use a compatible audio format. Adjust lip sync in the audio system if dialogue does not match the picture.
What Success Looks Like
Your setup is complete when the projected image fits the screen, has square edges, and appears sharp from the usual seats. The projector stays stable with clear ventilation, the selected source displays without signal interruptions, and audio comes from the intended speakers with dialogue synchronized to the picture. A short viewing session should not reveal blocked sightlines, loose cables, distracting glare, or an uncomfortable image height.
Next Steps
Keep the projector manual and note the final distance, input, and picture settings. Clean the lens and air filter only on the schedule and using the method specified by the manufacturer. Check that vents remain clear and that cables and mounting hardware stay secure. Recheck focus and alignment if the projector is moved, the screen changes, or the image shifts.
Frequently Asked Questions
Can I project onto a white wall instead of buying a screen?
Yes, if the wall is smooth, clean, and a neutral light color. Wall texture, paint color, and unevenness can affect detail and color. A dedicated screen may give a more uniform surface and can help in rooms with some ambient light.
How far should a home theater projector be from the screen?
The distance depends on the projector model and the image size. Use the model’s throw-distance chart and measure from the lens to the screen, following the manufacturer’s instructions.
Do I need a ceiling mount?
No. A stable table or shelf can work when it puts the lens at a suitable height and distance and leaves room for ventilation. Use a ceiling mount when it best suits your room, and attach it to a structural support with the specified hardware.
Why does the picture look dim?
Ambient light, a large image, an unsuitable picture mode, or a lamp or light source nearing the end of its service life can reduce perceived brightness. Darken the room, check the picture mode and lamp status, and consult the manual before changing lamp or light-source settings.
Can I connect a game console or streaming device directly?
Usually. Connect it to a compatible HDMI input on the projector, or route it through an audio-video receiver if you want the receiver to manage sound and video. Check the equipment specifications for supported resolution, refresh rate, and audio formats.