
To create a DIY star ceiling that brings the night sky indoors, start by gathering your materials like glow-in-the-dark paint, star stickers, fiber optics, and proper tools. Plan your design carefully, choosing colors and patterns that fit your space. Prepare the ceiling surface thoroughly to guarantee even application. Apply base coats, then add star patterns and celestial details. Enhance the effect with soft lighting and glow-in-the-dark elements. Keep exploring for more tips to make your starry sky truly stunning.
Key Takeaways
- Gather materials like glow-in-the-dark paint, fiber optics, or star stickers, and prepare tools such as a drill, ladder, and paint supplies.
- Prepare the ceiling surface by cleaning, sanding, and removing fixtures to ensure proper adhesion of paint and decorations.
- Plan your star pattern, choosing star density and constellation layouts, using projectors or stencils for accurate placement.
- Apply a base coat of ceiling-appropriate matte paint, then add star elements using paint, stickers, or fiber optics for a realistic night sky.
- Install ambient lighting and maintain the ceiling regularly to enhance the starry effect and preserve the overall ambiance.

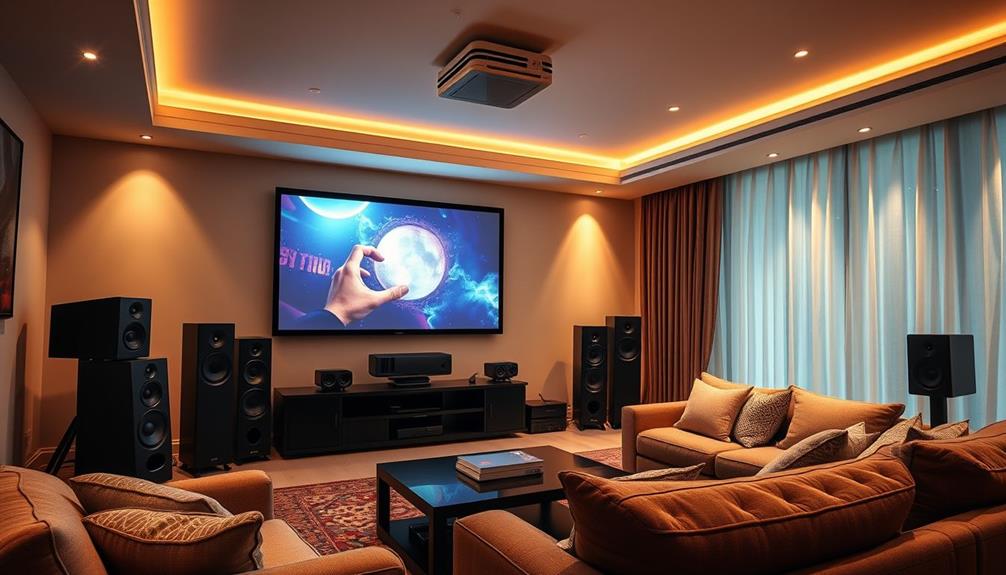
ALR Projector Screen for Standard Throw- Wall Mounted - High Contrast 70% ALR High Brightness 2.7X Gain - 120 inch 16:9 Gray Screen-by SilverMagic
★【Ambient Light Rejection】 The screen effectively suppresses ambient light (70%), significantly improving image contrast. This makes it suitable...
As an affiliate, we earn on qualifying purchases.
Gathering Materials and Tools

Before you begin your DIY star ceiling project, it is essential to gather all the necessary materials and tools. Start by selecting your lighting options, such as fiber optic cables or glow-in-the-dark paint, depending on your desired effect. You’ll also need tools like a drill, scissors, a ladder, and a measuring tape. Safety precautions are indispensable—wear protective glasses and gloves, especially when handling sharp tools or electrical components. Make sure your workspace is well-ventilated and clear of clutter. Double-check that you have enough lighting supplies and adhesive materials to secure the fibers or paint. Proper sound healing science can also inform your choice of calming lighting effects, creating a more serene atmosphere. Understanding real couples and their experiences can inspire personalized touches to your ceiling design, making it uniquely meaningful. Additionally, understanding anime culture and storytelling can inspire creative ideas for your ceiling design, making it uniquely personal. Selecting the appropriate paint sprayer can significantly streamline your project, especially when applying paint or sealants efficiently. Proper preparation ensures a smooth installation process and a stunning final look, so don’t skip this critical initial step. Incorporating lighting psychology principles can help you choose colors and intensities that promote relaxation and well-being in your space.

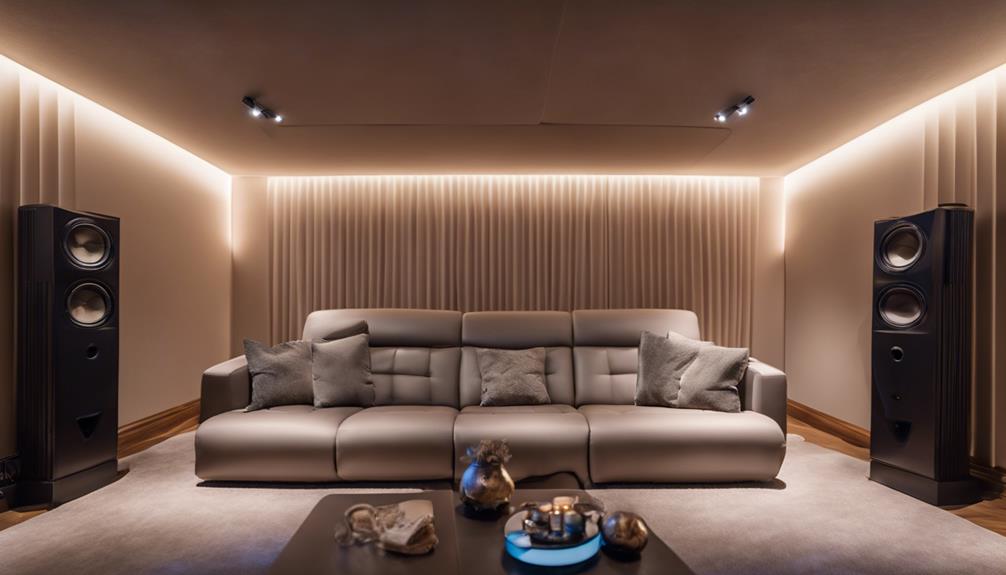
Fixed Frame High Gain Projector Screen by SilverMagic - 2.6X Gain and 30% ALR - Indoor Wall-Mounted White Screen for Home Theater/Living Room/Patio/Office/Classroom - 120 inch 16:9
★【 Significantly Brighter】The unique SilverMagic material delivers significantly brighter images than a standard white screen, especially when viewed...
As an affiliate, we earn on qualifying purchases.
Planning Your Design and Layout

Planning your design and layout is a crucial step to guarantee your star ceiling turns out just how you envision it. Start by considering the lighting ambiance you want to create—calm and relaxing or vibrant and lively. Think about your preferred color schemes; soft whites and blues evoke a serene night sky, while brighter colors add energy. Sketch a rough layout, marking where you’ll place the star points and any constellations or patterns. Decide on the density of the stars to balance realism with visual appeal. Keep in mind the overall room decor and how your design complements it. Taking time to plan ensures your star ceiling reflects your style and creates the perfect atmosphere, making your indoor night sky truly enthralling. Incorporating diverse designs and materials can enhance the visual depth and authenticity of your starry ceiling. Additionally, exploring different lighting techniques can help achieve the desired mood and highlight your design features effectively. Being aware of regional lighting conditions can also influence your choices of illumination and materials, ensuring your star ceiling looks stunning under your specific room environment. Furthermore, researching light pollution levels in your area can help you select the most effective lighting options for optimal star visibility indoors.

Valerion 120-inch Fixed Frame Projector Screen, 1.3 dB Gain, 80% PQE, 4K/8K Ultra HD, 3D Wall Mount Projector Screen, Works with Long Throw, Short Throw & Ultra Short Throw Projectors
Matte White Screen with 1.3 Gain:Provides enhanced brightness and contrast for superior image quality, ensuring vivid and clear...
As an affiliate, we earn on qualifying purchases.
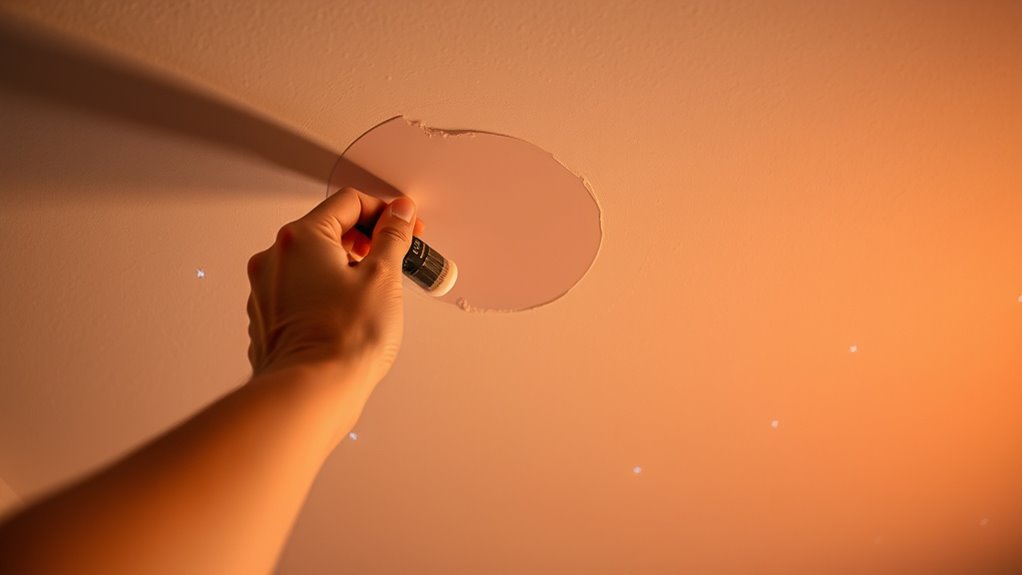
Preparing the Ceiling Surface

Preparing the ceiling surface is essential to guarantee your star ceiling adheres properly and looks professional. Start by inspecting the ceiling texture; smooth surfaces work best, so you may need to sand down rough patches or uneven areas. Remove or temporarily cover existing fixtures like light fixtures and vents to prevent interference and ensure a clean surface. Clean the ceiling thoroughly to eliminate dust, grease, or cobwebs that could affect adhesion. If the ceiling has a glossy finish, lightly scuff it with fine-grit sandpaper to improve paint or adhesive grip. Confirming the surface is dry, smooth, and free of debris creates ideal conditions for your project, helping your starry sky stay intact and look seamless. Additionally, understanding the types of ceiling finishes can help you choose the best surface for your DIY star ceiling project. Incorporating advances in surface preparation techniques can further enhance the adhesion and durability of your installation. Proper surface preparation is also crucial in addressing trust issues with ceiling surfaces, ensuring that your adhesive bonds securely over time. Being aware of common surface issues can help you troubleshoot potential problems early and ensure a long-lasting installation. Moreover, using appropriate preparation tools can make the process more efficient and effective.

Akia Screens Fixed Frame Projector Screen 120-Inch, 16:9, Wall Mount, CINEWHITE UHD-B, 4K/8K Ready, Indoor Home Theater, AK-FF120WH2
120-INCH 16:9 FIXED FRAME DISPLAY: 120-inch diagonal fixed frame projector screen with a 16:9 aspect ratio. Designed for...
As an affiliate, we earn on qualifying purchases.
Applying a Base Coat or Paint
Choose a paint that’s suitable for ceilings, preferably one with a matte finish to hide imperfections. When applying the base coat, use smooth, even strokes to make certain a uniform look. Taking your time with even coats will make the final starry effect much more striking. Additionally, selecting a paint that enhances the cozy farmhouse ambiance can help create a warm and inviting atmosphere in your space. Color accuracy and the ability to calibrate your paint choices can further improve the overall effect, ensuring the stars look realistic and vibrant. Natural materials like linen or wood-inspired paints can contribute to this effect. Incorporating skincare ingredients such as glycolic acid in your paint or finishing products can improve the durability and finish of your project, making the surface more resistant to wear and air purification benefits, which can help maintain a cleaner indoor environment over time. Using paint with anti-fungal properties can also help maintain the ceiling’s appearance over time, especially in humid environments.
Selecting Appropriate Paint
To create a realistic starry sky on your ceiling, selecting the right paint is essential. You’ll want a paint with a finish that suits your desired look. A gloss finish reflects more light and can make stars appear brighter, but it may also highlight imperfections. A matte finish offers a softer, non-reflective surface that can create a more subtle night sky. Consider the overall room lighting and your aesthetic goals. Here’s a quick comparison:
| Finish Type | Pros | Cons |
|---|---|---|
| Gloss | Bright, vibrant stars | Shows surface imperfections |
| Matte | Soft, realistic look | Less reflective, may dull glow |
| Satin | Balanced shine | Slightly reflective |
| Eggshell | Slight sheen, smooth | Not very reflective |
| Flat | Non-reflective, matte | Less durable |
Choose based on your desired star effect and room lighting. Additionally, using specialty paints designed for effects can enhance the realism of your night sky. Incorporating lighting techniques can further improve the overall starry effect and ambiance in your space. For added depth, consider applying a base coat before the star paint to create a more immersive night sky. Proper surface preparation and understanding paint finishes are crucial for achieving the best results in your DIY project.
Applying Even Coats
Applying even coats of paint is essential to achieving a smooth, professional-looking star ceiling. To do this, focus on your brush techniques, using long, steady strokes to distribute paint evenly. Keep your brush loaded with the right paint consistency—neither too thick nor too runny—so that the coat applies smoothly without drips or streaks. Work in small sections, overlapping each pass slightly to avoid visible lines. Maintain a consistent pressure on your brush to prevent uneven texture. If you notice streaks or uneven areas, wait for the first coat to dry completely before applying a second. Proper brush techniques combined with the right paint consistency ensure your ceiling has a flawless, uniform finish that sets the perfect stage for the star effects.
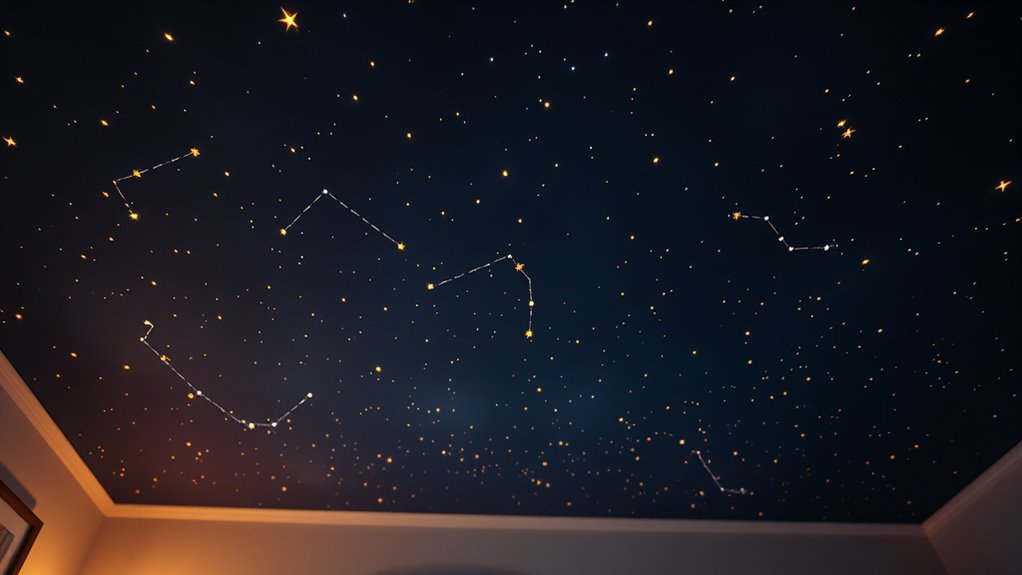
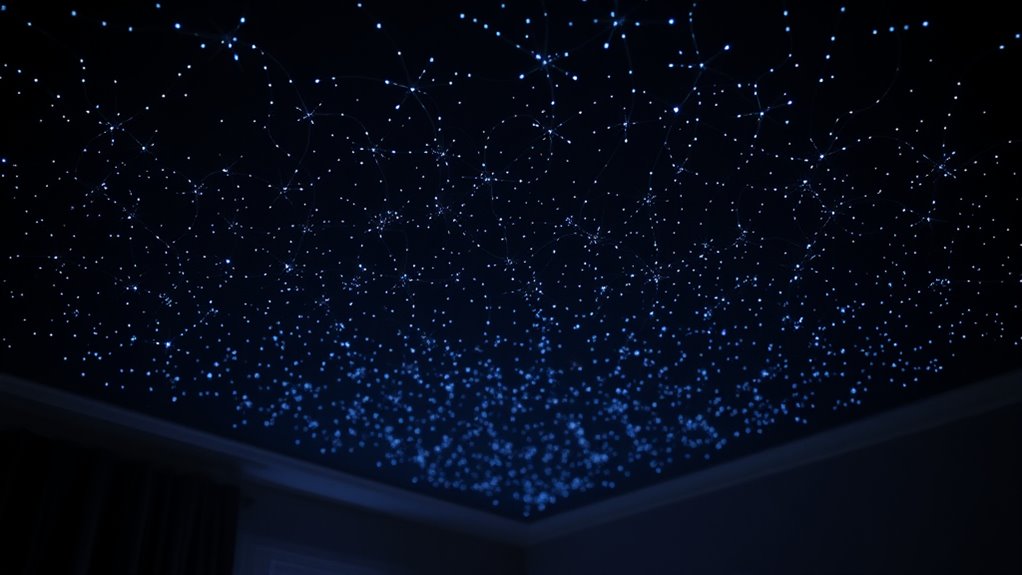
Creating the Star Patterns

Creating the star patterns is a essential step that transforms your ceiling into a realistic night sky. To achieve this, you can use fiber optics or laser projectors for precise placement. Here are key steps:
- Decide on star density and distribution to mimic real constellations.
- Use a laser projector to cast random star patterns across the ceiling, adjusting focus for varied sizes.
- Install fiber optics in strategic spots to create pinpoint stars, easily controlled with small diffusers.
- Mix different methods—laser for broad patterns and fiber optics for twinkling effects—to add depth and realism.
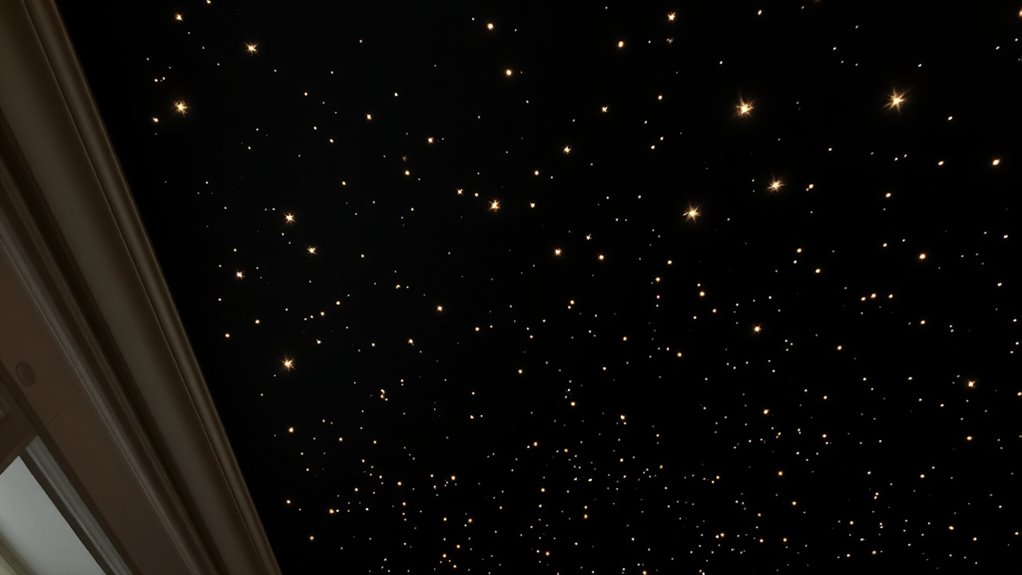
Installing the Glow-in-the-Dark Paint or Stickers
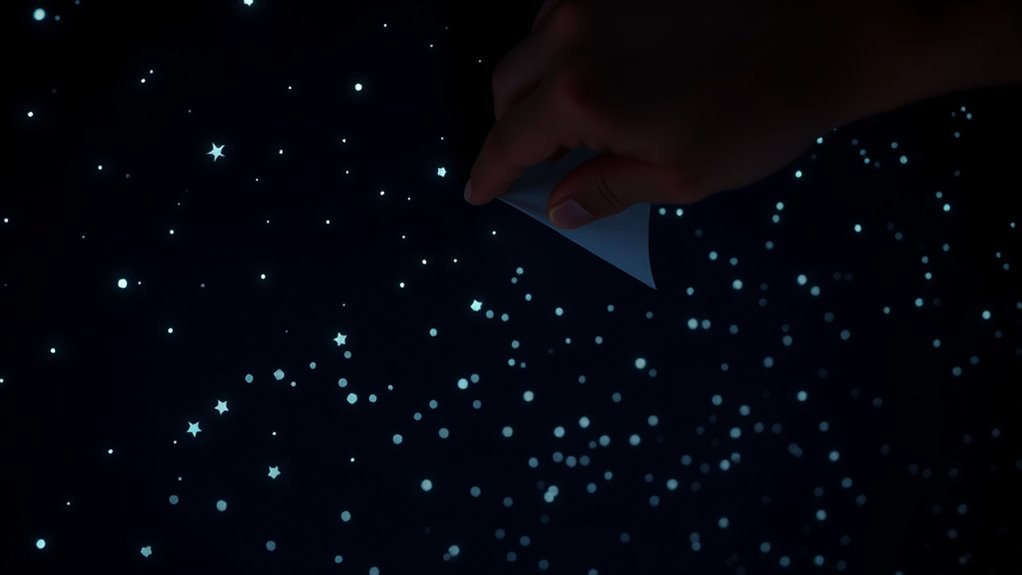
Once you’ve established the star patterns on your ceiling, it’s time to bring them to life with glow-in-the-dark paint or stickers. Apply the glow in the dark paint carefully over your celestial patterns, making certain even coverage for a natural glow. If using stickers, peel and place each one precisely on your pre-drawn designs, pressing firmly to eliminate air bubbles. For the best glow, expose the painted or stickered ceiling to light before turning off the lights. The glow in the dark elements will absorb energy and emit a soft light, creating a realistic night sky. Take your time to guarantee all stars and celestial patterns are properly highlighted, resulting in a stunning, luminous star ceiling that mimics the night sky indoors.
Adding Additional Celestial Elements
You can make your star ceiling more dynamic by adding shooting stars or constellation stickers. These elements create a more realistic and mesmerizing night sky. Consider placing them strategically to enhance the overall celestial effect.
Incorporating Shooting Stars
Have you ever wondered how to make your star ceiling even more dynamic and mesmerizing? Incorporating shooting stars adds an exciting burst of movement and wonder. To do this effectively, consider these steps:
- Use fiber optic cables or LED strips to simulate shooting stars, creating quick streaks across your ceiling.
- Time the flashes with a controller to mimic natural shooting star patterns, enhancing realism.
- Integrate celestial myths by placing shooting stars near specific star map regions, telling stories through your design.
- Apply star mapping techniques to position shooting stars accurately, making your celestial scene more authentic.
This approach makes your ceiling not just a mirror of the night sky but a spellbinding story of celestial myths, complete with fleeting shooting stars that leave lasting impressions.
Using Constellation Stickers
Adding constellation stickers to your star ceiling is an easy and versatile way to enhance its celestial realism. These stickers can represent specific constellation symbolism, adding personal meaning or educational value. Choose stickers with high sticker durability to guarantee they stick securely and last over time, even in humid conditions. To visualize, imagine the night sky with a few well-placed constellations:
| Constellation | Symbolism |
|---|---|
| Orion | Warrior, strength |
| Cassiopeia | Queen, beauty |
| Ursa Major | Great bear, guidance |
Placing these stickers thoughtfully creates an authentic sky, helping you connect with the stars and deepen your appreciation for celestial patterns. Stickers are a simple, durable addition that elevates your DIY star ceiling.
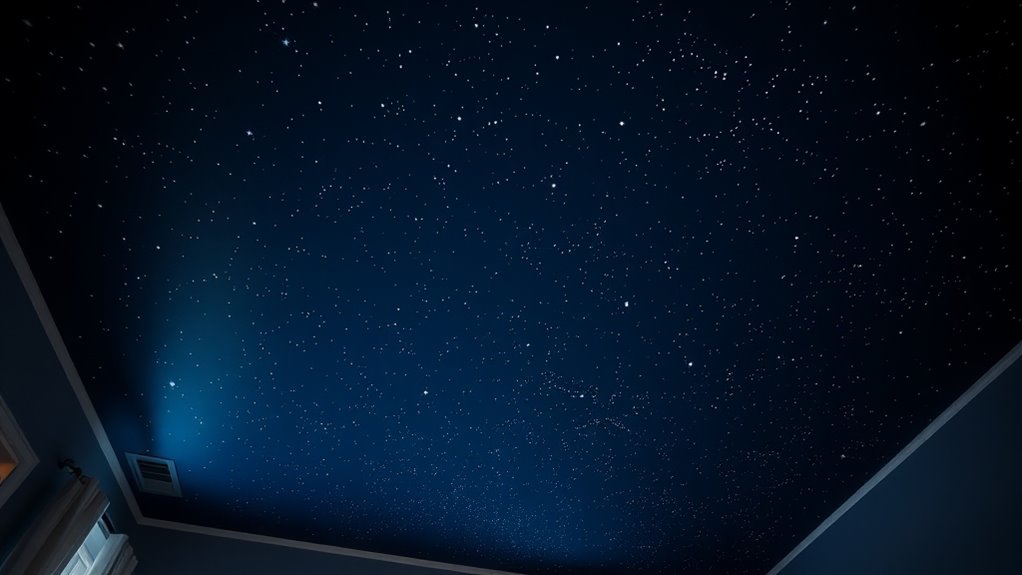
Setting Up Ambient Lighting for Effect
To create a mesmerizing star ceiling, setting up ambient lighting that highlights the twinkling effect is essential. Proper ambient lighting enhances the overall mood and makes your indoor night sky more immersive. Here’s how to do it:
Create a cozy, immersive night sky with soft, dimmable LED lighting and warm tones.
- Choose soft, dimmable lights to prevent overpowering the stars.
- Install LED strip lights along the ceiling edges for even, subtle illumination.
- Use warm-colored bulbs to create a cozy, relaxing atmosphere.
- Dim or turn off main lights when you want the star effect to shine brightest.
These steps help you control the mood, making your DIY star ceiling a stunning, atmospheric feature that invites relaxation and wonder. Proper ambient lighting is key to mood enhancement and the overall effect.
Tips for Maintenance and Enhancing Your Starry Sky
Regular maintenance is key to keeping your star ceiling looking its best, ensuring the twinkling effect remains vibrant and clear. To preserve the long-term durability, use gentle cleaning techniques like a soft microfiber cloth to remove dust and fingerprints without damaging the surface. Avoid harsh chemicals or abrasive cleaners that could degrade the materials over time. Regularly inspect your ceiling for signs of wear or damage, addressing issues early to prevent deterioration. Keep the area free of excess humidity and avoid direct contact with water, which can affect the adhesive and star effects. Enhancing your starry sky is simple—consider adding subtle ambient lighting or adjusting the existing lights to boost the glow. Consistent upkeep not only maintains the beauty but also extends the lifespan of your DIY star ceiling.
Frequently Asked Questions
How Long Does a DIY Star Ceiling Typically Last Before Reapplication?
A DIY star ceiling usually lasts around 5 to 10 years before you’ll need to reapply, depending on factors like paint longevity and your maintenance schedule. You should check for fading, peeling, or dust accumulation periodically. Regular cleaning and avoiding excessive humidity can extend its life. When signs of wear appear, a fresh coat of glow-in-the-dark paint will restore the night sky effect and keep your ceiling stunning.
What Safety Precautions Should I Consider During Installation?
When installing a star ceiling, prioritize electrical safety by turning off power and using proper wiring techniques. Guarantee good ventilation considerations to avoid inhaling dust or fumes from adhesives and materials. Wear protective gear like gloves and goggles, and work in a well-lit area. Double-check connections and secure fixtures properly. Taking these precautions helps prevent accidents and ensures a safe, successful installation of your DIY star ceiling.
Can I Customize the Star Patterns for Different Room Sizes?
Planning perfect star patterns for your space starts with understanding room size adaptation. You can personalize patterns by varying the star density and placement to suit different room sizes. Whether you’re creating a cozy corner or a grand hall, adjusting the patterning ensures a balanced, beautiful sky. With clever customization, you’ll craft a celestial scene that’s perfectly tailored, transforming your space into a stunning, starry sanctuary.
Are There Eco-Friendly or Non-Toxic Glow-In-The-Dark Paints Available?
You ask about eco-friendly and non-toxic glow-in-the-dark paints. Yes, many brands now offer eco-friendly paints that are non-toxic, making them safe for indoor use, especially in bedrooms or children’s rooms. These paints typically use natural or low-impact ingredients, reducing environmental harm. Look for labels indicating non-toxic and eco-friendly properties, and choose water-based options for easier cleanup and minimal VOC emissions. This way, you can enjoy a glowing night sky indoors safely.
How Can I Ensure the Ceiling’s Durability Over Time?
To guarantee your ceiling’s durability over time, focus on choosing high-quality, long-lasting materials. Use paints with good material longevity, and apply a protective sealant to prevent wear and fading. Regular cleaning and maintenance are key; gently dust and clean the surface to avoid damage. Avoid harsh chemicals, and fix any chips or cracks promptly. Proper care keeps your star ceiling vibrant and intact for years to come.
Conclusion
Now, with your ceiling transformed into a glowing night sky, you’ll enjoy a peaceful escape right in your home. It’s like gazing up at stars from your cozy room, blending the serenity of the cosmos with the comfort of your space. As you marvel at your handiwork, remember that this celestial masterpiece is both a stunning visual and a calming retreat. Your DIY star ceiling turns everyday walls into a universe of wonder.