Designing a DIY projector shelf can transform your space while addressing common challenges like clutter and accessibility. Start by gathering essential supplies, including folding brackets and thin plywood. You'll want to verify proper positioning, with the shelf at least 10 inches below the ceiling for ideal airflow. Use a level during installation to achieve the correct projection angle. Don't forget to enhance your audio with Bluetooth connectivity and external speakers for an immersive experience. With the right steps, you can create a functional and stylish solution that fits your needs. There's plenty more to discover about maximizing your setup's efficiency!
Key Takeaways
A dedicated DIY projector shelf reduces clutter and enhances accessibility for your projector and devices, improving overall organization.
Utilize folding brackets and thin plywood or melamine for a sturdy, stable shelf that can support the projector's weight.
Proper positioning is crucial; maintain at least 10 inches below the ceiling and adjust height based on the projector's lens shift capabilities.
Incorporate external audio systems with Bluetooth connectivity to significantly enhance sound quality and create a seamless viewing experience.
Explore community insights for creative modifications and soundproofing techniques to avoid resonance and improve usability.
SOULWIT 50Pcs Self Adhesive Cable Management Clips, Cable Organizers Wire Clips Cord Holder for TV PC Ethernet Cable under Desk Home Office (Black)
🔷SUPER EASY TO USE: Stick to clean surface, open tab, insert multiple cables, close the tab, enjoy the...
As an affiliate, we earn on qualifying purchases.
Understanding Projector Setup Challenges
Setting up a projector can feel like an intimidating task, especially when you're juggling multiple devices and trying to position everything just right. You'll often find yourself relocating devices like your Switch and Apple TV, which can be time-consuming.
A well-designed Projector Shelf can ease this process by providing a dedicated space for all your devices, minimizing clutter and ensuring everything's within reach. Additionally, considering eco-friendly practices like utilizing locally sourced materials for your shelf can further enhance your project's sustainability while supporting eco-friendly living.
Choosing a standard projector offers a budget-friendly alternative to large TVs, but it can raise aesthetic concerns if visible equipment spoils your decor. To tackle this, consider utilizing outlets behind furniture for easier connections of HDMI cables essential for linking your devices to the projector.
If you're looking for a simpler solution, all-in-one projectors with built-in streaming services can markedly reduce the number of external devices you need to connect.
Don't forget about sound quality! Projectors with integrated Dolby Audio can enhance your experience, addressing the common problem of limited audio performance often hindered by fan noise.
SOULWIT 50 Pcs Self Adhesive Cable Management Clips, Cable Organizers Sticky Wire Clips Cord Holder for TV PC Laptop Ethernet Cable Desktop Home Office (Black)
🔷EASY TO USE: Simply peel and stick, making your home look tidier.
As an affiliate, we earn on qualifying purchases.
Essential Supplies for Your Project
When creating your DIY projector shelf, you'll need to gather a few essential supplies to guarantee a sturdy and functional setup. Start with ten folding brackets; they'll provide the necessary support for your shelf while allowing easy access when you need it.
For the shelf surface, choose a thin plywood or melamine board. This choice offers a stable, aesthetically pleasing platform for your projector.
Next, make sure you have the right tools for assembly. A level and tape measure are vital for ensuring your shelf is perfectly aligned and securely mounted. A stud finder will help you locate the best spots for anchoring, while a drill will make the installation process smoother.
You'll also need screws and hollow wall anchors to firmly mount the shelf, accommodating the typical projector weight of around 34 lbs.
While you're setting things up, consider using temporary brackets for initial leveling and positioning checks. This allows you to make adjustments before finalizing the setup, ensuring everything's just right.
With these supplies in hand, you'll be well on your way to creating the perfect built-in solution for your projector.
XHF 120 PCS Adhesive Cable Wire Clips Black, Outdoor Christmas Light Clips, Cable Management Wire Organizer Cord Holder for Under Desk, Car, Wall, TV PC Ethernet Cable
High quality material:XHF Adhesive Cable Clips are manufactured from Strong Adhesive and PA66 nylon
As an affiliate, we earn on qualifying purchases.
Step-by-Step Assembly Instructions
Now that you've gathered your essential supplies, it's time to start assembling your projector shelf.
You'll need to follow a clear process to guarantee everything fits perfectly and functions smoothly.
Materials Needed for Assembly
To successfully assemble your DIY projector shelf, you'll need a few essential materials. Start with ten folding brackets, which are vital for creating a sturdy and functional shelf. A clean and organized workspace can also enhance your efficiency during the assembly process and contribute to a more enjoyable DIY experience; consider incorporating health and wellness benefits of a tidy environment.
Choose thin plywood or melamine board for the surface; make certain it's cut to the desired width to accommodate your projector dimensions. You'll also need some blocks to secure the shelf within the bracket frame.
Next, gather the necessary tools: a level, tape measure, stud finder, and drill. These tools will help guarantee accurate measurements and secure installation. Use screws and hollow wall anchors for mounting the brackets, as these provide the stability you need. Before you begin, mark the corners of any decorative piece to determine bracket placement accurately.
Adjust the bracket height for ideal projector positioning, and test the folding and unfolding mechanisms to guarantee smooth operation during assembly. After aligning and securing the shelf with brackets using screws, verify that everything is square and properly aligned. This attention to detail will help you create a reliable and visually appealing projector shelf that meets your needs.
Assembly Process Overview
As you commence on assembling your DIY projector shelf, start by cutting the aluminum extrusion pieces to the specified lengths: 500mm for the sides and 237mm for the front cross brace.
Guarantee precision for a stable structure. Next, use corner brackets to join the side pieces with the rear crossbar.
Install a pillow bearing and mount the stepper motor centrally for peak shelf movement.
Then, pre-drill holes on the mounting block of the shelf and attach it to the slides, guaranteeing there's enough clearance for the motor and smooth operation during extension and retraction.
Secure the shelf to the mounting block using four M4x30 screws.
Make sure all connections are tight, as this is vital for stability when placing your projector.
Final Testing Procedures
Once you've assembled your DIY projector shelf, it's time to focus on the final testing procedures. Start by conducting a clearance check. Verify the shelf slides smoothly over existing furniture and adjust the bottom attachment arms until the rubber seal compresses properly.
Next, test the projector and shelf movement by manually operating the lead screw. Check for any binding and adjust the alignment as necessary for peak function. Confirm that the stepper motor is centered and secured. This step is vital for proper operation during the extension and retraction of the shelf.
After these adjustments, apply your preferred finish—paint, stain, or sanding—making sure all components are securely fastened and visually appealing before use.
120 PCS Cable Clips, Adhesive Cord Clips for Wires on Wall, Strong Wire Clips Holders Cord Organizer for Cable Management, Christmas Lights, USB, Phone Charger, Cat 6, Car Dash Cam (Small, Black)
What You Get: Our cable clips package comes with 120 pcs black wire clips, they are nicely organized...
As an affiliate, we earn on qualifying purchases.
Positioning and Installation Tips
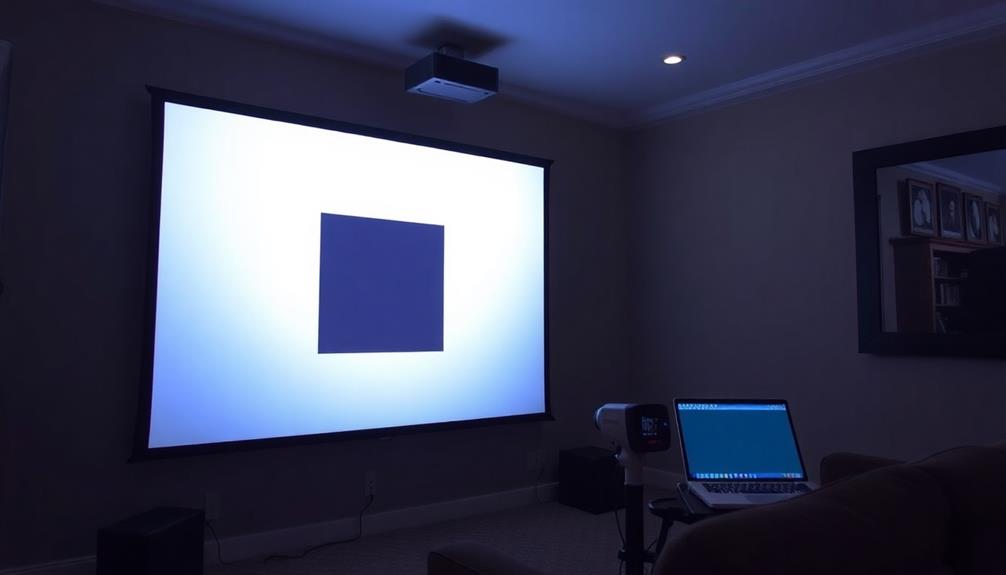
Positioning your projector shelf correctly is vital for achieving the best viewing experience. Start by verifying that the shelf is at least 10 inches below the ceiling, allowing for proper airflow and making maintenance easy.
When it comes to installation, use a level to align the brackets straight. This alignment is essential for the ideal projection angle.
Next, adjust the height of your brackets based on your projector's lens shift capabilities. Aim for the lens to be positioned between 12 to 20 inches from the screen for a clear image.
Don't forget to take into account the room's depth; for a 100-inch 16:9 screen, a distance of 9.9 to 20.1 feet is recommended to guarantee a fantastic viewing experience.
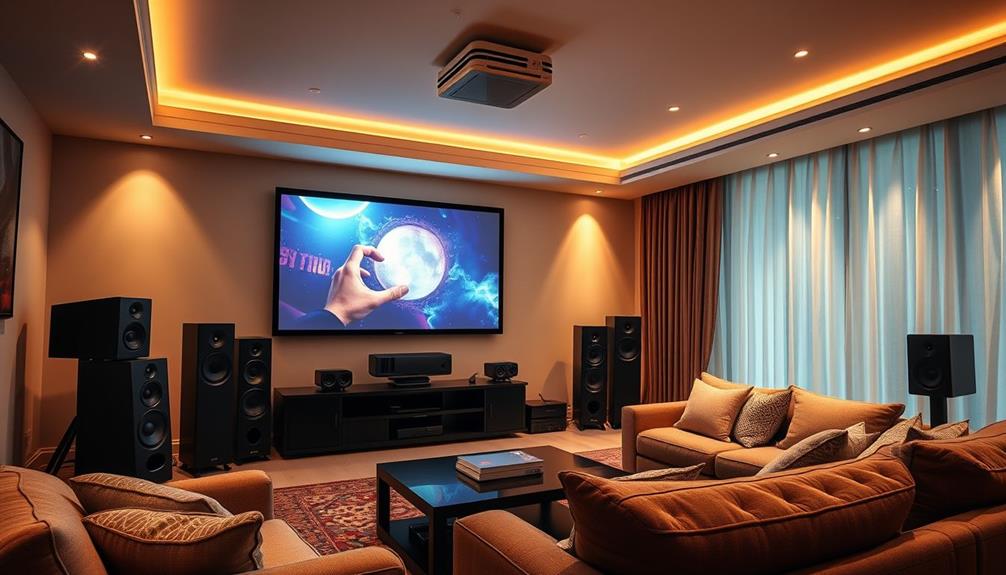
Enhancing Audio for Your Projector
To truly elevate your projector experience, consider investing in an external audio system that complements your setup.
With the rise of smart technology, incorporating features like Google Pay security measures can enhance your overall entertainment safety.
With Bluetooth connectivity, you can easily link your projector to speakers or streaming devices, enhancing sound quality without messy wires.
Plus, positioning your speakers strategically can create a more immersive atmosphere, making movie nights unforgettable.
Choosing External Audio Systems
Enhancing your projector's audio experience can greatly elevate your viewing sessions, especially since many projectors struggle with sound quality due to fan noise.
Investing in external audio systems is a practical way to boost the overall sound quality. Look for systems that offer features like Dolby Audio, which can notably complement the visual quality of your projector.
When choosing external speakers, consider options with Bluetooth connectivity. This allows for easy pairing with your projector, providing you with the flexibility to connect to portable speakers or high-quality bookshelf speakers, like those from Sony.
Positioning these speakers behind the screen can create an immersive cinematic experience, as sound will seem to come directly from the action unfolding on-screen.
Don't forget to assess your viewing environment. For larger spaces, you might want a more robust audio system, while smaller settings can benefit from compact speakers.
Bluetooth Connectivity Options
Bluetooth connectivity considerably improves your projector's audio capabilities, making it easier to connect high-quality external speakers or soundbars. Many projectors now come with built-in Bluetooth, allowing for seamless pairing with these audio systems.
By utilizing Bluetooth, you can considerably enhance your audio experience, as external speakers often deliver superior sound compared to the projector's built-in options.
Some projectors even support multiple Bluetooth connections, which means you can effortlessly switch between devices during presentations or movie nights. This feature provides flexibility and convenience, letting you customize your audio setup based on your needs.
Moreover, Bluetooth connectivity eliminates the hassle of messy cables, creating a cleaner, more organized viewing environment. You won't have to worry about tripping over cords or dealing with tangled wires, which can detract from your projector's aesthetic appeal.
When choosing a projector, look for models that feature integrated Dolby Audio or similar technologies. These enhancements can further improve your audio experience when paired with compatible Bluetooth devices, ensuring that you enjoy the best sound quality possible for your movies and presentations.
Speaker Positioning Techniques
Positioning your speakers effectively can make a world of difference in your projector setup.
With the right speaker positioning techniques, you can create an immersive audio experience that complements your visuals. Here are three key strategies to evaluate:
1. Speakers Behind the Screen: Installing your speakers behind the screen reduces sound travel distance, enhancing clarity and immersion.
This positioning creates a seamless audio-visual experience, making you feel like you're part of the action.
2. Utilize Bluetooth Connectivity: Integrating external audio systems, like Sony bookshelf speakers, can drastically improve sound quality compared to built-in projector speakers.
This flexibility allows you to customize your audio setup for peak performance.
3. Implement Acoustic Treatment: Lining the interior of your projector shelf with sound-absorbing materials helps minimize sound reflection.
This acoustic treatment enhances clarity and overall audio quality, making your viewing experience even better.
Community Insights and Creative Solutions
When it comes to building the perfect DIY projector shelf, community insights can be a goldmine of inspiration and practical solutions. Numerous forums feature a wealth of designs tailored to various home theater setups, showcasing innovative approaches that can enhance your project.
Members often emphasize the importance of avoiding resonance and vibration issues; soundproofing techniques are frequently discussed to guarantee a stable viewing experience.
You'll find that the evolution of original shelf designs is well-documented, with users sharing their modifications for improved usability. One particularly creative solution involves using picture hanging wire for additional shelf support, which adds both stability and a unique touch to your project.
Additionally, many users have explored inverted shelf designs to mount projectors closer to the ceiling. This method not only facilitates easy access but also allows for quick alignment adjustments, making your setup more user-friendly.
Frequently Asked Questions
How Can I Make a Good Quality Projector at Home?
To make a good quality projector at home, choose a bright projector with the right throw ratio, prioritize lens shift capabilities, and consider soundproofing to enhance audio. Proper placement and setup are essential for ideal performance.
How to Mount a Projector With No Holes?
When it comes to mounting a projector with no holes, think outside the box. You can use heavy-duty adhesive strips, tension rods, or repurpose furniture, ensuring your setup's stable without damaging your walls or ceiling.
How to Hide a Short Throw Projector?
To hide a short throw projector, you can install it in a custom box with acoustic materials, ensuring proper ventilation. Use a motorized shelf for easy concealment when not in use, improving your room's aesthetics.
How to Attach a Projector to a Wall Without Drilling?
Imagine your dreams projected onto a blank canvas. To attach your projector without drilling, use heavy-duty adhesive mounts or a sturdy mounting bracket, ensuring it holds securely while you create your perfect viewing experience.
Conclusion
In the grand theater of home entertainment, a well-designed projector shelf is your stage, elevating both your projector and viewing experience. With the right supplies and thoughtful assembly, you're not just building a shelf—you're crafting a portal to immersive cinema. Remember, positioning is key; it's like finding the perfect seat in a packed auditorium. So, embrace your creativity, enhance your audio, and let your project shine like a star in your living room sky!
Projector sound systems vary from basic built-in speakers to audiophile setups; discover how to elevate your audio experience for an immersive viewing adventure.
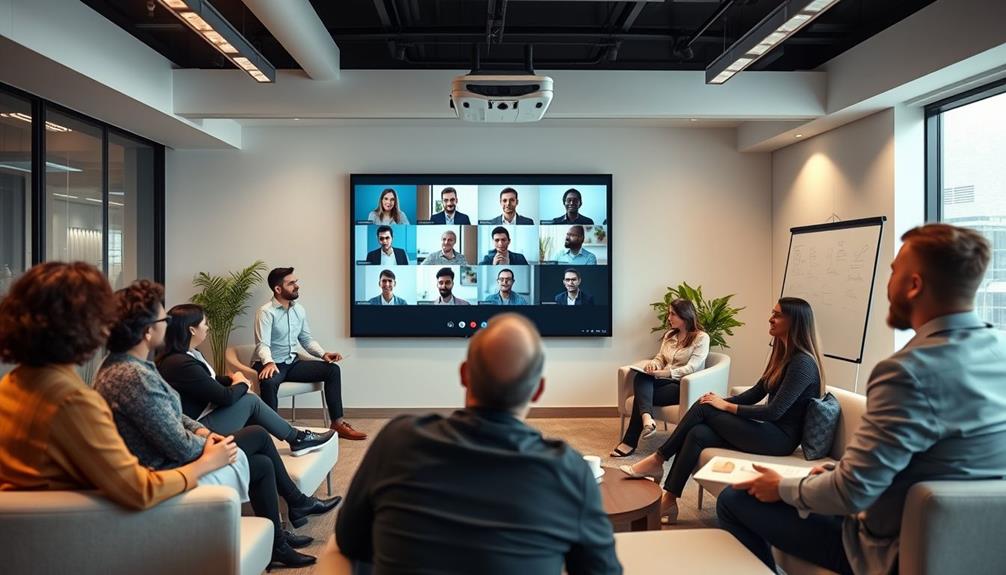
How to Use Your Projector for Video Conferencing and Virtual Meetings
Set up your projector for seamless video conferencing and discover essential tips for a professional virtual meeting experience that will elevate your communication.
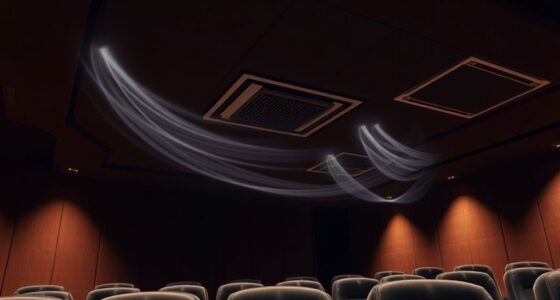
When designing ventilation and airflow for enclosed theater rooms, understanding key strategies can make all the difference in comfort and air quality.