To refresh your headphones in just 10 minutes, start by choosing the right replacement pads that match your headphone model and preferred comfort (like leather or velour). Gather simple tools such as a flat-head screwdriver or pry tool to remove the old pads gently. Clean the ear cups thoroughly before attaching the new pads, making sure they align evenly and fit snugly. Keep these tips in mind to extend your pads’ lifespan and enjoy improved sound and comfort—continue for detailed steps and expert advice.
Gather compatible replacement pads and the necessary tools like pry tools or screwdrivers before starting.
Carefully remove old pads using gentle prying to avoid damaging the headphone or ear cups.
Clean the headphone surface thoroughly to ensure a secure and hygienic fit for the new pads.
Align the new pads evenly around the ear cups and press firmly to secure them in place.
Regularly clean and store your headphones properly to extend the lifespan of the new pads.
SwitchBot Universal Remote Control with Hub Mini Matter Enabled, Multi-use Smart Remote with Customize App, Control 25 IR/Bluetooth Devices and 10 Scenes, Compatible with TV/AC/SwitchBot BLE Devices
Compatibility Check Before Purchase – IR & Bluetooth Limitations: Please confirm device compatibility before purchasing or contact SwitchBot...
As an affiliate, we earn on qualifying purchases.
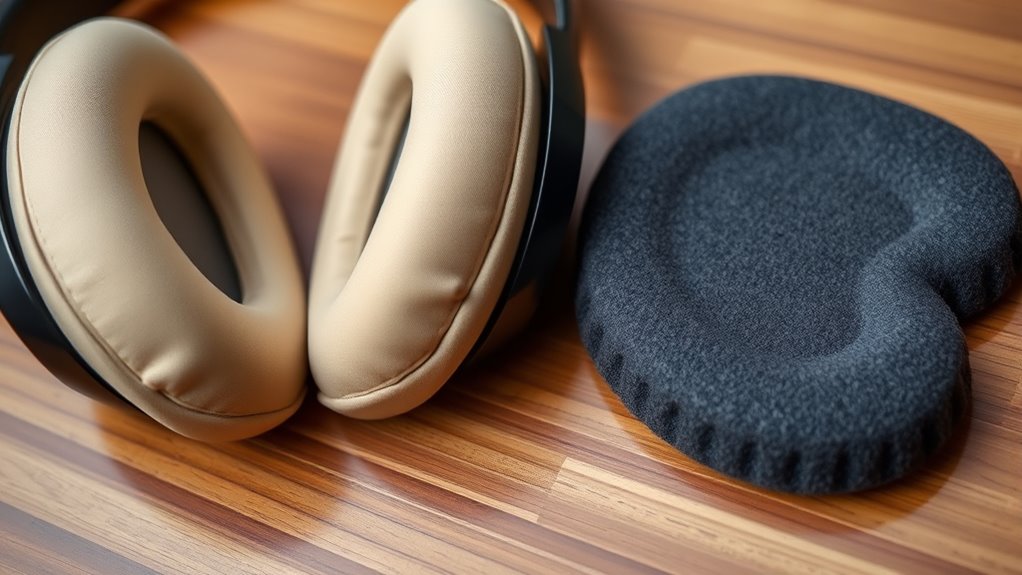
Choosing the Right Replacement Pads for Your Headphones
When selecting replacement pads for your headphones, it’s essential to contemplate both comfort and compatibility. The pad material markedly impacts how your headphones feel during extended use, with options like memory foam, leather, or velour offering different comfort levels. Consider how the material interacts with your skin and whether it suits your climate—breathable fabrics prevent overheating. Additionally, the material’s durability influences how long your replacement pads will last and maintain their comfort. Using quality materials can also enhance the overall sound isolation provided by your headphones, improving your listening experience. Equally important is ensuring headphone compatibility; not all pads fit every model. Measure your original pads or check your headphone manufacturer’s specifications to find compatible replacements. Properly matching the pad material and ensuring compatibility guarantees a secure fit, improved sound isolation, and a more enjoyable listening experience. Additionally, being aware of local resources can assist in finding quality replacement pads and accessories. For specific models like the Kia Forte or Kia Sportage, understanding the tuning options can help you customize and enhance your vehicle’s performance and aesthetics. To ensure a seamless fit, consulting manufacturer guides can provide detailed instructions and compatibility lists for your headphone model.
(XRT270) for VIZIO Smart TV Universal Voice Remote Control XRT270, 4K FHD Compatible, Premium Series Replacement
Universal voice-enabled remote designed for VIZIO Smart TVs (2019-2023 models), compatible with premium 4K/FHD and advanced display series....
As an affiliate, we earn on qualifying purchases.
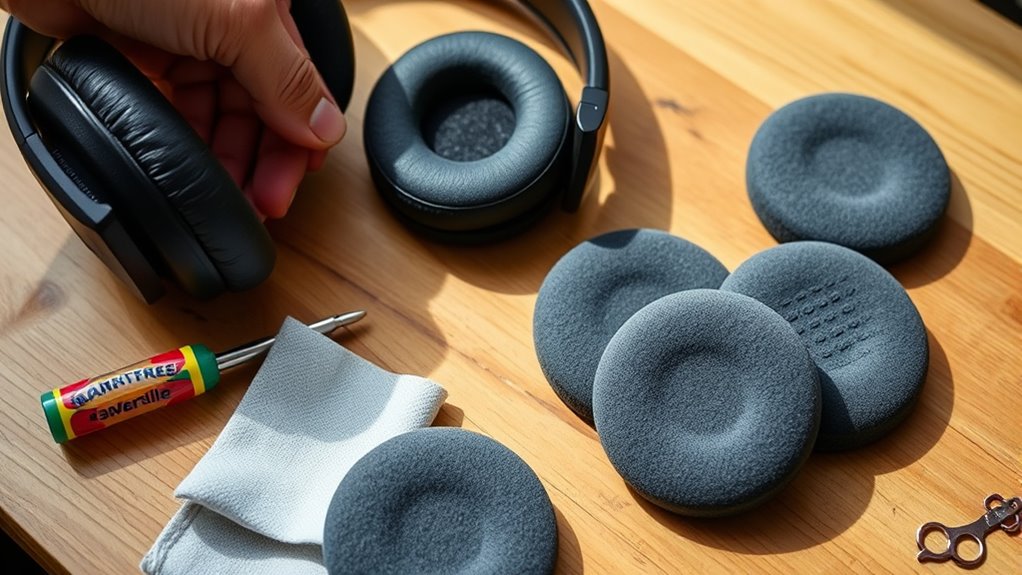
Gathering Easy-to-Use Tools and Materials
To successfully replace your headphone pads, you need to gather a few simple tools and materials that are easy to use. First, choose the right tools: a small flat-head screwdriver or plastic pry tool helps lift the pads without damage. Second, select materials suited for your headphone style and preferred material options, like foam, leather, or velour. Third, have a clean cloth or cloth wipes ready to remove dust and residue for a smooth installation. No matter your headphone style, these basic tools make the process straightforward. Focus on lightweight, user-friendly items that won’t damage delicate components. With these essentials on hand, you’ll be ready to refresh your headphones quickly and easily, ensuring a comfortable fit and fresh look in just minutes.
SofaBaton X1S Universal Remote with Hub, Universal Remote Control with One Touch Activities, Customize SofaBaton APP, Compatible with 60 Devices, Compatible with Alexa Google Assistant, Raise to Wake
X1S Universal Remotes Updates and Smart Connectivity: Compared to the previous generation X1 remote, the upgraded X1S remote...
As an affiliate, we earn on qualifying purchases.
Removing Old Pads and Preparing for Installation
Start by carefully lifting the old pads away from your headphones using your chosen pry tool or small flat-head screwdriver. Gently work around the edges to avoid damaging the headphone surface. Once removed, inspect the pads for any glue or residue; use a mild cleaning method, like a damp cloth or alcohol wipe, to clean the area. If the pads are made of leather, fabric, or foam, consider the appropriate cleaning method to prevent damage. Removing old pads thoroughly prepares your headphones for the new ones, ensuring a secure fit. Take your time to clear away dust, sweat, and debris that can affect comfort and sound quality. Proper preparation guarantees your replacement pads will stay in place and provide optimal comfort and sound quality. Cleaning the area thoroughly can also help prevent bacterial buildup and prolong the lifespan of your headphones.
SofaBaton X2 Universal Remote Control with Touch Screen and Hub, All-in-One Smart Remote with Charging Dock & Custom APP, One-Touch Activities, Works with Alexa, Google Assistant & Home Assistant
【THE PERFECT UPGRADE】This X2 universal remote is designed to replace all your old remotes including IR, Bluetooth, Wi-Fi,...
As an affiliate, we earn on qualifying purchases.
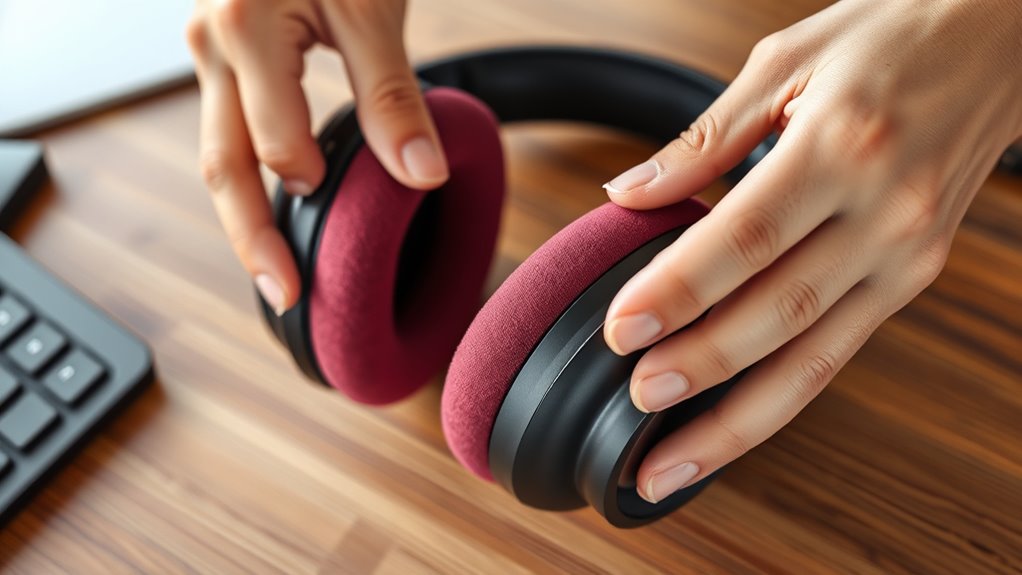
Attaching the New Pads Correctly for Comfort and Fit
Attaching your new pads correctly guarantees a comfortable fit and peak sound quality. First, confirm the material compatibility between the pads and headphone frame to avoid slipping or damage. Next, use proper sewing techniques if your pads need to be stitched to secure them firmly. Proper installation also involves understanding industry trends to ensure compatibility with your specific headphone model. Additionally, paying attention to material properties can help select the best pads for durability and comfort. Finally, follow these steps:
Align the pad evenly around the headphone’s ear cup, making sure it sits flush.
Secure the pad with gentle but firm pressure, checking for gaps or unevenness.
If stitching is required, sew along the edges using appropriate techniques for durability and flexibility.
Ensuring proper installation can also help mitigate data privacy concerns related to device customization.
Tips for Maintaining and Extending the Life of Your Replacement Pads
Proper maintenance is key to keeping your replacement pads comfortable and prolonging their lifespan. Regularly cleaning your headphone hygiene prevents dirt, sweat, and oils from building up, which can degrade the pad material over time. When choosing replacement pads, consider a pad material comparison; some materials like leather or foam are more durable, while others like velour offer breathability. To extend their life, wipe down your pads weekly with a damp cloth and use mild cleaning solutions if needed. Avoid exposing pads to excessive heat or sunlight, as this can cause cracking or deterioration. Proper storage also helps; keep your headphones in a cool, dry place. Additionally, integrating AI-powered maintenance reminders can help you stay on top of cleaning schedules and ensure your pads last longer. Using proper storage techniques can significantly reduce wear and tear over time. Staying informed about celebrity lifestyle trends can also inspire you to personalize your headphone setup for better comfort and style. Incorporating regular inspections can help identify early signs of wear, preventing complete pad replacement. Monitoring wear and tear indicators can further assist in timely maintenance, preserving your pads’ comfort and durability longer. By staying attentive to these maintenance tips, you’ll preserve your pads’ comfort and durability longer.
Frequently Asked Questions
Can I Use Third-Party Replacement Pads With My Headphones?
Yes, you can use third-party replacement pads with your headphones, but you should consider compatibility concerns first. Check if the pads fit your headphone model’s size and attachment style. Material differences matter too—some materials may feel different or affect sound quality. Make sure the third-party pads are designed for your headphones to guarantee comfort, proper fit, and peak performance without damaging your device.
Are There Specific Cleaning Instructions for New Headphone Pads?
Sure, because new headphone pads are so delicate, right? When cleaning, you’ll want to use gentle cleaning solutions and check material compatibility first—no harsh chemicals, or you might ruin them. Lightly wipe with a damp cloth and avoid soaking. Remember, even new pads deserve a careful touch to keep them fresh. Follow these simple steps, and your headphones will thank you with better sound and longer-lasting comfort.
How Often Should I Replace Headphone Pads for Optimal Comfort?
You should replace your headphone pads when they show signs of wear or become uncomfortable, usually every 6 to 12 months. Regularly maintaining headphone hygiene helps extend the padding lifespan and keeps your listening experience fresh. If you notice cracks, loss of cushioning, or persistent dirt, it’s time for a replacement. Doing this ensures maximum comfort and ideal sound quality, making your headphones feel like new longer.
Will Replacing the Pads Affect the Sound Quality?
Think of your headphones as a window, where replacing the pads is like cleaning the glass. When you swap them out, it can restore the seal integrity, ensuring sound quality stays clear and rich. Properly fitted pads prevent sound leakage and improve bass response. If you choose the right replacement, your headphones will sound just as good—or better—making every note crisp and immersive without sacrificing audio performance.
Are There Differences in Replacement Pads for Over-Ear Versus On-Ear Headphones?
You’ll notice differences in replacement pads for over-ear versus on-ear headphones because of the ear cup size and ear pad material. Over-ear pads are larger and cushioned for full ear coverage, often made from plush foam or leather-like materials. On-ear pads are smaller, lighter, and rest directly on your ears, usually with softer foam or fabric. Choosing the right type guarantees comfort and maintains sound quality.
Conclusion
Replacing your headphone pads takes just 10 minutes and can save you up to 30% compared to buying new headphones. Did you know that regular pad replacement can improve sound quality and extend the life of your headphones? By following these simple steps, you’ll enjoy a more comfortable, immersive listening experience without breaking the bank. So go ahead—refresh your headphones today and hear the difference!
Transparency Modes: Staying Aware While Enjoying Movies
Discover how transparency modes let you enjoy movies while staying aware of your surroundings, ensuring you never miss a moment—continue reading to learn more.
Ear Safety: Recommended Volume Levels and Safe Listening Practices
Discover essential ear safety tips, including recommended volume levels and listening practices, to protect your hearing—learn how to avoid long-term damage.