
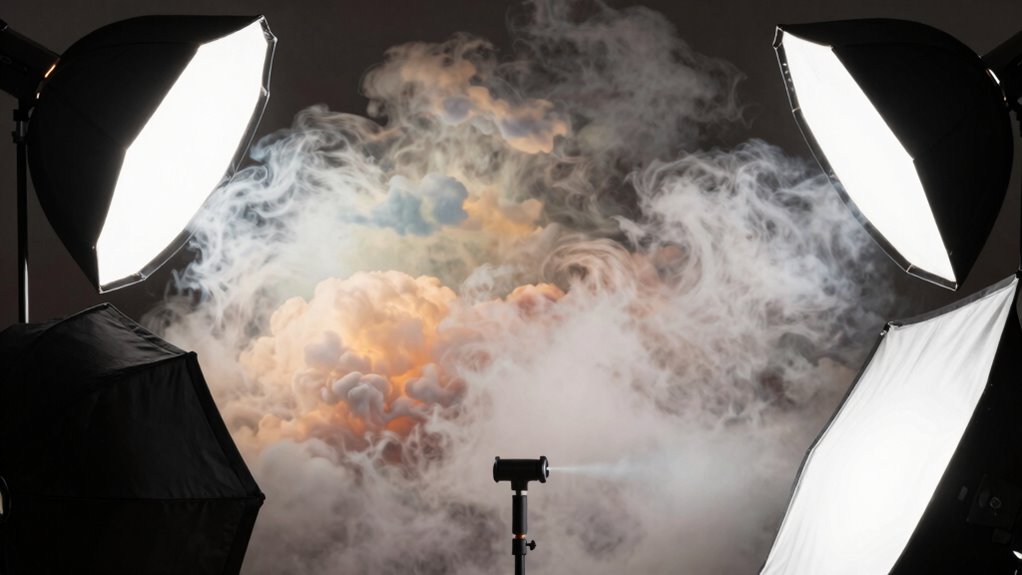
The key trick to instantly improve your atmosphere overhead effects is adjusting your light placement to create natural depth. By strategically positioning lights at different angles, you add shadows and highlights that define layers and bring scene realism. This simple tweak enhances contrast and separates foreground from background effortlessly. If you want to master this effect and more techniques for stunning atmosphere, keep exploring to unleash even better results.
Key Takeaways
- Incorporate layered sound effects with varying volume and textures to add spatial depth and realism.
- Use atmospheric haze and depth cues like perspective and atmospheric perspective to enhance visual layering.
- Adjust lighting angles and shadows to create natural contrast and highlight scene depth.
- Apply color grading techniques that boost contrast and saturation for richer atmosphere.
- Synchronize sound layering with visual cues to reinforce spatial perception and immersion.

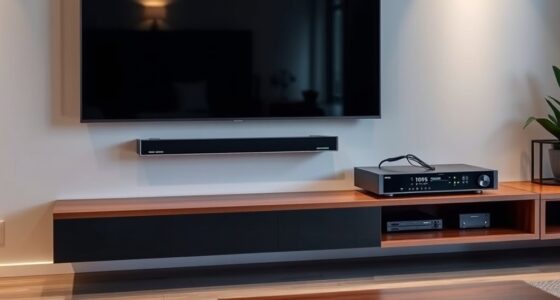
Wohome 2.1ch Small Sound Bars for TV with 6 Levels Voice Enhancement, Built-in Subwoofer, 16 Inches Bluetooth 5.3 Soundbar Speakers with Optical/AUX/USB Connection, S100
2.1 Channel: With one built-in subwoofer deliver powerful deep bass, 2 full range speakers provide clearly voice and...
As an affiliate, we earn on qualifying purchases.
Why Overhead Atmosphere Effects Often Lack Depth: and How to Fix That
Overhead atmosphere effects often lack depth because they tend to be flat and uniform, making the scene feel less immersive. This flatness stems from inadequate sound design and color grading choices that don’t add spatial cues or tonal variation. Without dynamic soundscapes, your scene can seem empty or disconnected. Similarly, poor color grading can make the atmosphere look dull, washing out subtle differences in light and shadow. To fix this, you should incorporate layered sound design that varies in volume and texture, creating a sense of space and movement. Additionally, apply thoughtful color grading to add depth through contrast, saturation, and tonal shifts. Incorporating sound layering techniques can significantly enhance spatial perception. Paying attention to visual depth cues such as perspective and atmospheric haze can further improve the realism. Utilizing spatial audio in your sound design can also greatly boost the sense of immersion, making your overhead effects feel more realistic and engaging. Incorporating subtle lighting variations can also help highlight different atmospheric layers, drawing viewers further into the scene. These tweaks help your overhead effects feel more realistic and engaging, drawing viewers into your scene rather than leaving them detached.

Samsung B-Series Soundbar HW B400F 2.0 ch Soundbar with Built in Subwoofer (2025 Model) One Remote Control, Surround Sound Expansion, Voice Enhance Mode
FULL, BALANCED SOUND WITH A SUBWOOFER INCLUDED: Immerse yourself in your favorite content with perfectly balanced sound and...
As an affiliate, we earn on qualifying purchases.
Common Challenges in Making Realistic Atmos Overhead Effects

Creating realistic overhead atmos effects presents several challenges that can trip up even experienced designers. You might struggle with seamlessly integrating lighting, maintaining proper depth perception, or controlling atmospheric density to achieve the desired look. Recognizing these issues is the first step toward overcoming them and improving your effects. Additionally, understanding home life tips can help you create safer and more effective atmospheric setups. Paying attention to visual cohesion ensures the effects blend naturally within your environment, enhancing realism and safety. Moreover, mastering lighting techniques can significantly improve the overall believability of your atmosphere effects. Incorporating the right projector technology can also enhance image clarity and color fidelity, making your effects more convincing. Proper piercing care and hygiene practices can further prevent disruptions in your setup caused by health issues or infections that could interfere with equipment or setup timing.
Lighting Integration Challenges
Achieving realistic atmos overhead effects often presents significant lighting integration challenges. You need to match the right color temperature to create mood and ensure the material reflectivity aligns with the environment. Inconsistent lighting can make the effect seem unnatural or disconnected from the scene. Balancing these elements requires precise control and understanding of how light interacts with different surfaces. Paying attention to lighting consistency can help create more seamless and convincing effects. Additionally, utilizing trusted resources can assist in troubleshooting and refining lighting setups for better realism. Understanding battery capacity and how it influences power availability can also be crucial when planning complex lighting arrangements for atmosphere effects. Proper calibration of equipment ensures the lighting remains uniform, avoiding hotspots or shadows that disrupt the scene’s realism. Moreover, considering lighting control systems can significantly improve the ability to adapt lighting conditions dynamically for optimal atmospheric effects.
Depth Perception Issues
Even with perfectly matched lighting and materials, viewers can still struggle to perceive depth accurately in atmos overhead effects. One common challenge is inadequate color contrast, which can make different layers or particles blend together, confusing the viewer’s sense of distance. Adjusting color contrast helps separate foreground and background elements, improving depth clarity. Additionally, camera angles play a vital role; a fixed or poorly chosen angle can flatten the scene, making it hard to gauge spatial relationships. Experimenting with dynamic or strategically placed camera angles can create a sense of depth and immersion. By enhancing color contrast and carefully selecting camera perspectives, you can considerably improve the viewer’s perception of depth, making your atmos overhead effects look more realistic and engaging. Incorporating visual cues such as size variation and atmospheric perspective further enhances depth perception, guiding viewers’ eyes through the scene with greater clarity.
Atmospheric Density Control
Controlling atmospheric density is essential for producing realistic overhead effects, yet it often presents challenges that can undermine believability. Variations in density affect sky realism, making scenes look either too thin or overly thick. Achieving the right balance requires careful adjustments in your color grading and atmospheric parameters. If density is too high, the sky appears muddled and unnatural; too low, and it looks flat. To improve, focus on:
- Fine-tuning haze layers for depth perception
- Matching color grading to atmospheric conditions
- Observing real-world sky density variations for authenticity
- Utilizing atmospheric density control techniques to refine the overall effect
Implementing density calibration ensures your atmosphere maintains consistent realism across different scenes. Additionally, understanding environmental factors can help you anticipate how atmospheric density changes under various conditions. Recognizing how weather patterns influence atmospheric density can further enhance the authenticity of your effects. Incorporating real-time adjustments can also help dynamically maintain atmospheric consistency as scene conditions evolve. These steps help create a believable atmosphere that enhances immersion and maintains visual consistency across your scene. Proper atmospheric density control guarantees your overhead effects look convincing and seamlessly integrate into your environment.

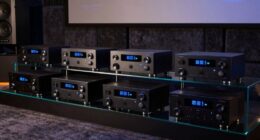
ULTIMEA 5.1CH Surround Sound Bar with Subwoofer, Dolby Atmos, VoiceMX, BassMX, APP, 300W Soundbar for Smart TV, Home Theater Surround Sound System for TV, BT 5.4, Poseidon M60 (2025 Model)
Simplified 5.1ch Dolby Atmos Setup: Enjoy immersive 4D sound with real Dolby Atmos and 5.1-channel audio. Five built-in...
As an affiliate, we earn on qualifying purchases.
How to Use Light and Shadow Placement to Add Depth Instantly

By carefully placing lights, you can instantly create a sense of depth in your atmospheric effects. Use shadow layering techniques to emphasize different layers and add dimension. Mastering strategic light and shadow placement transforms flat visuals into immersive, realistic scenes. Incorporating principles from societal impact can also help inform how depth enhances viewer engagement and perception. Additionally, understanding how visual storytelling influences viewer perception allows you to craft more compelling and engaging effects. Integrating perception psychology can further refine how viewers interpret spatial cues and depth cues, elevating the overall visual experience.
Strategic Light Placement
Strategic light placement is key to transforming Atmos overhead effects instantly, as it creates natural depth and dimension within your scene. By carefully positioning your lights, you enhance color contrast and highlight focal points, guiding viewers’ attention effortlessly. Proper placement emphasizes the layers in your scene, making it feel immersive and realistic. Consider these principles:
- Use light to accentuate key focal points and draw the eye.
- Adjust light angles to create contrasting shadows and highlights.
- Balance lighting to maintain natural color contrast and avoid flatness.
This approach ensures your scene feels dynamic and engaging. When you master light placement, you can instantly add depth, making your Atmos effects more compelling without complex layering. The right light positioning transforms flat visuals into captivating, three-dimensional environments, especially when considering essential safety tips for using portable oil radiators to ensure a safe setup.
Shadow Layering Techniques
Layering shadows effectively can instantly add depth to your Atmos overhead effects, making your scene feel more three-dimensional. Shadow layering involves strategically placing shadows at different intensities and angles to create a sense of volume and spatial separation. By carefully adjusting shadow placement, you can highlight the contours of objects and suggest their position in space. Use softer shadows for background elements and sharper, more defined shadows for foreground objects to enhance depth. This technique amplifies the sense of realism and draws viewers’ focus where you want it. Depth enhancement through shadow layering is a simple yet powerful way to elevate your overhead effects without adding complexity. Mastering this approach will give your Atmos scenes a more immersive and dynamic quality.

Bose Smart Soundbar 600 with Dolby Atmos, Bluetooth Wireless Sound Bar for TV with Built-in Microphone and Alexa Voice Control, Black
FULL IMMERSION FOR ALL ENTERTAINMENT: Smart Soundbar 600 is a Dolby Atmos soundbar that also features proprietary TrueSpace...
As an affiliate, we earn on qualifying purchases.
Layering Techniques to Enhance Your Atmosphere Overhead Effects

To truly elevate your overhead effects, mastering layering techniques is essential. Proper layering creates depth and richness, making your atmosphere more immersive. Focus on color blending to seamlessly shift between hues, adding visual interest. Incorporate sound design elements that complement the layers, enhancing the overall mood. When layering, consider these key points:
- Use varied textures and intensities to avoid flatness
- Balance color blending for smooth, natural transitions
- Sync sound design with visual layers for cohesion
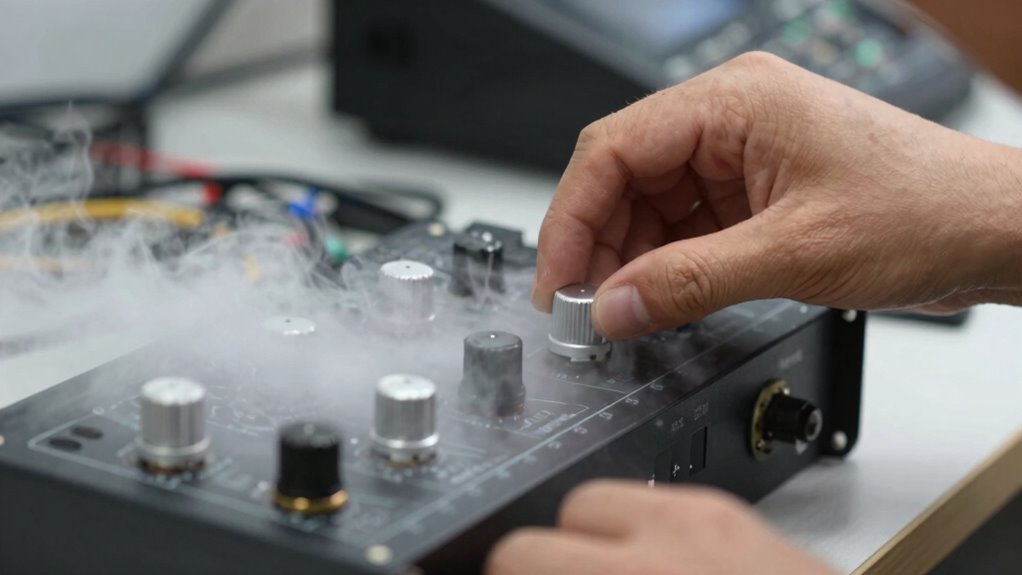
The Best Tools and Settings for Quick Improvements
Once you’ve mastered effective layering techniques, optimizing your workflow with the right tools and settings can lead to quick, noticeable improvements. Focus on color grading to enhance the mood of your atmosphere effects—adjust contrast, saturation, and color balance for a more immersive feel. For sound design, use EQ and reverb sparingly to add depth without muddying the mix. Tools like dedicated DAW plugins or atmospheric libraries can streamline your process. Set your buffer size low for real-time feedback, and experiment with automation for dynamic changes. Keep your interface organized to speed up adjustments. Combining precise color grading with thoughtful sound design and optimized settings enables you to elevate your atmosphere effects swiftly and effectively.
Troubleshooting Tips When Your Atmos Effects Don’t Look Right
When your atmosphere effects don’t look right, the first step is to identify the specific issue—whether they appear flat, inconsistent, or out of sync. Check your lighting balance; uneven lighting can flatten or distort the effect. Adjust your color grading to ensure the atmosphere matches the scene’s mood and environment. If effects seem inconsistent, verify your equipment calibration and settings. To troubleshoot effectively:
- Ensure your lighting setup is uniform and well-balanced
- Fine-tune color grading for natural integration
- Sync effects timing with scene cues
Addressing these areas helps your atmosphere effects look authentic and cohesive. Remember, small adjustments in lighting balance and color grading can make a significant difference in achieving realistic overhead effects.
Combining This Technique With Other Atmos Effects for Realism

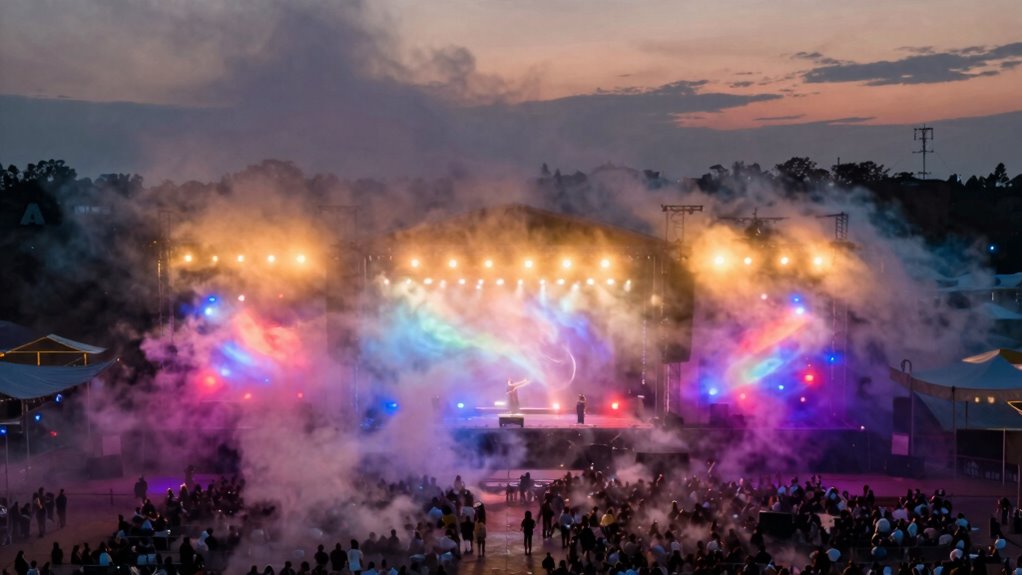
Have you ever wondered how combining your overhead atmosphere effect with other atmospheric techniques can boost realism? By integrating thoughtful color grading, you can match the atmosphere’s hue and brightness to your scene’s mood, enhancing believability. Pair this with sound design—adding subtle wind, distant thunder, or rustling leaves—to create an immersive environment. When these elements work together, they reinforce each other, making the overhead effects feel more natural and convincing. Use color grading to unify visual cues, ensuring the atmosphere blends seamlessly with lighting and scenery. Meanwhile, sound design adds depth and texture, grounding the visuals in a tangible world. This synergy elevates your project’s realism, drawing viewers deeper into the scene without distraction.
Before and After: Real Examples of the Power of This Technique
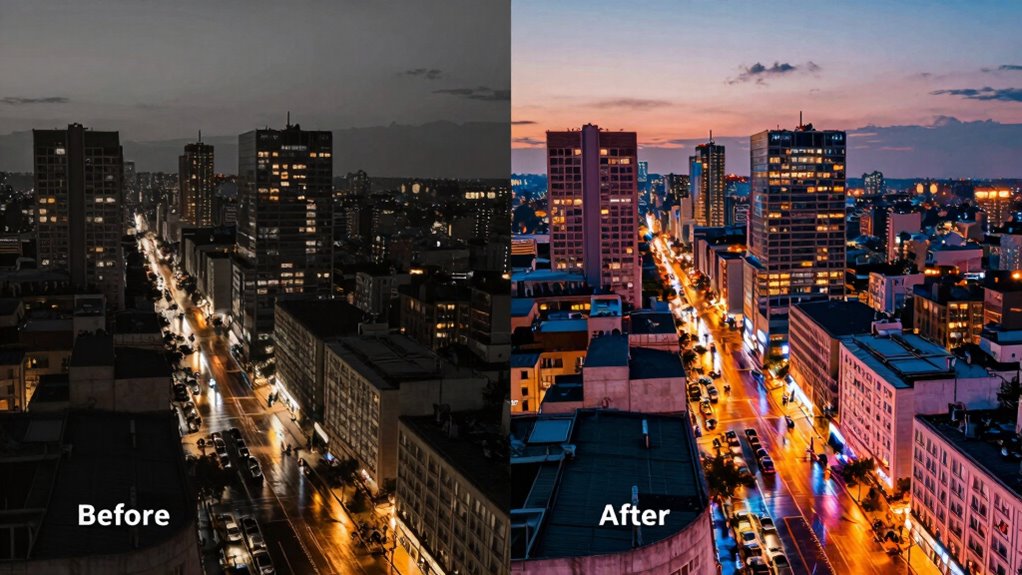
Seeing the difference this technique makes is eye-opening; real-world examples clearly demonstrate its impact. Before applying the method, atmospheric effects often lack depth and vibrancy, making scenes feel flat. Afterward, you’ll notice a significant improvement in depth enhancement and color grading, giving the overhead effects a more immersive quality. The atmosphere becomes richer, more believable, and visually compelling.
- Enhanced depth creates a sense of space and realism
- Improved color grading adds vibrancy and mood
- Overall atmosphere feels more integrated and alive
This technique transforms your scenes from basic to cinematic, allowing you to evoke stronger emotions. By focusing on these key aspects, you’ll elevate your atmospheric effects and produce more riveting visual storytelling. The difference is clear, and once you see it, you won’t want to go back.
Frequently Asked Questions
Can This Trick Be Used With Any Atmospheric Effect Software?
Yes, you can use this trick with most atmospheric effect software, but software compatibility varies. It works best with programs that allow effect customization, so you can tweak settings to fit your scene. Before applying, check if your software supports the needed adjustments. With some experimentation, you’ll find it enhances your atmospheric effects, making them more immersive and dynamic. Just verify your software is compatible and offers enough control for customization.
How Does This Technique Impact Rendering Times?
This technique enhances rendering efficiency by optimizing resource use, which speeds up the rendering process. It helps you achieve better visual quality without substantially increasing render times. By streamlining overhead effects, you’ll notice quicker turnaround times and smoother workflows, especially with complex atmospheric effects. Overall, it’s a smart way to balance high-quality visuals with efficient rendering, making your projects more manageable and visually impressive.
Is This Method Suitable for Real-Time Applications?
You’ll find this method suitable for real-time applications, as it streamlines atmospheric effects, like a breeze through leaves, ensuring smooth performance. Keep performance considerations in mind, ensuring your hardware handles the enhanced visuals without lag. Check software compatibility beforehand, like fitting a puzzle piece perfectly, so the technique integrates seamlessly. When optimized, it maintains fluid, immersive visuals without sacrificing responsiveness, making it ideal for dynamic, real-time experiences.
What Are Common Mistakes to Avoid When Applying This Trick?
To avoid common mistakes, make certain you maintain lighting consistency; inconsistent lighting can ruin the overhead effects. Be cautious with color grading—overdoing it can distort the atmosphere. Test your setup thoroughly before finalizing, and avoid abrupt changes that draw attention away from the scene. Keep your adjustments subtle and accurate, so the effects enhance the mood without overpowering the overall visual harmony.
Does This Trick Work Equally Well for Indoor and Outdoor Effects?
This trick works like a charm for both indoor and outdoor effects, but lighting consistency and scene compatibility matter. Outdoors, you might need to adapt for natural light variations, while indoors, controlled lighting ensures better results. You’ll find it effective in either setting, as long as you tailor your approach accordingly. Keep in mind, scene compatibility is key to making atmospheric overhead effects truly immersive, no matter where you’re working.
Conclusion
By blending bold lighting with balanced layering, you brighten your atmos overhead effects and bring them to life. Don’t settle for flat, forgettable fog—foster depth and drama with simple, smart strategies. Practice patience, apply precision, and push your boundaries. With this one trick, you’ll transform your atmospheric overheads from flat to fantastic, fueling your flair for realistic, radiant results that truly stand out. So, seize the skill, sharpen your setup, and see your scenes soar!