To get the best performance from your PS5 or Series X, connect directly to your TV using a high-quality HDMI cable supporting 4K and HDR. Enable Game Mode, VVR, and ALLM for smooth gameplay with minimal lag. Adjust picture settings for brightness, contrast, and color accuracy, and configure your audio system for immersive sound. Keeping firmware updated and experimenting with settings will boost your gaming. Continue exploring to unleash your system’s full potential and maximize your experience.
Key Takeaways
- Use high-quality HDMI cables supporting 4K, HDR, Dolby Vision, or Atmos for optimal visual and audio quality.
- Enable ‘Game Mode’ on your TV, activate VRR and ALLM for smooth, low-latency gameplay.
- Connect consoles directly to the TV’s HDMI input and set resolution to 4K with HDR active.
- Configure audio output to support Dolby Atmos or bitstream for immersive surround sound.
- Keep firmware and software updated, organize interface for quick access, and regularly tweak settings for the best experience.
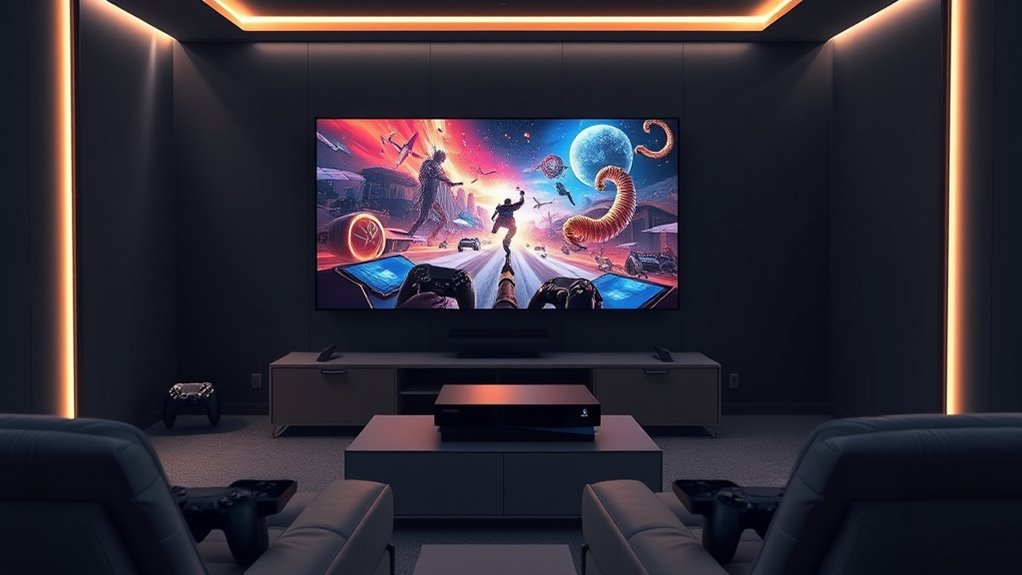
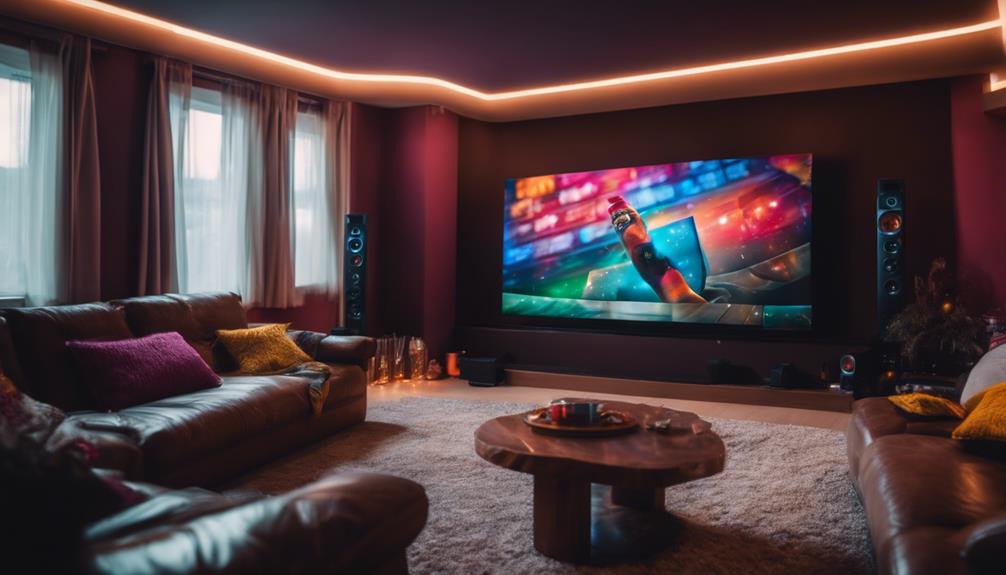
Integrating gaming consoles into your home entertainment setup can enhance your gaming experience and streamline device management. When you optimize your PS5 or Series X with the right settings, you guarantee smooth gameplay, stunning visuals, and minimal lag, making your theater feel like a dedicated gaming hub. The first step is to connect your console properly, using high-quality HDMI cables that support 4K and HDR. This guarantees you get the best picture quality your TV can offer. Once connected, turn on your console and navigate to display settings. For both PS5 and Series X, setting the resolution to 4K and enabling HDR is essential for vibrant visuals. If your TV supports Dolby Vision or Dolby Atmos, activate these options for immersive audio and picture quality. These settings are often found under the display or sound menus, and enabling them can greatly enhance your gaming experience.
Optimize your gaming setup with 4K, HDR, and immersive audio for the ultimate console experience.
Next, consider your TV’s picture mode. For gaming, switching to a ‘Game Mode’ reduces input lag, providing more responsive controls. Many modern TVs automatically detect when a game console is active and switch to this mode, but if yours doesn’t, manually select it in your TV’s settings. This step is critical for fast-paced games where every millisecond matters. Also, disable any unnecessary image processing features like motion smoothing or noise reduction, as these can introduce latency and distort graphics. If your TV offers customizable picture settings, tweak brightness, contrast, and color saturation to your preference, but keep in mind that high contrast and accurate color reproduction improve visual clarity.
Sound is equally important. For the best audio experience, connect your console to a soundbar or AV receiver via HDMI ARC or eARC, if available. This setup allows for high-quality surround sound, which adds depth to your gaming sessions. Enable the console’s audio output settings to match your audio system, choosing bitstream or Dolby Atmos if supported. These options deliver immersive soundscapes that heighten your gaming immersion. Additionally, consider enabling any specific gaming enhancements available on your console, such as VRR (Variable Refresh Rate) or ALLM (Auto Low Latency Mode). These features sync your TV and console to reduce screen tearing and input lag, offering a smoother gameplay experience.
Finally, organize your home theater interface for quick access. Set up your console as a favorite device or in a dedicated input, so you can switch effortlessly between gaming and other entertainment. Regularly update your console firmware and TV software to guarantee compatibility and access to the latest features. By fine-tuning these settings, you create a seamless, high-quality gaming environment that maximizes your console’s capabilities and elevates your overall home theater experience.
![[3500 ANSI/ Official Apps/65W Audio] Outdoor 4K Projector with WiFi and Bluetooth, Auto Focus, Auto Keystone Smart Projector Support DoIby Audio, 2026 Upgrade GO2 Short Throw Projector with 360°Stand](https://m.media-amazon.com/images/I/41-laeqxhwL._SL500_.jpg)
[3500 ANSI/ Official Apps/65W Audio] Outdoor 4K Projector with WiFi and Bluetooth, Auto Focus, Auto Keystone Smart Projector Support DoIby Audio, 2026 Upgrade GO2 Short Throw Projector with 360°Stand
3500 ANSI Lumens & 360°Rotatable Stand---With upgrade 3500 ANSI lumens brightness, the GO2 outdoor projector offers bright, vibrant...
As an affiliate, we earn on qualifying purchases.
Frequently Asked Questions
How Do I Connect Multiple Consoles to a Single AV Receiver?
You can connect multiple consoles to a single AV receiver by using HDMI inputs on the receiver. First, plug each console into separate HDMI ports. Then, connect the receiver to your TV with an HDMI cable from the receiver’s HDMI OUT port. Use the receiver’s input selector to switch between consoles. Make certain your receiver supports enough HDMI inputs, or consider an HDMI switch if needed for more devices.
What Are the Best Audio Settings for Immersive Gaming Sound?
Did you know that immersive sound can boost gaming enjoyment by up to 30%? To achieve this, set your console’s audio output to Bitstream or Dolby Atmos if available. Enable spatial audio features in your console settings and your receiver. Use high-quality HDMI cables, and verify your speakers are correctly calibrated. This setup delivers rich, surround sound, making your gaming experience more realistic and engaging.
How Can I Reduce Input Lag on My Gaming Console?
To reduce input lag on your gaming console, start by enabling Game Mode on your TV, which minimizes processing delays. Use a wired Ethernet connection instead of Wi-Fi for a more stable signal. Make sure your console’s firmware is up to date, and connect it directly to the TV rather than through an AV receiver. Turning off unnecessary background apps also helps *guarantee* your console runs smoothly, reducing lag.
What HDMI Version Is Required for 4K 120HZ Gaming?
Think of your HDMI cable as a highway for your gaming dreams. To cruise at 4K 120Hz, you need an HDMI 2.1 version—it’s the express lane that handles high-speed data without traffic jams. This version guarantees smooth, vibrant visuals and fast response times, so your gaming experience feels seamless and immersive. Without HDMI 2.1, you’re stuck in slower lanes, missing out on the ultra-high-definition, ultra-smooth gameplay.
How to Optimize Picture Settings for Different Game Genres?
To optimize picture settings for different game genres, start by adjusting your display’s contrast, brightness, and color saturation to enhance visuals. For fast-paced games like shooters, enable motion blur reduction and set a higher refresh rate for smooth gameplay. For story-driven or puzzle games, prioritize vivid color and sharpness for immersion. Experiment with preset modes or customize settings to match each genre’s unique visual demands, ensuring an enjoyable gaming experience.
![[Now with Netflix & 2000ANSI] 4K Smart Projector with WiFi and Bluetooth,Auto Focus & Keystone Portable Mini Projector with Stand,Outdoor Home Theater Small Proyector for bedroom white](https://m.media-amazon.com/images/I/51+w1LIZZBL._SL500_.jpg)
[Now with Netflix & 2000ANSI] 4K Smart Projector with WiFi and Bluetooth,Auto Focus & Keystone Portable Mini Projector with Stand,Outdoor Home Theater Small Proyector for bedroom white
[Built in APP- Cinema-Quality Streaming] This Smart projector with wifi and bluetooth comes with pre-installed with YouTube, and...
As an affiliate, we earn on qualifying purchases.
Conclusion
By optimizing your PS5 or Series X settings, you’re creating a gaming setup that truly shines. Remember, a stitch in time saves nine—taking the time now guarantees you enjoy seamless gaming later. With the right adjustments, your theater transforms into the ultimate gaming haven. So don’t wait until problems arise; setting up correctly now guarantees countless hours of entertainment. After all, a well-prepared gamer is a happy gamer!
![[Built-in Apps/4K Support] Smart Outdoor Projector with WiFi and Bluetooth, Movie Projector, DoIby Audio with Dual Speaker, Auto Focus w/ YouTube&PrimeVideo Proyector, Upgrad P62 Pro](https://m.media-amazon.com/images/I/51yAGv8VI7L._SL500_.jpg)
[Built-in Apps/4K Support] Smart Outdoor Projector with WiFi and Bluetooth, Movie Projector, DoIby Audio with Dual Speaker, Auto Focus w/ YouTube&PrimeVideo Proyector, Upgrad P62 Pro
[Upgraded Classic – P62 Pro Movie Projector] Building on the reliability and low return rate of the classic...
As an affiliate, we earn on qualifying purchases.

【Officially-Licensed APP & Native 1080P】 Thinnest 1.81" Smart Mini Projector with WiFi and Bluetooth, Auto Focus & Keystone Portable Outdoor Projector, VOPLLS 4K Support Home Movie Projector
【Compatibe with Netflix, No Extra Devices Needed】This isn’t just a projector—it’s your "Hollywood Digital Pass." Instantly access a...
As an affiliate, we earn on qualifying purchases.