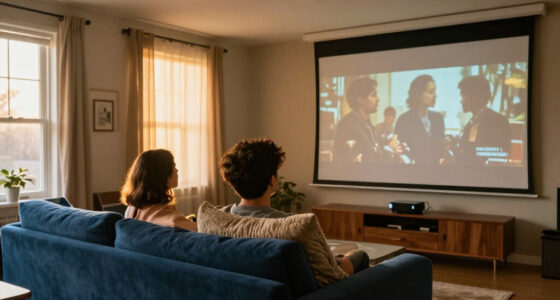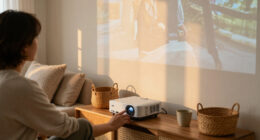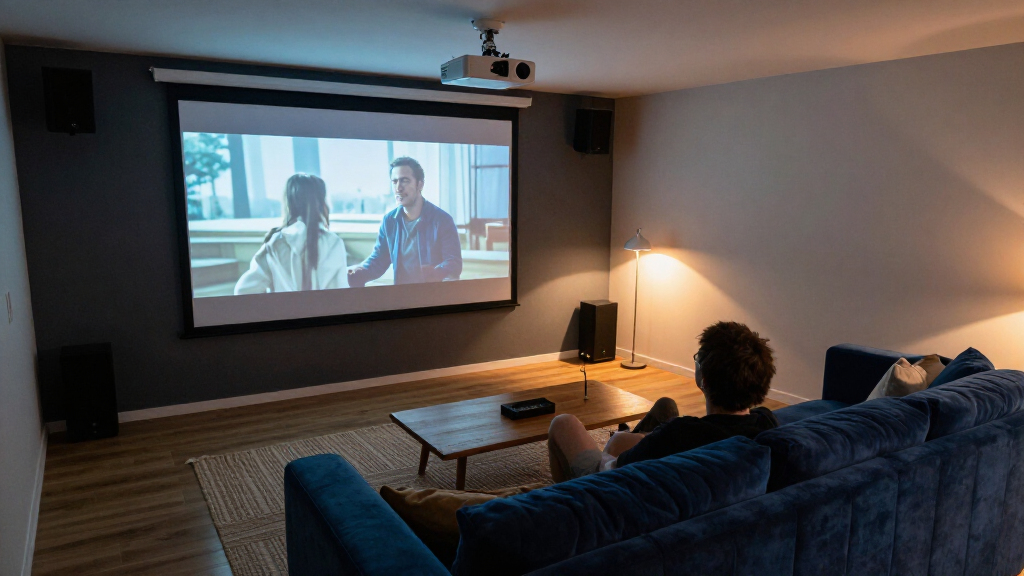

Choose and install a projector screen that fits your room, viewing distance, projector, and seating. This guide is for beginners setting up or upgrading a home theater; allow 2–4 hours, including measuring, mounting, and checking the picture. You will finish with a screen that sits securely, presents a properly sized image, and works with your projector’s placement and throw distance.

Get business pricing on your home office setup
- Business-only prices and quantity discounts
- Tax-exempt purchasing
- Multiple users, one account, clear invoices

120 Inch Projector Screen with Black Backing, Foldable 16:9
- ✔ Screen size: 120 inches diagonal
- ✔ Aspect ratio: 16:9
- ✔ Viewing area: 102 × 58 inches

120 inch Projector Screen with Stand – Portable Outdoor/Indoor 16:9 4K HD with Carry Bag and Sandbag
- ✔ Screen size: 120 inches
- ✔ Aspect ratio: 16:9
- ✔ Resolution support: Listed as 4K HD

120 inch Projector Screen 16:9 Foldable Anti-Crease Portable Double-Sided Projection
- ✔ Screen size: 120 inches diagonal
- ✔ Screen dimensions: 104 × 58 inches
- ✔ Aspect ratio: 16:9
Difficulty: Beginner | Time: 2–4 hours, including room measurements and installation
What You’ll Need
Tools & Materials:
- Tape measure
- Painter’s tape
- Pencil
- Stud finder or a way to confirm the mounting surface
- Level
- Drill and mounting hardware suited to the wall or ceiling
- Ladder, if mounting overhead
- Projector and its manual
Knowledge:
- Basic measuring and marking
- Ability to use a drill safely or help from someone who can
Check your projector manual for its throw distance, lens shift, image size, and mounting limits. Screen installation may require a second person, especially for a large or ceiling-mounted screen. Use anchors and fasteners rated for your wall or ceiling material; get help from a qualified installer if you cannot confirm that the surface can support the screen.
120 Inch Projector Screen with Black Backing, Foldable 16:9
The Iolieo is the strongest fit in this group for buyers building a home theater around a screen that can stay mounted or stretched onto a frame. Its black backing is the main distinction: it is intended to limit light passing through the fabric, which can matter when the screen hangs in front of a bright wall or an open area. Compared with the Mdbebbron, it gives up some listed viewing-angle width, but its 170-degree specification is still broad, and the backing makes it the more purpose-directed choice for a controlled room.Its foldable, washable polyester fabric is easier to store and maintain than a rigid screen, and the supplied mounting flexibility—hooks, ropes, or a DIY frame—lets us adapt it to the room. The tradeoff is that flexibility does not equal a complete installation: we still need suitable hardware or a frame, and the packed dimensions are substantial. Buyers wanting a quick, freestanding setup should look to the ZUVMITG instead; buyers who prioritize the lowest listed weight may prefer Mdbebbron. For a fixed home theater, however, the black-backed surface and adaptable mounting make this the most balanced pick.
Pros:
- Black backing is designed to reduce light passing through the screen.
- Foldable and machine washable for easier storage and upkeep.
- Supports wall hooks, ropes, invisible nail hooks, or a DIY frame.
- Listed 170-degree viewing angle accommodates seats spread across a room.
Cons:
- Mounting hardware or a DIY frame is not included in the described package.
- Its large packed dimensions make it less convenient to carry or store.
Best for: Home theater owners who can mount or frame a large screen and want black backing to help control light bleed.
Not ideal for: Buyers who need a ready-to-use stand, compact transport, or an installation that requires no extra mounting supplies.
Bottom line: We recommend the Iolieo for a home theater that can accommodate a mounted or framed screen and benefit from its black backing.
“We recommend the Iolieo for a home theater that can accommodate a mounted or framed screen and benefit from its black backing.”
120 inch Projector Screen with Stand – Portable Outdoor/Indoor 16:9 4K HD with Carry Bag and Sandbag
When we cannot dedicate a wall to a screen, the ZUVMITG has the most complete setup in this roundup. It includes a steel stand, carry bag, sandbags, ground stakes, and ropes, so it can move between an indoor room and an outdoor viewing area without requiring a separate frame purchase. That makes it more practical than the Iolieo or Mdbebbron when the screen needs to be put up and taken down, though the extra structure also means more pieces to carry and assemble.The reinforced frame and outdoor accessories address a problem the other two listings leave to the buyer: keeping a freestanding screen supported. For home theater use, its 120-inch 16:9 format and stated wide viewing angle suit group viewing, but the large stand can be awkward in a tight room or a space where furniture already occupies the floor. The listing describes milk-silk fabric and 4K HD support; those specifications do not by themselves ensure a sharper picture than the fabric-only alternatives. We rank it behind Iolieo for a dedicated theater because the latter has black backing and a more room-oriented mounting approach. Choose ZUVMITG when portability and a supplied support system matter more than a permanent, low-footprint installation.
Pros:
- Stand and carry bag are included for freestanding use and transport.
- Stakes, ropes, and sandbags are supplied for added outdoor stability.
- Steel frame is designed to reduce wobbling compared with unsupported fabric.
- Washable fabric and a 160-degree viewing angle suit shared viewing.
Cons:
- The large frame can be cumbersome in small indoor rooms.
- A stand-based setup requires more assembly and storage space than a fabric panel.
Best for: Households that want one large screen for occasional indoor movie nights and outdoor gatherings, with a supplied stand and stability accessories.
Not ideal for: Dedicated theater owners with limited floor space or anyone who wants a screen to remain mounted without setup and teardown.
Bottom line: We would choose the ZUVMITG when an included stand and outdoor stabilization kit are worth the extra setup and floor space.
“We would choose the ZUVMITG when an included stand and outdoor stabilization kit are worth the extra setup and floor space.”
120 inch Projector Screen 16:9 Foldable Anti-Crease Portable Double-Sided Projection
Mdbebbron is the simplest option for buyers who want a large screen that can be folded away after use. At a listed 1.7 pounds, it is far lighter than a frame-based screen and supports both front and rear projection, giving us more freedom to place it where the room allows. Its 160-degree viewing angle also suits seating spread across a living room. Compared with the Iolieo, however, it lacks the stated black backing, so the Iolieo is a better match where limiting light passing behind the screen is a priority.The polyester surface is described as anti-crease and washable, which addresses two common concerns with portable fabric: storage marks and upkeep. We should still plan the installation carefully, because the listing calls for hooks, ropes, brackets, or tape and does not include mounting hardware. That leaves more work for us than the ZUVMITG, which arrives with a stand and outdoor supports. Mdbebbron is therefore most appealing for a multipurpose room where a permanent screen is impractical and we can provide a suitable mounting method. It is a lightweight, adaptable panel, rather than a complete freestanding theater setup.
Pros:
- At 1.7 pounds, it is the lightest listed option in this comparison.
- Foldable and washable fabric is convenient for storage and maintenance.
- Supports front and rear projection for flexible room layouts.
- A 160-degree viewing angle suits seating across a shared space.
Cons:
- Mounting hardware such as hooks, ropes, or brackets must be sourced separately.
- No black backing is specified, unlike the Iolieo screen.
Best for: Viewers who want a lightweight, foldable screen for a living room or occasional indoor and outdoor use and can arrange their own mounting.
Not ideal for: Buyers who need an included stand, a fully specified light-blocking backing, or a complete installation kit.
Bottom line: We recommend Mdbebbron when low weight and flexible projection placement matter more than an included stand or black-backed fabric.
“We recommend Mdbebbron when low weight and flexible projection placement matter more than an included stand or black-backed fabric.”
As an Amazon Associate we earn from qualifying purchases.
Before You Start
Decide where viewers will sit and where the projector can be placed before ordering a screen. The projector must be able to fill the planned screen area from its installation position. A screen that is too wide, too high, or incompatible with the projector’s throw range can make installation difficult or force an uncomfortable seating layout.
Plan for a screen ratio that matches the content you watch most often. A 16:9 screen suits standard television and many films. A wider format can suit a dedicated cinema setup, but may leave unused space around television content. Check the screen’s overall outer dimensions as well as its viewing area so the frame, case, and mounting brackets fit the chosen wall.
Step-by-Step Instructions
Step 1: Measure the viewing area
Measure the available wall width and height, then mark the proposed screen’s viewing area with painter’s tape. Include enough room for the screen frame or case, nearby speakers, furniture, and any doors or shelves that could obstruct it. Sit in the main viewing seats and check that the marked image area is easy to see without an uncomfortable upward head tilt.
Use the screen’s stated diagonal and aspect ratio to confirm its image width and height. For a 16:9 image, the width is about 1.74 times the height. Do not treat the screen’s diagonal as its width; that can lead to ordering a screen that is much larger than the wall can accommodate.
Tip: Leave space for the screen’s border and hardware. A fixed frame takes more wall space than its visible image area.
Check: The taped outline fits the wall, clears obstacles, and looks comfortable from the primary seats.
Step 2: Confirm projector compatibility
Use the projector manual or manufacturer’s calculator to check that the planned screen size works at the projector’s intended position. Compare the projector’s throw distance and zoom range with the distance from the lens to the screen. Check whether lens shift or keystone adjustment is available if the projector cannot sit centered and level; lens shift is usually preferable for preserving image quality.
Confirm that the projector’s native aspect ratio matches the screen. Also check whether the model supports the screen’s resolution and any planned high dynamic range or 3D features. If you already own the projector, project an image onto the taped outline before ordering when practical.
Tip: Measure from the projector lens to the screen surface, not from the back of the projector body.
Check: The manual or calculator shows that the projector can fill the marked area from the planned position.
Step 3: Choose the screen type and surface
Choose a fixed-frame screen for a dedicated room where it can remain in place. Choose a pull-down or motorized screen when the wall must serve other purposes. For a motorized model, confirm there is a suitable power source and space for the case, and check how it will be controlled.
Select a surface suited to the room’s light and seating. A white surface is a common choice for a light-controlled room. A gray or ambient-light-rejecting surface may help in some brighter rooms, but its effect depends on the projector’s brightness, light direction, viewing position, and screen design. Check the manufacturer’s viewing-angle guidance so seats at the sides still get a consistent image. Avoid choosing by gain rating alone; a high-gain surface can create uneven brightness or a narrow viewing area.
Tip: If you use an ultra-short-throw projector, buy a screen designed for that projection angle; a standard surface may not handle overhead light the same way.
Check: The selected screen’s type, surface, ratio, and dimensions suit the room and projector specifications.
Step 4: Mark the mounting points
Read the screen’s mounting instructions and identify the exact bracket or frame positions. Hold the screen or mounting template against the wall, align it with your taped outline, and mark the mounting points. Use a level to mark a horizontal line. Locate studs or suitable masonry fixing points, and plan fasteners for the actual wall material.
For a ceiling mount, confirm that the support is structural and that the screen will hang at the intended height without interfering with lights, fans, or the projector beam. Do not rely on drywall alone for a heavy screen. If the required mounting points do not line up with secure supports, choose an appropriate mounting system or get professional help.
Tip: Check measurements against the screen manual before drilling; bracket spacing can differ from the visible screen width.
Check: The marks are level, match the manual’s mounting dimensions, and align with secure fixing points.
Step 5: Install the screen
Attach the brackets using the specified fasteners, then fit the screen according to its instructions. Have another person support large or overhead screens while you secure them. Tighten the hardware as directed and check that the frame or case is firmly supported before releasing it.
For a fixed-frame model, assemble the frame and attach the screen material in the order described by the manufacturer. Keep the surface clean and avoid touching the viewing area with dirty hands. For a roll-down screen, leave enough clearance for it to descend fully without hitting furniture or a speaker.
Tip: Do not force brackets or alter the screen frame to make it fit. Stop if the mounting points or fasteners do not match the instructions.
Check: The screen is level, stable, and fully supported; a pull-down screen opens and retracts without catching.
Step 6: Align the projector and focus the image
Place or mount the projector at the position confirmed in the compatibility check. Aim it squarely at the screen and adjust zoom, lens shift, and focus to fit the image to the viewing area. Use keystone correction only when needed, since digital correction can reduce usable resolution. Avoid aiming the projector at an angle that creates a trapezoid if you can reposition it instead.
Display a test pattern or image with straight edges. Adjust the projector until the picture is level, fills the intended viewing area, and does not spill over the screen border. Set focus at the screen plane, then check sharpness near the center and corners.
Tip: Make alignment changes in small increments. If the image cannot fit without heavy keystone correction, revisit the projector position or screen size.
Check: The image fills the screen evenly, its edges are straight, and text or fine details look sharp across the picture.
Step 7: Check the picture from your seats
View a bright scene, a dark scene, and content in the screen’s usual aspect ratio from the main seats. Look for wrinkles, waves, hot spots, color shifts, blocked sightlines, or reflections from room lights. Check seats at the sides as well as the center, especially if several people will watch together.
Dim or redirect lights that wash out the image, then adjust the projector’s picture settings using its manual. Keep ventilation openings clear and route power and signal cables so they cannot be tripped over or pulled loose.
Check: The picture remains visible and evenly focused from the usual seats, and the screen surface appears flat with no distracting reflections.
Common Mistakes to Avoid
- Ordering a screen based on its diagonal alone. — Calculate the image width and height from the aspect ratio, then include the frame or case dimensions when checking wall fit.
- Choosing a screen size before checking projector throw distance. — Use the projector manual or calculator with the actual lens-to-screen distance before buying.
- Mounting a heavy screen to unsupported drywall. — Fasten into studs, masonry, or an appropriate rated mounting system; confirm the support can carry the load.
- Using a high-gain or light-rejecting surface without checking seating and light direction. — Review viewing-angle guidance and test the surface with the room’s seating and lighting where possible.
Troubleshooting
Problem: The image does not fill the screen.
Solution: Check the projector’s zoom range and lens-to-screen distance. Move the projector or resize the planned image within the manufacturer’s supported range; do not stretch the image digitally.
Problem: The picture is trapezoidal or tilted.
Solution: Level and reposition the projector so its lens faces the screen squarely. Use lens shift if available, then apply only modest keystone correction if placement cannot resolve the shape.
Problem: The screen looks wavy or has wrinkles.
Solution: Check that the frame or case is level and installed according to its instructions. Allow a roll-down surface time to settle if the manufacturer recommends it; contact the seller if the distortion remains.
Problem: The image looks washed out or uneven from side seats.
Solution: Reduce light falling on the screen, check the surface’s viewing angle, and compare the picture from the center and side seats. Adjust projector settings or consider a surface suited to the room’s light and seating.
What Success Looks Like
The screen is firmly mounted and level, the projector fills its viewing area without distortion, and the image is focused across the screen. Viewers in the intended seats can see a consistent picture without distracting reflections, blocked sightlines, loose cables, or visible surface defects.
Next Steps
Keep the projector lens and screen surface clean using the manufacturers’ care instructions; abrasive cleaners can damage a screen coating. Save the projector position and picture settings so you can restore them after moving equipment. Recheck fasteners and cable routing if the projector or screen is moved, and contact the manufacturer or an installer if the mount loosens or the screen surface develops persistent defects.
Frequently Asked Questions
What screen size should I get for my room?
Choose a size that fits the available wall and is comfortable to view from your seats, then check that your projector can produce that image from its planned position. Use the projector’s throw calculator and the screen’s width and height, not just its diagonal.
Is a white or gray projector screen better?
White is a common choice for a room where you can control light. Gray or ambient-light-rejecting surfaces can help in some brighter setups, but performance depends on projector brightness, where light comes from, and where viewers sit. Compare the screen maker’s guidance with your room.
Can I use a projector screen with the lights on?
You can, but room light reduces image contrast. A suitable screen may help with some light sources, but dimming lights or blocking light from windows usually improves the picture. Avoid shining lights directly at the screen.
Can I paint a wall instead of buying a screen?
A smooth, neutral wall can work for a basic setup, but wall texture and color can affect detail and brightness. A dedicated screen offers a more consistent surface and may include features suited to your projector and room.